![To make these tasty raspberry lemonade bars, gather these simple ingredients: - 1 cup all-purpose flour - 1/2 cup powdered sugar - 1/4 cup unsalted butter, softened - 1/4 teaspoon salt - 2 large eggs - 1 cup granulated sugar - 1/3 cup fresh lemon juice (about 2-3 lemons) - Zest of 1 lemon - 1/2 cup fresh raspberries (plus extra for garnish) - 1/4 teaspoon baking powder - Extra powdered sugar for dusting You can switch some ingredients for variety or to fit your needs: - For a gluten-free option, use a gluten-free flour blend. - Swap granulated sugar with coconut sugar for a different flavor. - If you don’t have fresh lemons, bottled lemon juice works in a pinch. - You can use margarine instead of butter if needed. - For a vegan option, replace eggs with flax eggs or unsweetened applesauce. Selecting ripe fruits makes a big difference in taste. Here are some tips: - Raspberries: Look for firm, plump berries without bruises. They should be bright in color. Smell them; they should have a sweet scent. - Lemons: Choose lemons that feel heavy for their size. Their skin should be smooth and shiny. If they're firm, they are likely juicy. - When buying, check for mold or softness. Avoid any that look past their prime. Fresh fruits lead to the best flavor in your bars. You can find the full recipe for these raspberry lemonade bars to get started! Start by preheating your oven to 350°F (175°C). Grab an 8x8 inch baking pan. Grease it well and line it with parchment paper. Leave some paper hanging over the sides. This helps you lift the bars later. In a medium bowl, mix these dry ingredients: - 1 cup all-purpose flour - 1/2 cup powdered sugar - 1/4 cup unsalted butter, softened - 1/4 teaspoon salt Use a fork or your fingers to combine them. You want it to look like coarse crumbs. Next, take this mixture and press it evenly into the bottom of your pan. Bake this crust for 15 minutes until it turns lightly golden. While your crust bakes, it's time to make the filling. In a separate bowl, whisk together: - 2 large eggs - 1 cup granulated sugar - 1/3 cup fresh lemon juice (about 2-3 lemons) - Zest of 1 lemon - 1/2 cup fresh raspberries - 1/4 teaspoon baking powder Make sure everything is well combined. The raspberries should break apart a bit, mixing into the batter. Once your crust is ready, take it out of the oven. Pour the raspberry lemon mixture on top of the crust. Use a spatula to spread it evenly. Carefully return the pan to the oven. Bake for an additional 20-25 minutes. You know they are done when the edges are lightly golden and the center is set. After baking, let the bars cool completely in the pan on a wire rack. When they're cool, lift them out using the parchment overhang. Cut them into squares and dust with extra powdered sugar. Add fresh raspberries on top for a nice touch. You just made delicious raspberry lemonade bars! For the full recipe, check below. To cut your raspberry lemonade bars easily, chill them first. After they cool, place the whole pan in the fridge for at least an hour. Once firm, lift the bars out using the parchment paper. Use a sharp knife to slice them into squares. Wipe the knife with a damp cloth between cuts. This keeps each piece neat and tidy. To boost the flavor, use fresh ingredients. Fresh lemons and raspberries make a big difference. Add more lemon zest for an extra zing. You can also mix in a bit of vanilla extract for warmth. If you like a little spice, add a pinch of ginger. This gives the bars a unique twist! One common mistake is overbaking the bars. Keep an eye on them to prevent drying out. Another mistake is not measuring ingredients carefully. Use measuring cups and spoons for best results. Finally, don’t skip the dusting of powdered sugar. It adds a nice touch and balances the tartness. For more detailed instructions, check the Full Recipe. {{image_2}} You can make gluten-free raspberry lemonade bars easily. Just swap the all-purpose flour with a gluten-free blend. Look for a mix that includes xanthan gum. This helps mimic the texture of regular flour. The taste will still be bright and tangy. You won’t lose flavor or fun by going gluten-free! Adding more fruits can give these bars a twist. You can mix in blueberries, strawberries, or blackberries. Each fruit brings a new flavor that pairs well with lemon. Just keep the total fruit amount the same. This keeps the texture right and the bars firm. You can change up the sweetener too. Try honey or maple syrup for a different taste. These options add a nice depth to the bars. If you prefer less sugar, a sugar substitute works well too. Just make sure it measures like sugar. This way, your bars will stay sweet and delicious. For the full recipe to create these delightful variations, be sure to check the [Full Recipe]. To keep your raspberry lemonade bars fresh, store them in an airtight container. Place parchment paper between layers to avoid sticking. This method helps maintain their texture and taste. Keep them in the fridge if you plan to eat them within a week. If you want to store them longer, freezing is a great option. Raspberry lemonade bars last about five days in the fridge. After that, they may lose their flavor and freshness. If you freeze them, they can last up to three months. Just remember to wrap them well to prevent freezer burn. This way, you can enjoy these treats anytime! To freeze your bars, let them cool completely first. Cut them into squares, and wrap each square in plastic wrap. Then, place them in a freezer-safe bag or container. When you're ready to enjoy, thaw them in the fridge overnight. You can also eat them straight from the freezer for a chilly treat! For more detail, check the Full Recipe. Yes, you can use frozen raspberries. Thaw them first and drain any extra juice. This helps keep the filling from becoming too watery. Frozen raspberries can work well in many recipes. They still give you that bright flavor and color. Just be aware that the texture might change slightly. You may notice the filling is a bit softer than with fresh ones. You can tell the bars are done when the edges turn a light golden color. The center should look set but still have a slight jiggle. A toothpick inserted into the center should come out clean or with just a few moist crumbs. Keep an eye on them as they bake. Overbaking can lead to dry bars, which we want to avoid. Trust your instincts, and don’t hesitate to check a bit early. These bars pair well with whipped cream or a scoop of vanilla ice cream. The creaminess balances the tartness of the bars. Fresh fruit on the side is also a great option. Think strawberries, blueberries, or more raspberries. You could serve them with a refreshing glass of lemonade too. This adds to the zesty theme of the dessert. These serving ideas enhance the experience and make it extra special. For the full recipe, check out the details above. Raspberry lemonade bars combine bright flavors and simple steps. You learned about key ingredients, helpful tips, and easy variations. Remember to choose fresh raspberries and lemons for the best taste. Avoid common mistakes to get perfect results every time. These bars are not just a treat; they offer many options for everyone. Enjoy making them gluten-free or adding your favorite fruits. With proper storage, your bars can last and stay tasty. Try freezing them for later enjoyment. Now go ahead and create your delicious raspberry lemonade bars!](https://recipesure.com/wp-content/uploads/2025/05/28e22046-473f-4ade-8644-56a3165eeb5a.webp)
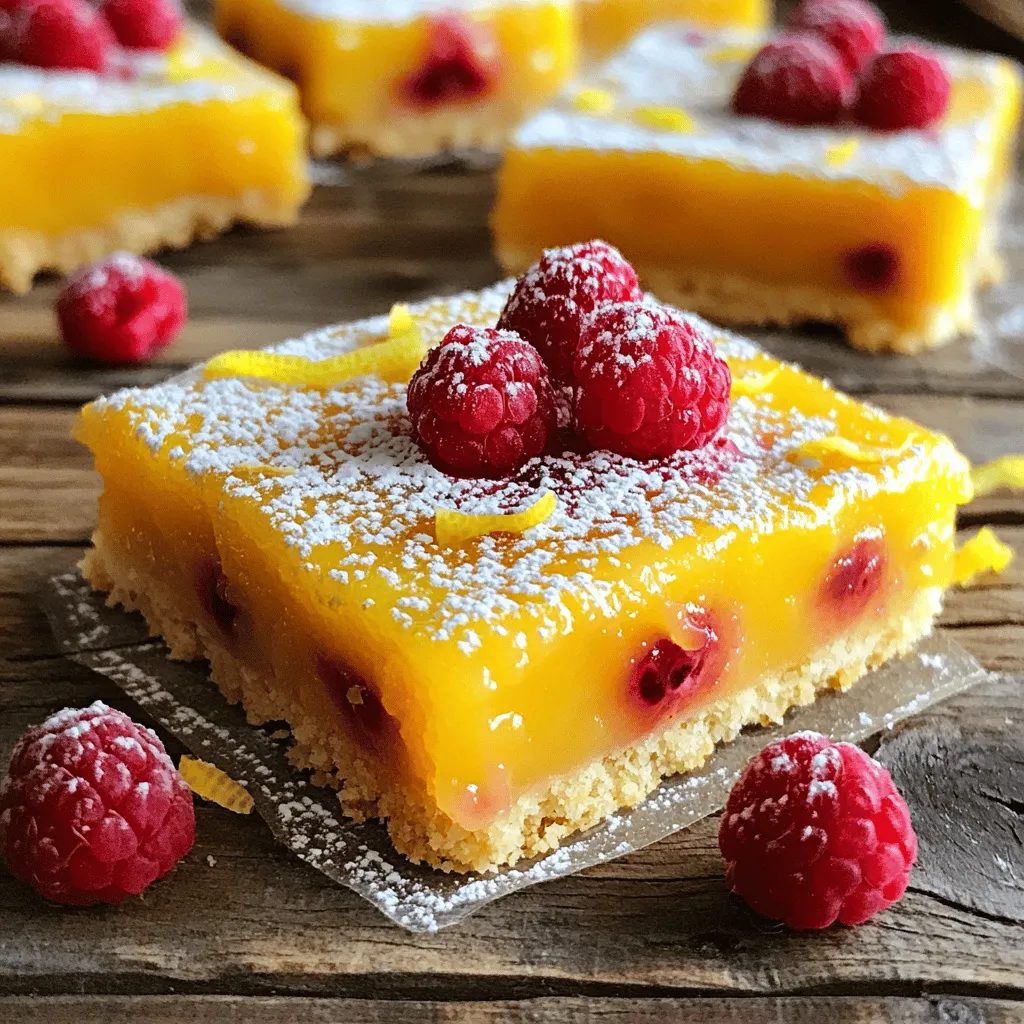
Are you ready to indulge in a sweet and tangy delight? Raspberry Lemonade Bars bring the perfect mix of juicy raspberries and zesty lemons. In this post, I’ll guide you through making these easy bars from scratch. Whether you want a refreshing treat for a summer picnic or a tasty dessert for friends, let’s dive into the deliciousness that awaits!
Ingredients
List of Ingredients for Raspberry Lemonade Bars
To make these tasty raspberry lemonade bars, gather these simple ingredients:
- 1 cup all-purpose flour
- 1/2 cup powdered sugar
- 1/4 cup unsalted butter, softened
- 1/4 teaspoon salt
- 2 large eggs
- 1 cup granulated sugar
- 1/3 cup fresh lemon juice (about 2-3 lemons)
- Zest of 1 lemon
- 1/2 cup fresh raspberries (plus extra for garnish)
- 1/4 teaspoon baking powder
- Extra powdered sugar for dusting
Ingredient Substitutions
You can switch some ingredients for variety or to fit your needs:
- For a gluten-free option, use a gluten-free flour blend.
- Swap granulated sugar with coconut sugar for a different flavor.
- If you don’t have fresh lemons, bottled lemon juice works in a pinch.
- You can use margarine instead of butter if needed.
- For a vegan option, replace eggs with flax eggs or unsweetened applesauce.
Tips for Choosing Fresh Raspberries and Lemons
Selecting ripe fruits makes a big difference in taste. Here are some tips:
- Raspberries: Look for firm, plump berries without bruises. They should be bright in color. Smell them; they should have a sweet scent.
- Lemons: Choose lemons that feel heavy for their size. Their skin should be smooth and shiny. If they’re firm, they are likely juicy.
- When buying, check for mold or softness. Avoid any that look past their prime. Fresh fruits lead to the best flavor in your bars.
Step-by-Step Instructions
Preparation of the Crust
Start by preheating your oven to 350°F (175°C). Grab an 8×8 inch baking pan. Grease it well and line it with parchment paper. Leave some paper hanging over the sides. This helps you lift the bars later. In a medium bowl, mix these dry ingredients:
- 1 cup all-purpose flour
- 1/2 cup powdered sugar
- 1/4 cup unsalted butter, softened
- 1/4 teaspoon salt
Use a fork or your fingers to combine them. You want it to look like coarse crumbs. Next, take this mixture and press it evenly into the bottom of your pan. Bake this crust for 15 minutes until it turns lightly golden.
Making the Raspberry Lemon Filling
While your crust bakes, it’s time to make the filling. In a separate bowl, whisk together:
- 2 large eggs
- 1 cup granulated sugar
- 1/3 cup fresh lemon juice (about 2-3 lemons)
- Zest of 1 lemon
- 1/2 cup fresh raspberries
- 1/4 teaspoon baking powder
Make sure everything is well combined. The raspberries should break apart a bit, mixing into the batter. Once your crust is ready, take it out of the oven. Pour the raspberry lemon mixture on top of the crust. Use a spatula to spread it evenly.
Baking Instructions for Perfect Bars
Carefully return the pan to the oven. Bake for an additional 20-25 minutes. You know they are done when the edges are lightly golden and the center is set. After baking, let the bars cool completely in the pan on a wire rack. When they’re cool, lift them out using the parchment overhang. Cut them into squares and dust with extra powdered sugar. Add fresh raspberries on top for a nice touch. You just made delicious raspberry lemonade bars!
Tips & Tricks
How to Easily Cut Bars
To cut your raspberry lemonade bars easily, chill them first. After they cool, place the whole pan in the fridge for at least an hour. Once firm, lift the bars out using the parchment paper. Use a sharp knife to slice them into squares. Wipe the knife with a damp cloth between cuts. This keeps each piece neat and tidy.
Tips for Enhancing Flavor
To boost the flavor, use fresh ingredients. Fresh lemons and raspberries make a big difference. Add more lemon zest for an extra zing. You can also mix in a bit of vanilla extract for warmth. If you like a little spice, add a pinch of ginger. This gives the bars a unique twist!
Common Mistakes to Avoid
One common mistake is overbaking the bars. Keep an eye on them to prevent drying out. Another mistake is not measuring ingredients carefully. Use measuring cups and spoons for best results. Finally, don’t skip the dusting of powdered sugar. It adds a nice touch and balances the tartness.
Variations
Gluten-Free Raspberry Lemonade Bars
You can make gluten-free raspberry lemonade bars easily. Just swap the all-purpose flour with a gluten-free blend. Look for a mix that includes xanthan gum. This helps mimic the texture of regular flour. The taste will still be bright and tangy. You won’t lose flavor or fun by going gluten-free!
Incorporating Additional Fruits
Adding more fruits can give these bars a twist. You can mix in blueberries, strawberries, or blackberries. Each fruit brings a new flavor that pairs well with lemon. Just keep the total fruit amount the same. This keeps the texture right and the bars firm.
Offering Different Sweetener Options
You can change up the sweetener too. Try honey or maple syrup for a different taste. These options add a nice depth to the bars. If you prefer less sugar, a sugar substitute works well too. Just make sure it measures like sugar. This way, your bars will stay sweet and delicious.
Storage Info
Best Practices for Storing Bars
To keep your raspberry lemonade bars fresh, store them in an airtight container. Place parchment paper between layers to avoid sticking. This method helps maintain their texture and taste. Keep them in the fridge if you plan to eat them within a week. If you want to store them longer, freezing is a great option.
How Long Do They Last?
Raspberry lemonade bars last about five days in the fridge. After that, they may lose their flavor and freshness. If you freeze them, they can last up to three months. Just remember to wrap them well to prevent freezer burn. This way, you can enjoy these treats anytime!
Freezing Raspberry Lemonade Bars
To freeze your bars, let them cool completely first. Cut them into squares, and wrap each square in plastic wrap. Then, place them in a freezer-safe bag or container. When you’re ready to enjoy, thaw them in the fridge overnight. You can also eat them straight from the freezer for a chilly treat!
FAQs
Can I use frozen raspberries instead of fresh?
Yes, you can use frozen raspberries. Thaw them first and drain any extra juice. This helps keep the filling from becoming too watery. Frozen raspberries can work well in many recipes. They still give you that bright flavor and color. Just be aware that the texture might change slightly. You may notice the filling is a bit softer than with fresh ones.
How do I know when the bars are done baking?
You can tell the bars are done when the edges turn a light golden color. The center should look set but still have a slight jiggle. A toothpick inserted into the center should come out clean or with just a few moist crumbs. Keep an eye on them as they bake. Overbaking can lead to dry bars, which we want to avoid. Trust your instincts, and don’t hesitate to check a bit early.
What can I serve with Raspberry Lemonade Bars?
These bars pair well with whipped cream or a scoop of vanilla ice cream. The creaminess balances the tartness of the bars. Fresh fruit on the side is also a great option. Think strawberries, blueberries, or more raspberries. You could serve them with a refreshing glass of lemonade too. This adds to the zesty theme of the dessert. These serving ideas enhance the experience and make it extra special.
Raspberry lemonade bars combine bright flavors and simple steps. You learned about key ingredients, helpful tips, and easy variations. Remember to choose fresh raspberries and lemons for the best taste. Avoid common mistakes to get perfect results every time. These bars are not just a treat; they offer many options for everyone. Enjoy making them gluten-free or adding your favorite fruits. With proper storage, your bars can last and stay tasty. Try freezing them for later enjoyment. Now go ahead and create your delicious raspberry lemonade bars!
![To make these tasty raspberry lemonade bars, gather these simple ingredients: - 1 cup all-purpose flour - 1/2 cup powdered sugar - 1/4 cup unsalted butter, softened - 1/4 teaspoon salt - 2 large eggs - 1 cup granulated sugar - 1/3 cup fresh lemon juice (about 2-3 lemons) - Zest of 1 lemon - 1/2 cup fresh raspberries (plus extra for garnish) - 1/4 teaspoon baking powder - Extra powdered sugar for dusting You can switch some ingredients for variety or to fit your needs: - For a gluten-free option, use a gluten-free flour blend. - Swap granulated sugar with coconut sugar for a different flavor. - If you don’t have fresh lemons, bottled lemon juice works in a pinch. - You can use margarine instead of butter if needed. - For a vegan option, replace eggs with flax eggs or unsweetened applesauce. Selecting ripe fruits makes a big difference in taste. Here are some tips: - Raspberries: Look for firm, plump berries without bruises. They should be bright in color. Smell them; they should have a sweet scent. - Lemons: Choose lemons that feel heavy for their size. Their skin should be smooth and shiny. If they're firm, they are likely juicy. - When buying, check for mold or softness. Avoid any that look past their prime. Fresh fruits lead to the best flavor in your bars. You can find the full recipe for these raspberry lemonade bars to get started! Start by preheating your oven to 350°F (175°C). Grab an 8x8 inch baking pan. Grease it well and line it with parchment paper. Leave some paper hanging over the sides. This helps you lift the bars later. In a medium bowl, mix these dry ingredients: - 1 cup all-purpose flour - 1/2 cup powdered sugar - 1/4 cup unsalted butter, softened - 1/4 teaspoon salt Use a fork or your fingers to combine them. You want it to look like coarse crumbs. Next, take this mixture and press it evenly into the bottom of your pan. Bake this crust for 15 minutes until it turns lightly golden. While your crust bakes, it's time to make the filling. In a separate bowl, whisk together: - 2 large eggs - 1 cup granulated sugar - 1/3 cup fresh lemon juice (about 2-3 lemons) - Zest of 1 lemon - 1/2 cup fresh raspberries - 1/4 teaspoon baking powder Make sure everything is well combined. The raspberries should break apart a bit, mixing into the batter. Once your crust is ready, take it out of the oven. Pour the raspberry lemon mixture on top of the crust. Use a spatula to spread it evenly. Carefully return the pan to the oven. Bake for an additional 20-25 minutes. You know they are done when the edges are lightly golden and the center is set. After baking, let the bars cool completely in the pan on a wire rack. When they're cool, lift them out using the parchment overhang. Cut them into squares and dust with extra powdered sugar. Add fresh raspberries on top for a nice touch. You just made delicious raspberry lemonade bars! For the full recipe, check below. To cut your raspberry lemonade bars easily, chill them first. After they cool, place the whole pan in the fridge for at least an hour. Once firm, lift the bars out using the parchment paper. Use a sharp knife to slice them into squares. Wipe the knife with a damp cloth between cuts. This keeps each piece neat and tidy. To boost the flavor, use fresh ingredients. Fresh lemons and raspberries make a big difference. Add more lemon zest for an extra zing. You can also mix in a bit of vanilla extract for warmth. If you like a little spice, add a pinch of ginger. This gives the bars a unique twist! One common mistake is overbaking the bars. Keep an eye on them to prevent drying out. Another mistake is not measuring ingredients carefully. Use measuring cups and spoons for best results. Finally, don’t skip the dusting of powdered sugar. It adds a nice touch and balances the tartness. For more detailed instructions, check the Full Recipe. {{image_2}} You can make gluten-free raspberry lemonade bars easily. Just swap the all-purpose flour with a gluten-free blend. Look for a mix that includes xanthan gum. This helps mimic the texture of regular flour. The taste will still be bright and tangy. You won’t lose flavor or fun by going gluten-free! Adding more fruits can give these bars a twist. You can mix in blueberries, strawberries, or blackberries. Each fruit brings a new flavor that pairs well with lemon. Just keep the total fruit amount the same. This keeps the texture right and the bars firm. You can change up the sweetener too. Try honey or maple syrup for a different taste. These options add a nice depth to the bars. If you prefer less sugar, a sugar substitute works well too. Just make sure it measures like sugar. This way, your bars will stay sweet and delicious. For the full recipe to create these delightful variations, be sure to check the [Full Recipe]. To keep your raspberry lemonade bars fresh, store them in an airtight container. Place parchment paper between layers to avoid sticking. This method helps maintain their texture and taste. Keep them in the fridge if you plan to eat them within a week. If you want to store them longer, freezing is a great option. Raspberry lemonade bars last about five days in the fridge. After that, they may lose their flavor and freshness. If you freeze them, they can last up to three months. Just remember to wrap them well to prevent freezer burn. This way, you can enjoy these treats anytime! To freeze your bars, let them cool completely first. Cut them into squares, and wrap each square in plastic wrap. Then, place them in a freezer-safe bag or container. When you're ready to enjoy, thaw them in the fridge overnight. You can also eat them straight from the freezer for a chilly treat! For more detail, check the Full Recipe. Yes, you can use frozen raspberries. Thaw them first and drain any extra juice. This helps keep the filling from becoming too watery. Frozen raspberries can work well in many recipes. They still give you that bright flavor and color. Just be aware that the texture might change slightly. You may notice the filling is a bit softer than with fresh ones. You can tell the bars are done when the edges turn a light golden color. The center should look set but still have a slight jiggle. A toothpick inserted into the center should come out clean or with just a few moist crumbs. Keep an eye on them as they bake. Overbaking can lead to dry bars, which we want to avoid. Trust your instincts, and don’t hesitate to check a bit early. These bars pair well with whipped cream or a scoop of vanilla ice cream. The creaminess balances the tartness of the bars. Fresh fruit on the side is also a great option. Think strawberries, blueberries, or more raspberries. You could serve them with a refreshing glass of lemonade too. This adds to the zesty theme of the dessert. These serving ideas enhance the experience and make it extra special. For the full recipe, check out the details above. Raspberry lemonade bars combine bright flavors and simple steps. You learned about key ingredients, helpful tips, and easy variations. Remember to choose fresh raspberries and lemons for the best taste. Avoid common mistakes to get perfect results every time. These bars are not just a treat; they offer many options for everyone. Enjoy making them gluten-free or adding your favorite fruits. With proper storage, your bars can last and stay tasty. Try freezing them for later enjoyment. Now go ahead and create your delicious raspberry lemonade bars!](https://recipesure.com/wp-content/uploads/2025/05/28e22046-473f-4ade-8644-56a3165eeb5a-250x250.webp)