![- 1 can (15 oz) chickpeas, drained and rinsed - 2 tablespoons olive oil - 1 teaspoon garlic powder - 1 teaspoon onion powder - 1 teaspoon paprika - ½ teaspoon dried thyme - ½ teaspoon dried rosemary - Salt and pepper to taste To make Air Fryer Garlic Herb Chickpeas, you need some simple, tasty ingredients. First, grab a can of chickpeas. These little beans pack a punch of protein and fiber. Rinse and drain them well. This step helps remove any excess salt from the can. Next, you'll need olive oil. This oil adds flavor and helps the chickpeas get crispy. For seasoning, you will use garlic powder, onion powder, and paprika. These spices bring out the best flavors in our dish. Don't forget the herbs! Dried thyme and rosemary add a nice, earthy taste. Finally, season with salt and pepper to taste. Balancing these flavors makes all the difference. - Fresh parsley for garnish While not necessary, fresh parsley adds a burst of color and freshness. Sprinkle it on top after cooking for a lovely finish. - Air fryer - Mixing bowl - Measuring spoons You will need a few basic tools to whip up this dish. An air fryer is essential for achieving that perfect crunch. Use a mixing bowl to combine your chickpeas with the seasonings. Measuring spoons help ensure you get the right amounts of spices. With these tools in hand, you're ready to make a delicious snack. For the full recipe, check out the cooking instructions. To start, drain and rinse the chickpeas. Place them in a colander and run cold water over them. This removes any canning liquid and helps reduce sodium. Next, dry the chickpeas well. Use a clean kitchen towel to pat them dry. Drying is key for crispy results. If they are too wet, they won't crisp up as much in the air fryer. Now, let’s mix the ingredients. In a large bowl, combine the chickpeas with olive oil, garlic powder, onion powder, paprika, thyme, rosemary, salt, and pepper. Toss them well so every chickpea gets coated. This even coating makes sure each bite is full of flavor. If you skip this step, some chickpeas may taste bland. Set your air fryer to 400°F (200°C). Preheat it for about 5 minutes. This helps the chickpeas cook evenly. Once preheated, add the seasoned chickpeas to the basket. Spread them in a single layer for the best crispiness. Air fry for 12-15 minutes. Make sure to shake the basket halfway through. This helps them cook evenly and turn golden brown. When done, they should be crispy and delicious. Enjoy these flavorful chickpeas as a snack or add them to your meals. For the full recipe, check out the details above. To make your chickpeas crispy, spread them in a single layer in the air fryer. This helps hot air circulate around each chickpea. If they stack up, they won’t cook evenly. During cooking, shake the basket every 5 minutes. This move keeps them moving and helps them crisp up well. You can spice things up with more flavors! Try adding cayenne pepper for heat or cumin for warmth. Fresh herbs like basil or cilantro can also blend well. Adjusting the olive oil can change how crunchy they get. Less oil gives a drier finish, while more oil creates a richer, crunchier bite. Crispy chickpeas pair nicely with salads or grain bowls for added crunch. You can also use them as a topping for soups. If you have leftovers, store them in an airtight container. You can toss them into your next wrap or sprinkle them on popcorn for a tasty snack. For the full recipe, check the link above. {{image_2}} You can change the flavor of your chickpeas with different spice blends. For a Cajun twist, add cayenne pepper and smoked paprika. If you like curry, mix in curry powder and turmeric. To customize heat levels, add more or less spice based on your taste. Just remember to start small. You can always add more! If you don’t have an air fryer, you can still enjoy crispy chickpeas. Oven-baking is a great option. Preheat your oven to 400°F (200°C). Spread the seasoned chickpeas on a baking sheet and bake for about 25-30 minutes, shaking the pan halfway through. Stovetop methods work too. You can use a skillet to pan-fry the chickpeas in olive oil until they are golden. Making these chickpeas gluten-free is easy. All the ingredients are naturally gluten-free. For a vegan-friendly option, you already have that covered! Just ensure your spices are also vegan. If you want to adjust nutrition, try using less olive oil for fewer calories. You can also add more herbs to boost flavor without added fat. Explore the [Full Recipe] for all the details on creating these tasty snacks! To keep your crispy chickpeas fresh, use airtight containers. Glass jars or plastic containers work well. Store them at room temperature for up to three days. After that, they may lose their crunch. Yes, you can freeze cooked chickpeas. Spread them on a baking sheet to freeze individually first. Once frozen, transfer them to a freezer bag. Use them within three months for the best taste. Thaw them in the fridge overnight. To reheat, simply air fry for a few minutes until warm and crispy. Leftover chickpeas can shine in many dishes. Toss them into salads for added crunch. They also work great in grain bowls or wraps. Try mixing them with quinoa and fresh veggies for a tasty meal. For more ideas, check out the [Full Recipe]. I usually cook chickpeas in the air fryer for 12 to 15 minutes at 400°F (200°C). Your cook time may change based on your air fryer model. If you like them extra crispy, go for the longer time. Just remember to shake the basket halfway through to ensure even cooking. Yes, you can use dried chickpeas! But you must soak and cook them first. Start by soaking them in water overnight. Then, boil them for 45 to 60 minutes until tender. After that, drain and rinse them before air frying. This method takes more time but gives you great flavor. If your chickpeas come out soggy, it may be due to a few common mistakes. First, make sure to dry the chickpeas well after rinsing. Excess moisture makes them less crispy. Also, avoid overcrowding the air fryer basket. A single layer helps them crisp up nicely. If you fix these issues, you’ll get the perfect crunch every time! You can make crispy chickpeas with simple steps and easy ingredients. We covered everything from prepping chickpeas to choosing spices. The air fryer gives them a great crunch. Remember to shake the basket for even cooking. Don't be afraid to try new flavors or add herbs. You can make your chickpeas fit any diet. Store them right to keep them fresh. Use leftovers creatively in salads or bowls. Enjoy your tasty chickpeas as a healthy snack or side!](https://recipesure.com/wp-content/uploads/2025/07/02cf143b-b6ca-4e90-b274-6c6025fd387b.webp)
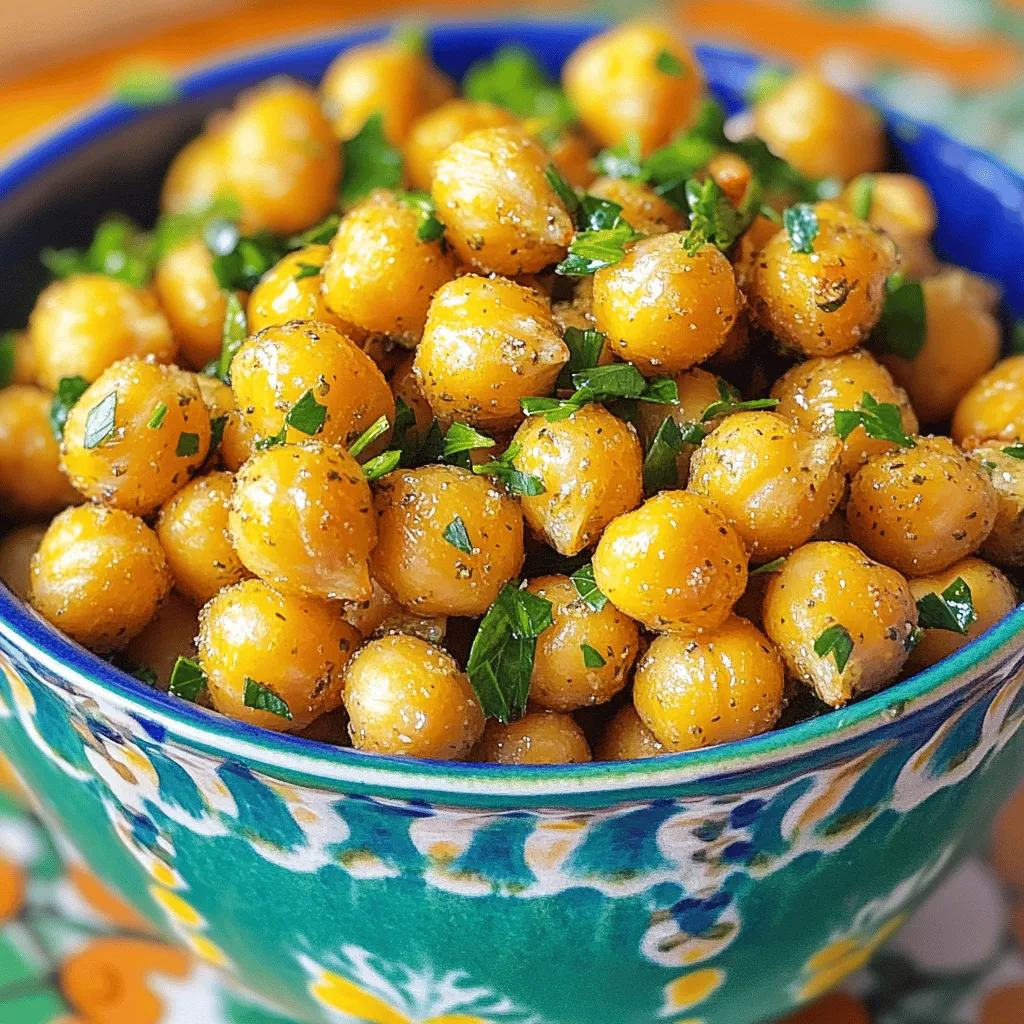
Looking for a crispy snack that’s packed with flavor? Try my Air Fryer Garlic Herb Chickpeas! These little bites are crunchy and full of savory herbs that you’ll love. With just a few simple ingredients and easy steps, you can whip up a delicious treat that’s perfect for any occasion. Join me, and let’s make a snack that’s not only tasty but also healthy! Your taste buds will thank you!
Ingredients
Main Ingredients
- 1 can (15 oz) chickpeas, drained and rinsed
- 2 tablespoons olive oil
- 1 teaspoon garlic powder
- 1 teaspoon onion powder
- 1 teaspoon paprika
- ½ teaspoon dried thyme
- ½ teaspoon dried rosemary
- Salt and pepper to taste
To make Air Fryer Garlic Herb Chickpeas, you need some simple, tasty ingredients. First, grab a can of chickpeas. These little beans pack a punch of protein and fiber. Rinse and drain them well. This step helps remove any excess salt from the can. Next, you’ll need olive oil. This oil adds flavor and helps the chickpeas get crispy.
For seasoning, you will use garlic powder, onion powder, and paprika. These spices bring out the best flavors in our dish. Don’t forget the herbs! Dried thyme and rosemary add a nice, earthy taste. Finally, season with salt and pepper to taste. Balancing these flavors makes all the difference.
Optional Garnishes
- Fresh parsley for garnish
While not necessary, fresh parsley adds a burst of color and freshness. Sprinkle it on top after cooking for a lovely finish.
Kitchen Tools Needed
- Air fryer
- Mixing bowl
- Measuring spoons
You will need a few basic tools to whip up this dish. An air fryer is essential for achieving that perfect crunch. Use a mixing bowl to combine your chickpeas with the seasonings. Measuring spoons help ensure you get the right amounts of spices. With these tools in hand, you’re ready to make a delicious snack.
Step-by-Step Instructions
Prepping the Chickpeas
To start, drain and rinse the chickpeas. Place them in a colander and run cold water over them. This removes any canning liquid and helps reduce sodium.
Next, dry the chickpeas well. Use a clean kitchen towel to pat them dry. Drying is key for crispy results. If they are too wet, they won’t crisp up as much in the air fryer.
Mixing the Ingredients
Now, let’s mix the ingredients. In a large bowl, combine the chickpeas with olive oil, garlic powder, onion powder, paprika, thyme, rosemary, salt, and pepper.
Toss them well so every chickpea gets coated. This even coating makes sure each bite is full of flavor. If you skip this step, some chickpeas may taste bland.
Air Frying Process
Set your air fryer to 400°F (200°C). Preheat it for about 5 minutes. This helps the chickpeas cook evenly.
Once preheated, add the seasoned chickpeas to the basket. Spread them in a single layer for the best crispiness. Air fry for 12-15 minutes.
Make sure to shake the basket halfway through. This helps them cook evenly and turn golden brown. When done, they should be crispy and delicious.
Enjoy these flavorful chickpeas as a snack or add them to your meals.
Tips & Tricks
Ensuring Maximum Crispiness
To make your chickpeas crispy, spread them in a single layer in the air fryer. This helps hot air circulate around each chickpea. If they stack up, they won’t cook evenly. During cooking, shake the basket every 5 minutes. This move keeps them moving and helps them crisp up well.
Flavor Enhancements
You can spice things up with more flavors! Try adding cayenne pepper for heat or cumin for warmth. Fresh herbs like basil or cilantro can also blend well. Adjusting the olive oil can change how crunchy they get. Less oil gives a drier finish, while more oil creates a richer, crunchier bite.
Serving Suggestions
Crispy chickpeas pair nicely with salads or grain bowls for added crunch. You can also use them as a topping for soups. If you have leftovers, store them in an airtight container. You can toss them into your next wrap or sprinkle them on popcorn for a tasty snack.
Variations
Spice Variations
You can change the flavor of your chickpeas with different spice blends. For a Cajun twist, add cayenne pepper and smoked paprika. If you like curry, mix in curry powder and turmeric. To customize heat levels, add more or less spice based on your taste. Just remember to start small. You can always add more!
Alternative Cooking Methods
If you don’t have an air fryer, you can still enjoy crispy chickpeas. Oven-baking is a great option. Preheat your oven to 400°F (200°C). Spread the seasoned chickpeas on a baking sheet and bake for about 25-30 minutes, shaking the pan halfway through. Stovetop methods work too. You can use a skillet to pan-fry the chickpeas in olive oil until they are golden.
Dietary Changes
Making these chickpeas gluten-free is easy. All the ingredients are naturally gluten-free. For a vegan-friendly option, you already have that covered! Just ensure your spices are also vegan. If you want to adjust nutrition, try using less olive oil for fewer calories. You can also add more herbs to boost flavor without added fat.
Storage Info
Short-term Storage
To keep your crispy chickpeas fresh, use airtight containers. Glass jars or plastic containers work well. Store them at room temperature for up to three days. After that, they may lose their crunch.
Freezing Instructions
Yes, you can freeze cooked chickpeas. Spread them on a baking sheet to freeze individually first. Once frozen, transfer them to a freezer bag. Use them within three months for the best taste. Thaw them in the fridge overnight. To reheat, simply air fry for a few minutes until warm and crispy.
Using Leftovers
Leftover chickpeas can shine in many dishes. Toss them into salads for added crunch. They also work great in grain bowls or wraps. Try mixing them with quinoa and fresh veggies for a tasty meal.
FAQs
How long do I cook chickpeas in the air fryer?
I usually cook chickpeas in the air fryer for 12 to 15 minutes at 400°F (200°C). Your cook time may change based on your air fryer model. If you like them extra crispy, go for the longer time. Just remember to shake the basket halfway through to ensure even cooking.
Can I use dried chickpeas instead of canned ones?
Yes, you can use dried chickpeas! But you must soak and cook them first. Start by soaking them in water overnight. Then, boil them for 45 to 60 minutes until tender. After that, drain and rinse them before air frying. This method takes more time but gives you great flavor.
What to do if my chickpeas are not crispy?
If your chickpeas come out soggy, it may be due to a few common mistakes. First, make sure to dry the chickpeas well after rinsing. Excess moisture makes them less crispy. Also, avoid overcrowding the air fryer basket. A single layer helps them crisp up nicely. If you fix these issues, you’ll get the perfect crunch every time!
You can make crispy chickpeas with simple steps and easy ingredients. We covered everything from prepping chickpeas to choosing spices. The air fryer gives them a great crunch. Remember to shake the basket for even cooking. Don’t be afraid to try new flavors or add herbs. You can make your chickpeas fit any diet. Store them right to keep them fresh. Use leftovers creatively in salads or bowls. Enjoy your tasty chickpeas as a healthy snack or side!
![- 1 can (15 oz) chickpeas, drained and rinsed - 2 tablespoons olive oil - 1 teaspoon garlic powder - 1 teaspoon onion powder - 1 teaspoon paprika - ½ teaspoon dried thyme - ½ teaspoon dried rosemary - Salt and pepper to taste To make Air Fryer Garlic Herb Chickpeas, you need some simple, tasty ingredients. First, grab a can of chickpeas. These little beans pack a punch of protein and fiber. Rinse and drain them well. This step helps remove any excess salt from the can. Next, you'll need olive oil. This oil adds flavor and helps the chickpeas get crispy. For seasoning, you will use garlic powder, onion powder, and paprika. These spices bring out the best flavors in our dish. Don't forget the herbs! Dried thyme and rosemary add a nice, earthy taste. Finally, season with salt and pepper to taste. Balancing these flavors makes all the difference. - Fresh parsley for garnish While not necessary, fresh parsley adds a burst of color and freshness. Sprinkle it on top after cooking for a lovely finish. - Air fryer - Mixing bowl - Measuring spoons You will need a few basic tools to whip up this dish. An air fryer is essential for achieving that perfect crunch. Use a mixing bowl to combine your chickpeas with the seasonings. Measuring spoons help ensure you get the right amounts of spices. With these tools in hand, you're ready to make a delicious snack. For the full recipe, check out the cooking instructions. To start, drain and rinse the chickpeas. Place them in a colander and run cold water over them. This removes any canning liquid and helps reduce sodium. Next, dry the chickpeas well. Use a clean kitchen towel to pat them dry. Drying is key for crispy results. If they are too wet, they won't crisp up as much in the air fryer. Now, let’s mix the ingredients. In a large bowl, combine the chickpeas with olive oil, garlic powder, onion powder, paprika, thyme, rosemary, salt, and pepper. Toss them well so every chickpea gets coated. This even coating makes sure each bite is full of flavor. If you skip this step, some chickpeas may taste bland. Set your air fryer to 400°F (200°C). Preheat it for about 5 minutes. This helps the chickpeas cook evenly. Once preheated, add the seasoned chickpeas to the basket. Spread them in a single layer for the best crispiness. Air fry for 12-15 minutes. Make sure to shake the basket halfway through. This helps them cook evenly and turn golden brown. When done, they should be crispy and delicious. Enjoy these flavorful chickpeas as a snack or add them to your meals. For the full recipe, check out the details above. To make your chickpeas crispy, spread them in a single layer in the air fryer. This helps hot air circulate around each chickpea. If they stack up, they won’t cook evenly. During cooking, shake the basket every 5 minutes. This move keeps them moving and helps them crisp up well. You can spice things up with more flavors! Try adding cayenne pepper for heat or cumin for warmth. Fresh herbs like basil or cilantro can also blend well. Adjusting the olive oil can change how crunchy they get. Less oil gives a drier finish, while more oil creates a richer, crunchier bite. Crispy chickpeas pair nicely with salads or grain bowls for added crunch. You can also use them as a topping for soups. If you have leftovers, store them in an airtight container. You can toss them into your next wrap or sprinkle them on popcorn for a tasty snack. For the full recipe, check the link above. {{image_2}} You can change the flavor of your chickpeas with different spice blends. For a Cajun twist, add cayenne pepper and smoked paprika. If you like curry, mix in curry powder and turmeric. To customize heat levels, add more or less spice based on your taste. Just remember to start small. You can always add more! If you don’t have an air fryer, you can still enjoy crispy chickpeas. Oven-baking is a great option. Preheat your oven to 400°F (200°C). Spread the seasoned chickpeas on a baking sheet and bake for about 25-30 minutes, shaking the pan halfway through. Stovetop methods work too. You can use a skillet to pan-fry the chickpeas in olive oil until they are golden. Making these chickpeas gluten-free is easy. All the ingredients are naturally gluten-free. For a vegan-friendly option, you already have that covered! Just ensure your spices are also vegan. If you want to adjust nutrition, try using less olive oil for fewer calories. You can also add more herbs to boost flavor without added fat. Explore the [Full Recipe] for all the details on creating these tasty snacks! To keep your crispy chickpeas fresh, use airtight containers. Glass jars or plastic containers work well. Store them at room temperature for up to three days. After that, they may lose their crunch. Yes, you can freeze cooked chickpeas. Spread them on a baking sheet to freeze individually first. Once frozen, transfer them to a freezer bag. Use them within three months for the best taste. Thaw them in the fridge overnight. To reheat, simply air fry for a few minutes until warm and crispy. Leftover chickpeas can shine in many dishes. Toss them into salads for added crunch. They also work great in grain bowls or wraps. Try mixing them with quinoa and fresh veggies for a tasty meal. For more ideas, check out the [Full Recipe]. I usually cook chickpeas in the air fryer for 12 to 15 minutes at 400°F (200°C). Your cook time may change based on your air fryer model. If you like them extra crispy, go for the longer time. Just remember to shake the basket halfway through to ensure even cooking. Yes, you can use dried chickpeas! But you must soak and cook them first. Start by soaking them in water overnight. Then, boil them for 45 to 60 minutes until tender. After that, drain and rinse them before air frying. This method takes more time but gives you great flavor. If your chickpeas come out soggy, it may be due to a few common mistakes. First, make sure to dry the chickpeas well after rinsing. Excess moisture makes them less crispy. Also, avoid overcrowding the air fryer basket. A single layer helps them crisp up nicely. If you fix these issues, you’ll get the perfect crunch every time! You can make crispy chickpeas with simple steps and easy ingredients. We covered everything from prepping chickpeas to choosing spices. The air fryer gives them a great crunch. Remember to shake the basket for even cooking. Don't be afraid to try new flavors or add herbs. You can make your chickpeas fit any diet. Store them right to keep them fresh. Use leftovers creatively in salads or bowls. Enjoy your tasty chickpeas as a healthy snack or side!](https://recipesure.com/wp-content/uploads/2025/07/02cf143b-b6ca-4e90-b274-6c6025fd387b-250x250.webp)