Instant Pot Chipotle Turkey Quinoa Chili Delight
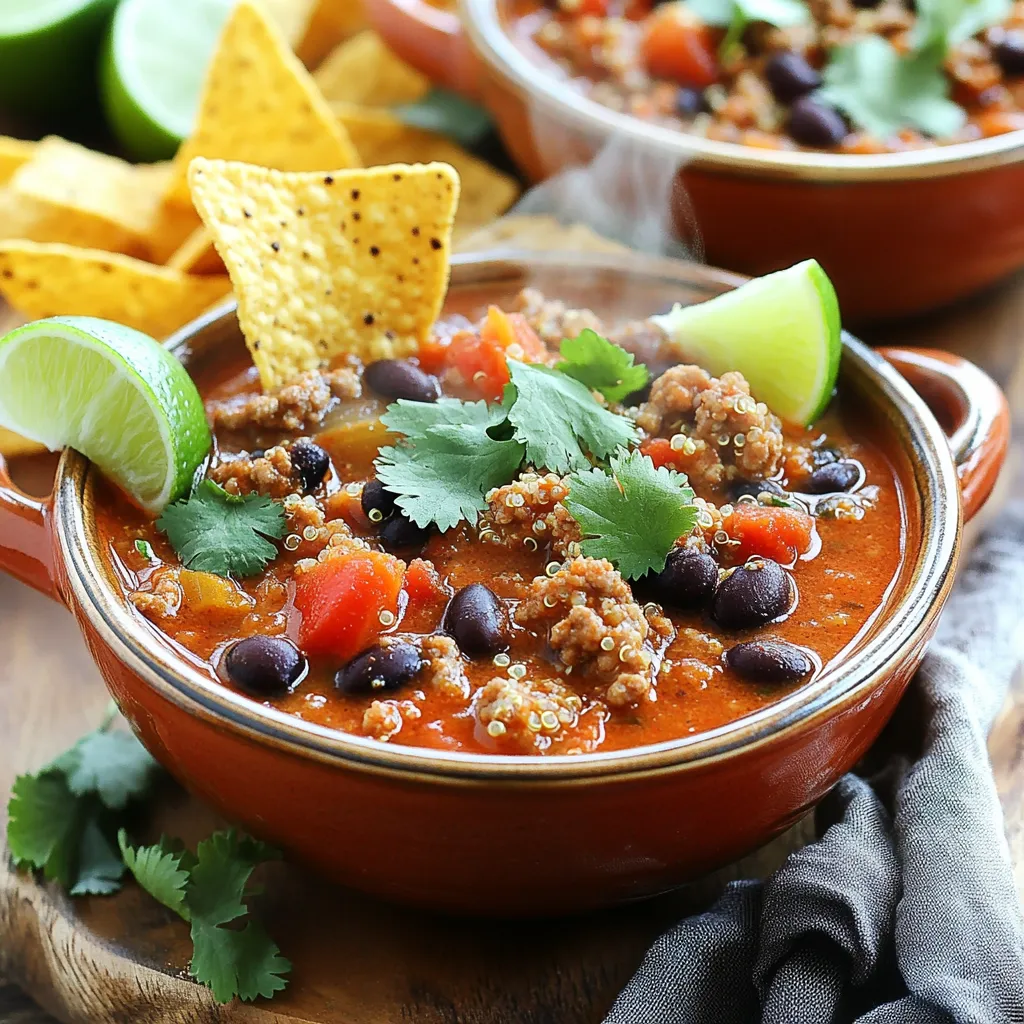
Are you ready to make a delicious meal in no time? This Instant Pot Chipotle Turkey Quinoa Chili is packed

Are you ready to make a delicious meal in no time? This Instant Pot Chipotle Turkey Quinoa Chili is packed

Are you ready to satisfy your sweet tooth with a treat that’s as easy as it is delicious? In this
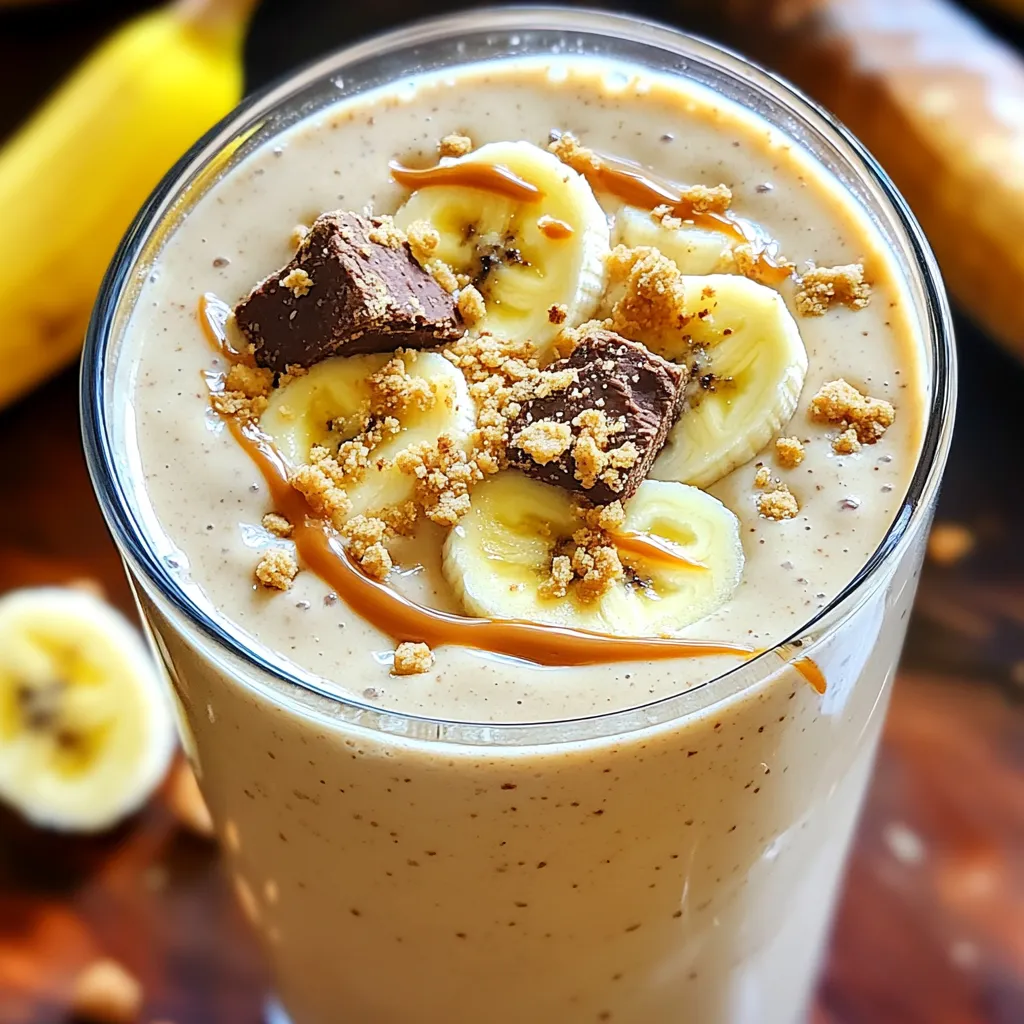
Are you ready to whip up a delicious and healthy treat? My High-Protein Cookies & Cream Smoothie will satisfy your
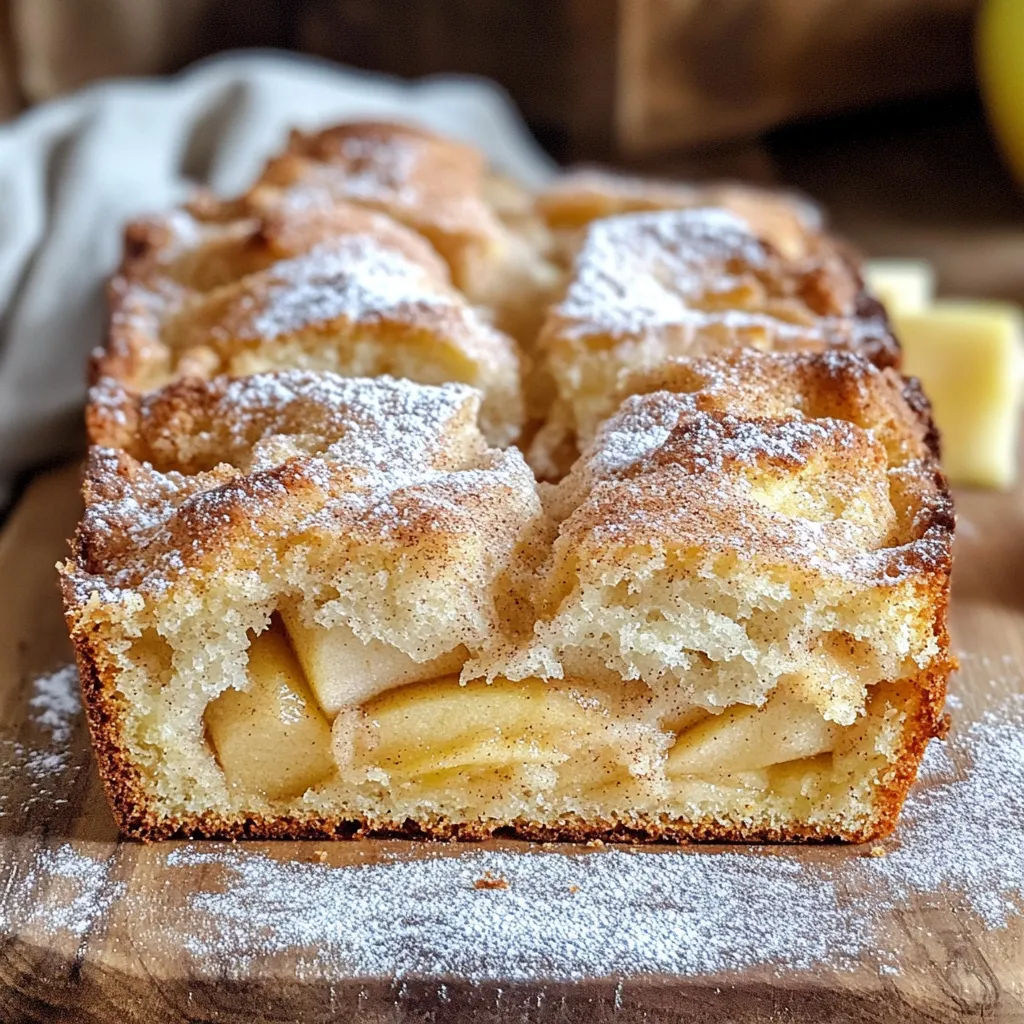
Craving a sweet and cozy treat? Look no further! Cinnamon Sugar Apple Fritter Bread blends the best flavors of fall
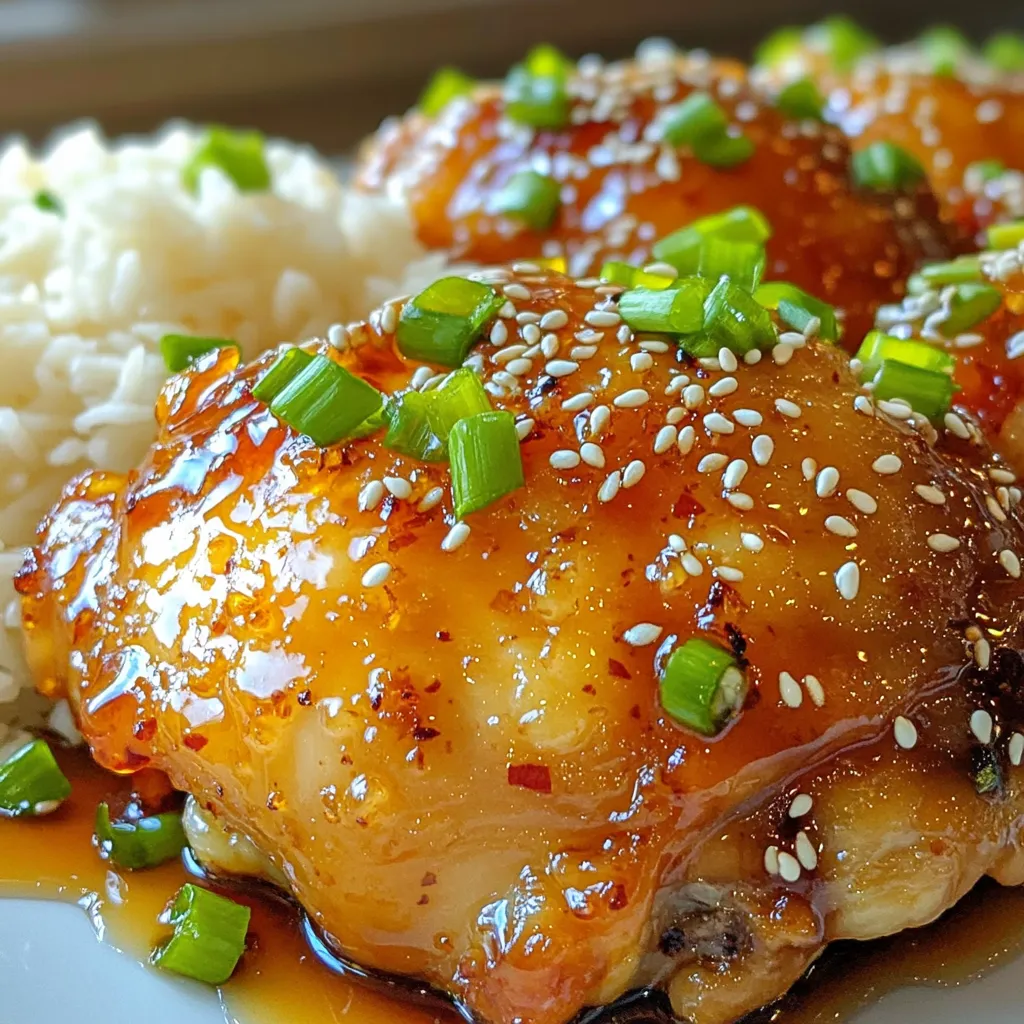
If you’re craving a quick and tasty meal, Minute Honey Garlic Chicken Thighs are a must-try! This bold dish combines
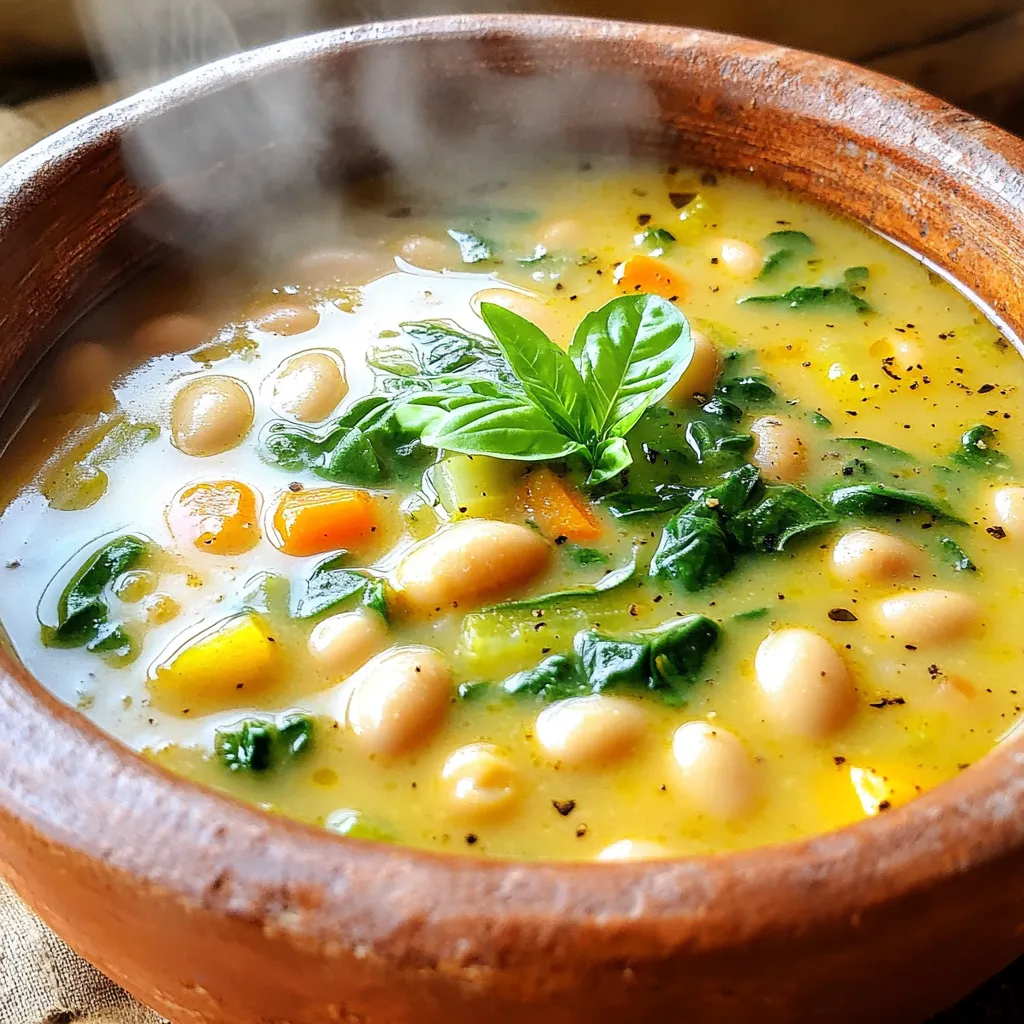
Looking for a cozy meal that warms both heart and belly? This Slow Cooker Creamy Tuscan Bean Soup checks all
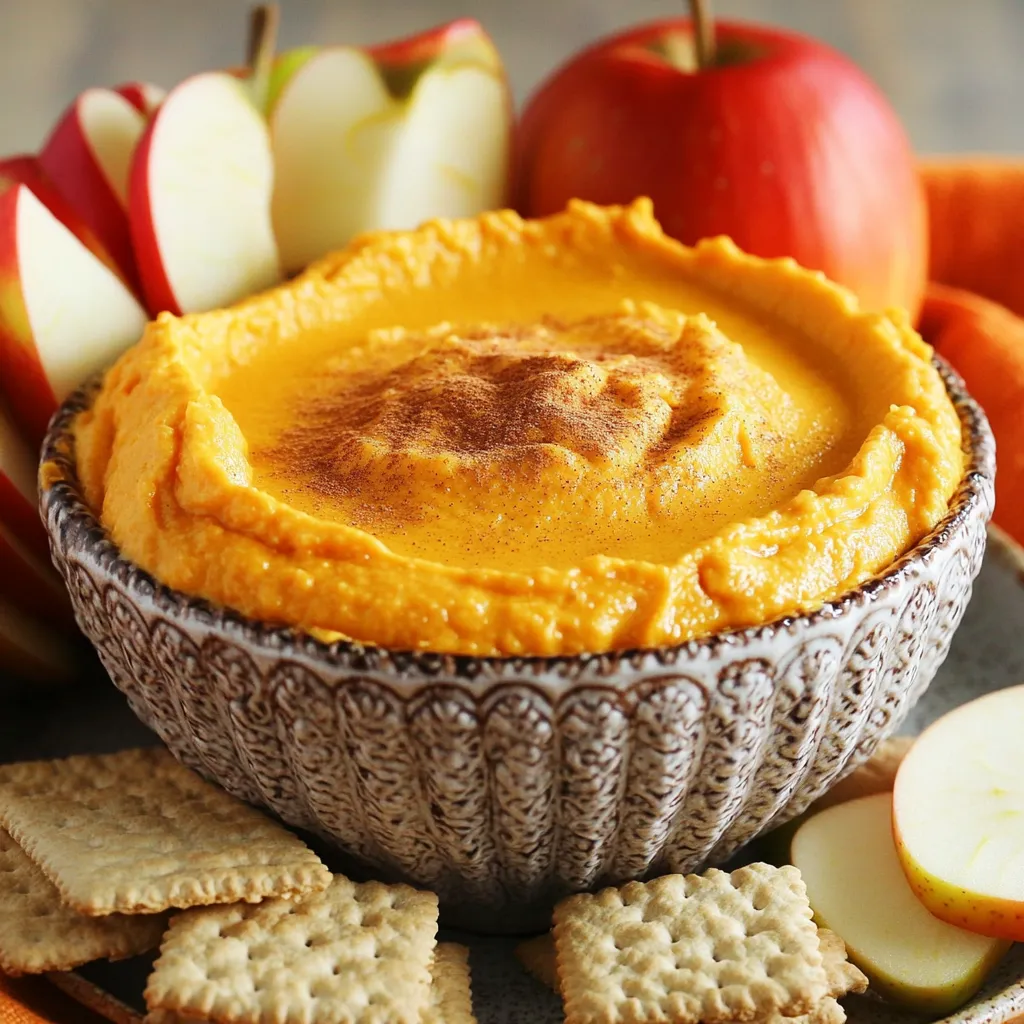
Are you ready to enjoy a sweet, creamy treat this fall? My Pumpkin Spice Cheesecake Dip packs all the best

Looking for a tasty twist on taco night? Try my Air Fryer Buffalo Cauliflower Tacos! These spicy delights bring big
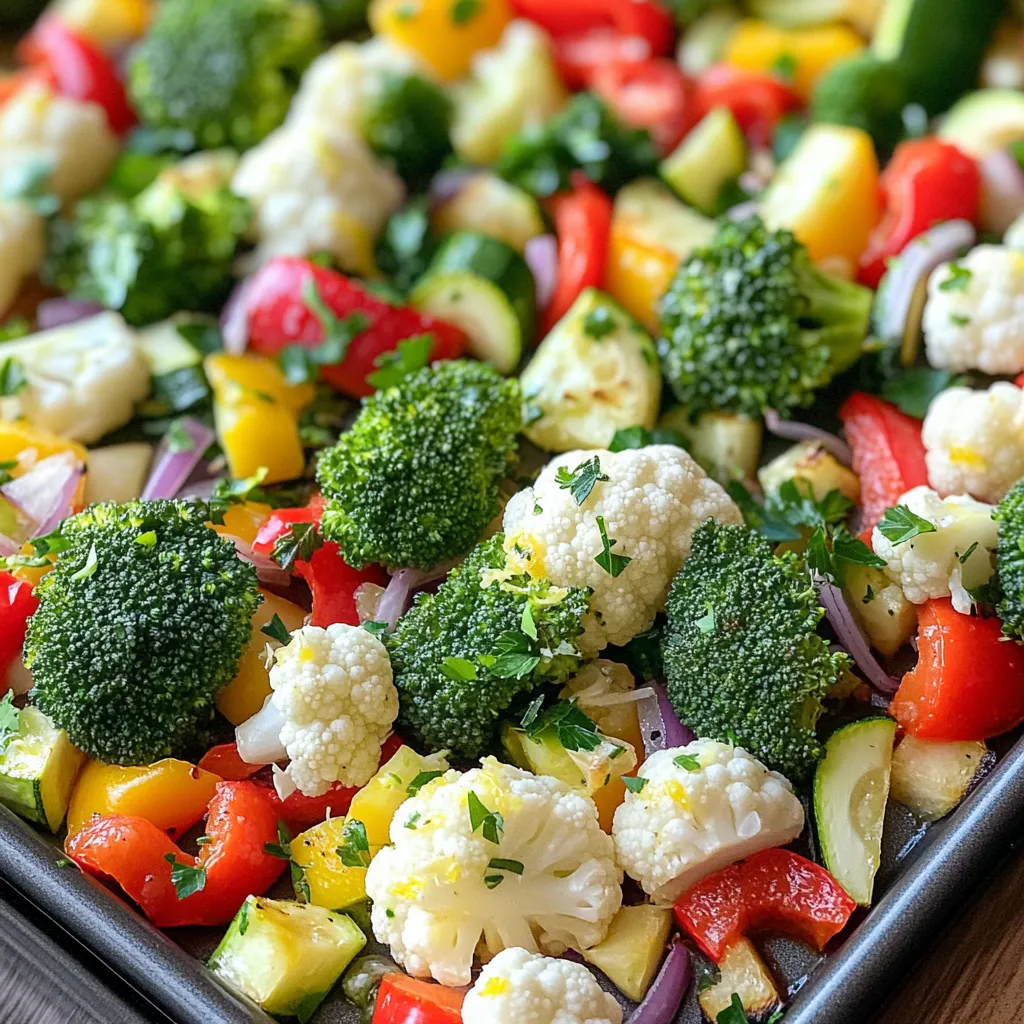
Are you ready to elevate your veggie game? My Sheet-Pan Lemon Garlic Roasted Veggies are simple, tasty, and packed with
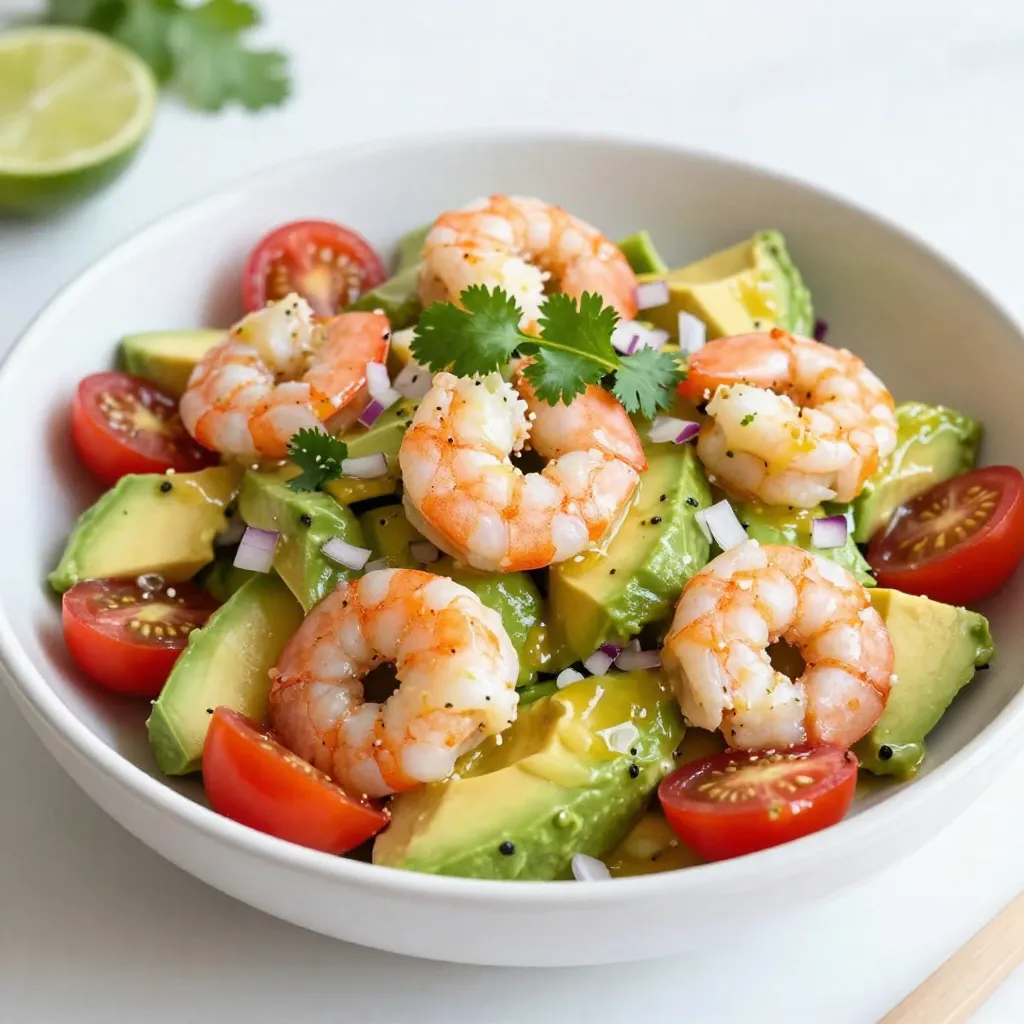
Get ready to dive into a bowl of fresh and tasty goodness! This Spicy Shrimp Avocado Salad bursts with flavor