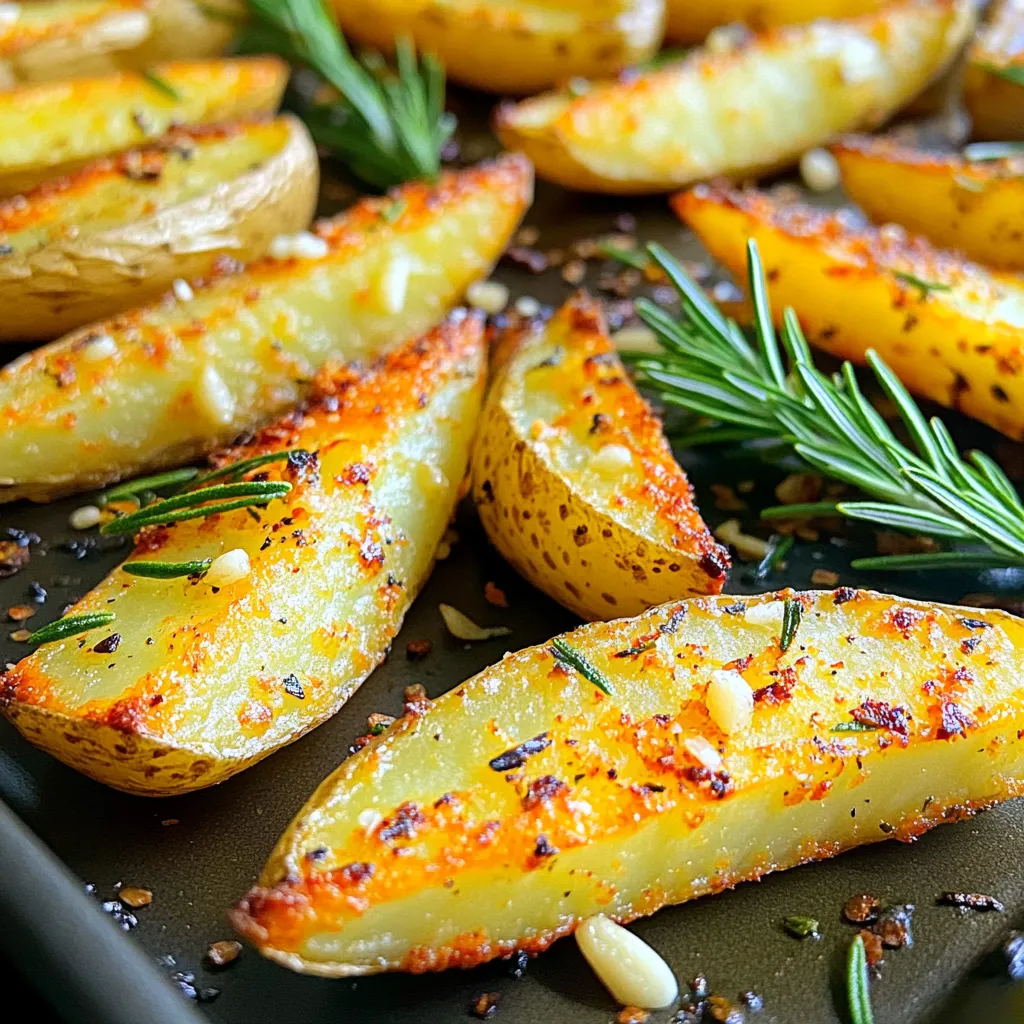
Sheet Pan Rosemary Garlic Potato Wedges Tasty Delight
Looking for a simple and tasty side dish? These Sheet Pan Rosemary Garlic Potato Wedges are your answer! With just

Looking for a simple and tasty side dish? These Sheet Pan Rosemary Garlic Potato Wedges are your answer! With just
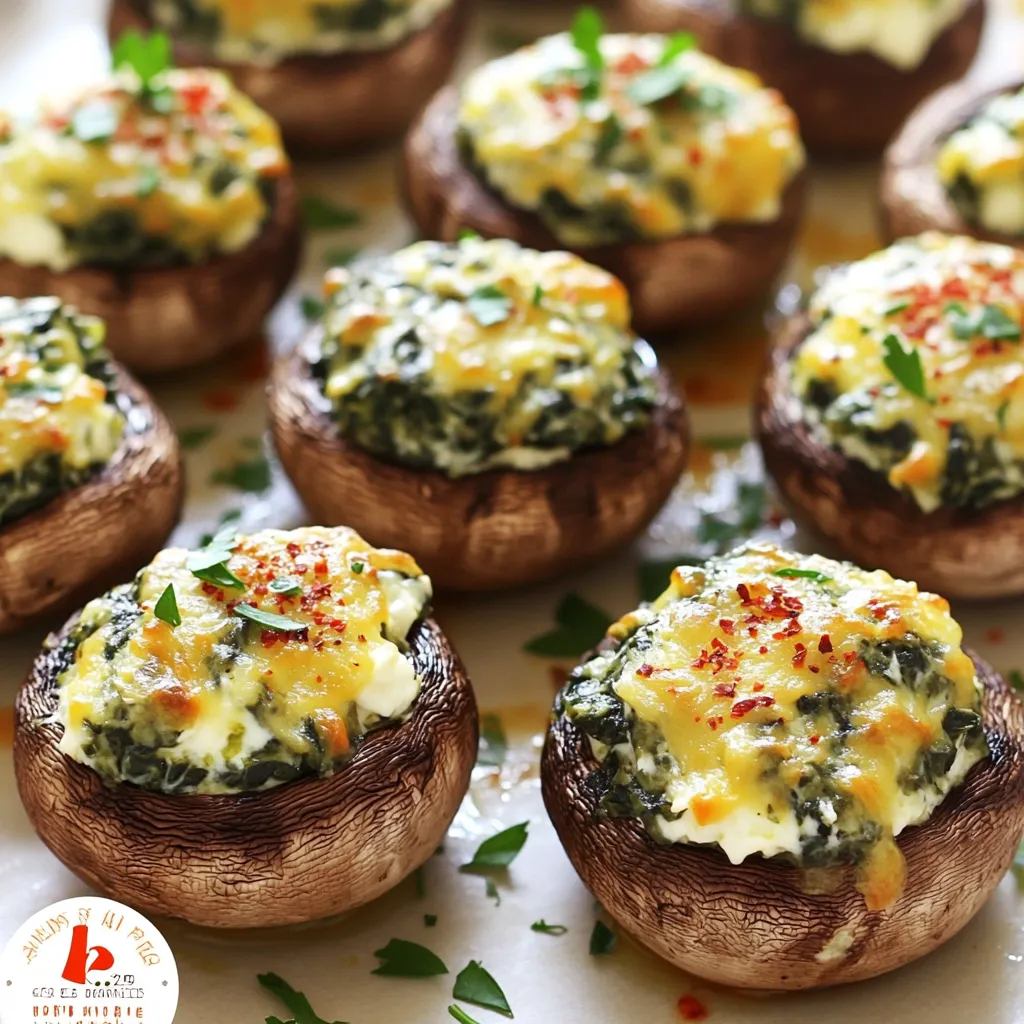
Are you ready to impress your guests with a mouthwatering appetizer? Creamy Spinach Parmesan Stuffed Mushrooms are the perfect dish!
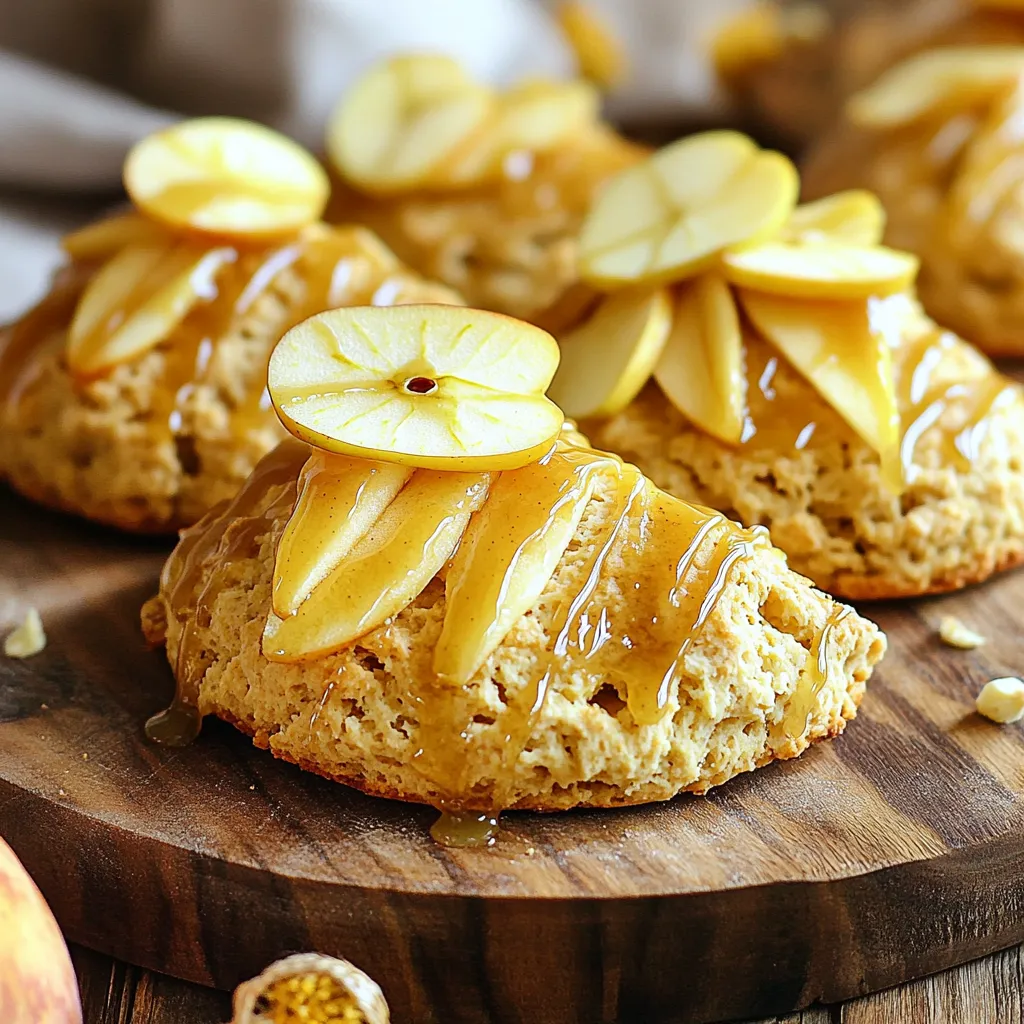
Fall is here, and nothing says cozy like warm Maple Glazed Apple Cider Scones. These scones blend sweet apple cider
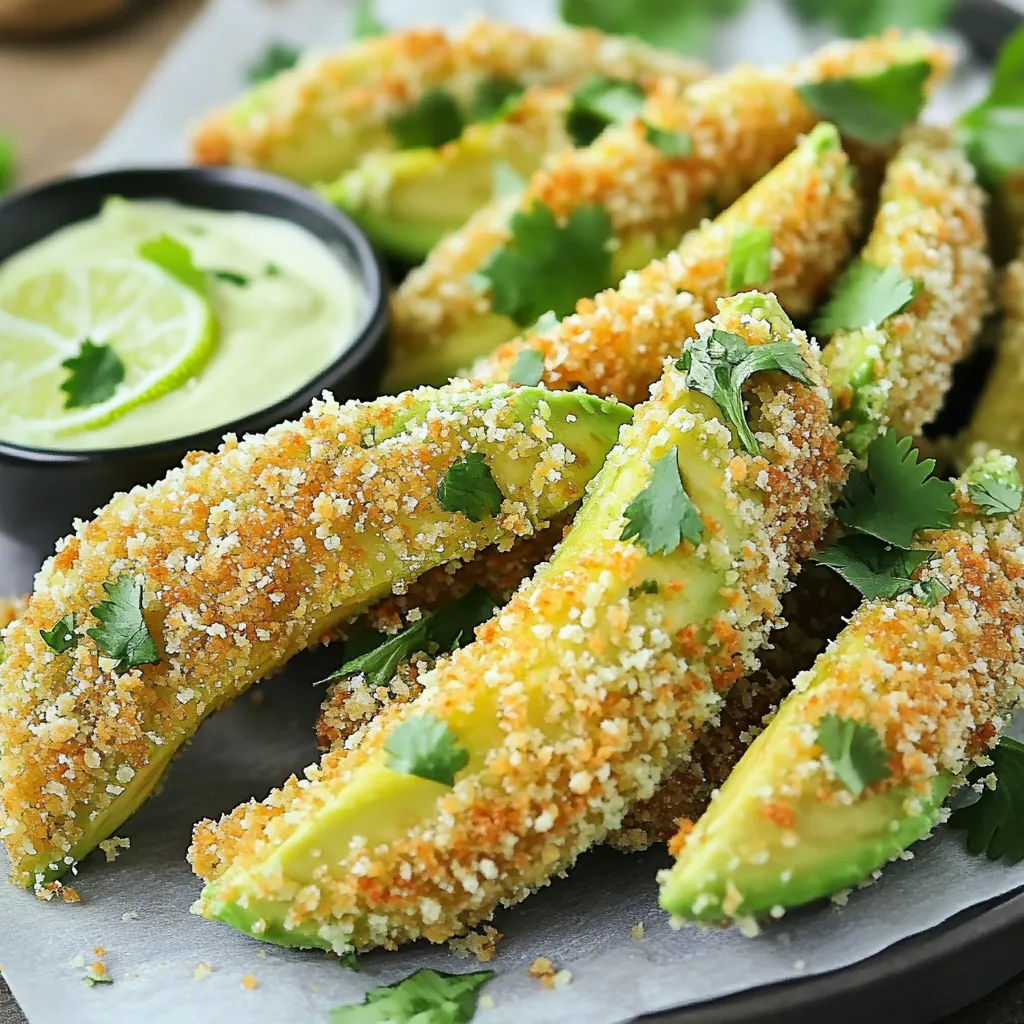
Looking for a new snack that’s both tasty and simple to make? You’re in the right place! Air Fryer Crispy
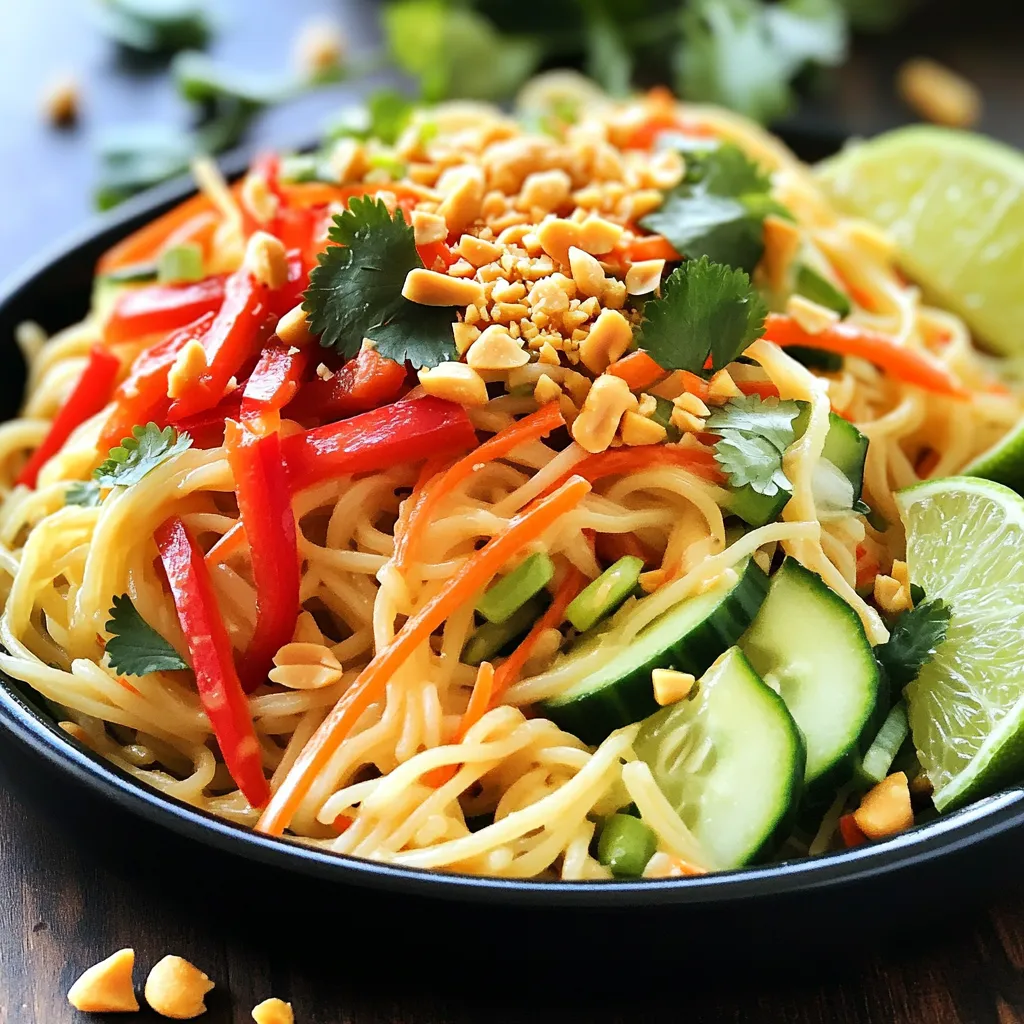
Craving something bold and tasty? My Spicy Peanut Noodle Salad is just what you need. This dish packs a punch

Get ready for a tasty treat! Brown Sugar Cinnamon Roasted Carrots are sweet, tender, and so easy to make. This
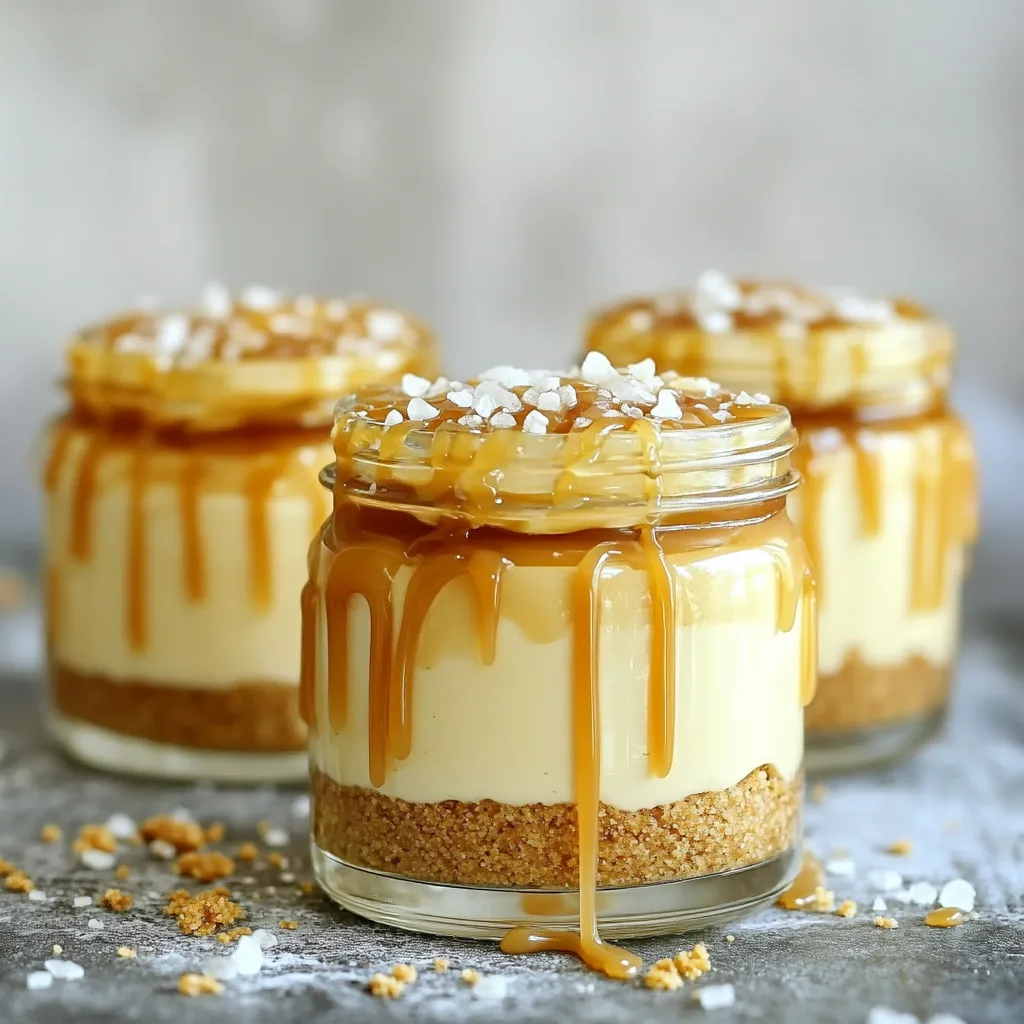
Ready to impress your taste buds? These No Bake Salted Caramel Cheesecake Jars are a delightful treat you can whip
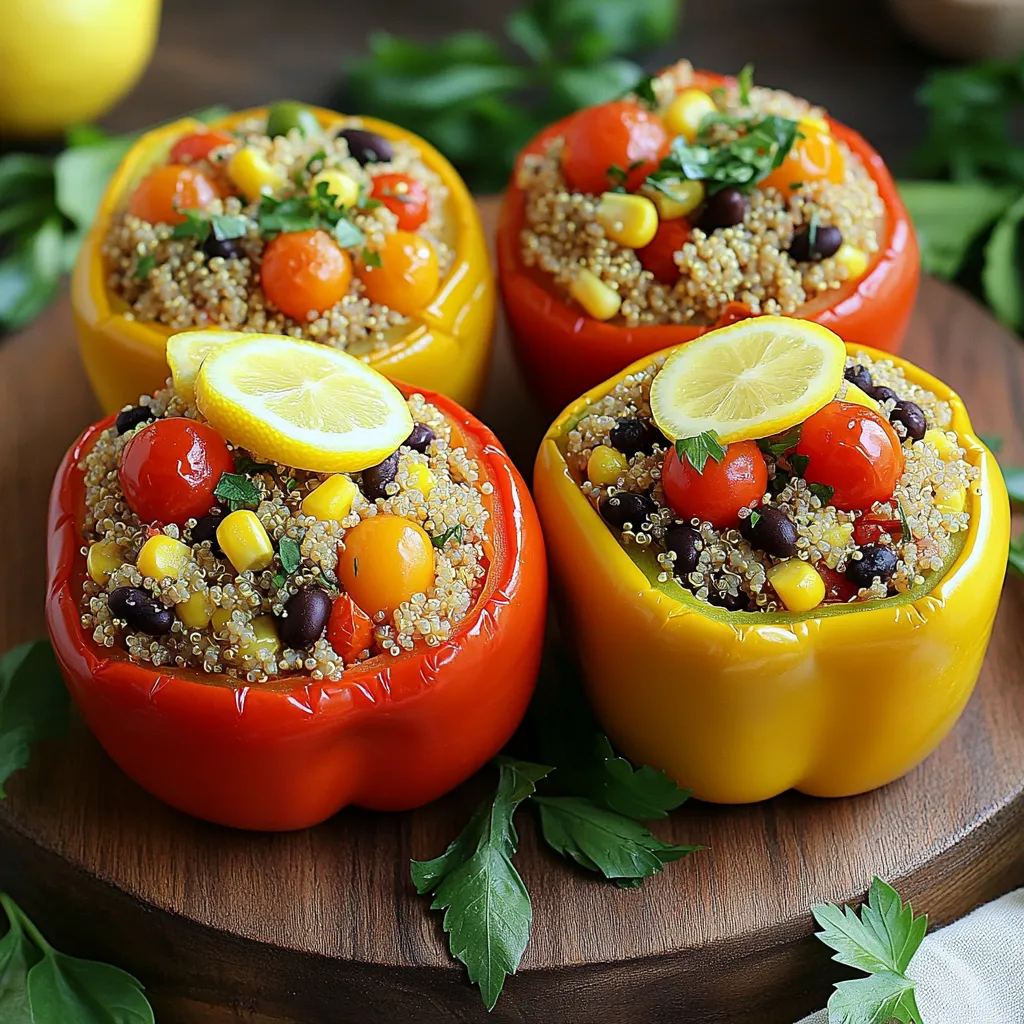
Lemon Herb Quinoa Stuffed Peppers make a tasty and healthy meal that’s easy to prepare. Packed with protein and fresh
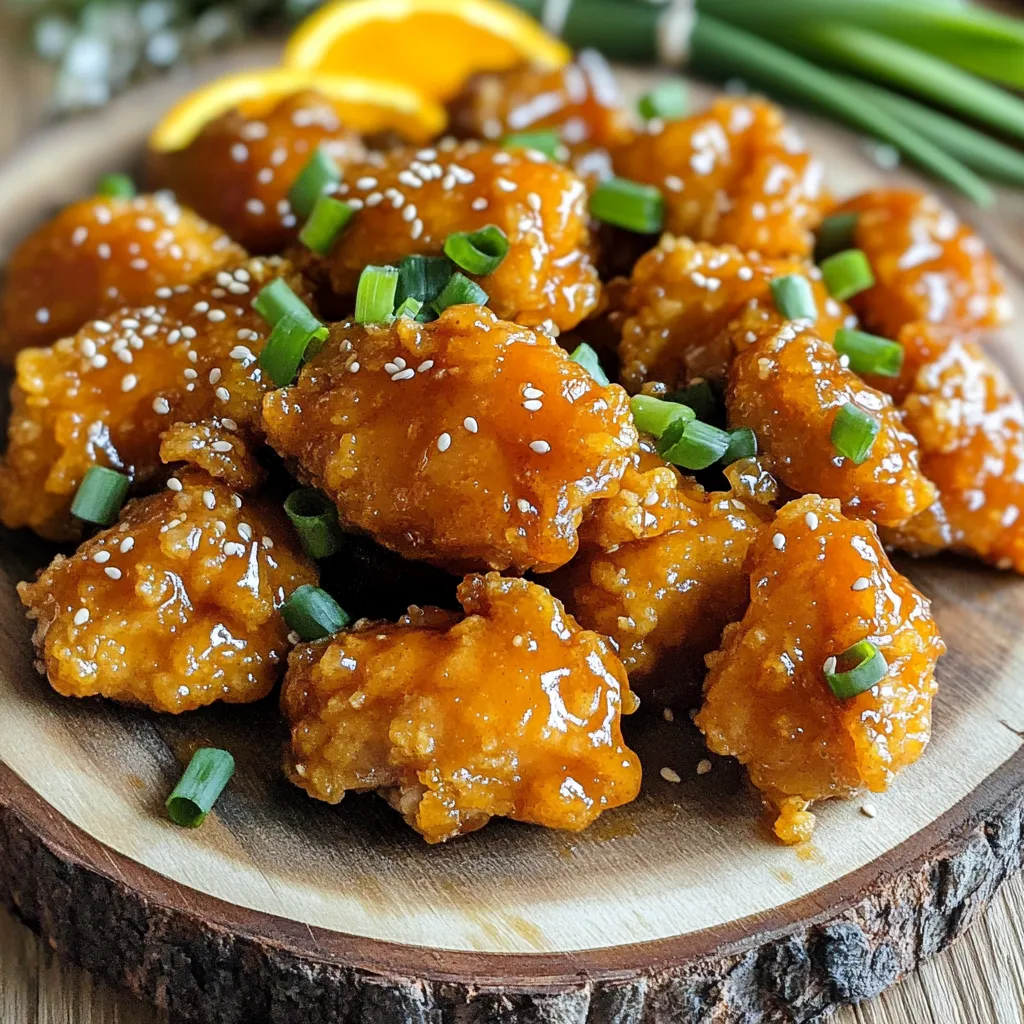
Looking for a meal that packs a punch and cooks quickly? You’re in the right place! My Air Fryer Sticky

If you love snacks that are quick and tasty, you’ll adore these Air Fryer Garlic Parmesan Pretzel Bites! This easy