
Roasted Garlic Parmesan Carrots Flavorful Side Dish
Looking for a side dish that wows your taste buds? Roasted Garlic Parmesan Carrots are the answer! This simple yet

Looking for a side dish that wows your taste buds? Roasted Garlic Parmesan Carrots are the answer! This simple yet

Looking for a refreshing dish that bursts with flavor? You’ve found it! My Cranberry Apple Spinach Salad combines crunchy apples,
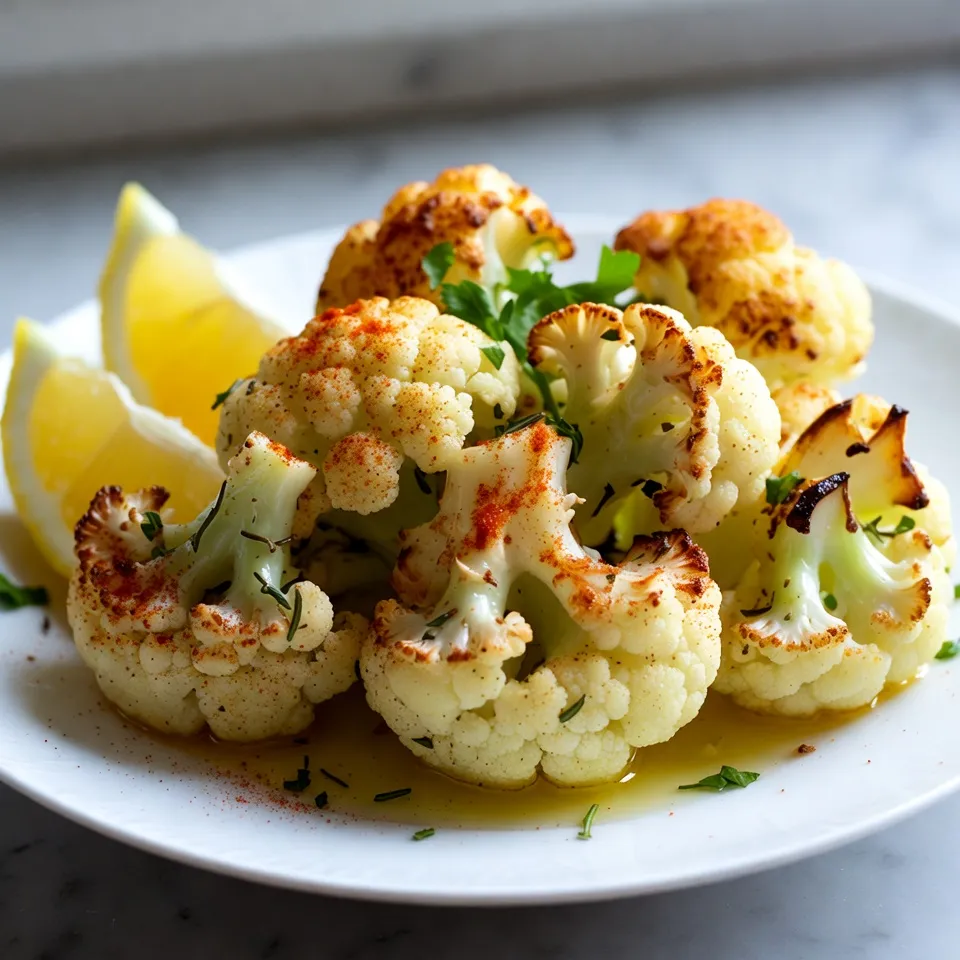
Are you ready to elevate your dinner table? Garlic Herb Roasted Cauliflower is a tasty and healthy side dish that

If you’re looking for a sweet treat that is easy to make and delicious, you’ve found it! Cinnamon sugar palmiers
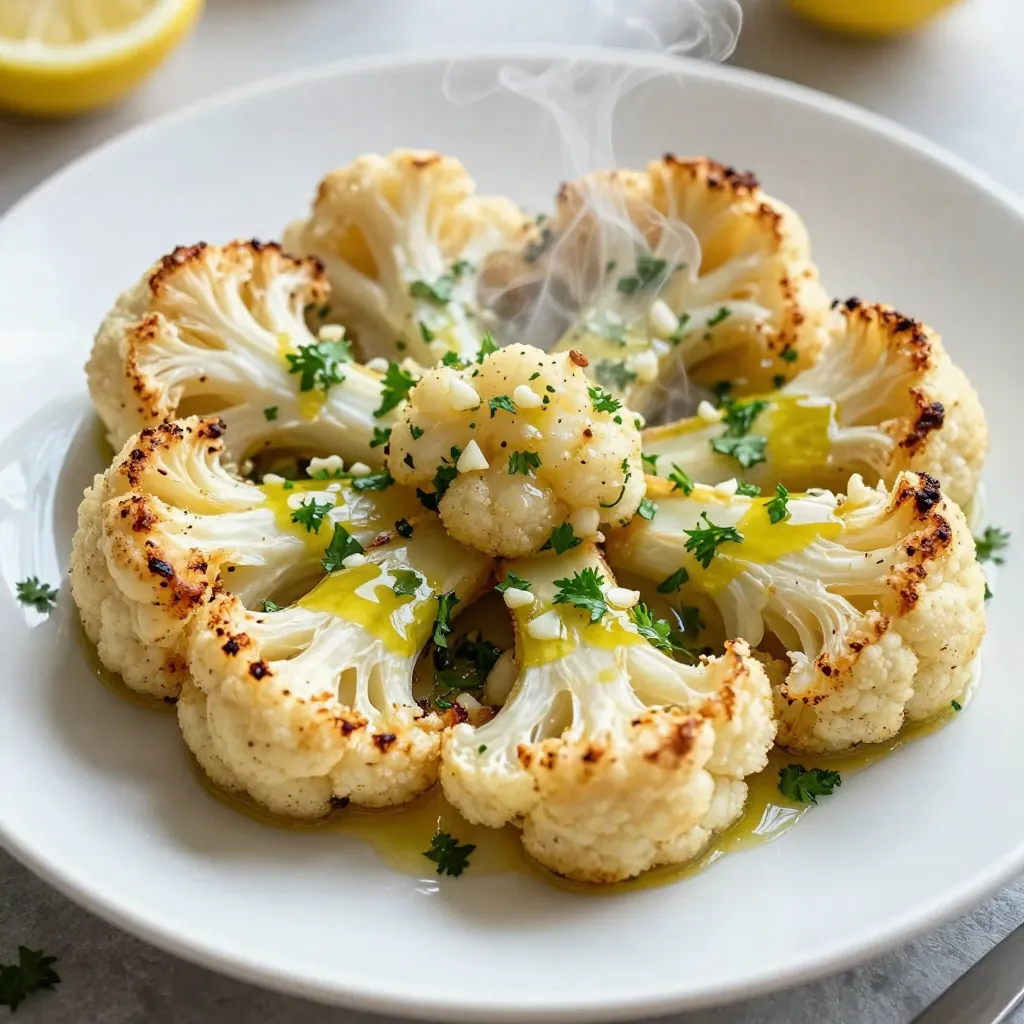
Looking for a tasty, healthy dish that impresses everyone? Try my Lemon Herb Roasted Cauliflower Steaks! This simple recipe bursts
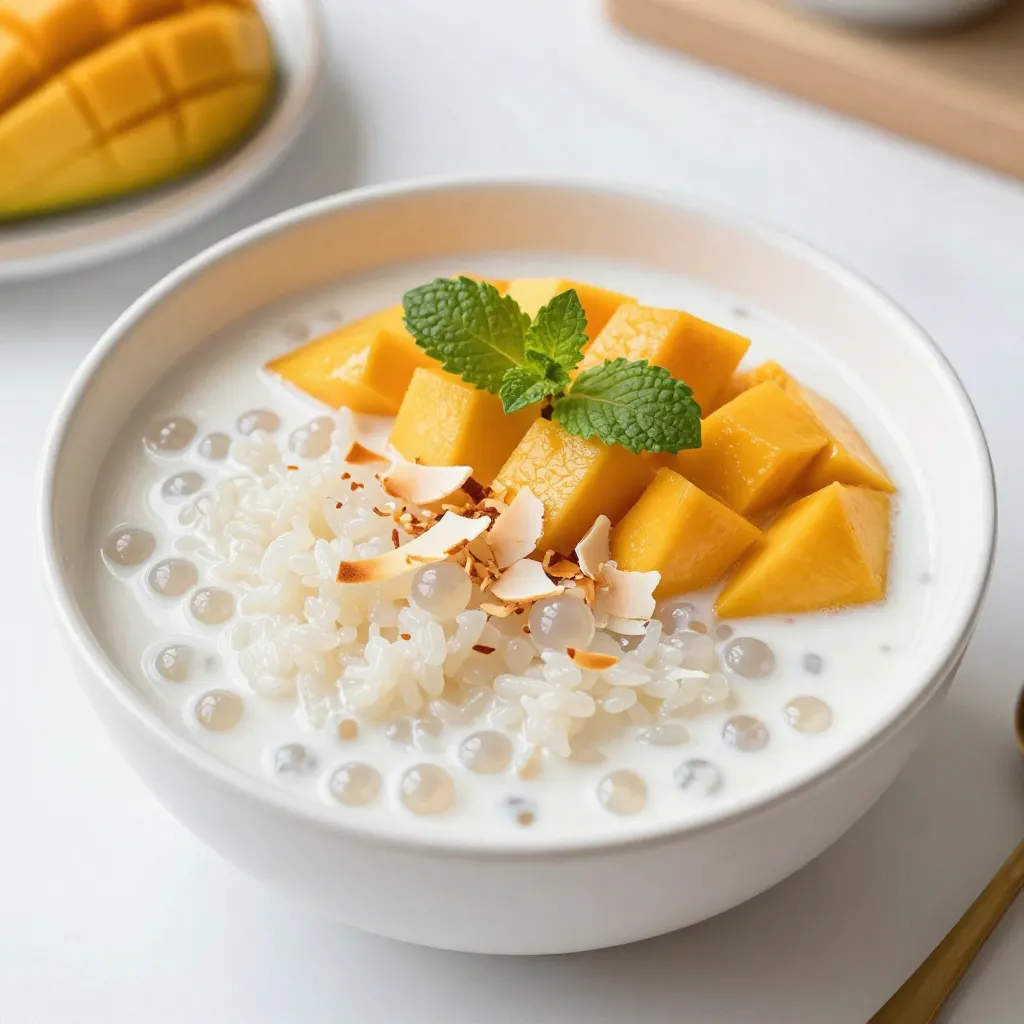
Indulge in the creamy sweetness of Mango Coconut Rice Pudding, a delightful treat you’ll love. This simple recipe combines fragrant
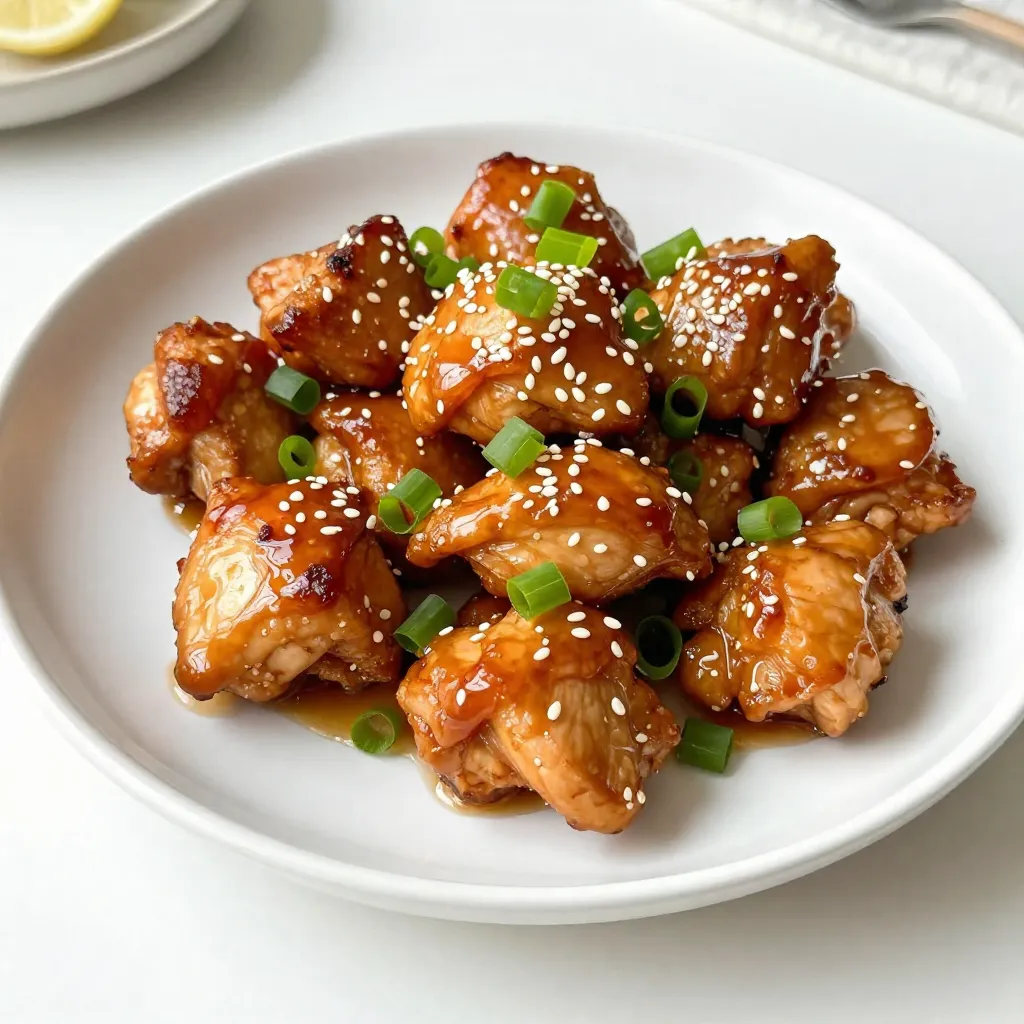
If you’re craving a meal that’s both simple and delicious, look no further than honey garlic chicken bites. These tasty
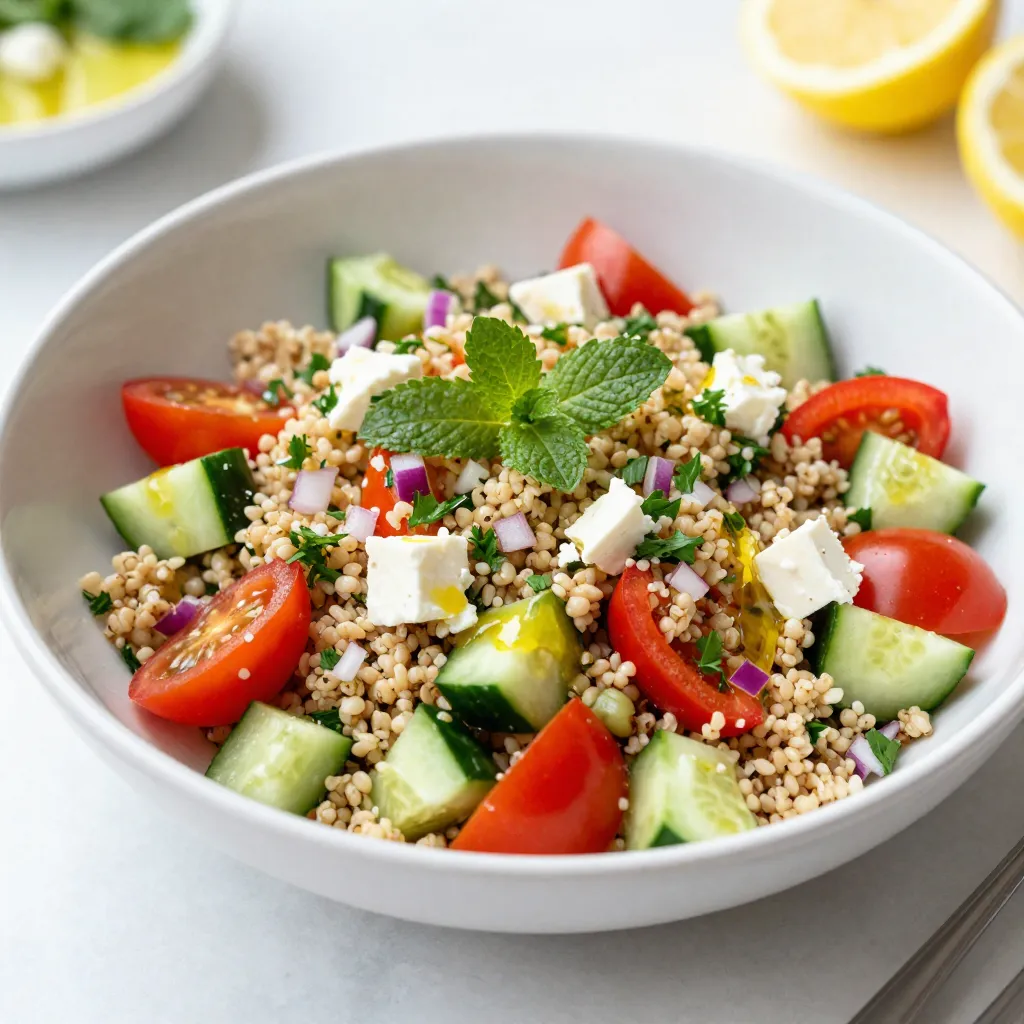
Looking for a fresh and easy meal? My Lemon Herb Quinoa Salad is just the ticket! It’s packed with vibrant
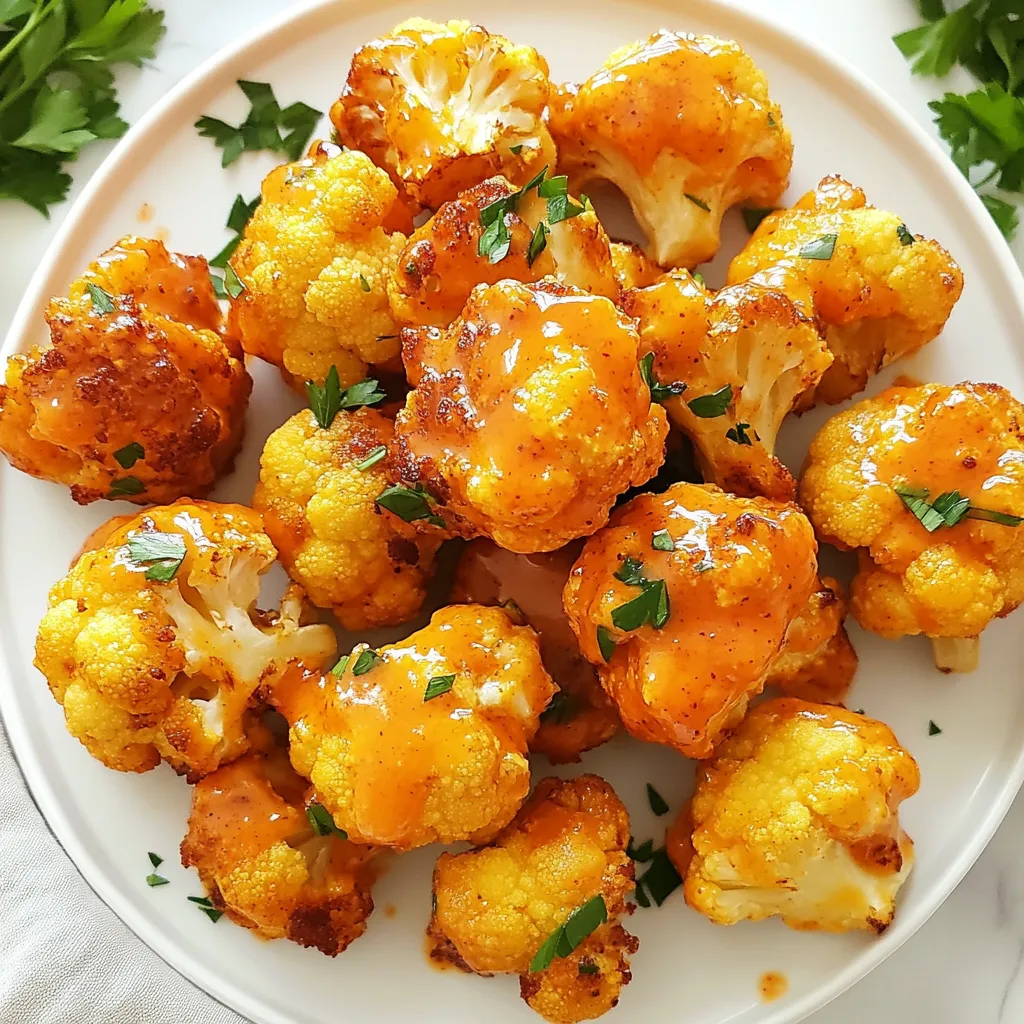
Craving a tasty snack that’s easy to make and packed with flavor? Look no further than these Savory Buffalo Cauliflower
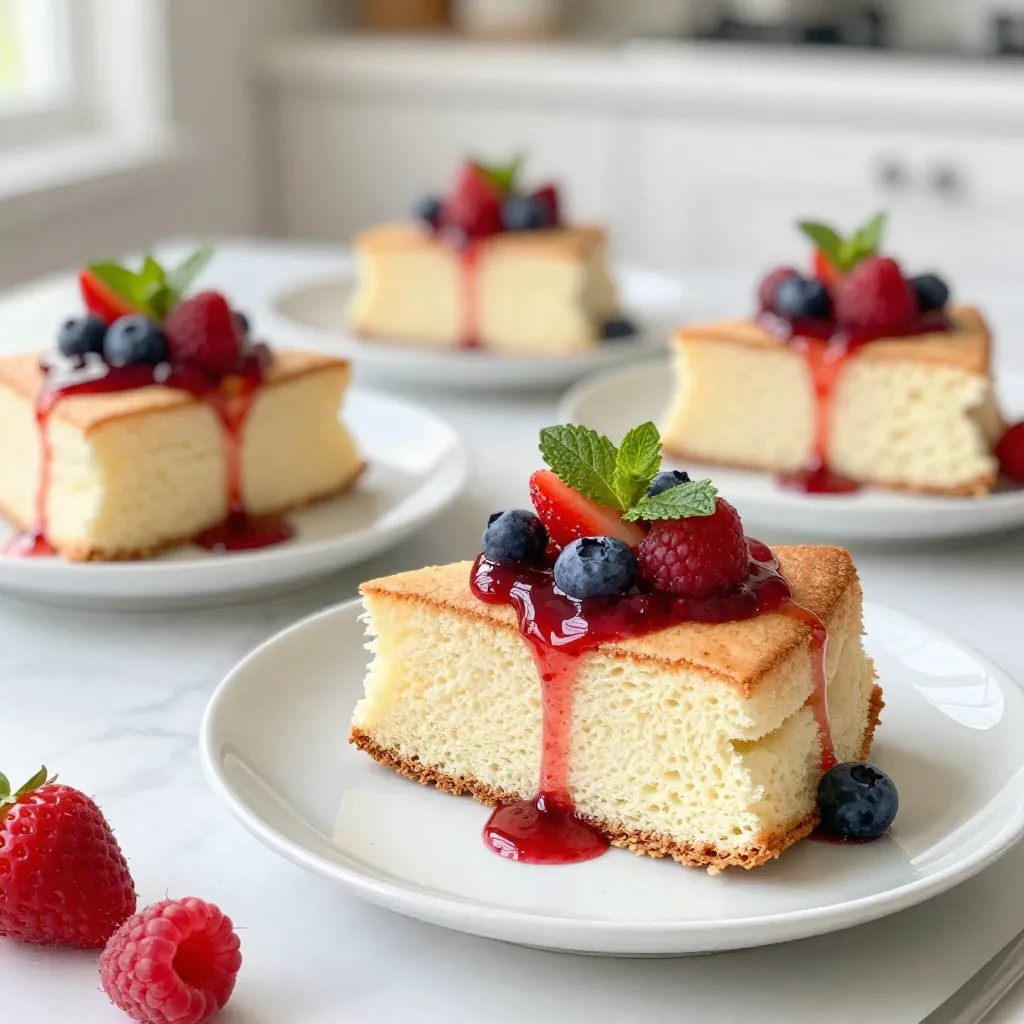
Welcome to a sweet journey of baking bliss! Today, we’re diving into the world of Classic Angel Food Cake with