
Garlic Parmesan Air Fryer Potatoes Crispy Delight
If you’re craving a crispy, savory side that’s quick and easy, you’ve come to the right place! Garlic Parmesan Air

If you’re craving a crispy, savory side that’s quick and easy, you’ve come to the right place! Garlic Parmesan Air
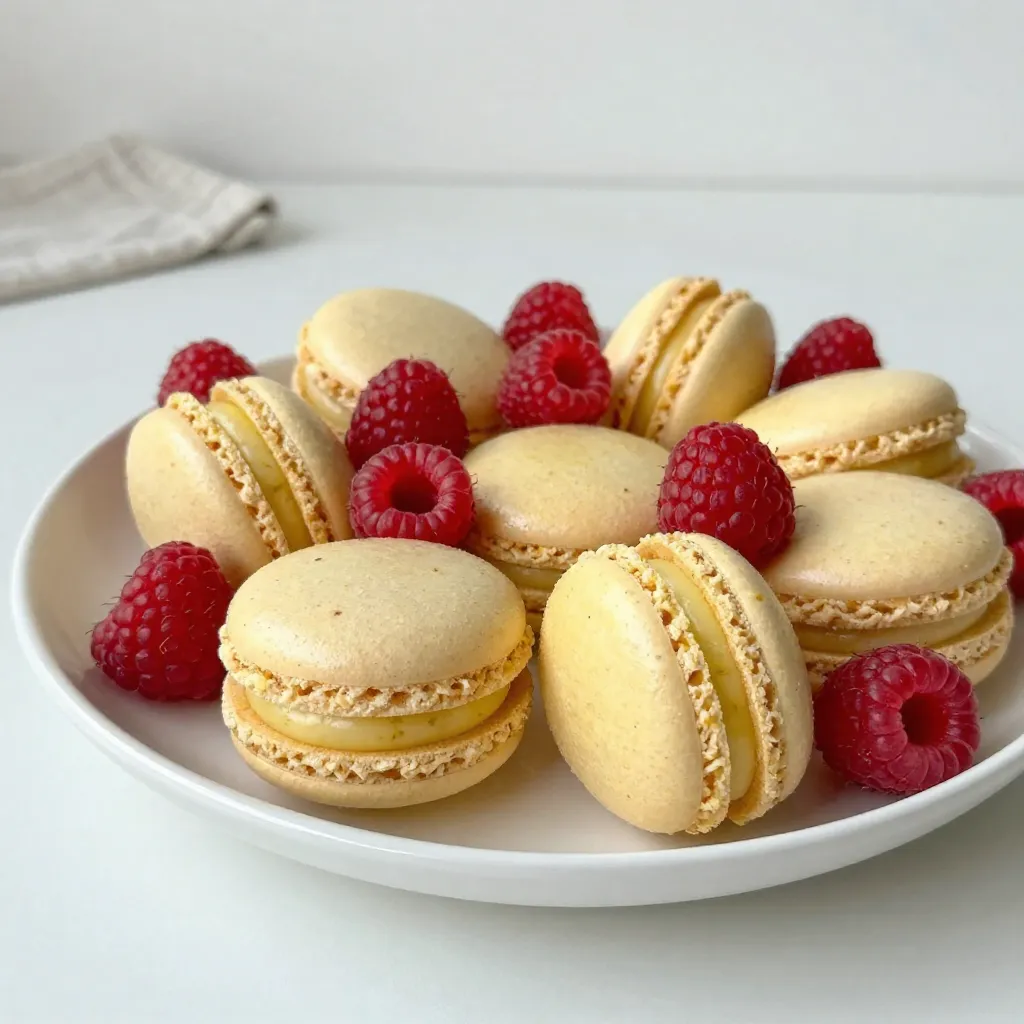
Are you craving a sweet treat that’s both bright and delightful? Let me introduce you to Lemon Raspberry Macarons, a
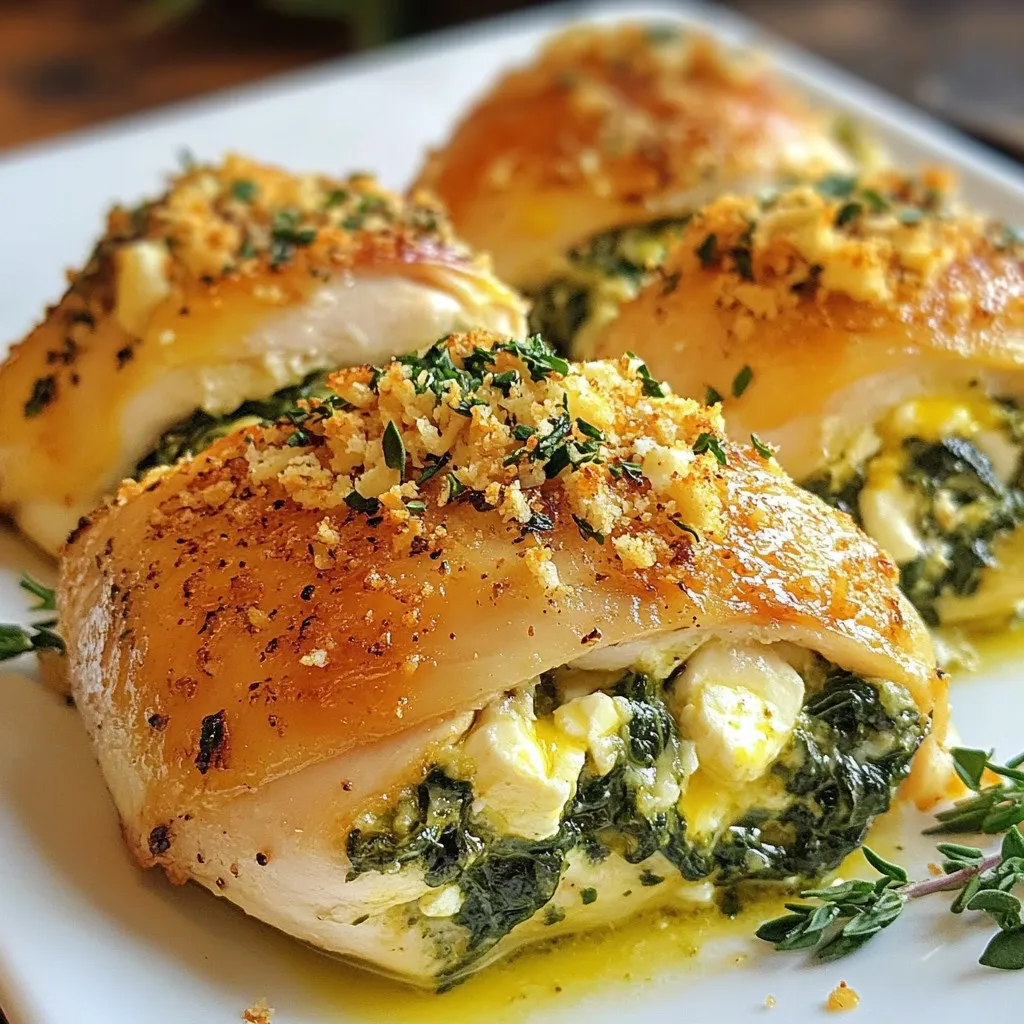
If you’re looking for a dish that’s both juicy and packed with flavor, you’ve found it! My Spinach Feta Stuffed
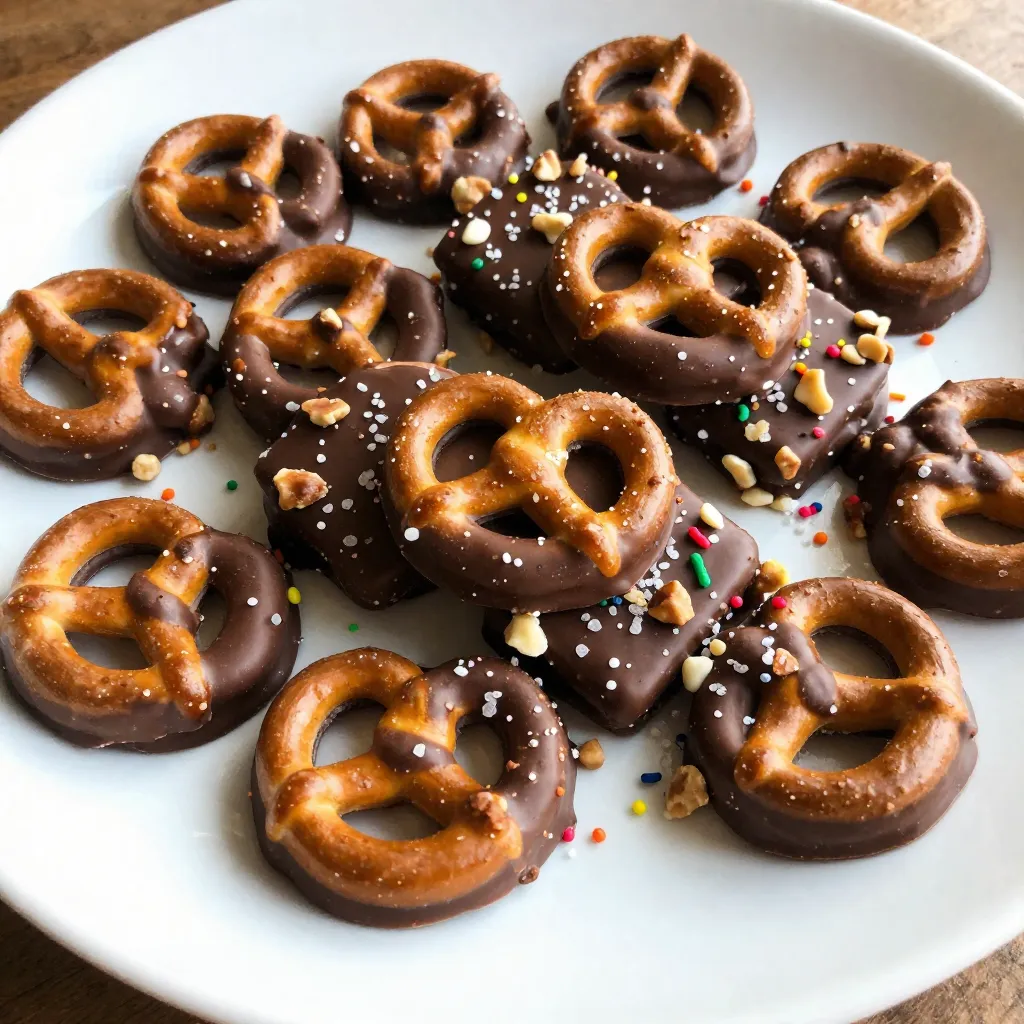
If you love sweet and salty snacks, you’ll adore this Irresistible Chocolate Covered Pretzel Bark recipe. Imagine crunchy pretzels covered
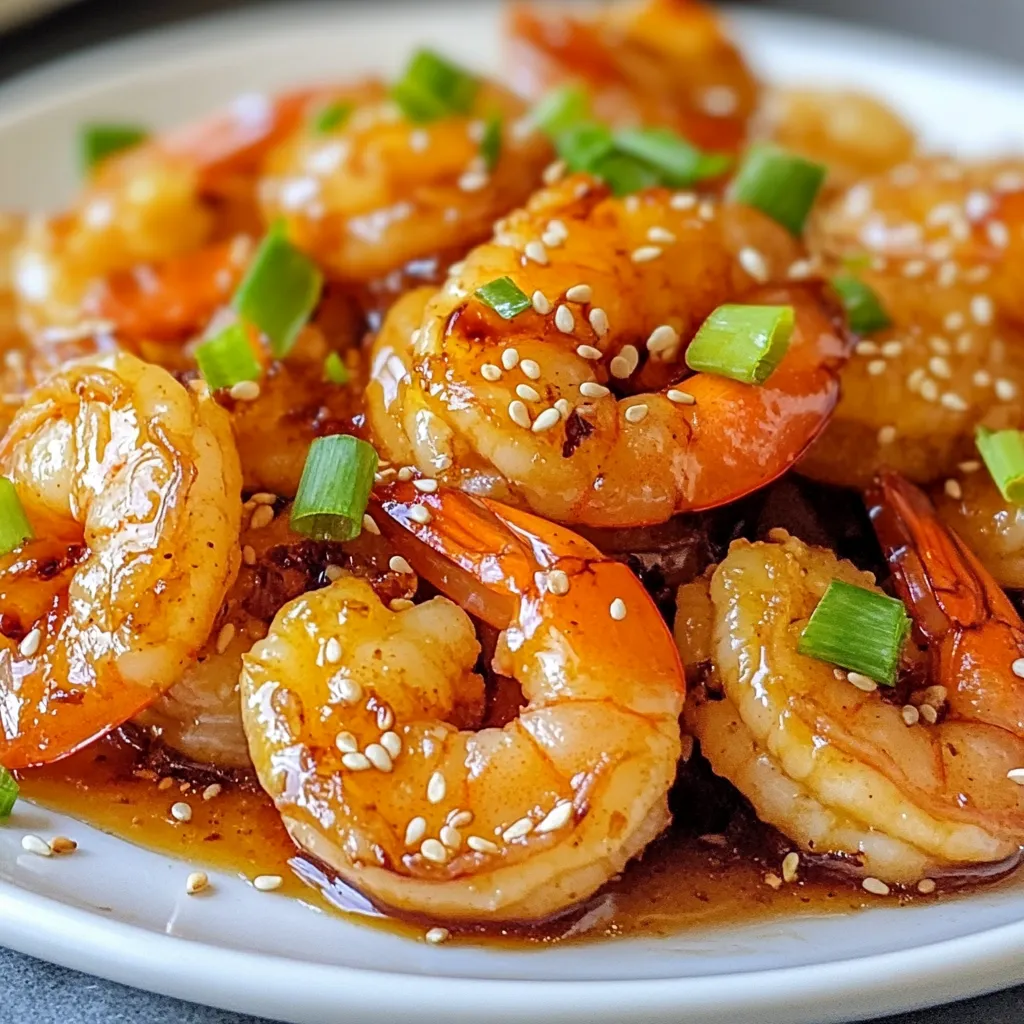
Are you ready to elevate your dinner game with a dish that’s both simple and delicious? Honey Garlic Air Fryer
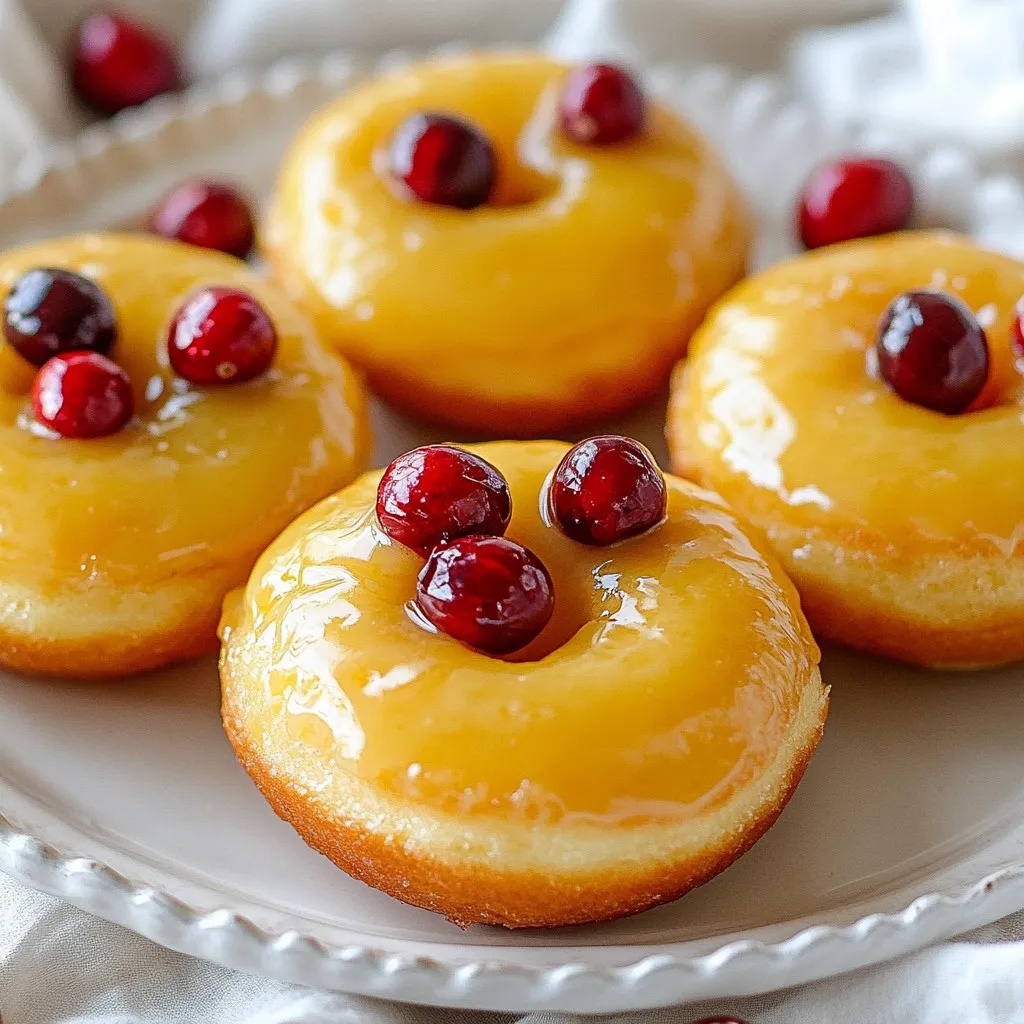
Cranberry Orange Glazed Donuts are the perfect treat for any occasion. With their sweet burst of cranberries and zesty orange

Craving a sweet treat that’s both simple and delicious? You’ve got to try this Strawberry Banana Bread! With ripe bananas
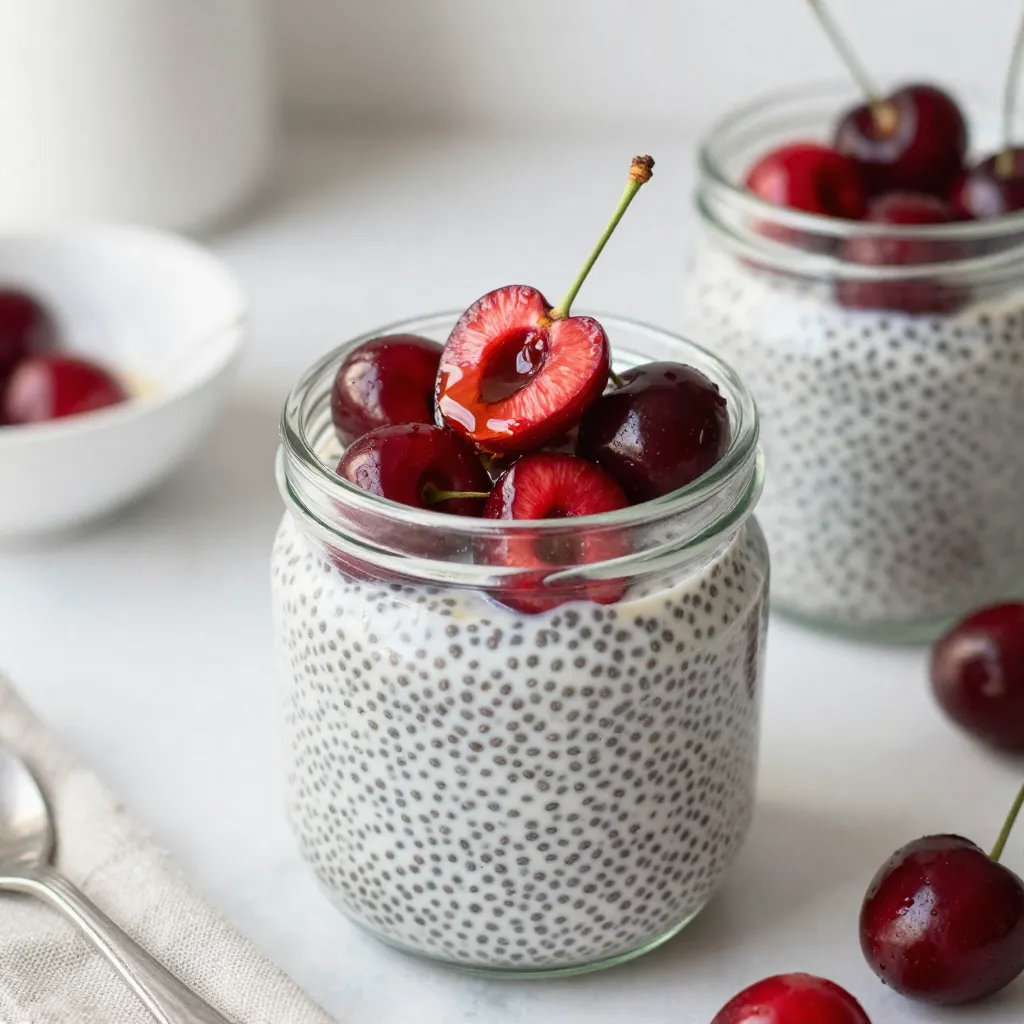
Looking for a quick, healthy treat? My Cherry Vanilla Chia Pudding is the answer! With just a few simple ingredients,
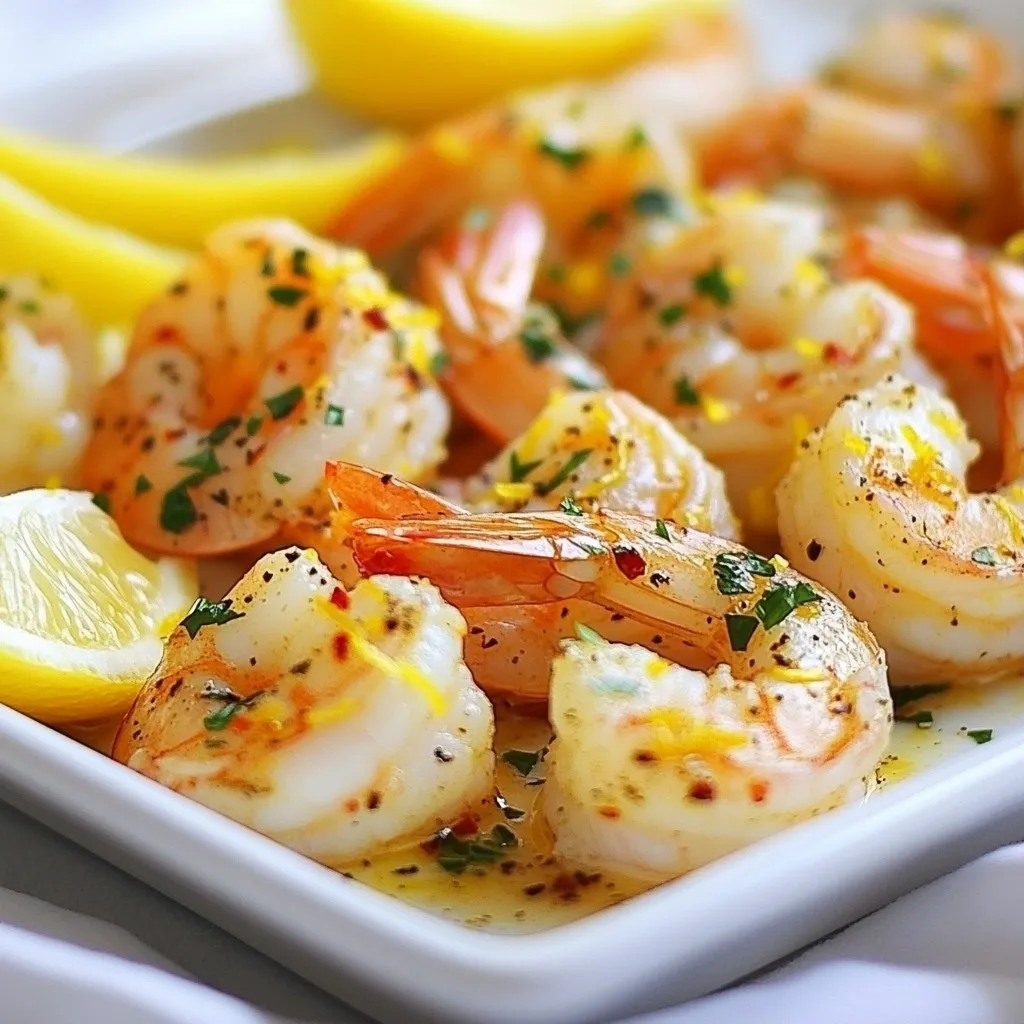
If you’re looking for a quick meal that bursts with flavor, you’ve landed in the right spot! My Lemon Garlic
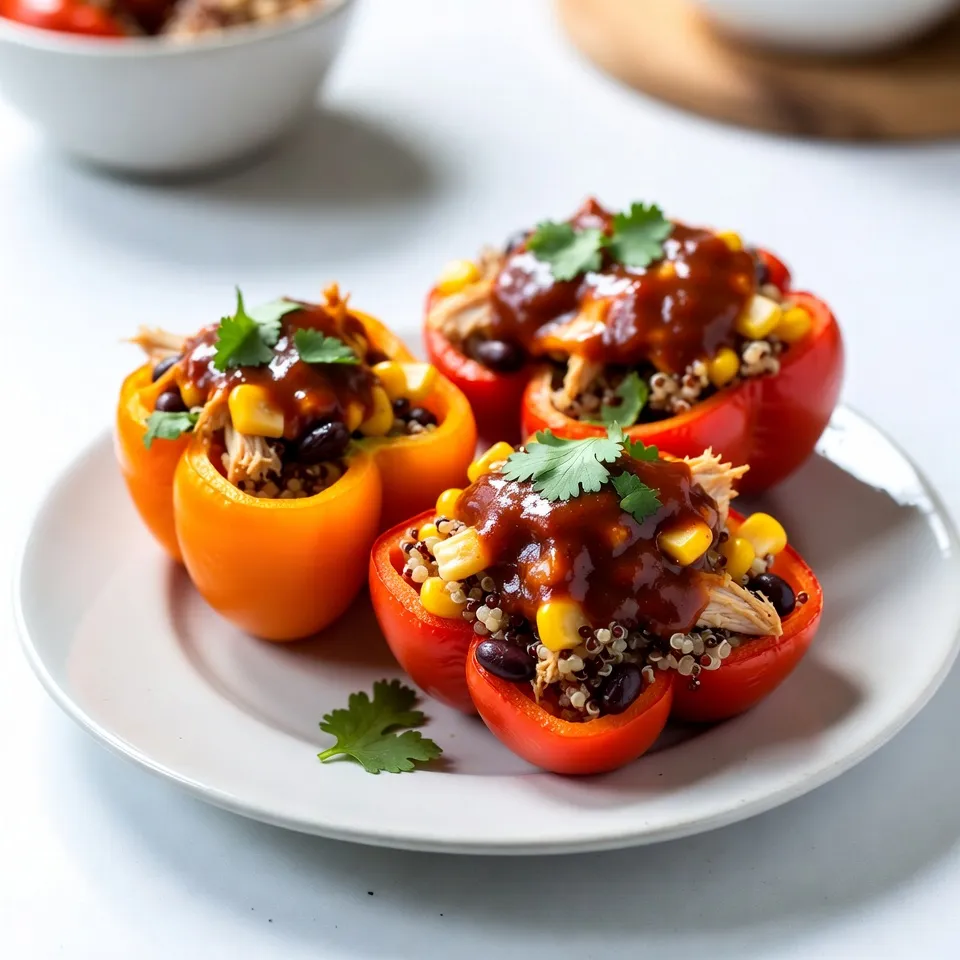
Looking for a fun and tasty meal idea? BBQ Chicken Stuffed Peppers are your answer! These vibrant peppers are packed