
Cheesy Spinach Breakfast Quesadillas Flavorful Delight
Wake up your taste buds with cheesy spinach breakfast quesadillas! These delicious, gooey delights are simple to make and packed

Wake up your taste buds with cheesy spinach breakfast quesadillas! These delicious, gooey delights are simple to make and packed
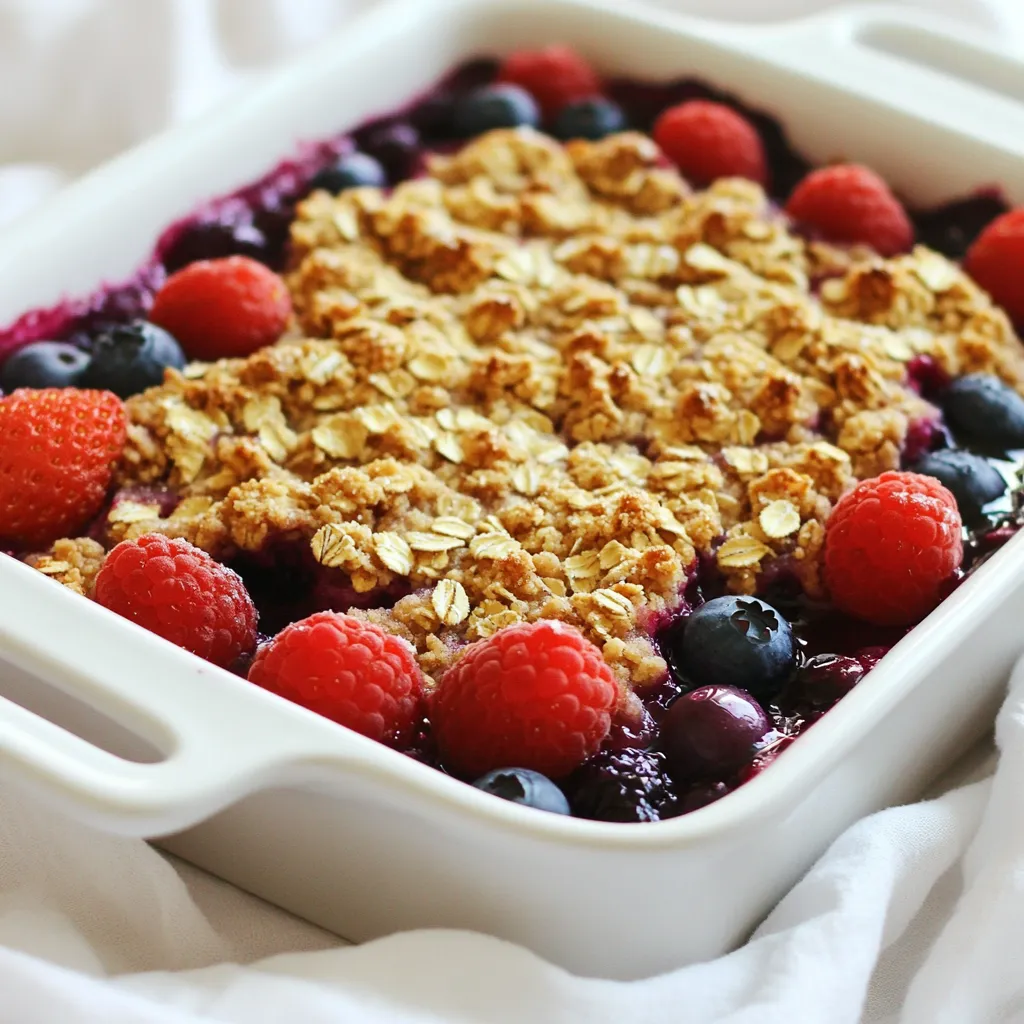
Get ready for a dessert that is both sweet and easy! My Triple Berry Crisp recipe combines fresh berries, sweet
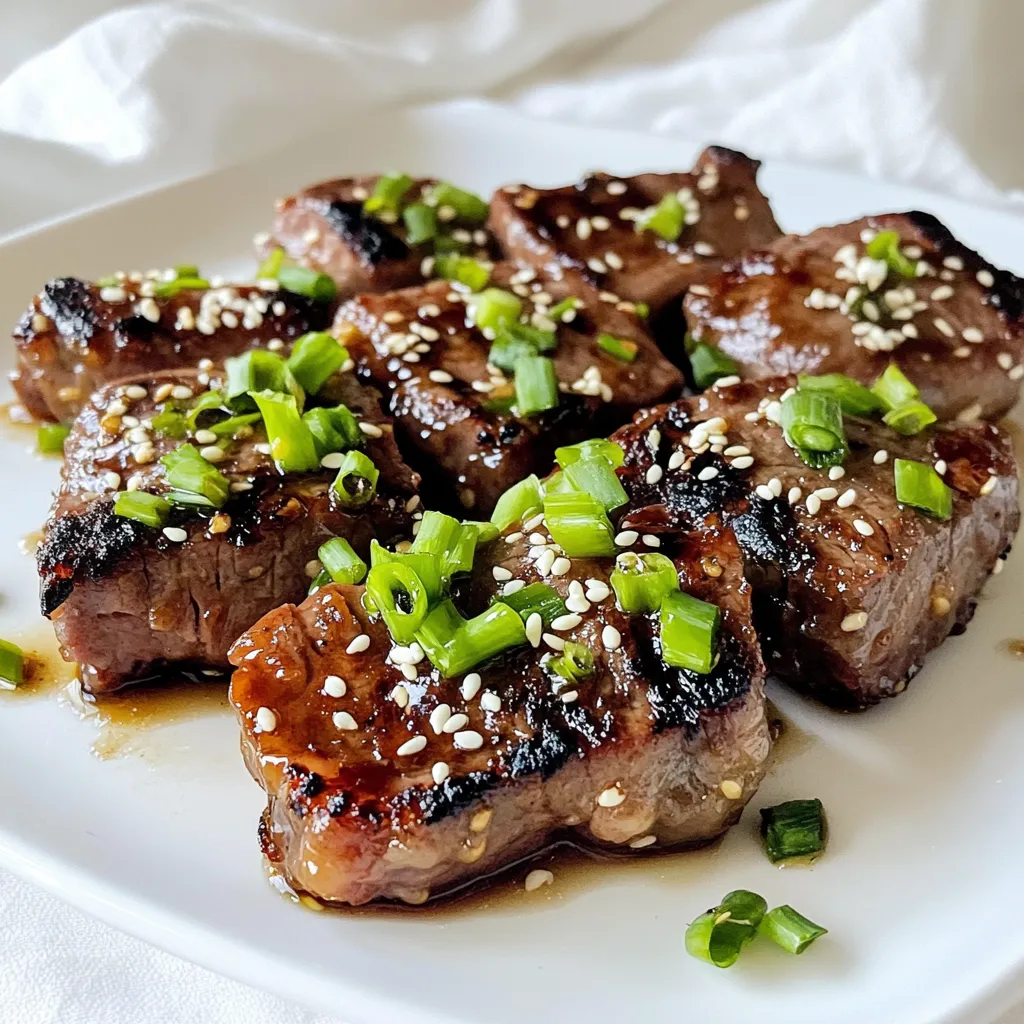
Are you ready to savor a dish that bursts with flavor? Honey Garlic Steak Bites are simple to make and
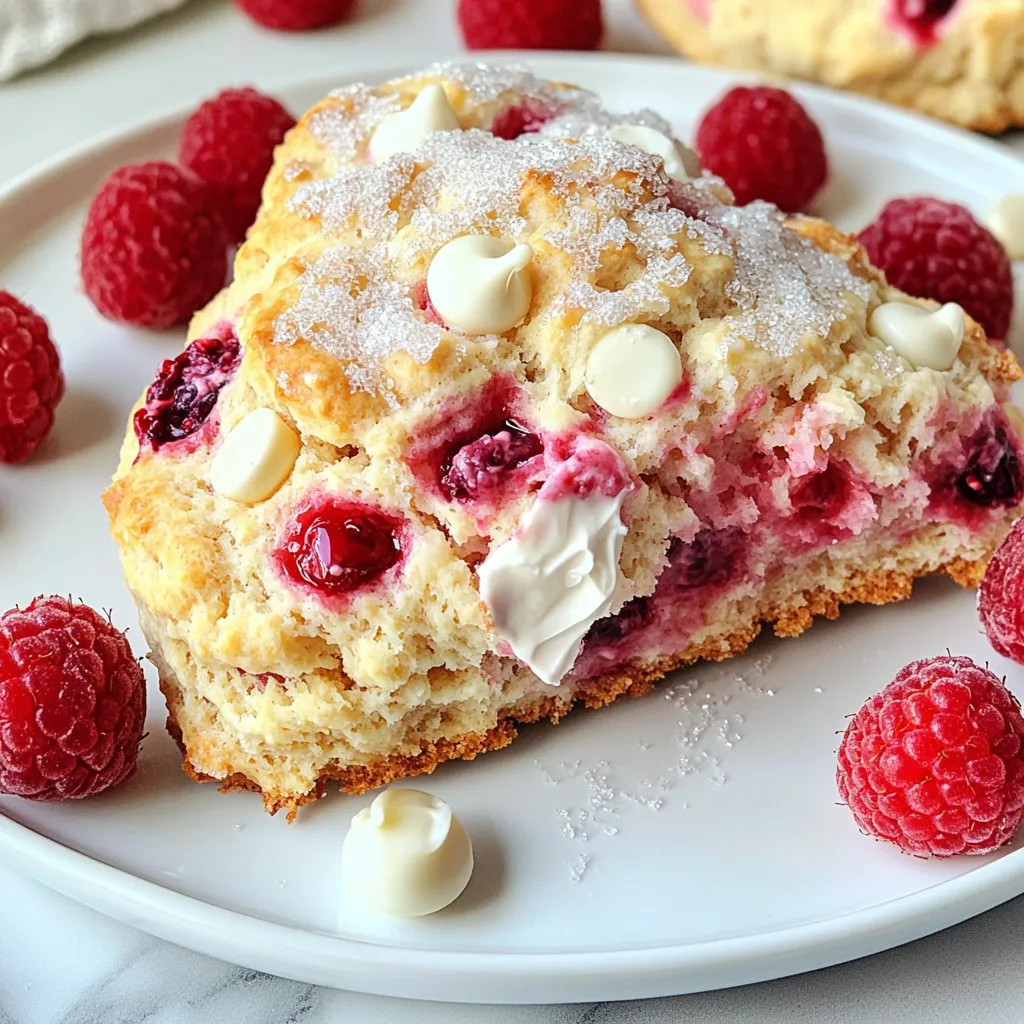
Are you ready to bake some delicious Raspberry White Chocolate Scones? These treats are simple to make and perfect for

Ready for a quick and tasty meal? These Savory Asian Chicken Lettuce Cups are your answer! Packed with flavor and

Ready for a cool, tasty treat? Let’s make a Coconut Mango Chia Smoothie that’s both refreshing and packed with nutrients!
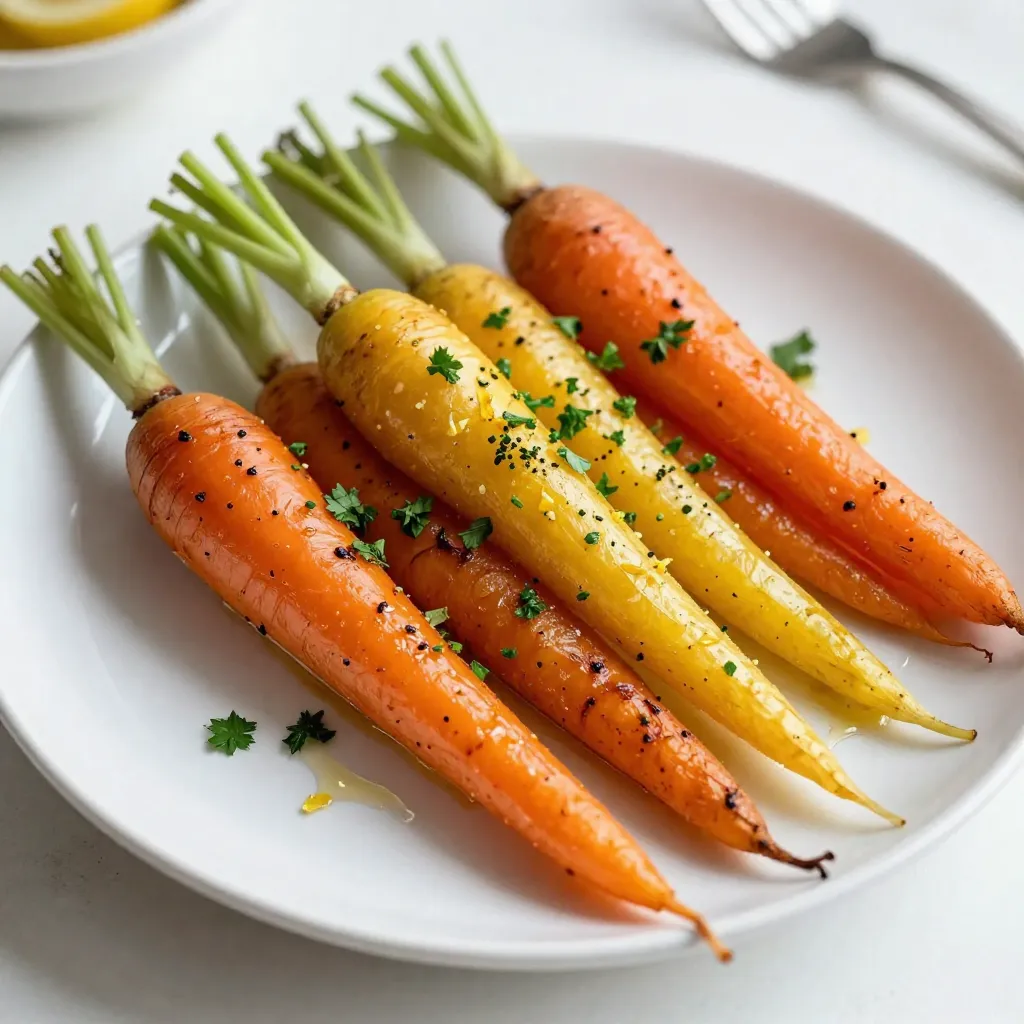
Looking for a vibrant side dish that’s simple and bursting with flavor? Let me introduce you to Garlic Herb Roasted
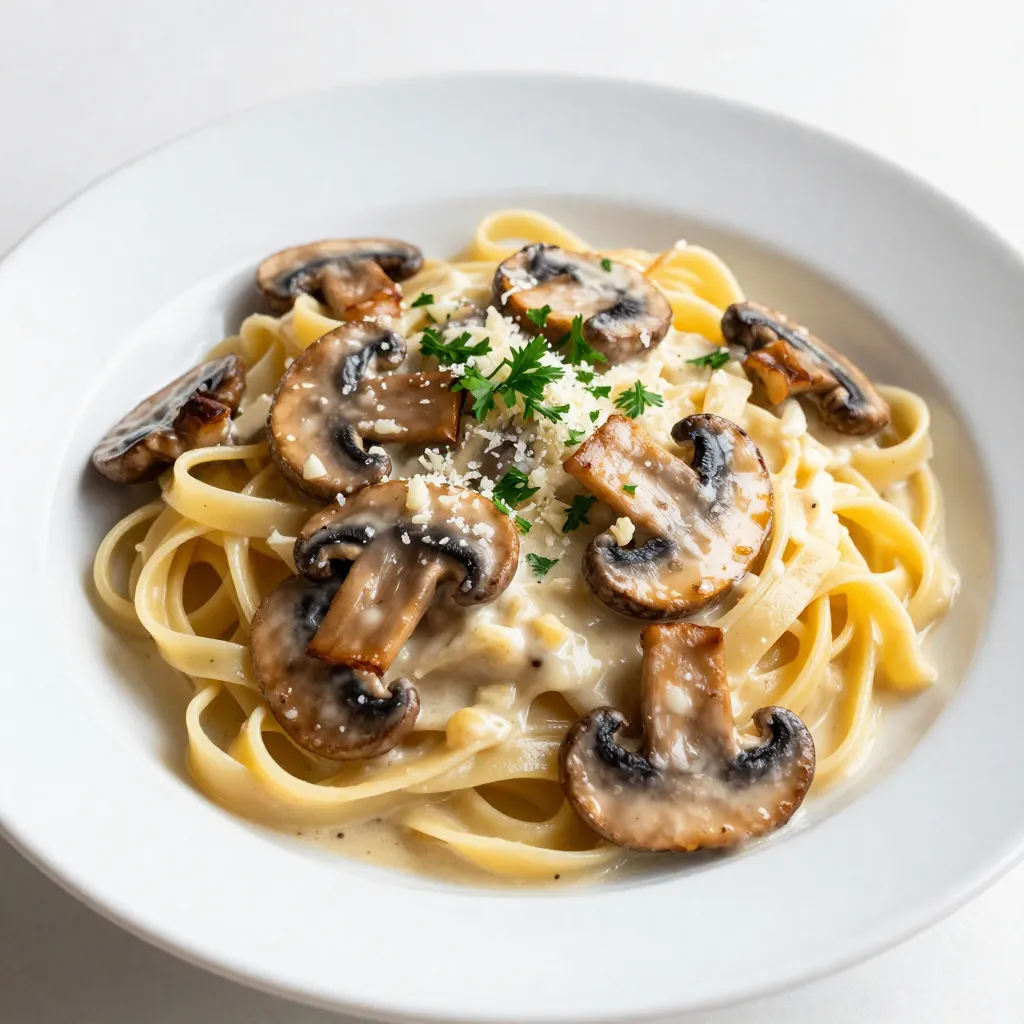
If you’re looking for a simple, tasty dish to impress, try Garlic Butter Mushroom Pasta! This creamy, savory meal features
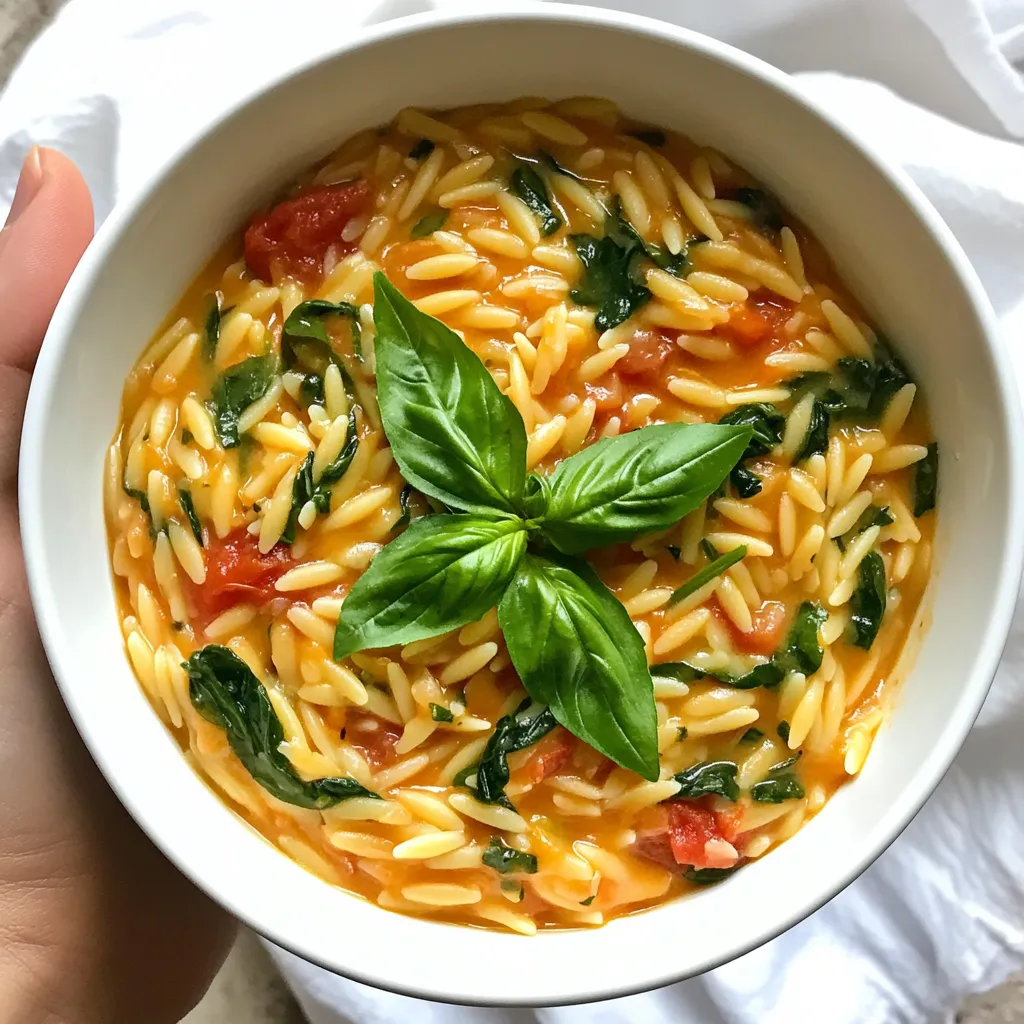
Craving a dish that’s both creamy and packed with flavor? My Creamy Tomato Spinach Orzo is your answer! This easy

Fall is here, and that means it’s time for cozy flavors! If you love pumpkin spice and snickerdoodles, you’ll adore