Are you ready to indulge in a sweet treat? This Creamy Coconut Cream Pie is a simple delight that combines rich flavors with smooth texture. With easy steps and common ingredients, you can impress family and friends. Whether you crave a classic dessert or want to explore fun variations, this recipe has you covered. Let’s dive into the deliciousness of coconut cream pie!
Ingredients
To make a delicious creamy coconut cream pie, gather these ingredients:
– 1 ½ cups sweetened shredded coconut
– 1 cup heavy cream
– 1 cup coconut milk
– ¾ cup granulated sugar
– 1/3 cup cornstarch
– ½ teaspoon salt
– 4 large egg yolks
– 2 tablespoons unsalted butter
– 1 teaspoon vanilla extract
– 1 premade 9-inch pie crust (graham cracker or traditional)
– Whipped cream (for topping)
– Toasted coconut flakes (for garnish)
These ingredients work together to create a rich and creamy filling. The sweetened shredded coconut adds texture and flavor. Heavy cream and coconut milk give the pie its smooth, creamy consistency. Granulated sugar balances the flavors, while cornstarch thickens the mixture perfectly. The egg yolks add richness, and the unsalted butter enhances the taste.
Choosing a premade pie crust simplifies the process, making it easy for anyone to enjoy this tasty treat. Finally, whipped cream and toasted coconut flakes on top create a beautiful finish.
Step-by-Step Instructions
Preparation Steps
– Toasting the coconut: Preheat your oven to 350°F (175°C). Spread 1 cup of shredded coconut on a baking sheet. Toast it for about 5-7 minutes until golden brown. Stir halfway to ensure even toasting. Once done, set it aside.
– Mixing dry ingredients: In a medium saucepan, whisk together ¾ cup of sugar, ⅓ cup of cornstarch, and ½ teaspoon of salt. This mix will help thicken your filling later.
– Heating the mixture: Gradually add 1 cup of coconut milk to the dry mix while whisking. Place the saucepan on medium heat. Stir constantly until the mixture thickens and bubbles, about 5-7 minutes.
– Tempering the egg yolks: In a separate bowl, whisk 4 large egg yolks. Slowly pour a cup of the hot mixture into the yolks while whisking. This step keeps the eggs from cooking too fast. Pour the egg yolk mix back into the saucepan.
Thickening the Filling
– Cooking until thickened: Continue to cook the mixture on medium heat for about 2-3 minutes. Stir constantly until it thickens to your liking.
– Incorporating butter and vanilla: Remove from heat and add 2 tablespoons of unsalted butter and 1 teaspoon of vanilla extract. Stir well until the butter melts and combines.
Final Assembly
– Filling the pie crust: Fold in the toasted coconut, saving a bit for garnish. Pour the filling into your premade pie crust. Smooth the top with a spatula.
– Chilling the pie: Cover the pie with plastic wrap. Refrigerate for at least 4 hours, or until set.
This creamy coconut cream pie recipe is sure to impress anyone who tastes it.Enjoy the process and the delicious result!
Tips & Tricks
Achieving a Creamy Texture
To get a creamy texture, constant stirring is key. It prevents lumps and ensures smooth filling. As you heat the mixture, keep your whisk moving. This motion helps the ingredients blend well. When you temper the egg yolks, do it slowly. Pour a bit of the hot mixture into the yolks while whisking. This step warms the yolks without cooking them. Once mixed, return the yolks to the pot. This way, your filling stays silky and rich.
Presentation Tips
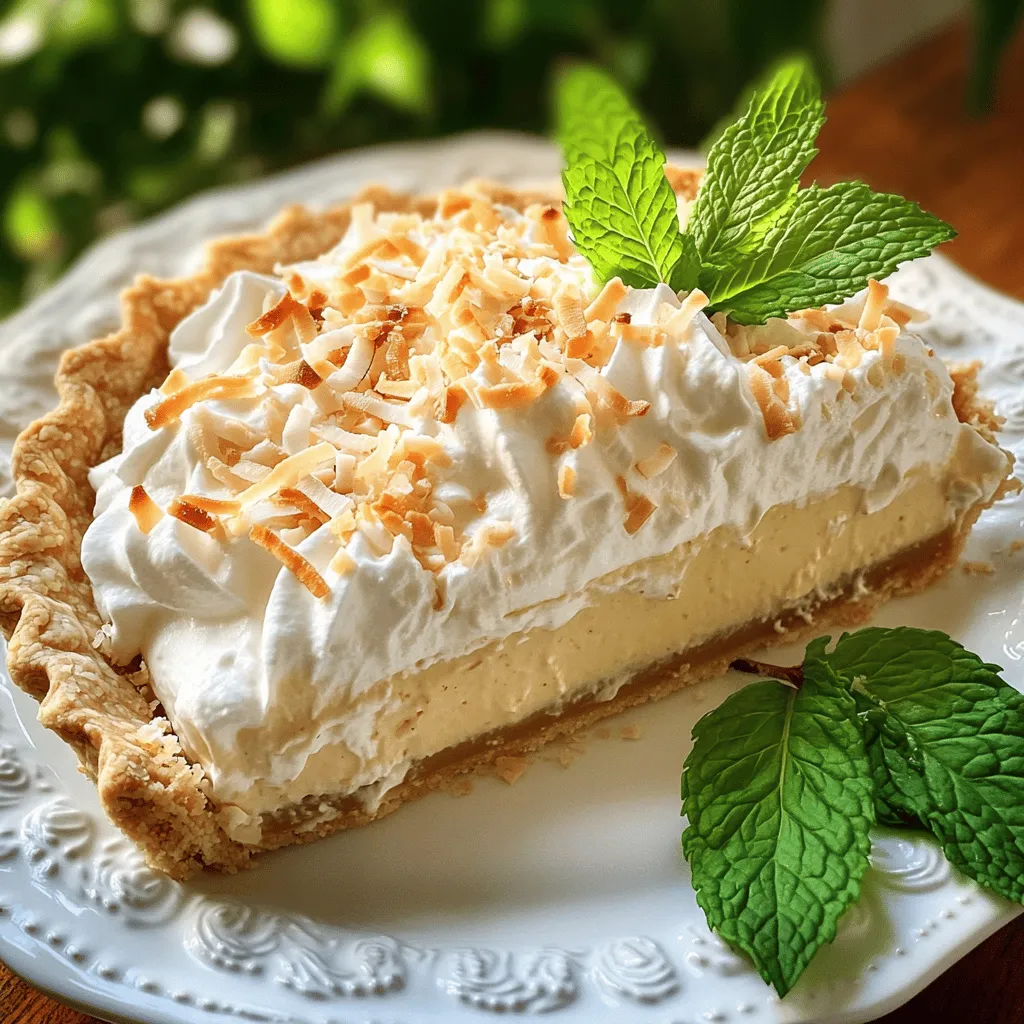
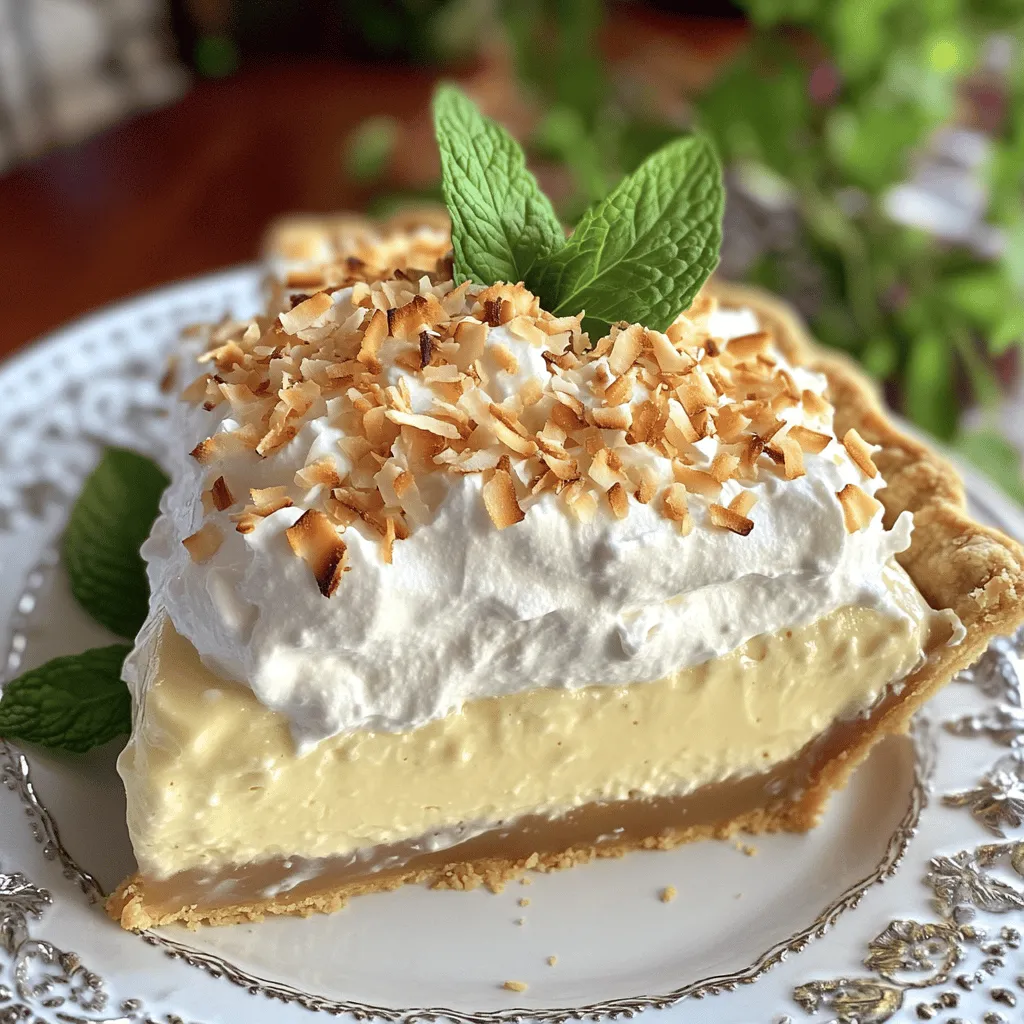
Garnishing makes your pie look special. Use whipped cream as a topping. A generous dollop adds charm. Sprinkle toasted coconut flakes on top for extra texture. For a bright touch, add a small mint leaf. When serving, slice the pie and place each piece on a dessert plate. This makes each serving feel fancy and inviting.
Helpful Kitchen Tools
Using the right tools makes cooking easier. A medium saucepan works best for heating the filling. A whisk is great for mixing ingredients smoothly. Use a spatula to fill the pie crust evenly. An oven mitt is helpful when toasting coconut. These simple tools help you create a perfect pie without hassle.Enjoy making your Creamy Coconut Cream Pie!
Variations
Different Crust Options
You can use different crusts for your creamy coconut cream pie. A graham cracker crust is a classic choice. It adds a sweet and crunchy texture. You can also use a traditional pie crust for a flakier taste. For a fun twist, try a cookie crust made from Oreos or gingersnaps. These options add unique flavors.
Flavor Variations
Want to mix it up? You can add chocolate to your pie. Melted chocolate swirled into the filling creates a rich taste. You can also try using other extracts. Almond or coconut extracts enhance the coconut flavor. Adding fruits like mango or pineapple gives a tropical vibe. Each option brings a new twist.
Dairy-Free Options
If you want a dairy-free pie, you can substitute coconut cream for heavy cream. This keeps the rich taste while making it dairy-free. Use maple syrup or agave as alternative sweeteners. These options give a different flavor and sweetness level. You can enjoy a creamy coconut cream pie that fits your diet.
Storage Info
Proper Storage Techniques
To keep your creamy coconut cream pie fresh, proper storage is key. First, cover the pie tightly with plastic wrap or aluminum foil. This prevents air from getting in and keeps the pie moist. Store it in the fridge. If you want to keep it longer, you can freeze it. Wrap the pie well in plastic wrap, then place it in an airtight container. This helps to avoid freezer burn.
Shelf Life
In the fridge, your creamy coconut cream pie lasts about 3 to 4 days. After this time, it may not taste as fresh. Look for any signs of spoilage. If you see mold or a sour smell, it’s time to toss it. Fresh whipped cream on top can also spoil quickly, so check that too.
Reheating Tips
If you have leftovers, reheating is easy. The best method is to let the pie sit at room temperature for about 15 minutes before serving. This helps to keep the texture creamy. You can also use the microwave. Heat it in short bursts of 10-15 seconds. This warms it gently without making it soggy. Always check the pie after each burst to keep the flavor just right.
FAQs
How do I make the coconut cream pie less sweet?
To make your coconut cream pie less sweet, reduce the sugar. You might cut it by half. You can also add a pinch of salt. This helps balance the flavors. Another option is using unsweetened coconut milk. This will keep the coconut flavor while lowering sweetness.
Can I use fresh coconut instead of shredded?
Yes, you can use fresh coconut. It adds a nice texture and flavor. To use fresh coconut, you’ll need to peel and grate it. Make sure to toast it as you would with shredded coconut. This brings out its natural sweetness and enhances the taste.
What can I use instead of a premade crust?
If you want to skip the premade crust, you have options. You can make a simple crust using crushed cookies and melted butter. Graham crackers work well. Alternatively, try a shortbread crust. If you prefer a gluten-free option, use almond flour or coconut flour.
How long should I chill the pie before serving?
Chill the pie for at least 4 hours. This helps the filling set properly. If you can wait longer, it tastes even better. A good chill helps the flavors meld together. It also makes cutting and serving easier.
Can I make this pie ahead of time?
Yes, you can make this pie ahead of time. It keeps well in the fridge for up to 3 days. Just cover it tightly with plastic wrap. This way, it stays fresh and delicious. Making it ahead gives the flavors time to develop. You can enjoy it without last-minute stress.
This blog covered how to make a delicious coconut cream pie. You learned about key ingredients, step-by-step instructions, and clever tips. You can create different flavors and crusts to fit your taste. Storing and reheating the pie correctly helps keep it fresh.
Now, go and enjoy making this pie! Your friends and family will love it.


