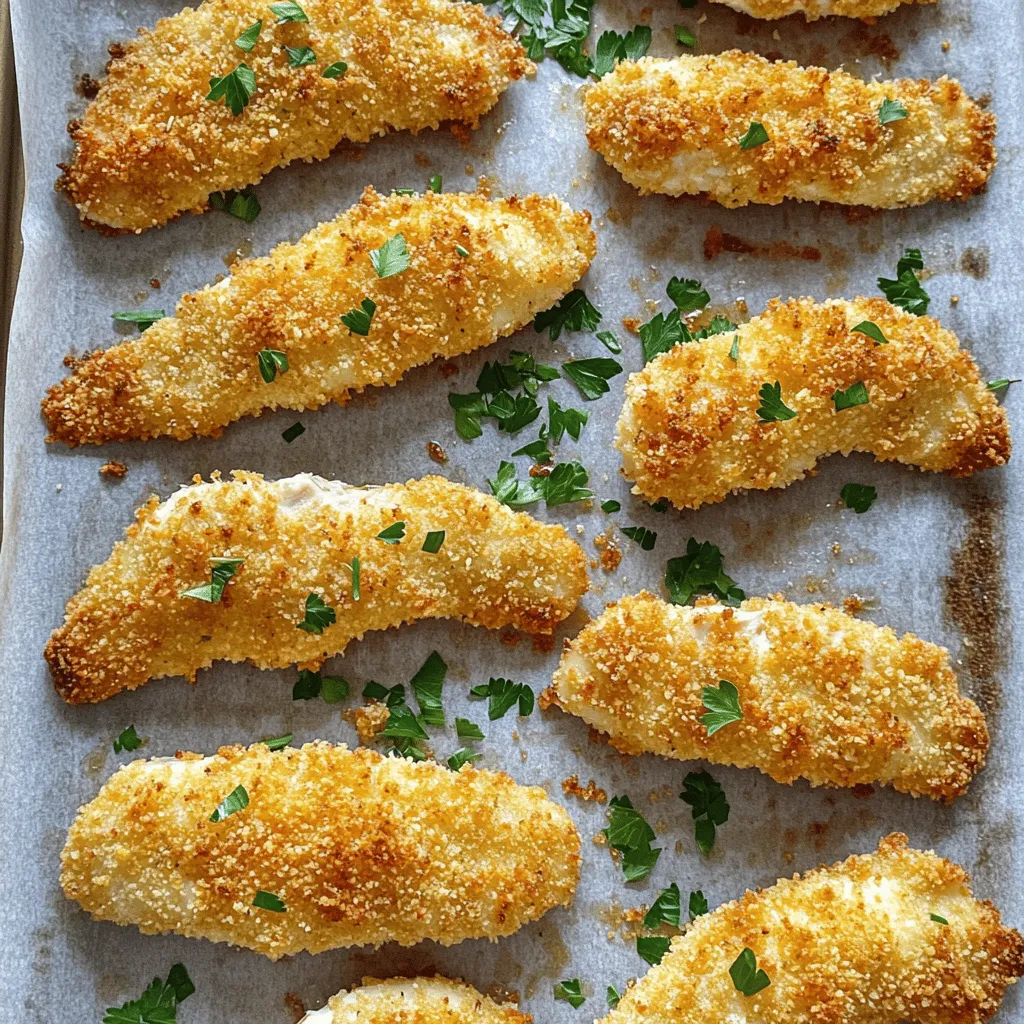
If you’re craving a simple, tasty meal, try my Crispy Baked Chicken Tenders! These tender, golden bites are easy to make and perfect for busy weeknights. With just a few main ingredients and flavorful spices, you’ll whip up a dish that your whole family will love. Let’s dive into how to create these delicious tenders that are lighter than fried but still pack a crunch!
Why I Love This Recipe
- Easy Preparation: This recipe involves simple steps that make it beginner-friendly while delivering delicious results.
- Healthy Alternative: Baking instead of frying keeps the chicken tenders lighter without sacrificing crunchiness.
- Customizable Spices: You can easily adjust the spices to suit your taste, making it perfect for everyone.
- Family Favorite: These crispy baked chicken tenders are sure to please both kids and adults alike!
Ingredients
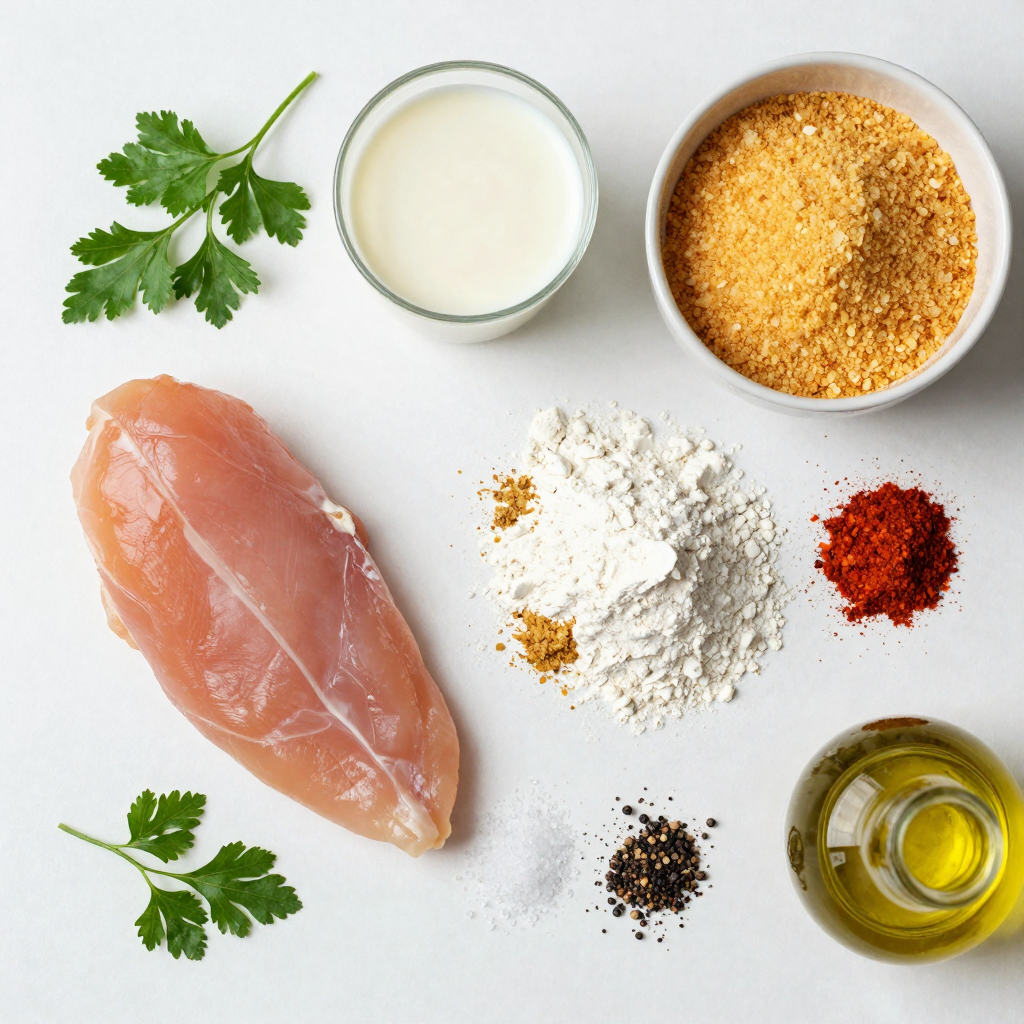
Main Ingredients for Crispy Baked Chicken Tenders
– 1 pound chicken breast tenders
– 1 cup buttermilk
– 1 cup breadcrumbs (panko recommended)
I love using chicken breast tenders for this recipe. They are tender and cook evenly. Soaking them in buttermilk is key. It adds flavor and keeps them juicy. You should try using panko breadcrumbs. They give the tenders a nice crunch.
Seasoning and Coating Ingredients
– ½ cup all-purpose flour
– 1 teaspoon garlic powder
– 1 teaspoon onion powder
– 1 teaspoon smoked paprika
– ½ teaspoon cayenne pepper (adjust for spice level)
– Salt and pepper to taste
– 2 tablespoons olive oil
For the coating, I mix flour with spices. Garlic powder and onion powder add great taste. Smoked paprika gives a nice smoky flavor. Adjust the cayenne pepper based on how spicy you want it. Drizzling olive oil helps with crispiness.
Optional Garnish
– Chopped fresh parsley
Chopped parsley is a great garnish. It adds color and freshness. You can sprinkle it on right before serving.
Step-by-Step Instructions
Preparation Steps
– Preheat your oven to 425°F (220°C) and line a baking sheet with parchment paper.
– Soak the chicken tenders in buttermilk for at least 30 minutes. This adds flavor and helps tenderize the meat.
Coating the Chicken
– In a bowl, mix breadcrumbs, flour, garlic powder, onion powder, smoked paprika, cayenne pepper, salt, and pepper. This is your seasoning mix.
– Remove the chicken from the buttermilk. Let any extra buttermilk drip off. Coat each chicken tender in the breadcrumb mixture. Press firmly so the coating sticks well.
Baking Process
– Place the coated chicken tenders on your prepared baking sheet. Make sure they are spaced out.
– Drizzle olive oil over the tenders. This helps them get crispy.
– Bake in the oven for 20 to 25 minutes. They should turn golden brown and reach an internal temperature of 165°F (74°C).
– For extra crispiness, broil the tenders for another 2 to 3 minutes. Watch them closely to avoid burning.
This method ensures you get crispy baked chicken tenders that are full of flavor.
Pro Tips
- Marinate for Maximum Flavor: Letting the chicken soak in buttermilk for at least 30 minutes enhances tenderness and infuses flavor.
- Use Panko Breadcrumbs: Opt for panko breadcrumbs instead of regular ones for extra crunch and a delightful texture.
- Watch the Broiling: If broiling for extra crispiness, keep a close eye on the tenders to avoid burning.
- Garnish for Freshness: A sprinkle of fresh parsley not only adds color but also enhances the dish’s flavor profile.
Tips & Tricks
Achieving the Best Texture
Soaking chicken in buttermilk is key. This step makes the meat juicy and tender. It also adds flavor. Aim to soak for at least 30 minutes. For the best crunch, choose panko breadcrumbs. These breadcrumbs create a light, crisp outside. Regular breadcrumbs work, but panko offers a better bite.
Cooking and Baking Tips
Set your oven to 425°F (220°C). This heat helps the chicken get crispy. Space the tenders on the baking sheet to allow air flow. For a golden finish, use the broiling technique. Broil for 2-3 minutes at the end. Watch closely to prevent burning.
Serving Suggestions
Dips make a great pairing with chicken tenders. Consider ranch, honey mustard, or barbecue sauce. These flavors enhance each bite. Serve the tenders hot for the best taste. Enjoy them right from the oven for a crispy treat. For extra flair, garnish with fresh parsley.
Variations
Flavor Variations
You can change the taste of your chicken tenders easily. Adding spices or herbs gives new flavors. Try adding Italian herbs like oregano or basil. For a spicy kick, add chili powder or cayenne. You can also mix in some parmesan cheese for a cheesy crust. Experimenting with different types of breadcrumbs can make a big difference. Panko gives a crunchier texture, while regular breadcrumbs provide a softer bite. You can even use crushed cornflakes for a fun twist.
Healthy Alternatives
Want to make your chicken tenders healthier? Use whole grain breadcrumbs instead of regular ones. This adds fiber and makes them more filling. For the marinade, substitute buttermilk with low-fat yogurt. This keeps the chicken moist while cutting calories. You can also add herbs to the yogurt for extra flavor. These swaps create a tasty dish that feels lighter without losing taste.
Serving Styles
How you serve your chicken tenders can change the meal. Serve them on top of a fresh salad for a healthy twist. Toss greens, veggies, and your tenders together. Drizzle with your favorite dressing for added flavor. You can also wrap the tenders in tortillas for delicious wraps. Add some lettuce, tomatoes, and sauce for a quick meal. Both styles make your chicken tenders fun and versatile.
Storage Info
Storing Leftovers
To keep your chicken tenders fresh, refrigerate them as soon as they cool. Place them in airtight containers. This prevents moisture loss and keeps out odors. Use them within three days for the best taste.
Reheating Instructions
To reheat and keep your tenders crispy, use the oven. Preheat it to 375°F (190°C). Place the tenders on a baking sheet and heat for about 10-15 minutes. This method revives their crunch. If you’re in a hurry, the microwave works too. Heat on medium for 1-2 minutes but note that they may lose some crunch.
Freezing Tips
You can freeze both raw and cooked tenders. For raw tenders, place them in a freezer bag and remove as much air as possible. Cooked tenders can also be frozen in airtight containers. To thaw, move them to the fridge overnight. For raw tenders, cook them straight from frozen, but add extra cooking time.
FAQs
Can I make Crispy Baked Chicken Tenders gluten-free?
Yes, you can easily make these chicken tenders gluten-free. For flour, use almond flour or coconut flour. As for breadcrumbs, try gluten-free panko or crushed cornflakes. These swaps keep the crunch while making the dish gluten-free.
How long do leftovers last?
Leftovers can last up to three days in the fridge. Store them in an airtight container to keep them fresh. To enjoy later, make sure to reheat them properly for the best taste.
What can I serve with Chicken Tenders?
You can serve chicken tenders with many tasty sides. Here are a few ideas:
– French fries
– Coleslaw
– Sweet potato wedges
– Mixed veggies
– Dipping sauces like ranch, BBQ, or honey mustard
These pairings make your meal even more fun and delicious!
Crispy baked chicken tenders are easy and fun to make. You learned about the key ingredients, like chicken and buttermilk. The step-by-step guide helps you prepare, coat, and bake them to perfection. You can customize flavors or serve them in creative ways. Remember to store leftovers properly for later enjoyment. With these tips, you can enjoy mouth-watering tenders that impress family and friends. Now get cooking and savor every crispy bite!