Are you ready to whip up a treat that will wow your friends and family? My Key Lime Pie Bars recipe is simple, zesty, and perfect for any occasion. With a buttery crust and creamy filling, these bars bring the taste of summer to your kitchen. Let’s dive into the fun, step-by-step process of making this delightful dessert that everyone will love! Your sweet journey starts right here.
Why I Love This Recipe
- Refreshing Flavor: The tangy key lime juice combined with the sweetness of the condensed milk creates a perfect balance that’s both refreshing and indulgent.
- Easy to Make: This recipe is straightforward and requires minimal ingredients, making it perfect for both novice and experienced bakers.
- Perfect for Any Occasion: These bars are ideal for summer gatherings, picnics, or any time you crave a light and zesty dessert.
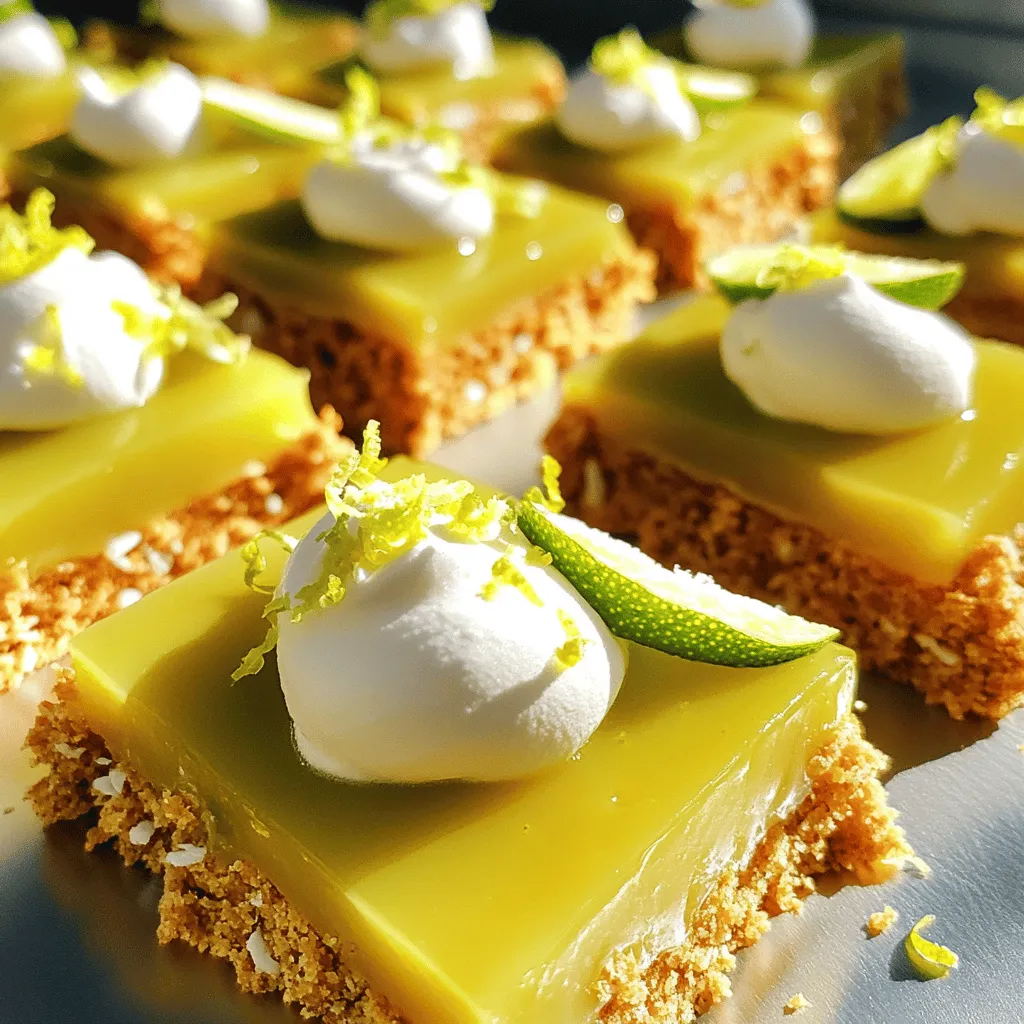
- Impressive Presentation: With a creamy filling and a beautiful garnish of lime slices and whipped cream, they make a stunning addition to any dessert table.
Ingredients
Main Ingredients for Key Lime Pie Bars
Making Key Lime Pie Bars is fun and simple. Here are the main ingredients you will need:
– 1 ½ cups graham cracker crumbs
– ½ cup unsweetened shredded coconut
– ⅓ cup granulated sugar
– ½ cup unsalted butter, melted
– 4 large egg yolks
– 1 can (14 oz) sweetened condensed milk
– ½ cup fresh key lime juice (or regular lime juice)
– Zest of 2 key limes
– ¼ teaspoon salt
These ingredients create a tasty crust and a zesty filling. The graham cracker crumbs and coconut mix give a nice texture. The key lime juice adds a bright, tangy flavor.
Optional Garnishes
You can make your Key Lime Pie Bars even better with these garnishes:
– Fresh whipped cream
– Lime slices
– Additional lime zest
These toppings give a nice look and add more flavor. You can use as much or as little as you like.
Ingredient Substitutions
If you need to swap some ingredients, here are some ideas:
– Use regular limes if key limes are hard to find.
– Substitute coconut with more graham cracker crumbs for a classic crust.
– If you want a dairy-free option, try using coconut cream instead of sweetened condensed milk.
These swaps still keep the bars delicious. Don’t be afraid to get creative with what you have!

Step-by-Step Instructions
Preparation of the Crust
Start by preheating your oven to 350°F (175°C). Grab an 8×8 inch baking pan. Line it with parchment paper, leaving a bit hanging over the edges. This helps when you lift out the bars later.
In a mixing bowl, add 1 ½ cups of graham cracker crumbs, ½ cup of unsweetened shredded coconut, and ⅓ cup of granulated sugar. Melt ½ cup of unsalted butter and pour it into the bowl. Mix everything well until it looks like wet sand.
Now, press this mixture firmly into the bottom of your lined pan. Make it even and compact. Bake it for about 10 minutes or until it turns lightly golden. Once done, take it out and let it cool for a few minutes.
Making the Key Lime Filling
In another bowl, whisk together 4 large egg yolks and 1 can of sweetened condensed milk until smooth. This step is key for a creamy texture. Then, add ½ cup of fresh key lime juice and the zest of 2 key limes. Don’t forget the ¼ teaspoon of salt! Whisk everything until it blends well.
This filling is the star of the show. It should smell zesty and fresh. Pour this mixture over your cooled crust. Spread it out evenly to cover all the edges.
Baking Process and Cooling
Bake the pan for another 15 to 20 minutes. You want the edges to set, but the center should jiggle a bit. This jiggle means it will set up nicely in the fridge later.
Once baked, take it out and let it cool at room temperature for about 30 minutes. After that, pop it in the fridge for at least 2 hours. This step is important for the bars to firm up.
When ready, lift the bars using the parchment paper. Cut them into squares. Serve with fresh whipped cream, a sprinkle of lime zest, and a slice of lime on top. Enjoy your zesty key lime pie bars!
Pro Tips
- Use Fresh Limes: Always opt for fresh key limes or regular limes to ensure the best flavor in your pie bars. Bottled lime juice lacks the vibrant taste of fresh juice.
- Chill Before Serving: Allow the bars to chill completely in the refrigerator for at least 2 hours. This helps the filling to set properly and enhances the flavors.
- Customize the Crust: Feel free to mix in some crushed nuts or use a combination of graham crackers and cookies for a unique twist on the crust.
- Whipped Cream Variations: For an extra touch, consider folding in some lime zest or a splash of coconut cream into the whipped cream before serving for added flavor.
Tips & Tricks
How to Achieve the Perfect Crust
To get a great crust, use fresh graham cracker crumbs. You can crush them yourself for the best taste. Mix the crumbs with shredded coconut and sugar. Melt the butter and pour it in. Stir until it feels like wet sand. Press this mixture firmly into your pan. Bake it until golden. This step ensures a crisp and crunchy base.
Tips for the Best Lime Flavor
Fresh key limes bring the best flavor. If you can’t find them, regular limes work too. Always zest your limes before juicing. The zest adds a nice kick to your bars. Use a fine grater for the best results. Taste your lime juice before adding it to the filling. If it’s too sweet, add a touch more zest to balance.
Troubleshooting Common Issues
Bars can crack if baked too long. Watch for a slight jiggle in the center as they bake. If they seem too soft after cooling, chill them longer. They need time to set properly. If your crust is too crumbly, add a bit more melted butter next time. For too sweet bars, reduce the sugar in the filling by a tablespoon. This recipe is flexible for your taste!
Variations
Coconut Key Lime Pie Bars
Want a tropical twist? Try coconut key lime pie bars. Just add ½ cup of shredded coconut to the crust. This gives a nice chew and flavor. You can also mix coconut milk into the filling. This adds creaminess. The coconut enhances the tart lime taste. It’s a fun twist on a classic!
Gluten-Free Key Lime Pie Bars
Need gluten-free options? You can easily make these bars gluten-free. Use gluten-free graham cracker crumbs for the crust. Check the label to ensure they are safe. The filling remains the same. This way, everyone can enjoy the sweet tartness of key lime pie bars. It’s a great way to include all guests!
No-Bake Key Lime Pie Bars
Want a quick option? Go for no-bake key lime pie bars. Skip the oven and use a fridge instead. For the crust, mix crushed graham crackers with melted butter. Press it into the pan. For the filling, mix sweetened condensed milk, fresh lime juice, and whipped cream. Spread it on the crust and chill it for a few hours. It’s easy and super refreshing!
Storage Info
How to Store Leftover Bars
To keep your key lime pie bars fresh, place them in an airtight container. You should store them in the fridge. They will stay good for about 3 to 5 days. Make sure they are fully cooled before you store them. If you leave them out too long, they may spoil.
Freezing Key Lime Pie Bars
Freezing is a great way to save extra bars. Start by cutting the cooled bars into squares. Wrap each square tightly with plastic wrap. Then, place the wrapped bars in a freezer bag. Label the bag with the date. You can freeze them for up to 3 months. When you want to eat them, move them to the fridge to thaw overnight.
Best Practices for Reheating
If you prefer warm bars, you can reheat them. Preheat your oven to 350°F (175°C). Place the bars in a baking dish. Cover them with foil to prevent drying out. Heat for about 10 to 15 minutes. Check if they are warm enough. Serve them with fresh whipped cream for a treat!
FAQs
What can I use instead of key limes?
You can use regular limes if you can’t find key limes. Regular limes have a strong flavor. They work well in this recipe. You may notice a slight taste difference. Add a bit more zest to enhance the flavor.
How long do Key Lime Pie Bars last?
Key Lime Pie Bars last about a week in the fridge. Store them in an airtight container. They taste best when eaten fresh. You can also freeze them for up to three months. Just remember to wrap them well before freezing.
Can I use sweetened coconut instead of unsweetened?
Yes, you can use sweetened coconut. Just know it will add extra sugar. This can make the bars sweeter. Make sure to adjust the sugar in the recipe. This will help keep the balance of flavors just right.
You learned how to make tasty Key Lime Pie Bars using simple ingredients. We covered key steps from the crust to the filling. I shared tips for the best flavor and how to fix common problems. You can also try fun variations like coconut or gluten-free bars. Store leftovers properly to enjoy them later. Remember, experimenting with flavors can lead to delicious results. Keep these tips in mind, and you’ll impress everyone with your baking skills. Enjoy every bite!


