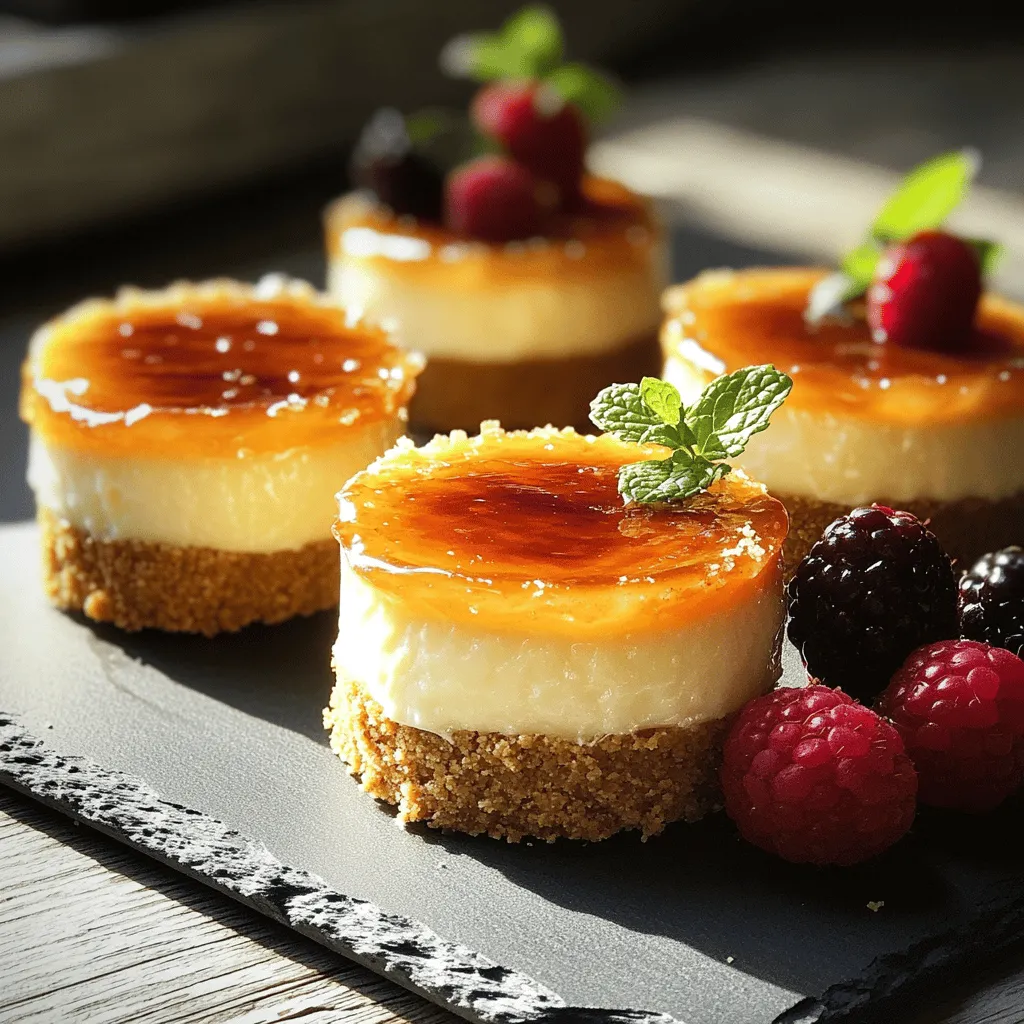
Craving a sweet treat that’s both easy to make and delicious? Look no further than my Mini Crème Brûlée Cheesecakes. They combine the rich flavors of creamy cheesecake with a crunchy caramel topping. Perfect for any occasion, these bite-sized delights will impress your friends and family without keeping you in the kitchen for hours. Let me guide you through the simple steps to whip up these irresistible mini desserts!
Ingredients
Main Ingredients
– 1 cup graham cracker crumbs
– 4 tablespoons unsalted butter, melted
– 16 oz cream cheese, softened
– 1 cup granulated sugar
– 2 large eggs
– 1 teaspoon vanilla extract
– 1 teaspoon lemon juice
– 1 cup heavy cream
Topping Ingredients
– 2 tablespoons brown sugar (for caramelization)
Kitchen Tools Needed
– Mini cheesecake pans or muffin tin
– Mixing bowls
– Hand mixer or stand mixer
– Kitchen torch
When I make these mini crème brûlée cheesecakes, I focus on quality. Each ingredient plays a role in flavor and texture. The graham cracker crumbs form a buttery base. The unsalted butter binds the crumbs and adds richness.
Cream cheese is the star of the show. It gives the cheesecake its creamy texture. Granulated sugar sweetens it perfectly. The eggs provide structure, making the cheesecake hold its shape.
Vanilla extract adds a warm, inviting flavor. Lemon juice brightens the taste and cuts through the richness. Finally, heavy cream makes it luscious and smooth.
For the topping, brown sugar is essential. It caramelizes beautifully, creating that signature crackly crust.
Gather these ingredients and tools before you start. This makes the process smooth and enjoyable. Trust me, these mini cheesecakes are easy to make and taste amazing!
Step-by-Step Instructions
Preparation Steps
– Preheat the oven to 325°F (160°C).
– In a medium bowl, mix graham cracker crumbs and melted butter until combined. Press this mixture firmly into the bottom of 12 mini cheesecake pans or a muffin tin to form a crust. Bake for 8-10 minutes until set, then let cool.
Cheesecake Filling Steps
– In a large mixing bowl, beat softened cream cheese until smooth.
– Gradually add granulated sugar, mixing well.
– Incorporate eggs one at a time, mixing well after each.
– Then, add vanilla extract and lemon juice.
– Finally, add heavy cream and mix until blended.
Baking and Cooling
– Carefully pour the cheesecake filling over the cooled crusts, filling each pan about three-quarters full.
– Place the filled pans in the oven and bake for 20-25 minutes. The edges should set, but the center should remain slightly jiggly.
– Once baked, turn off the oven. Leave the cheesecakes inside for 10 minutes with the door slightly ajar.
– Remove them and let cool on a wire rack. Chill in the fridge for at least 4 hours or overnight for the best results.
– Just before serving, sprinkle a thin layer of brown sugar on each cheesecake. Use a kitchen torch to caramelize the sugar until bubbly and golden brown. Let the sugar harden for a minute.
– To serve, run a knife around the edges of the cheesecakes to loosen them.
Tips & Tricks
Perfecting the Cheesecake
To make the best mini crème brûlée cheesecakes, start with softened cream cheese. This step ensures a smooth blend. If the cream cheese is cold, it will clump. Let it sit at room temperature for about 30 minutes before mixing.
Mixing is crucial, but be careful not to overmix after adding eggs. Overmixing can cause your cheesecakes to crack. You want a fluffy texture, so mix just until combined.
Caramelizing Tips
Caramelizing the top adds a special touch. If you use a kitchen torch, hold it about six inches away. This distance gives even heat without burning. Move the torch in circles to heat the sugar evenly.
If you do not have a torch, you can use your oven’s broiler. Place the cheesecakes on a baking sheet. Sprinkle brown sugar on top and broil for 1-2 minutes. Watch closely, as sugar can burn quickly.
Serving Suggestions
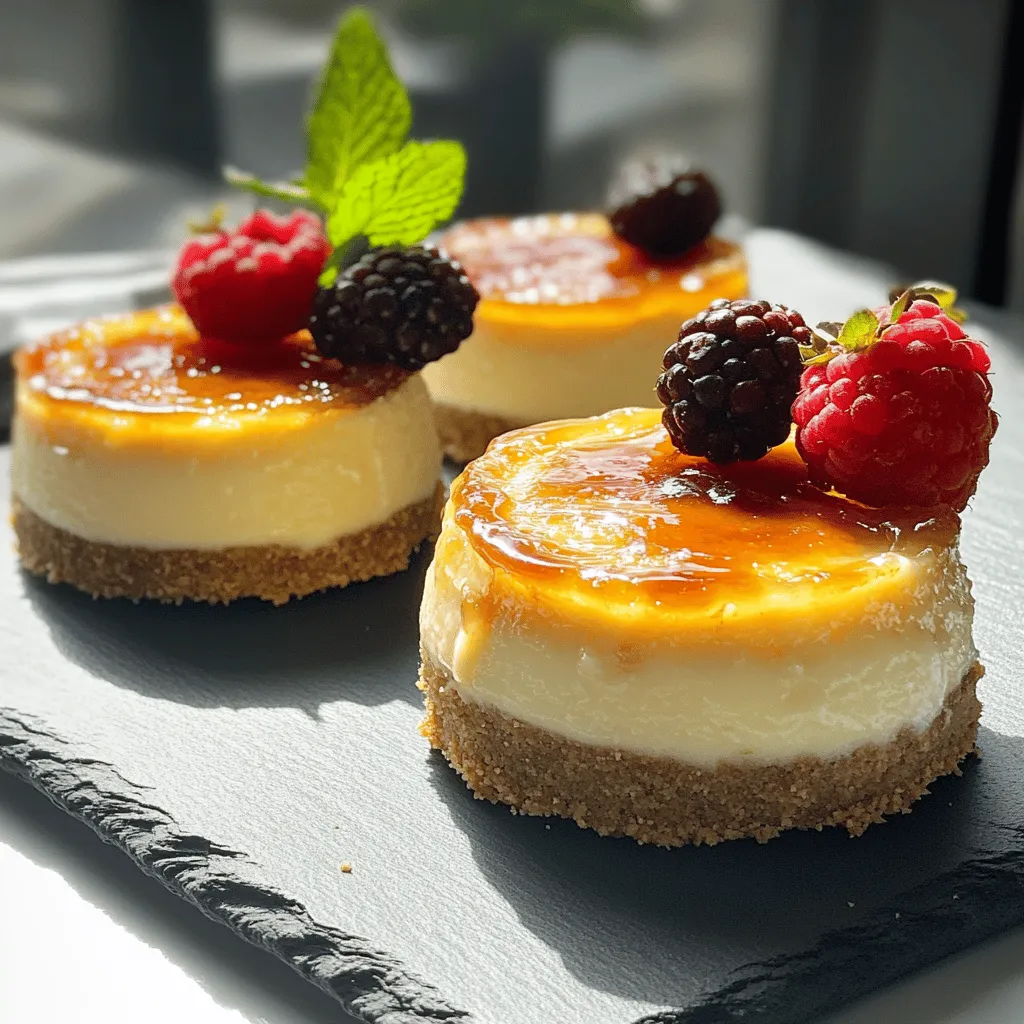
For a stunning presentation, serve the cheesecakes on a slate or white plate. This contrast highlights the golden top. Garnish each cheesecake with fresh berries. Raspberries or blueberries work well. Add a sprig of mint for color and freshness.
These small details make your dessert look professional and inviting. Enjoy your delightful mini crème brûlée cheesecakes!
Variations
Flavor Variations
You can easily switch up the flavors in mini crème brûlée cheesecakes. One fun option is to add chocolate. Just melt some dark chocolate and mix it into the cheesecake batter. This will give your dessert a rich, velvety taste. You can also add fruit flavors. Puree fresh strawberries or raspberries and fold them into the batter. This adds a fruity twist that pairs well with the creamy texture. Lastly, if you want a lighter option, try swapping cream cheese for ricotta. Ricotta brings a softer texture and a more delicate flavor.
Crust Alternatives
The crust plays a big role in the flavor. Instead of a graham cracker crust, you can use Oreo cookies. Crush them and mix with melted butter to form a tasty chocolate crust. This adds a nice contrast to the creamy filling. For those who need a gluten-free option, use gluten-free cookies or almond flour. Both give a great texture while keeping your dessert safe for gluten-sensitive eaters.
Serving Size Adjustments
You can adjust the size of your cheesecakes too. For mini cheesecakes, stick to the recipe, which fills standard muffin tins. If you want standard-sized cheesecakes, just pour more batter into larger pans. You will need to bake them longer, so check for doneness by looking for a firm edge and a slightly jiggly center. If you want to make a larger batch, just multiply the ingredients. This recipe is easy to scale, making it simple to serve a crowd.
Storage Info
Refrigeration Guidelines
You can keep mini crème brûlée cheesecakes in the fridge for up to five days. Store them in airtight containers to keep them fresh. This helps maintain their creamy texture and flavor.
Freezing Instructions
To freeze these mini cheesecakes, wrap them tightly in plastic wrap. Then place them in a freezer-safe container. They can last for up to three months in the freezer. When you are ready to eat, remove them from the freezer. Place them in the fridge overnight to thaw slowly. This keeps them creamy and delicious.
Reheating Suggestions
If you want to warm them, do it gently. Preheat your oven to 300°F (150°C). Place the cheesecakes on a baking sheet. Heat them for about 10 minutes. This way, they warm evenly without changing their texture.
FAQs
What is the best way to serve Mini Crème Brûlée Cheesecakes?
Serve these cheesecakes chilled for the best taste. I recommend using a decorative plate. A slate or white plate looks great. Add fresh berries on the side for color. A sprig of mint adds a nice touch too. This makes each dessert feel special.
Can I make this recipe gluten-free?
Yes, you can easily make it gluten-free. Swap the graham cracker crumbs with gluten-free options. Look for gluten-free cookies or crackers to crush. This will give you a tasty crust. Just make sure to check the labels.
How do I know when the cheesecakes are done baking?
Look for the edges to be set and the center to jiggle slightly. This means they are done baking. If the edges puff up, they may be overbaked. The cheesecakes will firm up as they cool.
How long can I store Mini Crème Brûlée Cheesecakes?
You can store them in the fridge for up to five days. Keep them in an airtight container. If you want to store them longer, freeze them. They can last for up to three months in the freezer. Just thaw them in the fridge before serving.
In this guide, we covered how to make Mini Crème Brûlée Cheesecakes. You learned about the essential ingredients, tools, and steps to bake these treats. We also discussed tips for perfection, variations, and storage options.
These little desserts are fun to make and taste great. Try different flavors and toppings to make them your own. Enjoy impressing friends and family with your cheesecake skills!
