Are you ready to whip up a sweet treat that will wow your friends and family? My No-Bake Buckeye Cheesecake Bars are the perfect combo of creamy cheesecake and rich chocolate. They’re easy to make, with simple ingredients you probably have on hand. Forget the oven; this dessert is chilled to perfection. Let’s dive in and create a delicious dessert that disappears in no time!
Ingredients
List of Ingredients
Grahams Cracker Crust Components
– 1 cup graham cracker crumbs
– 1/4 cup unsweetened cocoa powder
– 1/3 cup granulated sugar
– 1/2 cup unsalted butter, melted
Cream Cheese and Peanut Butter Filling
– 8 oz cream cheese, softened
– 3/4 cup creamy peanut butter
– 1 cup powdered sugar
– 1 teaspoon vanilla extract
– 1 cup whipped topping (like Cool Whip)
Chocolate Topping Ingredients
– 1/2 cup semi-sweet chocolate chips
– 2 tablespoons coconut oil
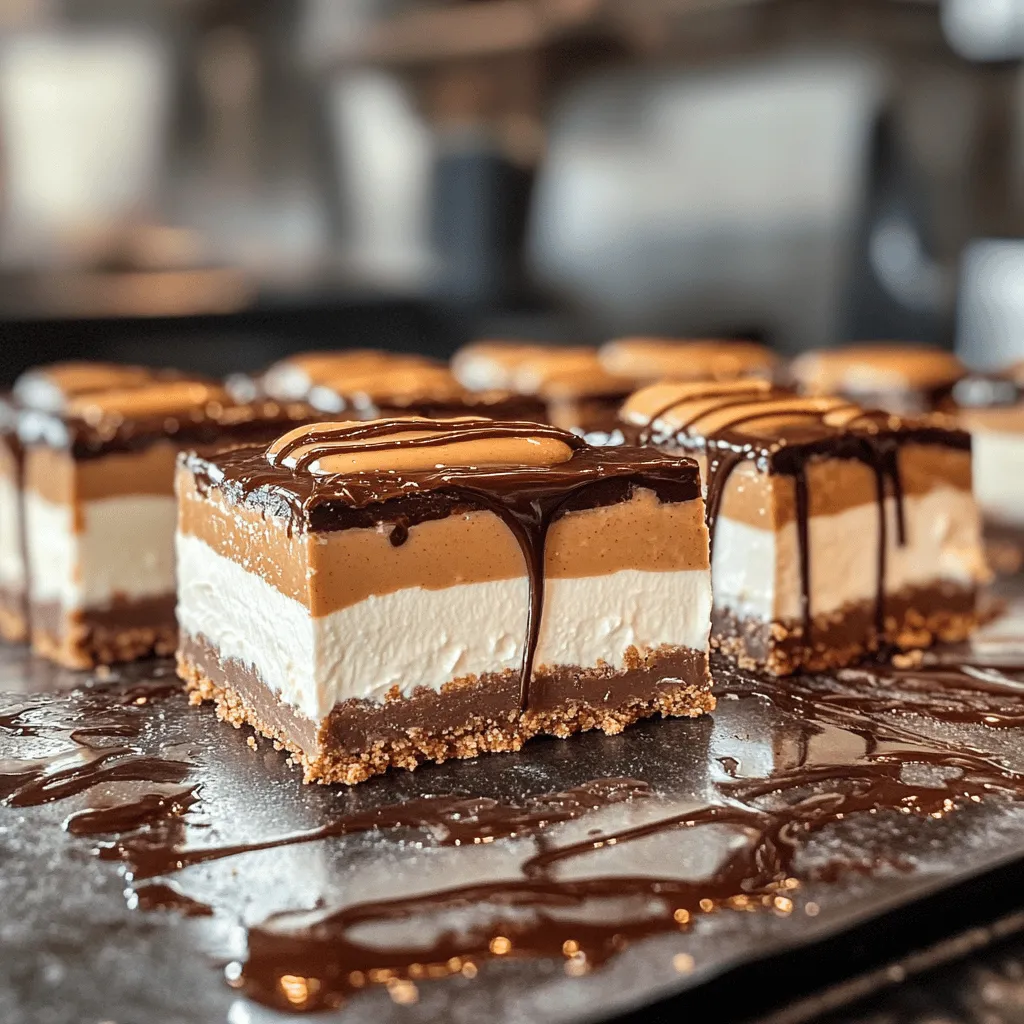
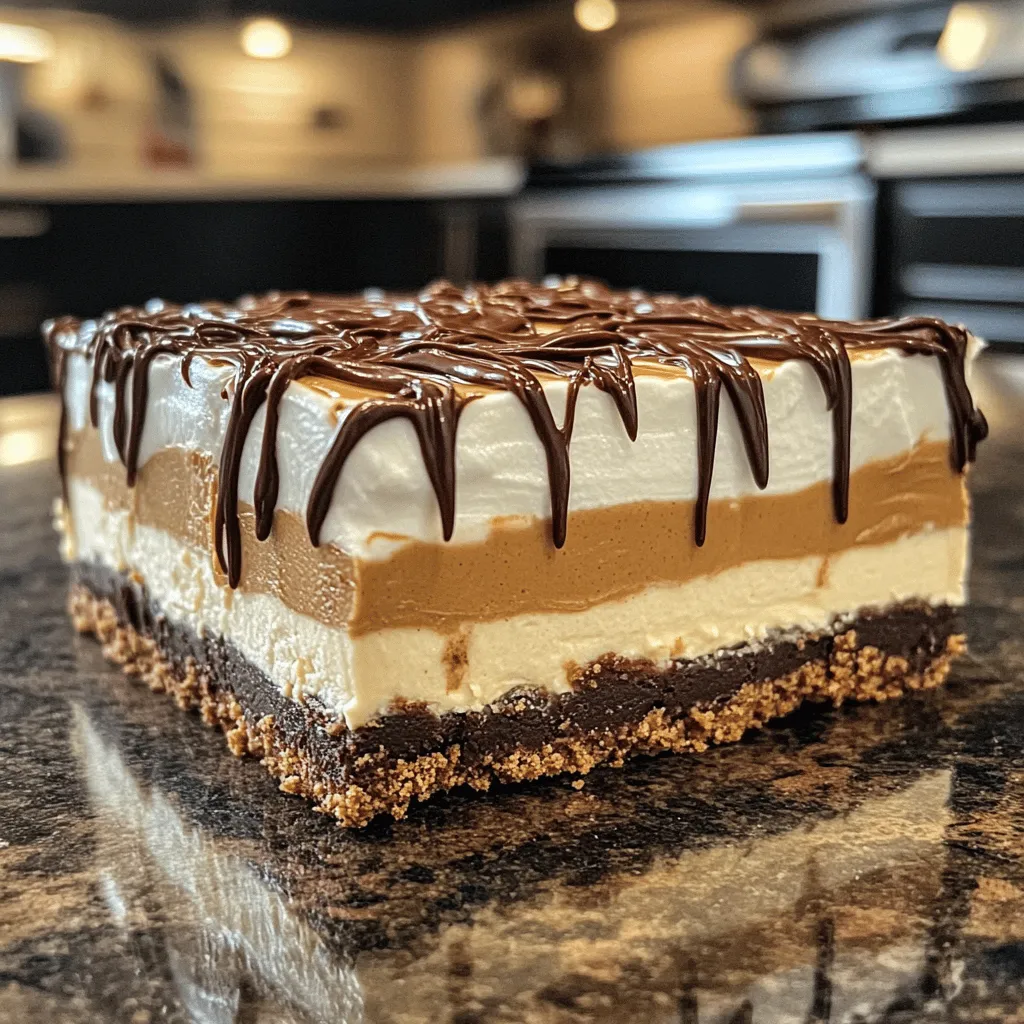
The ingredients in No-Bake Buckeye Cheesecake Bars are simple yet effective. The crust is a mix of graham cracker crumbs and cocoa powder. This gives it a rich chocolate taste. The melted butter helps bind the crust together. It creates a solid base for the creamy filling.
The filling combines cream cheese and peanut butter. These two create a smooth and rich texture. The powdered sugar adds sweetness, while vanilla gives flavor. The whipped topping makes the filling light and fluffy. It balances the density of the cream cheese and peanut butter.
For the topping, we use chocolate chips and coconut oil. The chocolate adds a nice finish. It also brings a delicious contrast to the creamy filling. When melted, the chocolate becomes easy to drizzle over the bars. This final touch makes them look and taste amazing.
Step-by-Step Instructions
Preparing the Crust
– Combining the Ingredients
Start with a medium mixing bowl. Add 1 cup of graham cracker crumbs, 1/4 cup of cocoa powder, and 1/3 cup of granulated sugar. Pour in 1/2 cup of melted unsalted butter. Mix well until it looks like wet sand.
– Pressing into the Baking Dish
Grab a 9×9-inch square baking dish. Evenly press the crumb mixture into the bottom. Use the back of a measuring cup or your hands to pack it tightly. This makes a strong base. Place the dish in the fridge while you make the filling.
Making the Cheesecake Filling
– Mixing Cream Cheese and Peanut Butter
In a large bowl, add 8 oz of softened cream cheese and 3/4 cup of creamy peanut butter. Use an electric mixer to mix until smooth and creamy. This will be the heart of your bars.
– Incorporating Sugar and Vanilla
Gradually add 1 cup of powdered sugar and 1 teaspoon of vanilla extract to the mixture. Mix until you have a smooth filling. Make sure there are no lumps. This adds sweetness and flavor.
Assembling the Bars
– Spreading the Filling
Take the chilled crust out of the fridge. Pour the cream cheese filling over the crust. Use a spatula to spread it evenly, covering every corner. This is where the magic happens.
– Chilling the Dessert
Cover the dish with plastic wrap. Place it back in the fridge for at least 4 hours. This step is key for the filling to set completely.
Adding the Chocolate Topping
– Melting the Chocolate Mix
In a small microwave-safe bowl, combine 1/2 cup of semi-sweet chocolate chips and 2 tablespoons of coconut oil. Microwave in 30-second bursts, stirring in between. Keep going until it’s melted and smooth.
– Drizzling over the Cheesecake
Once the filling is firm, drizzle the melted chocolate over the top. You can use a spoon or a piping bag for fun designs. Let it cool for a bit to set the chocolate.
Final Steps
– Chilling Time
After adding the chocolate, chill the bars again for about 30 minutes. This helps the chocolate harden and makes slicing easier.
– Slicing the Bars for Serving
Once the chocolate is set, take the bars out of the fridge. Slice them into squares and serve chilled. Enjoy your delicious creation!
Tips & Tricks
Common Mistakes to Avoid
– Overmixing the Filling: It’s easy to get excited while mixing. If you overmix, air can get into your filling. This makes it too fluffy and less dense. Mix until smooth, but don’t go overboard.
– Not Chilling Long Enough: Patience is key. If you take the bars out too soon, they won’t set. Let them chill for at least four hours. This step helps the flavors meld together.
Tools for Success
– Recommended Kitchen Equipment: You will need a medium mixing bowl and a large mixing bowl for this recipe. A 9×9-inch square baking dish is perfect for setting the bars. Don’t forget a spatula to spread the filling!
– Importance of Mixing Bowls: Having the right bowls makes mixing easier. Use a large bowl for the filling to avoid spills. A medium bowl works well for the crust mixture.
Enhancing Flavor and Texture
– Adding a Pinch of Salt: A small pinch of salt can elevate the taste. It balances the sweetness and enhances the peanut butter flavor. Just a tiny bit makes a big difference!
– Using Different Nuts or Toppings: Want to change up the bars? Try adding chopped nuts on top or mix them into the filling. You can also experiment with different toppings, like crushed pretzels or sprinkles.Enjoy making these delightful no-bake treats!
Variations
Flavor Variations
You can make No-Bake Buckeye Cheesecake Bars in fun flavors. Here are two ideas:
– Chocolate Peanut Butter Swirl: Mix in chocolate syrup with the peanut butter filling. This adds a delicious swirl. You create a pretty pattern and extra chocolate flavor.
– Pumpkin Spice Buckeye Bars: Add pumpkin puree and pumpkin spice to the filling. This gives a warm, fall taste. It’s perfect for autumn gatherings.
Dietary Adjustments
Some folks have special diets. Here are ways to make this dessert fit those needs:
– Gluten-Free Options: Use gluten-free graham crackers for the crust. This keeps the bars gluten-free without losing taste.
– Dairy-Free Alternatives: Substitute cream cheese with a dairy-free version. You can also use coconut whipped cream instead of regular whipped topping. This makes it friendly for those who avoid dairy.
Serving Suggestions
Serving ideas can make your bars even better. Here are a few suggestions:
– Pairing with Ice Cream: Serve these bars with a scoop of vanilla ice cream. The cold ice cream complements the creamy cheesecake.
– Spring and Summer Garnishes: Top the bars with fresh berries or a drizzle of honey. This adds color and a fresh taste. It’s great for warm weather gatherings.Enjoy your delicious creation!
Storage Info
Best Practices for Storage
To keep your No-Bake Buckeye Cheesecake Bars fresh, store them in an airtight container. This helps prevent them from drying out or absorbing other flavors in your fridge. A simple glass or plastic container will work great.
– Use a container with a tight seal.
– Label the container with the date made.
– Keep the bars in the refrigerator.
These bars should stay good for about five days in the fridge. Always check for any signs of spoilage before serving.
Freezing the Cheesecake Bars
If you want to save some for later, these cheesecake bars freeze well. To freeze, cut them into squares and place them in a single layer on a baking sheet. This prevents them from sticking together. After they freeze for about an hour, transfer the squares to a freezer-safe bag or container.
– Leave some space between each piece.
– Use parchment paper to separate layers.
When you’re ready to enjoy them, simply take out the desired amount. Let them thaw in the fridge for a few hours or overnight. You can also serve them slightly frozen for a fun twist. Enjoy your sweet treat anytime!
FAQs
Can I make this recipe ahead of time?
Yes, you can make this recipe ahead of time. I recommend preparing the No-Bake Buckeye Cheesecake Bars the day before you want to serve them. This allows the flavors to blend well. Plus, the bars set better when chilled overnight. Just cover them tightly with plastic wrap after they cool. This keeps them fresh and tasty.
What if I don’t have graham cracker crumbs?
If you don’t have graham cracker crumbs, don’t worry! You can use crushed cookies like Oreos or vanilla wafers. You can also try using crushed nuts and oats for a gluten-free crust. Just mix them with melted butter, just like the graham cracker base. This gives you a tasty and unique twist on the crust.
How long will the No-Bake Buckeye Cheesecake Bars last?
The No-Bake Buckeye Cheesecake Bars will last about 5 to 7 days in the fridge. Store them in an airtight container to keep them fresh. If you want them to last longer, you can freeze them. Just wrap each bar in plastic wrap and place them in a freezer bag. They can stay good for up to 3 months. Thaw them in the fridge before serving for the best taste.
This blog post covers the delicious no-bake Buckeye cheesecake bars. We looked at the key ingredients, simple steps, and helpful tips. You learned about crust preparation, filling creation, and assembling your tasty treat.
Remember, chilling your bars is crucial for the best texture. Don’t be afraid to try variations like pumpkin spice or gluten-free options. These bars are easy to make and a crowd-pleaser. Now, it’s time to gather your tools and start baking! Enjoy your sweet creation!


