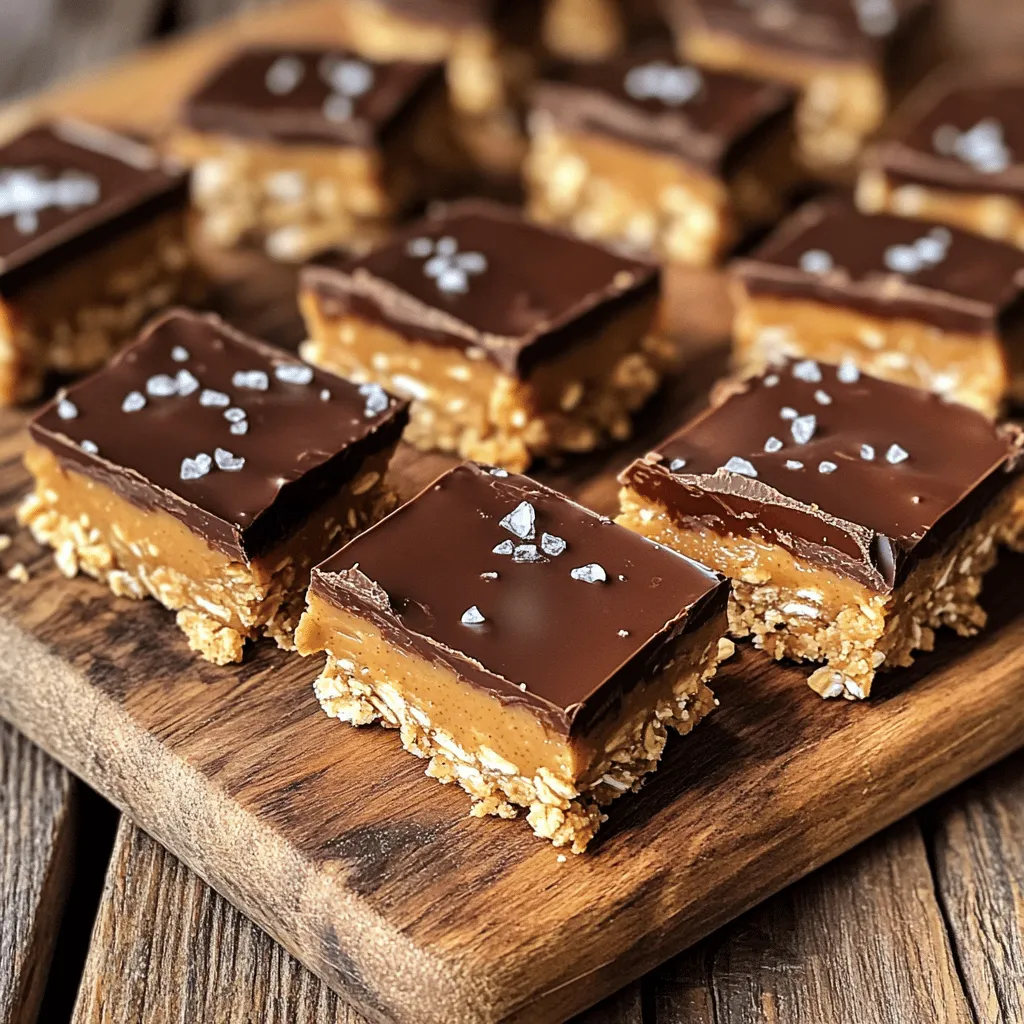
Do you crave a sweet treat that’s both simple and healthy? Look no further! These No-Bake Peanut Butter Bars are packed with flavor and nutrition. With just a few wholesome ingredients, you can whip up a delicious snack that satisfies your sweet tooth. Whether you’re rushing to prepare a quick dessert or looking for a healthy option for kids, these bars fit the bill perfectly. Let’s dive into this easy, no-bake recipe!
Why I Love This Recipe
- Easy to Make: This recipe requires no baking, making it a quick and hassle-free treat to prepare.
- Nutritious Ingredients: With natural peanut butter, oats, and honey, these bars are packed with goodness and energy.
- Customizable: You can easily add your favorite nuts or seeds to tailor the bars to your taste preferences.
- Deliciously Indulgent: The combination of peanut butter and chocolate creates a rich and satisfying flavor that everyone loves.
Ingredients
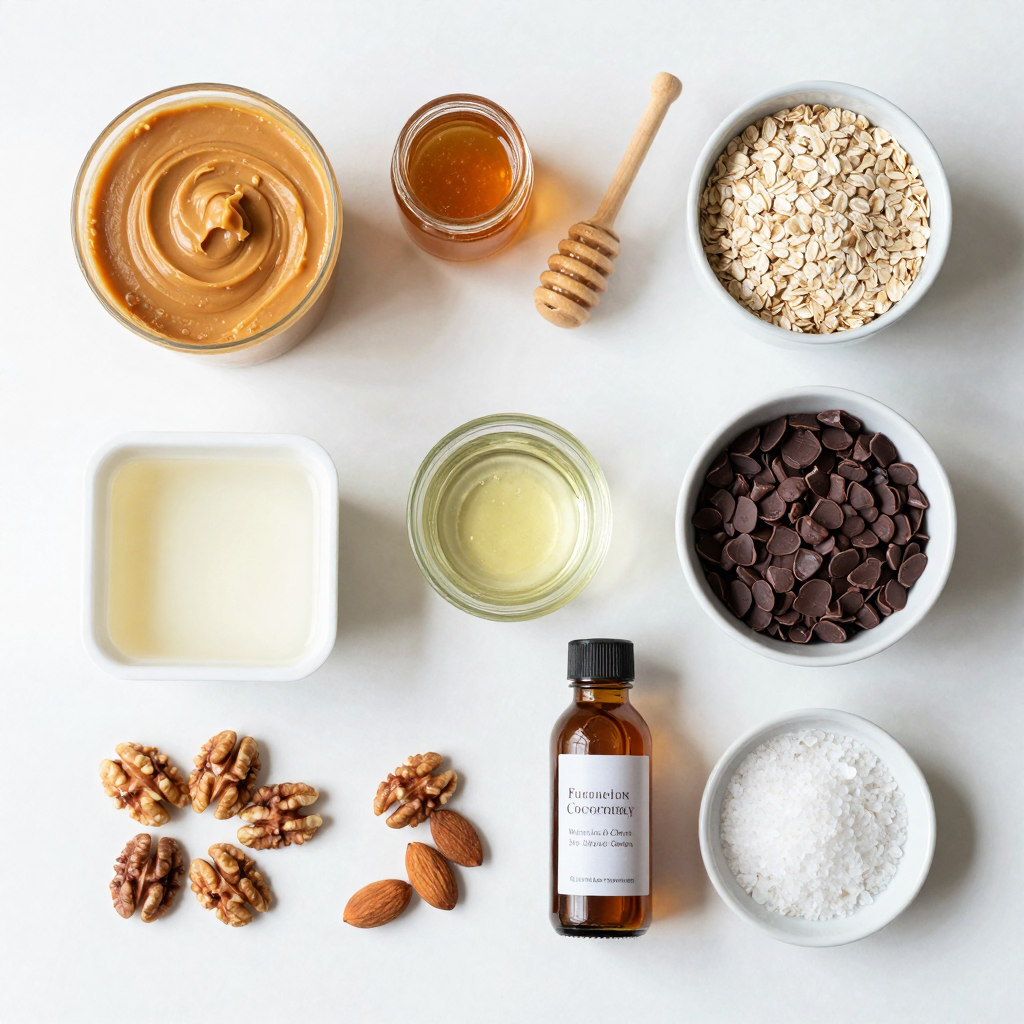
Main Ingredients for No-Bake Peanut Butter Bars
– 1 cup natural peanut butter
– 1/2 cup honey or maple syrup
– 2 cups rolled oats
– 1 cup dark chocolate chips
– 1/4 cup coconut oil
– 1 tsp vanilla extract
– A pinch of salt
– Optional: 1/2 cup chopped nuts (e.g., walnuts or almonds)
I love using natural peanut butter for its rich flavor and creamy texture. Honey or maple syrup adds sweetness and binds everything together. Rolled oats give the bars a hearty base, providing fiber. Dark chocolate chips add a sweet, rich contrast to the nutty flavor. I like to use coconut oil to help the chocolate melt smoothly. A dash of vanilla and a pinch of salt really enhance the taste, making these bars truly special. If you want extra crunch, toss in some chopped nuts.
Dietary Information
– Gluten-free options: Use certified gluten-free oats to make these bars safe for those with gluten sensitivities.
– Vegan alternatives: Substitute honey with maple syrup for a fully vegan treat.
– Nutritional highlights: These bars are packed with protein from peanut butter and fiber from oats. They make a great energy snack.
I enjoy making these bars because they fit various dietary needs. With just a few small changes, anyone can enjoy them. Plus, they are healthy enough for a guilt-free treat!
Step-by-Step Instructions
Mixing the Base
Start by grabbing a big bowl. In this bowl, mix the natural peanut butter and honey (or maple syrup). You want it to be smooth. Next, add the vanilla extract and a pinch of salt. This adds great flavor. Now, pour in the rolled oats. If you like nuts, mix in the chopped nuts too. Stir until everything blends well together.
Preparing the Pan
Take an 8-inch square baking pan and line it with parchment paper. Leave some paper hanging over the edges. This helps you lift the bars later. Now, spread the peanut butter mixture into the pan. Press it down firmly with a spatula. Make sure it is packed tight so the bars hold together.
Melting the Chocolate
In a small saucepan, melt the dark chocolate chips and coconut oil. Keep the heat low and stir until it’s smooth. Once melted, remove it from heat. Carefully pour the melted chocolate over the pressed oat mixture. Use a spatula to spread it out evenly.
Chilling and Cutting
Now, put the pan in the fridge. Let it chill for about 2 to 3 hours. This helps the bars firm up. Once they are set, lift them out using the parchment paper. Place them on a cutting board and cut them into squares or rectangles. Enjoy your no-bake peanut butter bars!
Pro Tips
- Use Natural Peanut Butter: Opt for natural peanut butter without added sugars or oils for a healthier and more authentic taste.
- Chill for Firmness: Ensure the bars are in the refrigerator for the full 2-3 hours to achieve optimal firmness, making them easier to cut and handle.
- Customize with Mix-ins: Feel free to add your favorite mix-ins like dried fruit, seeds, or protein powder for added nutrition and flavor.
- Perfect Chocolate Layer: For a glossy finish, let the melted chocolate cool slightly before pouring it over the oat mixture, ensuring a smooth and shiny top.
Tips & Tricks
Troubleshooting Common Issues
If your bars fall apart, don’t worry! You can fix this. Simply increase the compacting pressure when you press the mixture into the pan. A firm press helps hold everything together. You can also adjust the sweetness. If it’s too sweet, try adding a bit more oats. If it’s not sweet enough, mix in a little extra honey or maple syrup.
Presentation Ideas
Serving your bars nicely can impress guests. Place them on a rustic wooden board for a warm look. Drizzle some melted chocolate over the top. This adds flair and flavor. A sprinkle of sea salt on the chocolate can make it pop visually. You can also cut the bars into fun shapes or sizes. Use unique plates or arrange them in stacks for an inviting display.
Making It Your Own
Feel free to get creative with flavors! You could add different mix-ins, like dried fruit or seeds. Try adding a swirl of jam or honey on top for a fruity touch. Experimenting with toppings can also be fun. Consider adding crushed nuts or a layer of yogurt for extra texture. Each time you make these bars, you can create a new taste experience!
Variations
Flavor Variations
You can change the flavor of your no-bake peanut butter bars easily. A fun twist is the chocolate-peanut butter swirl. Just melt some chocolate and mix it in. This adds a rich taste and looks pretty too! Another option is adding protein powder. This boosts the protein content and keeps you full longer. Use chocolate or vanilla protein powder for more flavor.
Ingredient Substitutions
If you want to try different nut butters, almond and cashew are great options. They add unique flavors while keeping the bars creamy. You can also swap out the sweetener. Agave and stevia are good choices if you need something different. Just remember to adjust the amount based on sweetness.
Dietary Variations
For those on a keto diet, you can make simple changes. Use sugar-free sweeteners and swap oats for crushed nuts or seeds. This keeps the bars low in carbs. If you want a high-protein snack, add some protein powder or nuts. Both options will give you that extra boost without losing flavor.
Ready to make your own no-bake peanut butter bars?
Storage Info
Short-term Storage
To keep your no-bake peanut butter bars fresh, store them in the fridge. Use an airtight container to prevent them from drying out. This method will help maintain their taste and texture. I recommend placing parchment paper between layers to avoid sticking.
Long-term Storage
If you want to keep the bars longer, consider freezing them. Cut the bars into squares or rectangles before freezing. Wrap each piece in plastic wrap and place them in a freezer-safe bag. They last for about three months in the freezer. When you’re ready to enjoy, defrost them in the fridge for a few hours or at room temperature for about 30 minutes.
Signs of Spoilage
Check your bars for any changes in smell or texture. If they have a sour smell or feel sticky, it’s best to toss them out. Also, keep an eye on the best before date. I recommend consuming them within a week if stored in the fridge. Enjoy your delicious treat while it’s fresh!
FAQs
How long do No-Bake Peanut Butter Bars last?
No-Bake Peanut Butter Bars can last up to one week in the fridge. Keep them in an airtight container to stay fresh. If you freeze them, they can last for up to three months. Just wrap each bar tightly to avoid freezer burn.
Can I make No-Bake Peanut Butter Bars in advance?
Yes, you can prepare these bars ahead of time. I often make a batch on weekends for quick snacks during the week. Just store them in the fridge or freezer. This way, you’ll always have a tasty treat ready to enjoy.
What can I substitute for peanut butter?
If you need alternatives to peanut butter, try almond butter or sunbutter. These options work well in the recipe. They provide a similar texture and flavor. Be sure to check for allergies if you share with others.
How can I make these bars vegan?
To make these bars vegan, use maple syrup instead of honey. Also, choose dark chocolate chips that are dairy-free. This way, you can enjoy a delicious treat while sticking to a vegan diet. The taste will still be rich and satisfying!
Can I add protein powder to the recipe?
Yes, you can add protein powder to boost nutrition. I suggest adding about 1/4 cup of your favorite protein powder. Mix it in with the oats for even distribution. This adds a healthy kick without changing the flavor too much.
These no-bake peanut butter bars are easy to make and taste great. You only need a few simple ingredients, and follow these steps to get perfect bars every time. Remember, you can mix up the flavors or add your own twist. Store them well to keep them fresh longer. With all the options and tips, you can enjoy these bars in so many ways. Try making them vegan or keto to fit your needs. Enjoy your tasty treat!


