
If you love sweet treats, you’ll be delighted by this No-Bake Buckeye Cheesecake Bar recipe! It’s quick, easy, and requires no oven. With creamy layers of peanut butter and a rich chocolate topping, this dessert is a crowd-pleaser. Whether you’re hosting a party or want a special dessert for yourself, follow me into this delicious journey and learn how to create a dessert that everyone will enjoy!
Ingredients
Here’s what you need to make these No-Bake Buckeye Cheesecake Bars.
- 1 ½ cups graham cracker crumbs
- ½ cup unsalted butter, melted
- 1 cup creamy peanut butter
- 8 oz cream cheese, softened
- 1 cup powdered sugar
- 1 tsp vanilla extract
- 1 cup heavy whipping cream
- 1 cup semi-sweet chocolate chips
Each ingredient plays a key role in building flavor and texture. The graham cracker crumbs make a great base. They add a sweet crunch. The melted butter helps bind the crumbs together. Creamy peanut butter adds rich flavor. The cream cheese gives a smooth, creamy layer. Powdered sugar sweetens the mix without grittiness. Vanilla adds warmth and depth.
Whipping cream is crucial for fluffiness. It makes the cheesecake light and airy. The semi-sweet chocolate chips top it off with a rich finish.Gather these ingredients, and you’re ready to create an amazing treat!
Step-by-Step Instructions
Preparation of the Crust
To start, combine 1 ½ cups of graham cracker crumbs with ½ cup of melted unsalted butter. Mix well until the crumbs are fully coated. Then, press this mixture firmly into the bottom of a 9×9 inch baking pan. Make sure it forms an even layer. Refrigerate this crust for 10 minutes to help it set.
Making the Peanut Butter Layer
In a large mixing bowl, beat 8 oz of softened cream cheese until smooth. Next, mix in 1 cup of creamy peanut butter, 1 cup of powdered sugar, and 1 tsp of vanilla extract. Blend these ingredients until they are creamy and well combined.
Whipping the Cream
In a separate bowl, whip 1 cup of heavy cream until stiff peaks form. This step is key for a light texture. Once you have stiff peaks, gently fold the whipped cream into the peanut butter mixture. Be careful not to deflate the whipped cream as you fold it in.
Assembling the Cheesecake
Spread the peanut butter mixture evenly over the chilled graham cracker crust. Use a spatula to smooth the top. Return the baking pan to the refrigerator. Let it chill for at least 2-3 hours. This allows the cheesecake to firm up nicely.
Preparing the Chocolate Topping
For the chocolate topping, melt 1 cup of semi-sweet chocolate chips in a microwave-safe bowl. Heat in 30-second intervals, stirring in between until the chocolate is smooth and melted.
Final Assembly and Serving
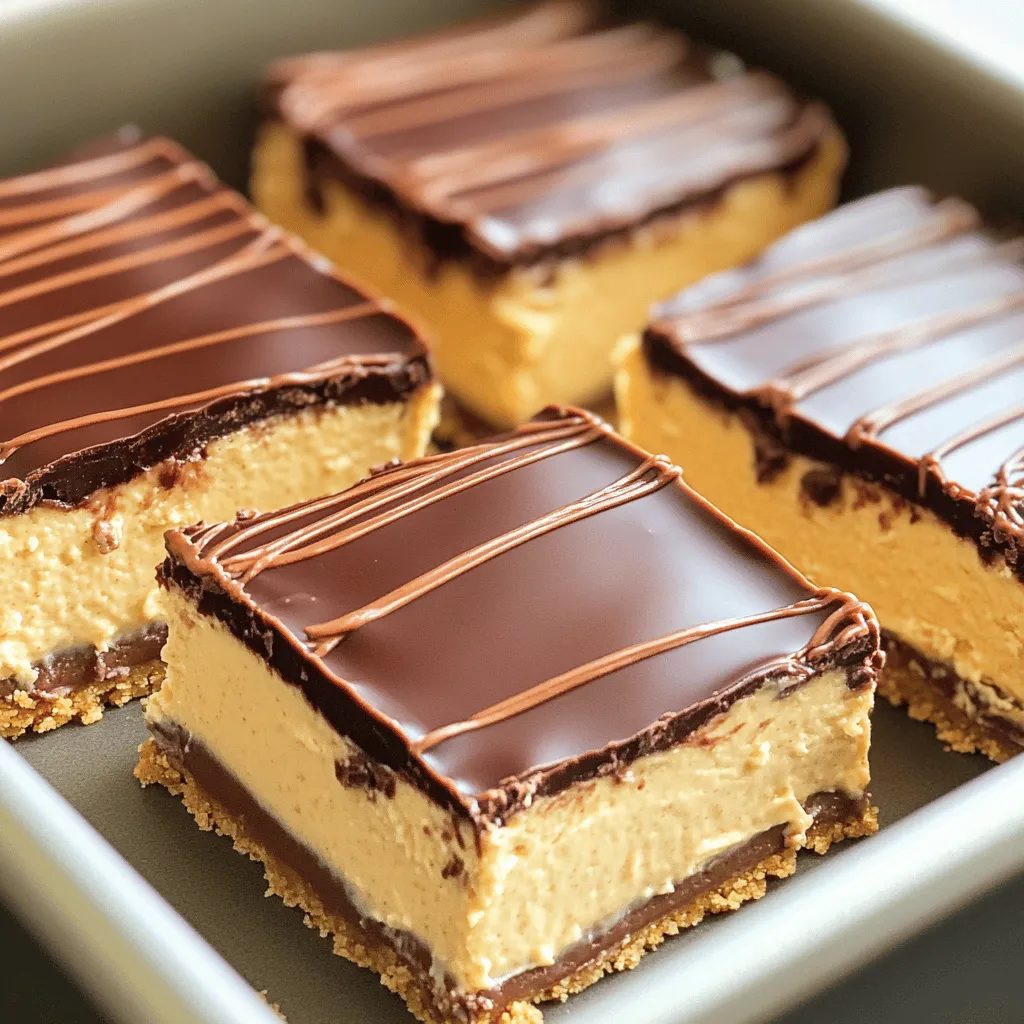
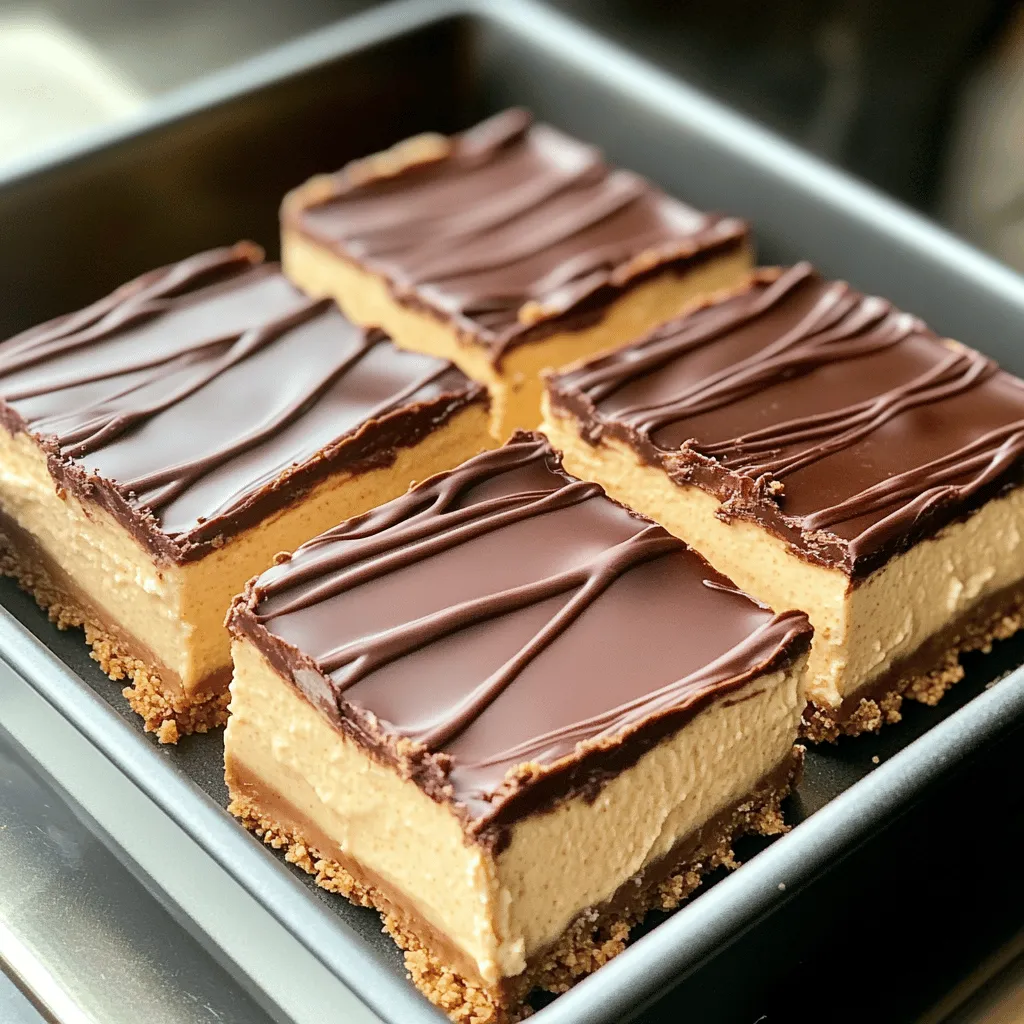
Once the peanut butter layer is set, pour the melted chocolate over the cheesecake. Spread it evenly for a nice finish. Allow it to set at room temperature for about 15-20 minutes. After that, chill it in the refrigerator for another 30 minutes. Once set, lift the cheesecake bars out of the pan. Cut them into squares and serve chilled. Enjoy this delightful treat!
Tips & Tricks
How to Achieve the Perfect Creamy Texture
To get that dreamy, creamy texture, start with softened cream cheese. Soft cream cheese mixes better and helps avoid lumps. Take it out of the fridge an hour before you start. This small step makes a big difference.
When you fold in the whipped cream, use a gentle motion. This keeps the air in the cream. Start at the bottom and lift the mixture up. Repeat until the whipped cream blends in. Avoid stirring too hard; you want it light and airy.
Serving Suggestions
To make your no-bake buckeye cheesecake bars shine, add a sprinkle of crushed peanuts on top. This gives a nice crunch and looks great. You can also drizzle some extra melted chocolate for a fancy touch.
Pair these bars with a cold glass of milk or a rich coffee. They also go well with a scoop of vanilla ice cream. These drinks help balance the sweet and creamy flavors in the bars.
Common Mistakes to Avoid
One big mistake is overmixing the peanut butter layer. This can make it too dense. Mix just until everything is combined.
Another common error is not letting the bars chill long enough. If you skip this step, they won’t set properly. Make sure to chill them for at least 2-3 hours. Patience pays off with a perfect treat.
These tips will guide you to make the best no-bake buckeye cheesecake bars.Enjoy your delicious creation!
Variations
Dietary Alternatives
For those with dietary needs, you can easily adapt this recipe. To make a gluten-free crust, swap graham cracker crumbs for gluten-free cookie crumbs or almond flour. This change keeps the flavor while meeting gluten-free needs. For a vegan option, use dairy-free cream cheese and coconut whipped cream. These swaps give you a rich taste without animal products.
Flavor Enhancements
Want to take your cheesecake bars up a notch? Adding chocolate chips to the peanut butter layer gives a delightful crunch. You can mix in half a cup of chocolate chips to the creamy mix. Another fun twist is to swirl in caramel or chocolate sauce on top before the chocolate sets. This adds layers of flavor and makes the bars even more fun to eat.
Portioning Options
When it comes to serving, you have choices. You can create mini bars by using a smaller pan. This makes perfect bite-sized treats for parties. If you want to adjust servings for gatherings, you can cut the bars larger or smaller based on your needs. These options ensure everyone gets a taste of this sweet delight.
Storage Info
How to Store Leftovers
To keep your No-Bake Buckeye Cheesecake Bars fresh, use a glass or plastic container with a tight lid. This helps prevent the bars from drying out. Store them in the fridge for up to five days. Make sure to keep them chilled until you serve them.
Tips for Freezing
If you want to save some bars for later, freezing is a great option. First, wrap each bar in plastic wrap, then place them in a freezer-safe bag or container. This helps avoid freezer burn. You can freeze these bars for up to three months. When you’re ready to enjoy them, transfer the bars to the fridge to thaw overnight. This method keeps the texture creamy and smooth.
Reheating Guidelines
Most of the time, you won’t need to reheat these cheesecake bars. They taste best when served cold. If you prefer them slightly warm, use a microwave. Heat them in short bursts of 10 seconds. Check after each burst to avoid melting. This gentle method helps maintain their delicious taste and texture.
FAQs
Can I make No-Bake Buckeye Cheesecake Bars ahead of time?
Yes, you can make these bars ahead of time. I often prepare them a day in advance. This gives the flavors time to blend nicely. Just store them in the fridge until ready to serve.
How long do these cheesecake bars last in the fridge?
These cheesecake bars last about five days in the fridge. Make sure to cover them well to keep them fresh. If they last longer, they may lose taste and texture.
Is there a way to make this recipe without peanut butter?
Yes, you can swap peanut butter for another nut butter. Almond or cashew butter works great too. You can even use sun butter for a nut-free option.
What can I use instead of graham cracker crumbs?
If you don’t have graham crackers, try crushed cookies or digestive biscuits. You can also use nuts or oats for a gluten-free crust. Just adjust the butter amount as needed.
How do I know when the cheesecake is set?
You’ll know the cheesecake is set when it feels firm to the touch. The edges should be solid, and the center may have a slight jiggle. Chilling for at least 2-3 hours helps achieve this perfect texture.
In this post, we explored no-bake buckeye cheesecake bars. We covered ingredients, step-by-step instructions, and tips for success. You learned how to make a creamy texture, avoid common mistakes, and choose great toppings.
Remember, you can customize this recipe to fit your needs. Try gluten-free options or different flavors. With proper storage, these bars will stay fresh and delicious. Enjoy making this fun treat for yourself and others. Your kitchen adventure awaits!
