Are you ready to whip up the best banana pudding you’ve ever tasted? This delightful recipe combines ripe bananas, creamy layers, and a hint of vanilla for a dessert that’s as simple to make as it is delicious. With a few key ingredients, I’ll walk you through each step to create a banana pudding that impresses everyone. Let’s dive into this easy, tasty treat that’s perfect for any occasion!
Ingredients for Best Banana Pudding
Essential Ingredients
To make your banana pudding shine, you need these key items:
- 3 ripe bananas, sliced
- 1 cup whole milk
- 1 cup heavy cream
- 1/2 cup granulated sugar
These ingredients create a rich and creamy base. The ripe bananas add natural sweetness and flavor. Whole milk and heavy cream work together to give the pudding a smooth texture. Granulated sugar enhances the overall taste.
Optional Ingredients
You can elevate your pudding with these optional additions:
- 1/2 teaspoon almond extract
- Fresh mint leaves for garnish
- Caramel sauce for drizzling
Almond extract adds a nice depth of flavor. Mint leaves provide a fresh touch and a pop of color. A drizzle of caramel sauce can turn this dessert into a true delight.
Ingredient Substitutions
You might want to swap some ingredients for health or taste reasons:
- Alternate milk options like almond or coconut can work well.
- Sugar substitutes, like honey or stevia, offer a healthier choice.
These swaps keep the pudding delicious while catering to different preferences. Feel free to experiment with flavors that suit your taste.
Step-by-Step Instructions
Making the Pudding Base
To start, grab a medium saucepan. Combine the following in the saucepan:
- 1/2 cup granulated sugar
- 1/3 cup cornstarch
- 1/4 teaspoon salt
Next, gradually whisk in:
- 1 cup whole milk
- 1 cup heavy cream
Whisk until the mixture is smooth. This step ensures your pudding will be creamy and lump-free.
Cooking the Mixture
Now, place the saucepan over medium heat. Stir the mixture continuously. Cook it until it thickens and starts to bubble, which takes about 5-7 minutes.
Watch closely to avoid lumps. If the heat is too high, the pudding can scorch. If it thickens too fast, just lower the heat and keep stirring. Once thick, remove it from the heat and add flavor.
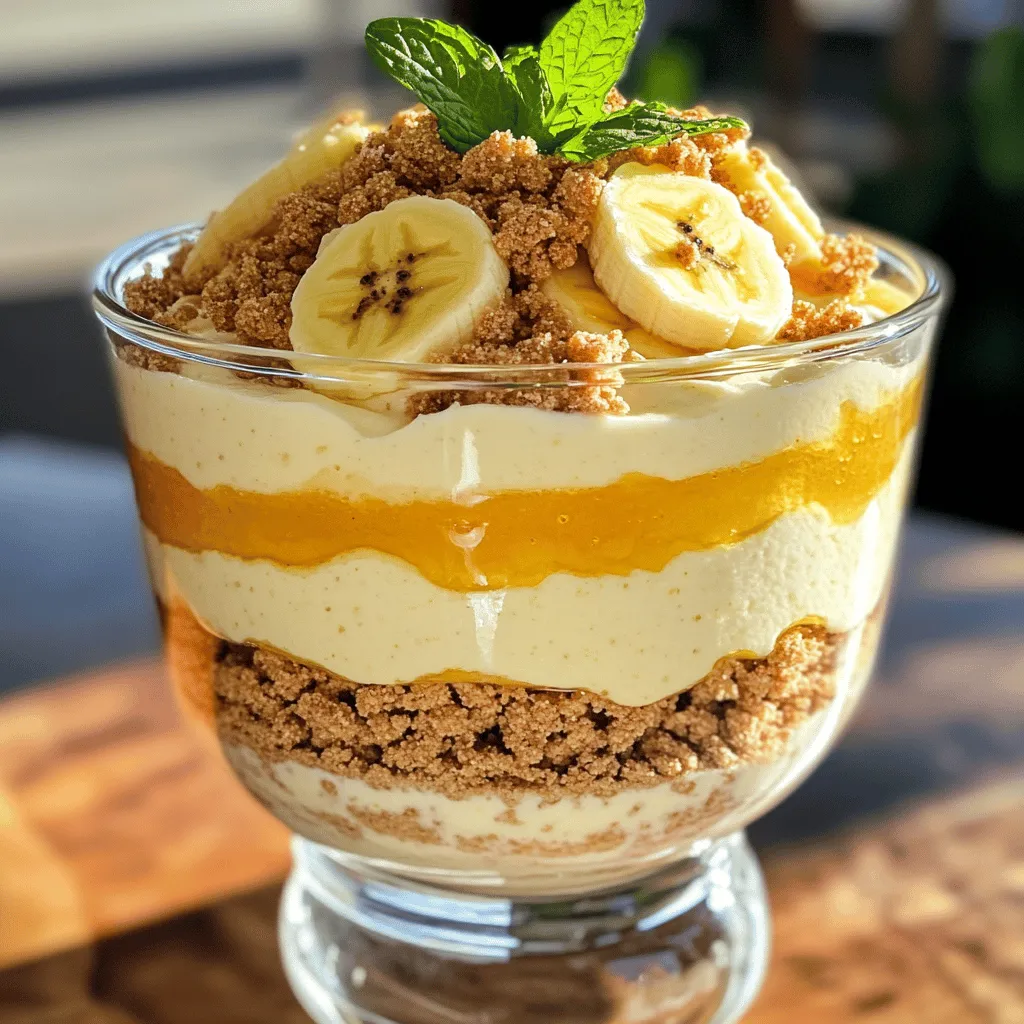
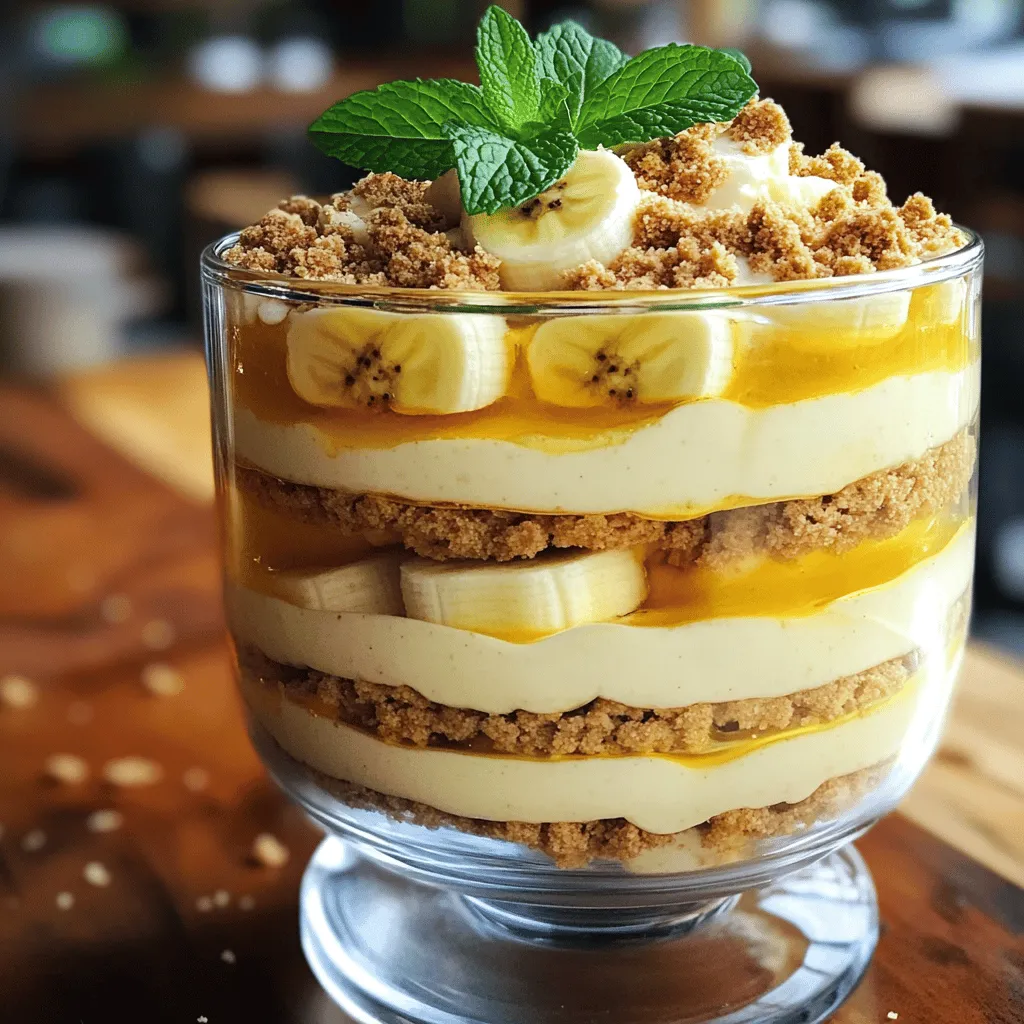
Layering Technique
Now comes the fun part: layering! Start with crushed Nilla wafers at the bottom of your dish. Then, spread half of the pudding over the wafers.
Next, add half of the sliced bananas. To prevent browning, you can brush the banana slices with a bit of lemon juice. This keeps them looking fresh and bright.
Repeat the layers. Add more wafers, the rest of the pudding, and finish with the last banana slices on top. Chill your masterpiece in the fridge for at least 4 hours. This lets the flavors meld and the pudding set.
For a delightful touch, sprinkle some crushed Nilla wafers on top before serving. Enjoy your banana pudding!
Tips & Tricks for the Best Banana Pudding
Perfecting the Texture
Cooling the pudding is key. It helps the pudding set properly. If you skip this step, your pudding may be runny. Once you cook your mixture, let it cool in a bowl. Cover the bowl with plastic wrap. Press it against the surface to avoid a skin.
Using crushed Nilla wafers correctly matters too. Start with a layer of crushed wafers at the bottom. This gives your pudding a crunchy base. Make sure to add layers of wafers between the pudding and bananas. This texture contrast makes every bite delightful.
Enhancing the Flavor
Adding vanilla and almond extracts can boost flavor. Vanilla makes it sweeter, while almond adds a nice twist. Start with one teaspoon of vanilla. If you like almond, use a half teaspoon.
Feel free to experiment with spices too. A pinch of cinnamon or nutmeg can add warmth. You can also try adding cocoa powder for a chocolate twist. Get creative and find what you like best!
Presentation Ideas
Serving can elevate your banana pudding. Use individual cups for a fun touch. They are perfect for gatherings and easy to serve. A large glass dish works well for family-style dessert.
Garnish is important for a professional look. Add crushed Nilla wafers on top for texture. Fresh mint leaves add color and freshness. You can even drizzle caramel sauce for extra sweetness. These little details make your dessert stand out.
Variations on Banana Pudding
Banana pudding is a classic dessert. You can change it up in fun ways. Here are some ideas to try.
Different Flavor Profiles
Chocolate banana pudding: Add cocoa powder to the pudding mix for a rich twist. This gives you a smooth chocolate layer. Use chocolate wafers instead of Nilla wafers for extra flavor.
Peanut butter or nut-based variations: Stir in creamy peanut butter into the pudding base. This adds a nutty taste that pairs well with bananas. You can also sprinkle crushed nuts on top for added crunch.
Healthier Options
Low-sugar and dairy-free recipes: Use almond milk or coconut milk for a lighter version. Replace sugar with honey or maple syrup to cut down on sweetness. Look for sugar-free pudding mixes to keep the flavor.
Using whole fruits in place of pudding: Instead of pudding, blend ripe bananas with a splash of milk. This creates a fresh, fruity layer. You still get that banana flavor without all the cream.
Unique Textures
Adding crunchy elements: Sprinkle crushed nuts or toffee bits between layers. This gives you a nice crunch with each bite. Try adding granola on top for a fun twist.
Incorporating whipped toppings: Top your banana pudding with whipped cream or whipped coconut cream. This adds a light, fluffy texture. It makes your dessert look fancy and tastes amazing.
These variations make banana pudding fun and exciting. You can mix and match to find your favorite!
Storage Information
Best Storage Methods
To keep your banana pudding fresh, use airtight containers. Glass or plastic containers work well. Make sure the lid seals tightly to prevent air from getting in. Cover your pudding with plastic wrap before sealing. This helps keep moisture in and stops the pudding from drying out.
Shelf Life
Banana pudding lasts about 3 to 4 days in the fridge. If you freeze it, it keeps for about 2 months. However, freezing can change the texture. Look for signs of spoilage. If you see mold or an off smell, throw it away. If the bananas turn brown, that’s normal, but it can affect taste.
Reheating Instructions
If your pudding is cold from the fridge, it may thicken. To fix this, add a splash of milk. Stir well to restore a creamy texture. Heat gently in the microwave for 15 seconds at a time. Avoid overheating, as this can change the flavor and make it weird. Enjoy your pudding fresh and tasty!
FAQs About Best Banana Pudding
What makes the best banana pudding?
The best banana pudding has a few key elements. First, you need ripe bananas. They bring natural sweetness and flavor. The pudding base should be creamy and smooth. Use a mix of whole milk and heavy cream for richness. The right balance of sugar and cornstarch is important. Sugar adds sweetness, while cornstarch thickens the pudding. Lastly, layer crushed Nilla wafers for texture. They add a delightful crunch.
How long can banana pudding sit out?
Banana pudding should not sit out for long. It’s best to keep it in the fridge. If you serve it, try to limit the time on the table. It can sit out for about two hours. After that, it may not be safe to eat. Bacteria can grow if it is warm too long. Always refrigerate leftovers to keep them fresh and tasty.
Can I use frozen bananas?
You can use frozen bananas, but they change the texture. When bananas freeze, they lose some firmness. This can make your pudding a bit mushy. The flavor will still be good, but fresh bananas are better. If you do use frozen ones, let them thaw first. Drain any extra juice to keep your pudding thick. Fresh bananas will give you that perfect bite you want in every layer.
This post covers the key steps for making the best banana pudding. You learned about essential ingredients, cooking techniques, layering, and tips for texture and flavor. Remember, you can customize it with different flavors or make healthier swaps. Storage and reheating tips ensure your pudding stays fresh and tasty. Enjoy experimenting with your banana pudding, and impress everyone with your skills! Use this guide to create a dessert that’s both delicious and memorable.
