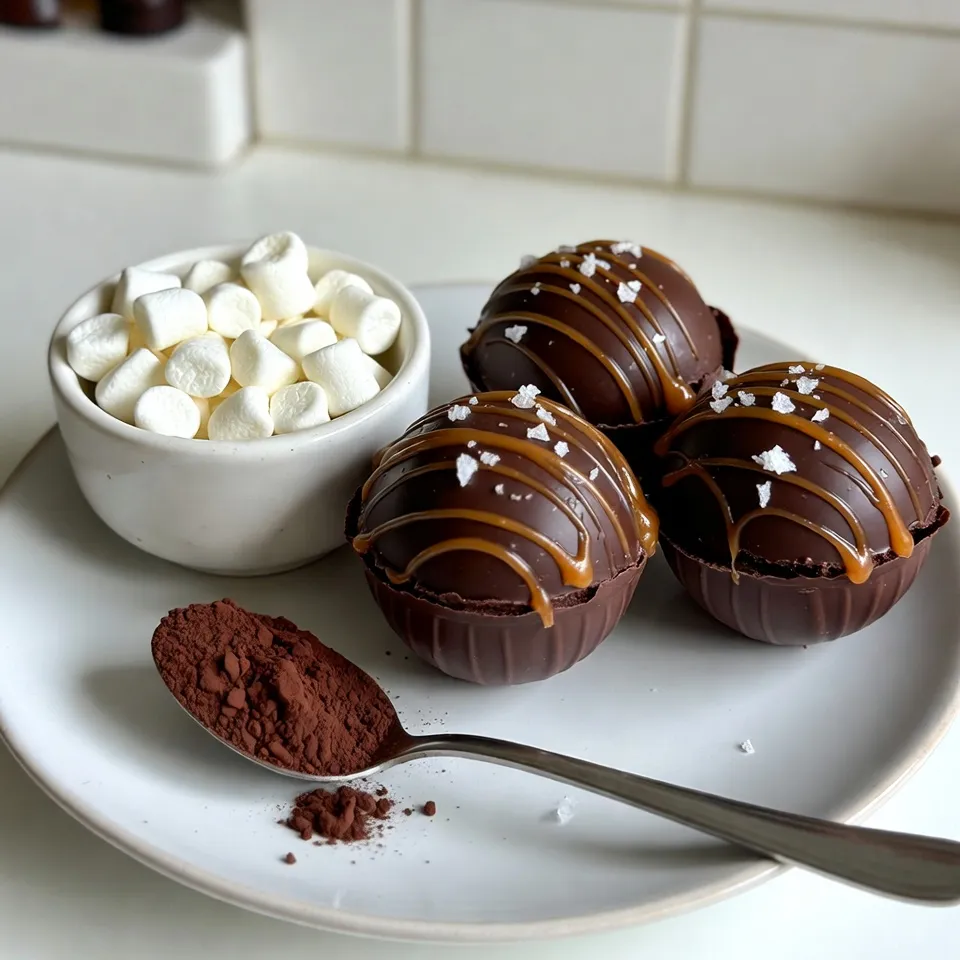
Indulge your taste buds with Salted Caramel Hot Chocolate Bombs! These delightful treats combine rich chocolate and creamy caramel, creating a cozy drink you can’t resist. As winter approaches, nothing beats a warm cup of joy made from these magical bombs. Join me as I share my best tips and easy steps to craft these incredible treats, perfect for any occasion. Let’s dive into the sweet world of hot chocolate bombs!
Why I Love This Recipe
- Decadent Flavor: The combination of rich dark chocolate and sweet caramel creates an indulgent treat that is perfect for cozy evenings.
- Fun to Make: Assembling hot chocolate bombs is a delightful activity, especially for kids or as a fun date night project.
- Customizable: You can easily adapt the fillings and toppings to suit your taste, whether you prefer different chocolates or extra flavors.
- Perfect Gift: These chocolate bombs make a charming and delicious gift for friends and family during the holidays or special occasions.
Ingredients
Required Ingredients for Salted Caramel Hot Chocolate Bombs
To make these tasty treats, you need a few key ingredients. Here’s what you’ll need:
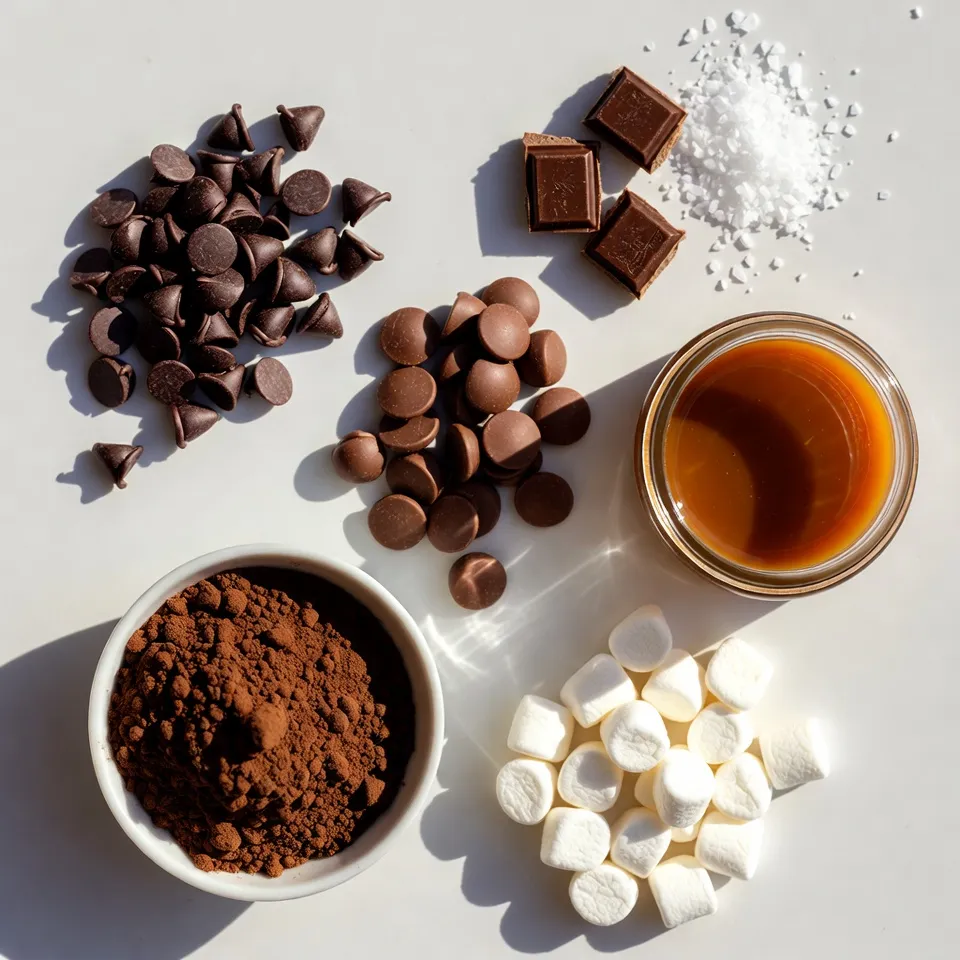
- 1 cup high-quality dark chocolate chips
- 1/2 cup milk chocolate chips
- 1 cup cocoa powder
- 1 cup caramel sauce (store-bought or homemade)
- 1/2 cup mini marshmallows
- Sea salt flakes for topping
- Silicone mold for round chocolate bombs
Each ingredient plays a special role. The dark and milk chocolate chips create a rich base. The cocoa powder adds depth to the flavor. Caramel sauce brings sweetness, while mini marshmallows add a fun twist. Don’t forget sea salt! It enhances all the flavors.
Recommended Tools and Equipment
You need the right tools to make these bombs. Here’s a list of what I recommend:
- Heatproof bowl
- Microwave or double boiler
- Spoon for coating
- Fridge for setting
- Plate for sealing
These tools help you melt the chocolate and shape the bombs perfectly. A good silicone mold is key. It makes it easy to pop out the chocolate without breaking.
Tips for Choosing the Best Quality Chocolate
Quality chocolate makes a big difference. Here are some tips for picking the best:
- Look for chocolate with a high cocoa content. This gives a rich flavor.
- Choose brands that list cocoa mass or cocoa liquor first in the ingredients.
- Avoid chocolate with too many additives. Simple is better.
Good chocolate melts well and has a smooth texture. It also tastes great on its own. Investing in quality chocolate leads to better hot chocolate bombs.
Step-by-Step Instructions
Detailed Process for Melting the Chocolate
Start by measuring one cup of dark chocolate chips. Place these in a heatproof bowl. You can melt the chocolate using a microwave or a double boiler. If using a microwave, heat in 30-second bursts. Stir the chocolate well in between. This helps it melt evenly. When it’s smooth, it’s ready for the next step.
Coating and Setting the Silicone Molds
Now, take your silicone mold and grab a spoon. Use it to coat the insides of each mold cavity with the melted chocolate. Make sure it’s a thick layer. This helps the bombs hold together. After coating, place the mold in the fridge. Let it chill for about 10-15 minutes until it sets.
Filling and Sealing the Hot Chocolate Bombs
Once the first layer is firm, repeat the coating. This time, make the layer thicker. Return the mold to the fridge for another 10-15 minutes. When fully hardened, gently pop the shells out of the mold. Take care not to break them.
To fill the bombs, take half of the shells. Add one tablespoon of cocoa powder to each. Next, layer mini marshmallows and drizzle caramel sauce on top. Sprinkle a little sea salt for extra flavor.
Now it’s time to seal the bombs. Take the empty half-shells and heat their edges on a warm plate. Press them onto the filled half-shells. If needed, use more melted chocolate to seal them well. For a decorative touch, drizzle any leftover caramel over the bombs and sprinkle with sea salt.
These steps make your salted caramel hot chocolate bombs a delight to enjoy!
Tips & Tricks
How to Achieve Perfect Chocolate Coating
To get a perfect chocolate coating, use high-quality chocolate chips. Melt them carefully in a heatproof bowl. I suggest using a microwave in short bursts. Stir the chocolate between intervals. This helps it melt evenly. Once melted, use a spoon to coat the silicone molds. Make sure to add a thick layer. This way, your bombs won’t break when you pop them out. Chill the molds in the fridge for 10-15 minutes. Then, repeat the coating for a thicker shell.
Common Mistakes to Avoid
One common mistake is not melting the chocolate properly. If it’s too hot or not hot enough, it can seize. Another mistake is using too thin a layer in the molds. This leads to weak shells. Be careful while popping them out. If they break, don’t panic. You can melt extra chocolate to fix it. Also, avoid overfilling the bombs. Too much filling can make sealing hard, causing leaks.
Best Practices for Storing Pre-Made Hot Chocolate Bombs
Store your hot chocolate bombs in a cool, dry place. Use an airtight container to keep them fresh. If you live in a warm area, keep them in the fridge. But, allow them to come to room temperature before serving. This helps them melt better in your hot milk. They can last up to two weeks if stored right. Enjoy them while they are fresh for the best taste!
Pro Tips
- Use Quality Chocolate: The better the chocolate, the better the flavor. Opt for high-quality dark and milk chocolate for the best results.
- Don’t Rush Setting: Allow each layer of chocolate to fully set in the fridge. This ensures a sturdy shell that won’t break easily.
- Seal with Care: When sealing the bomb halves, ensure they are well pressed together, and consider using extra melted chocolate to reinforce the seal.
- Customize Fillings: Feel free to experiment with different fillings like flavored syrups or different types of marshmallows to make your hot chocolate bombs unique.

Variations
Alternative Fillings for Hot Chocolate Bombs
You can play with different fillings for your hot chocolate bombs. Instead of cocoa powder, try using flavored hot chocolate mixes. Some ideas include peppermint, white chocolate, or even chai. You can also swap mini marshmallows for crushed candy canes or toffee bits. Each filling adds a fun twist that makes each bomb unique and exciting.
Different Flavor Combinations to Try
Mixing flavors can create a whole new experience. Instead of just salted caramel, how about adding a hint of espresso? You can also try orange zest or cinnamon for a warm touch. For a fruity option, use raspberry or strawberry sauce inside. Each flavor combination opens up a new world of taste and delight.
Tips for Making Vegan or Dairy-Free Versions
Making vegan or dairy-free hot chocolate bombs is easy. Use dark chocolate that does not contain milk. For the filling, opt for non-dairy milk powder or a plant-based cocoa mix. You can use coconut cream or almond milk instead of regular milk. For a creamy texture, add dairy-free whipped topping as a filling. These small changes make it easy to enjoy this treat without dairy.
Storage Information
How to Store Hot Chocolate Bombs
Store your salted caramel hot chocolate bombs in a cool, dry place. You can use an airtight container to keep them fresh. If you live in a warm area, store them in the fridge. Avoid moisture, as it can harm the chocolate’s texture.
Shelf Life of Homemade vs. Store-Bought
Homemade hot chocolate bombs last about two weeks if stored correctly. Store-bought bombs often last longer due to preservatives, up to four weeks. Always check the label for the best-by date.
Best Ways to Reheat for Enjoyment
To enjoy your hot chocolate bombs, don’t actually reheat them. Instead, pour hot milk over them. This melts the chocolate and mixes in the cocoa and marshmallows. Use milk heated to a steaming point, but not boiling. Stir well and enjoy the sweet, salted caramel flavor!
FAQs
What are Salted Caramel Hot Chocolate Bombs?
Salted caramel hot chocolate bombs are fun treats. They are round balls of chocolate filled with cocoa powder, marshmallows, and caramel. When you add hot milk, they melt and create a rich drink. The sea salt adds a nice contrast to the sweet caramel. They look fancy but are easy to make at home.
How do I use a hot chocolate bomb?
Using a hot chocolate bomb is simple and fun. You start by placing one bomb in a mug. Then, you pour hot milk over it. As the bomb melts, it releases the cocoa, marshmallows, and caramel inside. Stir everything together for a creamy drink. Enjoy every sip of this delicious treat!
Can I make these in advance for parties?
Yes, you can make salted caramel hot chocolate bombs ahead of time. Just store them in an airtight container. Keep them in a cool, dry place. They will stay fresh for about a week. This makes them perfect for parties or cozy evenings at home.
Where can I buy pre-made hot chocolate bombs?
You can find pre-made hot chocolate bombs at local stores or online. Many bakeries and specialty shops sell them. Look for ones made with quality chocolate and fun fillings. This way, you can enjoy the treat without any hassle!
In this blog post, we explored how to make delicious Salted Caramel Hot Chocolate Bombs. We covered key ingredients, the tools you need, and tips for choosing great chocolate. The step-by-step instructions show you how to melt, coat, fill, and seal your bombs. We also shared tips to ensure perfect results and tasty variations to try. Finally, I explained how to store these treats and answered common questions. Now, you have all the tools to create your own amazing hot chocolate bombs. Enjoy your sweet creation

Salted Caramel Hot Chocolate Bombs
Ingredients
- 1 cup high-quality dark chocolate chips
- 1/2 cup milk chocolate chips
- 1 cup cocoa powder
- 1 cup caramel sauce
- 1/2 cup mini marshmallows
- to taste sea salt flakes for topping
- 1 silicone mold for round chocolate bombs
Instructions
- In a heatproof bowl, melt the dark chocolate chips using a microwave in 30-second intervals or over a double boiler until smooth. Stir well between intervals to ensure even melting.
- Once melted, use a spoon to coat the insides of each cavity in a silicone mold. Ensure a thick layer to avoid breaking when unmolding. Place the coated mold in the fridge for about 10-15 minutes to set.
- After the first layer is set, repeat the coating process to create a thicker shell. Place back in the fridge for another 10-15 minutes until fully hardened.
- Gently pop the chocolate shells out of the silicone mold. Take care to avoid breaking them.
- In half of the chocolate shells, spoon about 1 tablespoon of cocoa powder, add a layer of mini marshmallows, and drizzle with caramel sauce. Top with a pinch of sea salt.
- Heat the rim of the empty half-shells briefly on a warm plate, then gently press them onto the filled half to seal. Use extra melted chocolate if necessary to ensure they are well sealed.
- Drizzle any remaining caramel sauce over the completed bombs and sprinkle with a bit more sea salt for a decorative touch.
- To use, place a hot chocolate bomb in a mug and pour steaming milk over it. Watch it melt and stir to combine, then enjoy your delicious salted caramel hot chocolate!