
Introduction
Soft pretzels have long been a cherished snack, captivating taste buds across cultures with their unique texture and delightful flavor. Whether enjoyed at a street fair, sporting event, or as a cozy homemade treat, these warm, doughy delights have a special place in our hearts. The traditional pretzel is beloved for its chewy exterior and soft interior, making it a perfect canvas for an array of toppings and fillings.
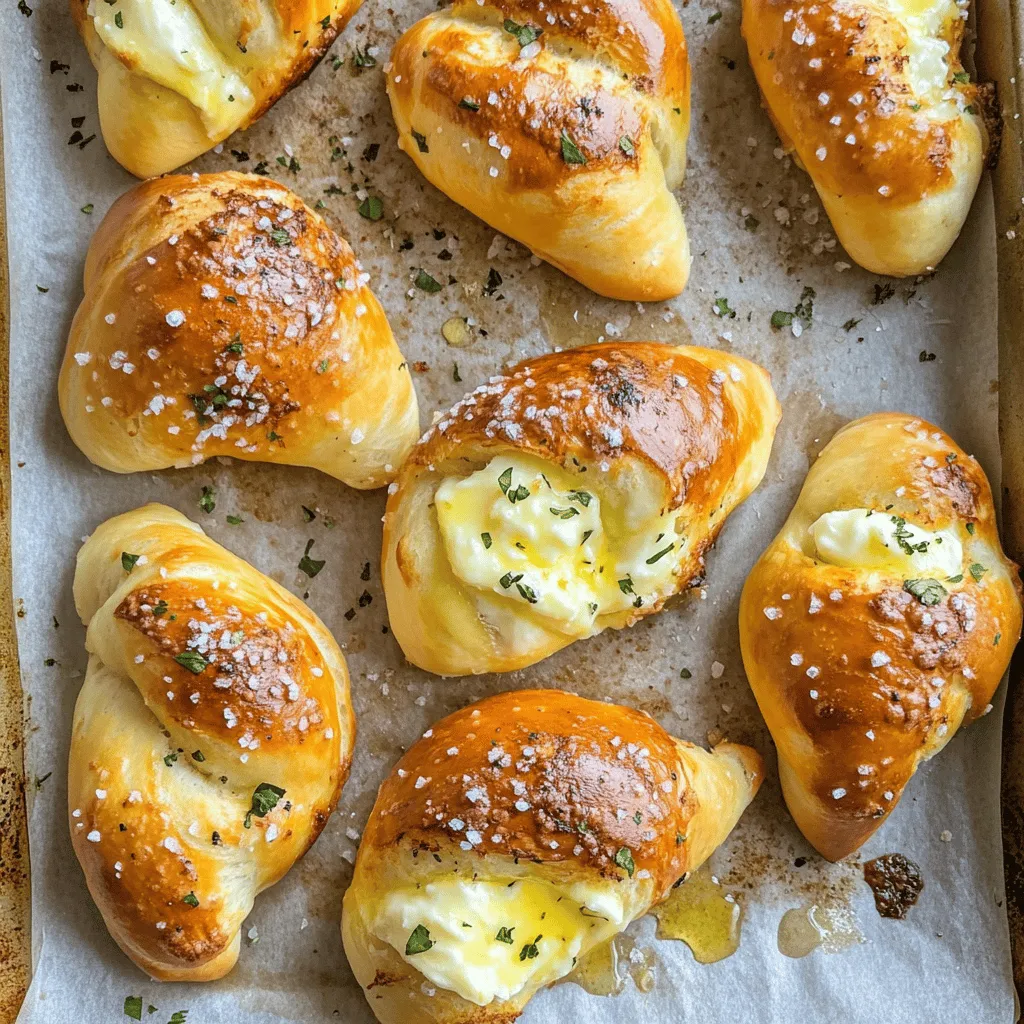
In this recipe, we’re taking the classic soft pretzel to new heights by introducing a gooey and delicious twist: mozzarella stuffing. This unexpected addition melds beautifully with the pretzel’s rich buttery flavor, creating a savory snack that is both comforting and indulgent. Perfect for parties, game day, or just a cozy night in, these mozzarella stuffed soft pretzels promise to be a crowd-pleaser.
Making snacks at home has its benefits beyond just taste. Homemade treats allow you to control the ingredients, ensuring freshness and quality while catering to personal preferences. Plus, there’s something incredibly satisfying about transforming simple ingredients into a delicious, mouthwatering snack that you can share with family and friends.
In this article, we’ll walk through the essential ingredients you’ll need and provide you with detailed step-by-step instructions to create your own mozzarella stuffed soft pretzels. By the end, you’ll not only satisfy your cravings but also master a versatile recipe that you can customize to your liking.
Understanding the Ingredients
Before diving into the preparation of these delectable pretzels, let’s take a closer look at the essential ingredients that will help bring this recipe to life.
Warm Water
Warm water is a critical component of this recipe, playing a vital role in activating the yeast. The ideal temperature for the water is between 100°F to 110°F (38°C to 43°C). Too hot, and you risk killing the yeast; too cold, and the yeast won’t activate properly. The warm water creates an optimal environment for the yeast to flourish, leading to a light and airy dough.
Active Dry Yeast
Active dry yeast is a key player in the dough-making process, responsible for fermentation and the rise of the pretzels. This type of yeast consists of dormant granules that need to be activated by warm water. As the yeast feeds on the sugars in the dough, it produces carbon dioxide, which creates air pockets and causes the dough to rise. Using fresh yeast is crucial for achieving the best texture and taste in your pretzels.
Granulated Sugar
Granulated sugar serves a dual purpose in this recipe. It not only enhances the overall flavor of the pretzels but also aids in the activation of the yeast. When sugar is combined with warm water, it provides a food source for the yeast, stimulating its growth and helping the dough rise more effectively.
All-Purpose Flour
All-purpose flour is the backbone of the pretzel dough, providing structure and stability. Its balanced protein content allows for gluten development, which gives the pretzels their characteristic chewiness. When measuring flour, it’s essential to spoon it into the measuring cup and level it off to avoid using too much, which can lead to dense pretzels.
Salt
Salt is essential for flavoring the pretzels and strengthening the dough. It enhances the overall taste and helps regulate yeast activity, ensuring a proper rise. Using the right amount of salt not only boosts flavor but also contributes to the dough’s elasticity, making it easier to shape.
Baking Soda
Baking soda plays a unique role in the pretzel-making process. After the dough is shaped, it is briefly boiled in a baking soda solution before baking. This step is crucial, as it gives pretzels their signature dark brown color and distinctive flavor. The alkaline nature of baking soda creates a Maillard reaction during baking, resulting in a beautiful crust.
Egg Wash
An egg wash is applied to the pretzels before baking to achieve that gorgeous golden-brown color. The egg wash enhances the appearance of the pretzels, giving them a shiny finish that makes them even more appetizing. It also helps any toppings, such as coarse sea salt, adhere to the surface.
Coarse Sea Salt
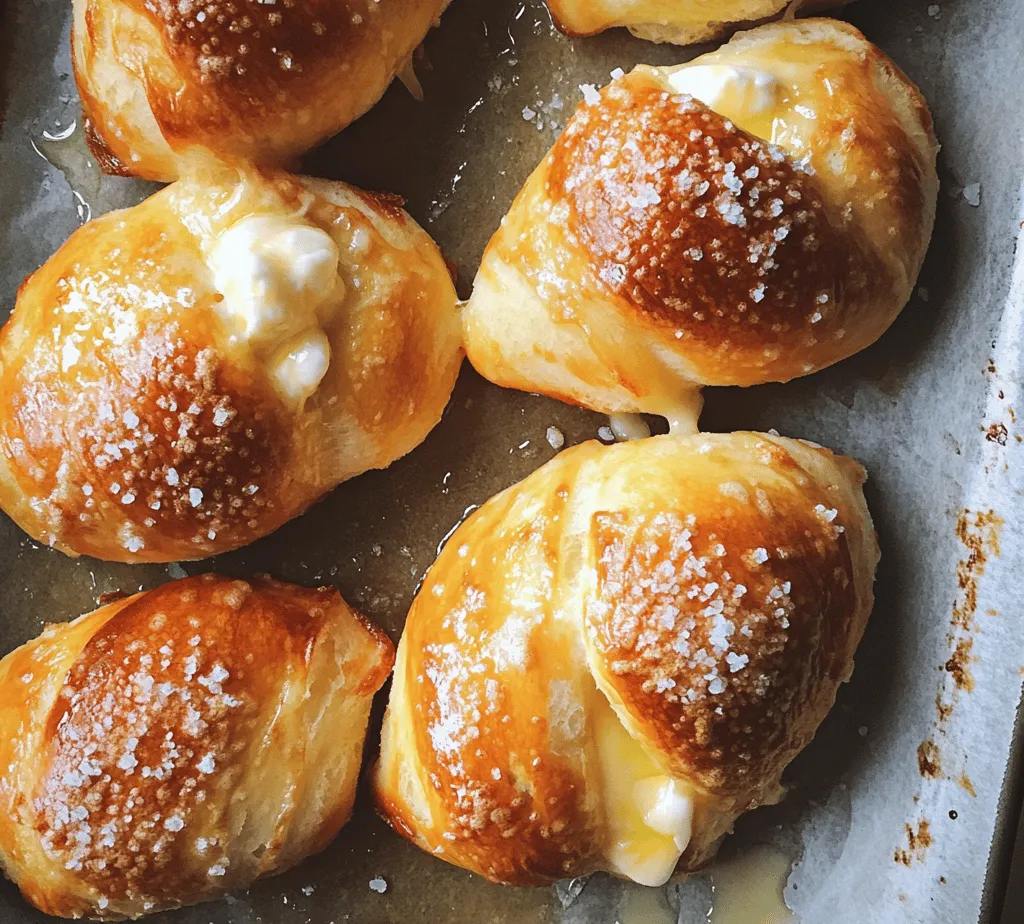
Coarse sea salt is the finishing touch that elevates the flavor of the pretzels. It adds a delightful crunch and salty kick, perfectly complementing the soft, chewy interior. When sprinkling salt on the pretzels, be generous but ensure it’s evenly distributed for balanced seasoning.
Mozzarella Cheese
The star of the show in this recipe is, of course, the mozzarella cheese. Its creamy texture and mild flavor create a delightful contrast to the salty, chewy pretzel exterior. As the pretzels bake, the cheese melts into a gooey filling that is sure to please. Fresh mozzarella is recommended for the best melting quality, but shredded mozzarella can also be used if that’s what you have on hand.
Optional Flavorings
While the classic mozzarella stuffed pretzel is delicious as is, feel free to experiment with optional flavorings to make the recipe your own. You can add herbs, garlic powder, or even a sprinkle of Italian seasoning to the dough for a little extra zing. Additionally, consider using different types of cheese or even adding spices to the filling to create unique flavor combinations.
Step-by-Step Instructions
Preparing the Dough
Now that you’re familiar with the ingredients, let’s dive into the preparation of the dough. This process is straightforward but requires attention to detail to achieve the perfect texture for your pretzels.
Detailed Explanation of the Yeast Activation Process
1. Combine warm water and sugar: In a mixing bowl, combine warm water and granulated sugar. Stir gently to dissolve the sugar completely.
2. Add the yeast: Sprinkle the active dry yeast over the surface of the warm water mixture. Allow it to sit for about 5 to 10 minutes until it becomes frothy. This froth indicates that the yeast is active and ready to use.
Mixing the Dough: Tips for Achieving the Right Consistency
3. Combine dry ingredients: In a separate large mixing bowl, whisk together the all-purpose flour and salt. Creating a well in the center, pour in the activated yeast mixture.
4. Mix the dough: Using a wooden spoon or your hands, mix the ingredients until they begin to come together. The dough should be slightly sticky but manageable. If it feels too wet, gradually add more flour, a tablespoon at a time, until you reach the right consistency.
Kneading the Dough
5. Knead the dough: Turn the dough out onto a lightly floured surface. Knead the dough for about 5 to 7 minutes, until it becomes smooth and elastic. Proper kneading is essential for gluten development, which contributes to the pretzel’s chewy texture. You’ll know the dough is ready when it springs back when poked and feels soft and pliable.
Allowing the Dough to Rise
6. Place the dough in a greased bowl: Lightly grease a large mixing bowl with oil and place the kneaded dough inside, turning it to coat all sides with oil. This prevents the dough from drying out as it rises.
7. Cover and let rise: Cover the bowl with a clean kitchen towel or plastic wrap. Allow it to rise in a warm, draft-free area for about 1 to 1.5 hours, or until it has doubled in size. The rising process is crucial, as it allows the yeast to work its magic, creating an airy dough.
The Science Behind Dough Rising and Optimal Conditions
The ideal rising temperature is around 75°F to 80°F (24°C to 27°C). If your kitchen is cooler, consider placing the dough in a slightly warm oven (turned off) with the door closed to maintain warmth. You can also place a bowl of hot water at the bottom of the oven to create a warm environment.
8. Check for readiness: After the rising time has elapsed, gently press your finger into the dough. If the indentation remains, the dough is ready to be shaped.
Preheating the Oven
9. Preheat the oven: While the dough is rising, preheat your oven to 425°F (220°C). Preheating is essential to ensure that the pretzels bake evenly and achieve that perfect golden-brown crust.
10. Prepare the baking sheet: Line a baking sheet with parchment paper or a silicone baking mat to prevent sticking, making for easy transfer after boiling.
Shaping the Pretzels
11. Divide the dough: Once the dough has risen, punch it down to release any air bubbles. Turn it out onto a lightly floured surface and divide it into equal pieces, about 8 to 10, depending on your preferred pretzel size.
12. Shape the pretzels: Roll each piece of dough into a long rope, about 24 inches in length. Create a U-shape with the rope, twist the ends around each other twice, and then fold them back down to form the classic pretzel shape.
As you shape each pretzel, make sure to tuck the ends underneath to secure them and avoid any unraveling during boiling and baking.
With the pretzels shaped and ready, you’re well on your way to enjoying a batch of mozzarella stuffed soft pretzels that are sure to impress. Stay tuned for the next section, where we will cover the boiling process, baking, and additional tips for perfecting your pretzel-making skills!
Detailed Instructions on Forming Pretzel Shapes
Once your dough has risen, it’s time to shape your pretzels. Start by dividing the dough into equal sections, roughly 2 ounces each, which will yield about 12 pretzels. Lightly flour your work surface to prevent sticking.
1. Roll the Dough: Take one piece of dough and roll it into a long rope, approximately 24 inches long. Use your hands to gently stretch and elongate the dough, maintaining even thickness throughout.
2. Forming the Pretzel Shape: To create the iconic pretzel shape, take the two ends of the rope and cross them over each other, forming a loop in the center. Then, twist the ends around each other once more and fold them back toward the base of the loop. Press the ends into the dough to secure the shape. Repeat this process with the remaining pieces of dough.
Tips for Ensuring the Pretzels Maintain Their Shape
Maintaining the shape of your pretzels during boiling and baking is crucial. Here are some tips:
- Don’t Overwork the Dough: Over-kneading can make the dough tough, affecting its ability to hold shape. Knead just enough to combine ingredients and develop gluten.
- Rest Between Shaping: After shaping, allow the pretzels to rest for about 10 minutes. This will help relax the gluten and reduce shrinkage during boiling.
- Use Parchment Paper: Place shaped pretzels on parchment-lined trays, which will make it easier to transfer them into the boiling water without losing shape.
Stuffing the Pretzels
Now comes the exciting part: stuffing your pretzels with gooey mozzarella cheese.
1. Creating the Pocket: Gently stretch the dough in the center of the pretzel shape to form a pocket. Be careful not to tear the dough; you want to create enough space to hold the cheese without compromising the structure.
2. Filling with Cheese: Take a small piece of mozzarella (about 1 ounce) and place it in the pocket.
3. Sealing the Pretzels: Pinch the dough around the cheese to seal it completely. Make sure there are no gaps, as this will prevent the cheese from leaking during boiling and baking.
Importance of Sealing to Prevent Leaks During Boiling and Baking
Properly sealing the pretzels is essential for a successful outcome. If the cheese leaks out during boiling, it could create a mess in your pot and leave you with less cheesy pretzels. Make sure to:
- Check for Gaps: After sealing, inspect each pretzel for any openings. If you find any, reshape and pinch the dough until it’s secure.
- Use Extra Dough if Needed: If the dough feels too thin at the seams, you can use small scraps from other pieces to reinforce the closure.
Preparing the Baking Soda Bath
The unique texture and flavor of soft pretzels come from the baking soda bath they undergo before baking.
1. Mixing the Bath: In a large pot, bring 10 cups of water to a boil. Once boiling, carefully add ⅔ cup of baking soda. Be cautious, as the mixture will bubble up vigorously.
2. Chemistry Behind the Boiling Process: The alkaline solution created by the baking soda bath helps develop the pretzel’s distinct crust and rich color. It reacts with the dough’s proteins, enhancing the Maillard reaction during baking, which gives pretzels that signature golden-brown hue.
3. Safety Tips for Handling Boiling Water and Baking Soda: Always wear gloves when handling hot water and baking soda to avoid burns. Use a long spoon to stir the mixture, and ensure children or pets are at a safe distance.
Boiling the Pretzels
Boiling is a critical step that contributes to the pretzel’s texture.
1. Timing and Flipping: Carefully lower each pretzel into the boiling water, allowing them to boil for about 30 seconds on each side. Use a slotted spoon to flip them; this will ensure even cooking and a uniform texture.
2. How Boiling Impacts the Final Product: Boiling the pretzels sets the shape, creates a chewy crust, and enhances the flavor. Skipping this step may result in a doughy interior and lack of that satisfying pretzel bite.
Applying the Egg Wash
An egg wash is essential for achieving that glossy finish.
1. Techniques for Even Application: Beat one egg with a tablespoon of water to create your egg wash. Using a pastry brush, apply a thin layer over each pretzel, ensuring full coverage.
2. Importance of Seasoning at This Stage: After applying the egg wash, sprinkle coarse sea salt or any seasoning of your choice (like garlic powder or sesame seeds) on top. This adds flavor and texture, enhancing the overall pretzel experience.
Baking to Perfection
Now, it’s time to bake your pretzels.
1. Signs That Pretzels Are Ready to Come Out of the Oven: Pretzels should be golden brown and firm to the touch. If they appear pale or doughy, give them an extra minute or two in the oven.
2. Optimal Baking Times for Achieving Golden-Brown Color: Bake the pretzels in a preheated oven at 425°F (220°C) for 12-15 minutes. Keep an eye on them, as oven temperatures can vary, and you want to catch them at the perfect moment.
Coating with Butter and Serving
To finish off your pretzels, add a touch of richness.
1. Final Touches to Enhance Flavor: Once the pretzels are out of the oven, immediately brush them with melted butter. This adds a delicious flavor and helps any additional toppings stick.
2. Suggestions for Dipping Sauces and Pairing Options: Serve your mozzarella stuffed soft pretzels warm with a variety of dips. Classic options include mustard, cheese sauce, or marinara. You may also consider pairing them with a spicy sriracha mayo for a kick or a sweet honey mustard for a contrasting flavor.
Nutritional Information
Each mozzarella stuffed soft pretzel contains approximately:
- Calories: 250
- Protein: 8g
- Carbohydrates: 32g
- Fat: 10g
- Fiber: 1g
While these pretzels are indulgent, they can be enjoyed as part of a balanced diet. The protein from the cheese helps to satisfy hunger, making them a delightful snack or appetizer.
Culinary Tips and Variations
Get creative with your pretzel-making experience! Here are some culinary tips and variations:
- Customizing Flavors: Experiment with different cheeses such as cheddar or pepper jack for added flavor. You can also mix in herbs or spices into the dough itself for a unique twist.
- Alternative Dipping Sauces: Consider serving your pretzels with creamy ranch dressing, spicy ketchup, or even a sweet chocolate sauce for dessert pretzels.
- Storage Tips for Leftovers: Store any leftover pretzels in an airtight container at room temperature for up to 2 days. For longer storage, freeze them in a single layer on a baking sheet, then transfer to a freezer bag for up to 3 months.
- Reheating Methods: To reheat, bake them in a preheated oven at 350°F (175°C) for about 5-7 minutes, or microwave for 15-20 seconds. Enjoy them fresh for the best texture!
Conclusion
Creating mozzarella stuffed soft pretzels at home is a rewarding culinary adventure. The process allows you to engage with your ingredients and discover the satisfaction of crafting delicious snacks from scratch.
We encourage you to try out this recipe and share it with friends and family. The joy of homemade snacks lies not only in their taste but also in the memories created around them. Whether you serve these pretzels as a party appetizer, a game-day snack, or a comforting treat during a movie night, they are sure to be a hit.
Embrace the versatility of this recipe and make it your own. Happy baking!