Sheet-Pan Maple Dijon Pork Tenderloin and Brussels Sprouts
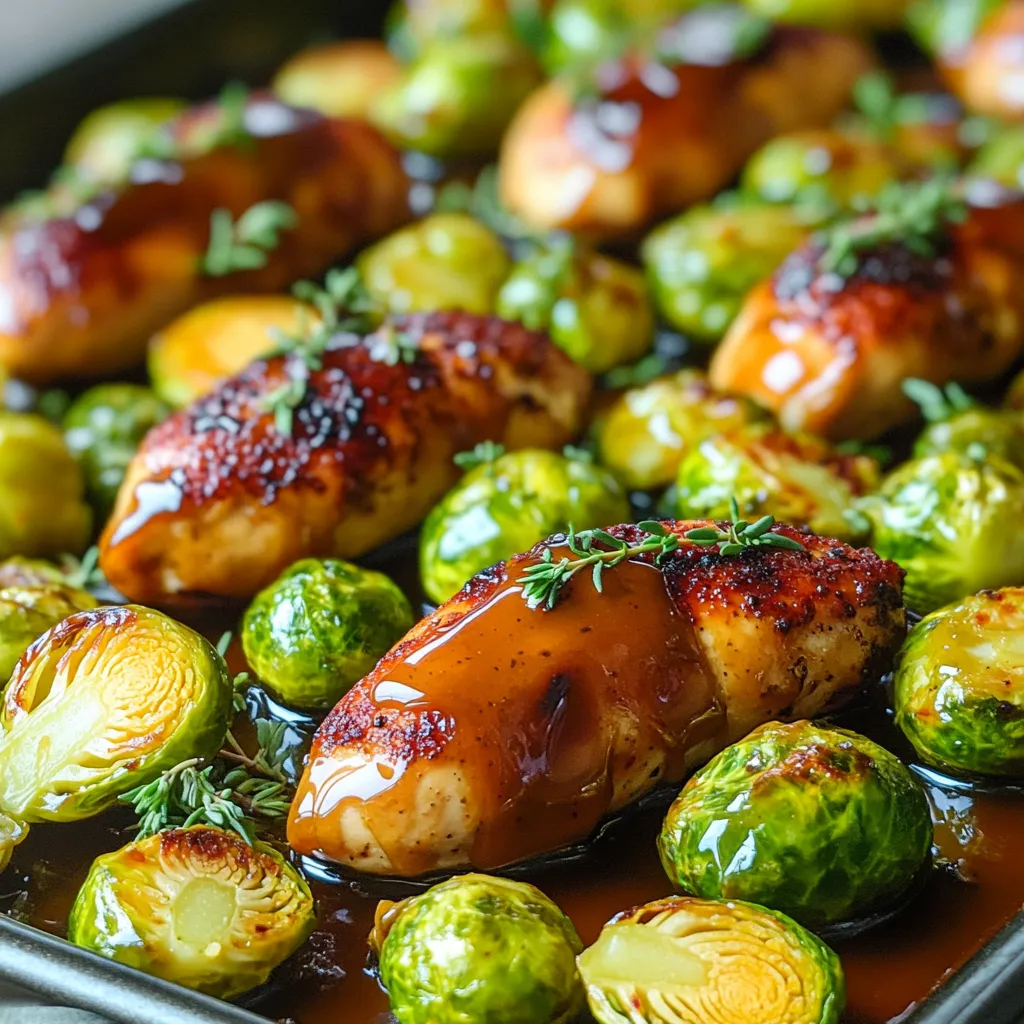
Ready to impress at your next dinner? Try my Sheet-Pan Maple Dijon Pork Tenderloin and Brussels Sprouts! This dish combines

Ready to impress at your next dinner? Try my Sheet-Pan Maple Dijon Pork Tenderloin and Brussels Sprouts! This dish combines
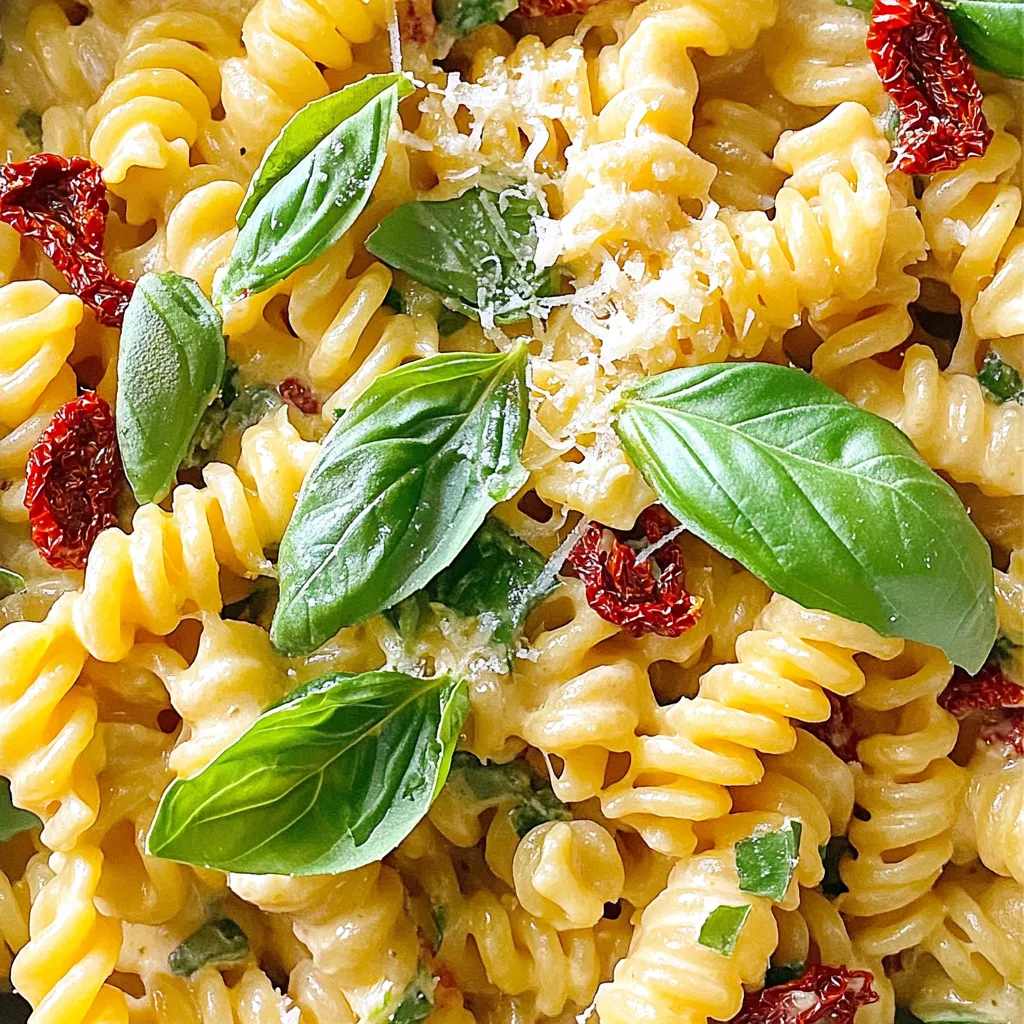
Are you ready to whip up a tasty meal with minimal fuss? This Creamy One-Pot Sun-Dried Tomato Basil Pasta is
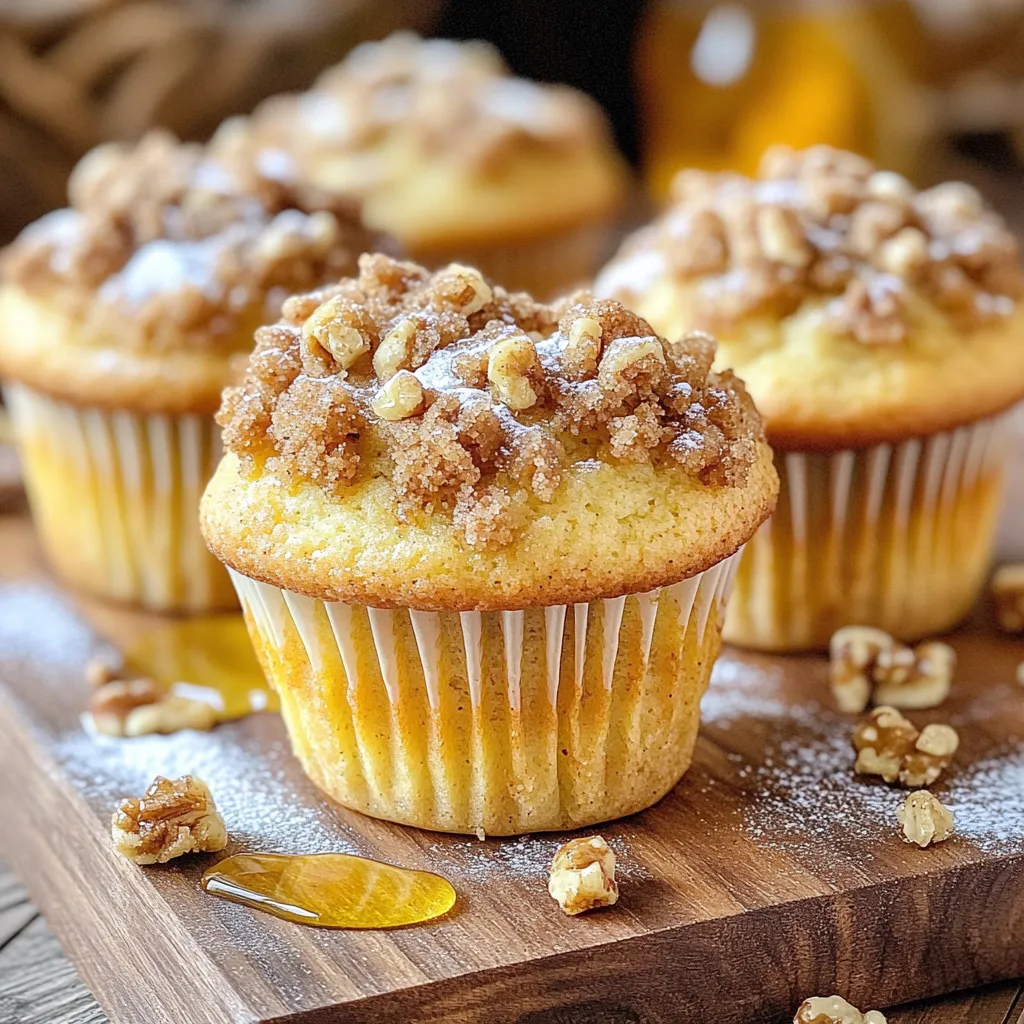
Get ready to bake some joy with my Bakery-Style Honey Walnut Streusel Muffins! These muffins are soft, sweet, and topped
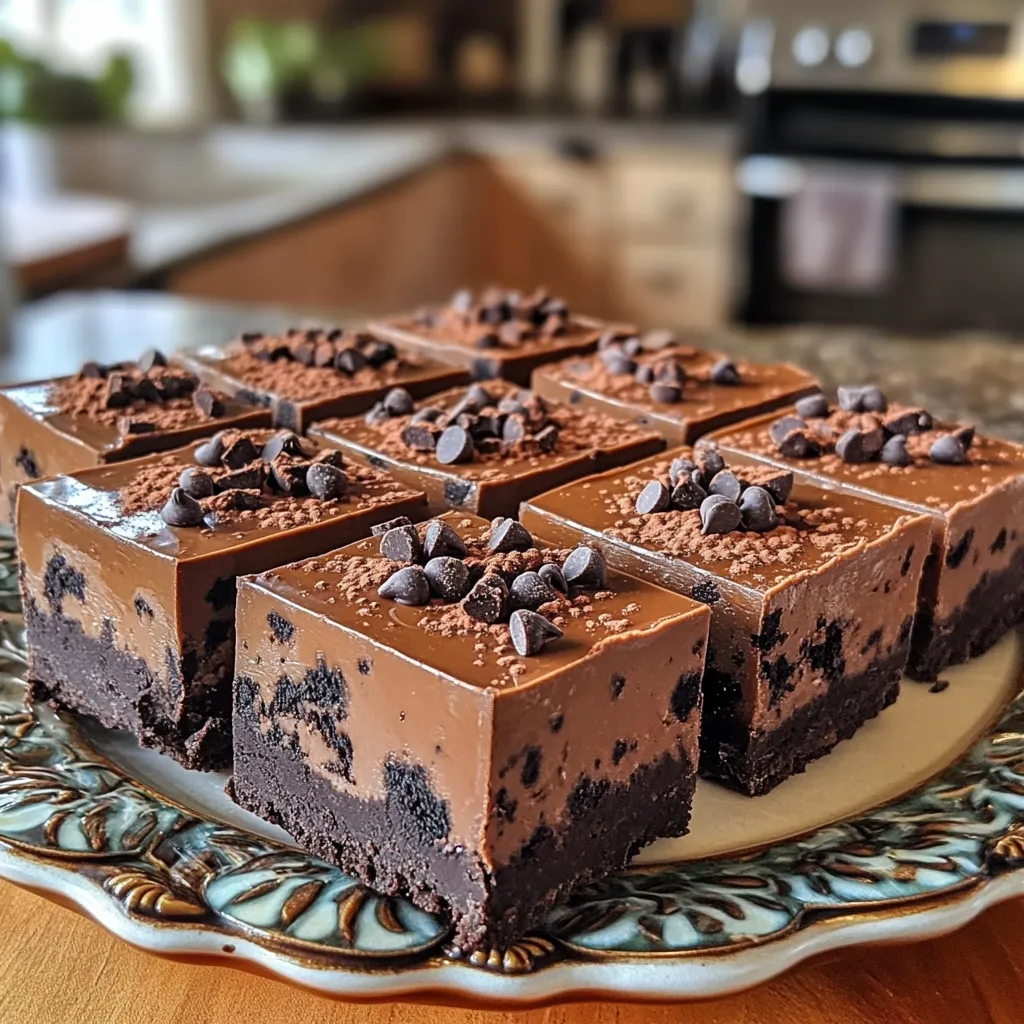
Craving a sweet treat that’s quick and easy? No-Bake Mocha Oreo Fudge Bars are your answer! With rich flavors from
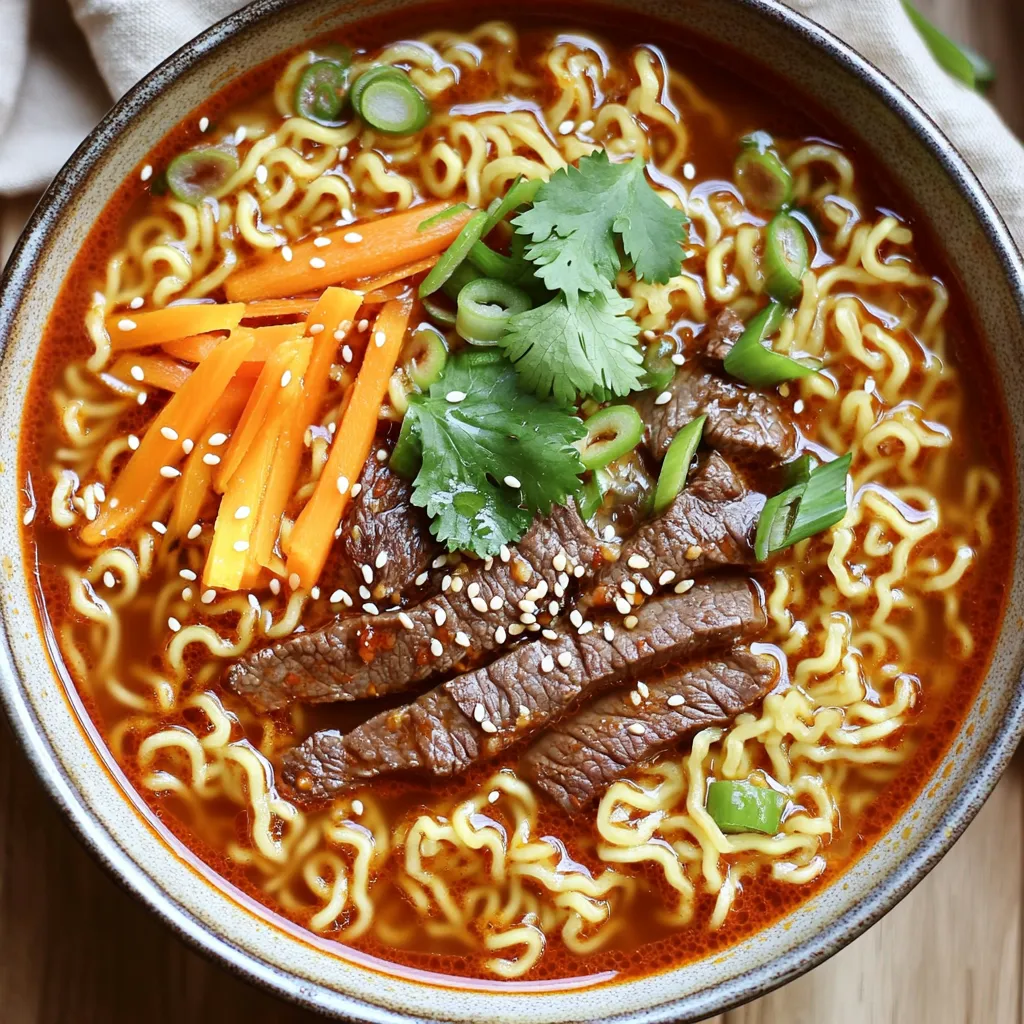
Are you craving a quick, tasty meal that packs a punch? Look no further than Minute Chili Sesame Beef Ramen!

Get ready to elevate taco night with my Air Fryer Crispy Coconut Shrimp Tacos! This delightful meal combines juicy shrimp,
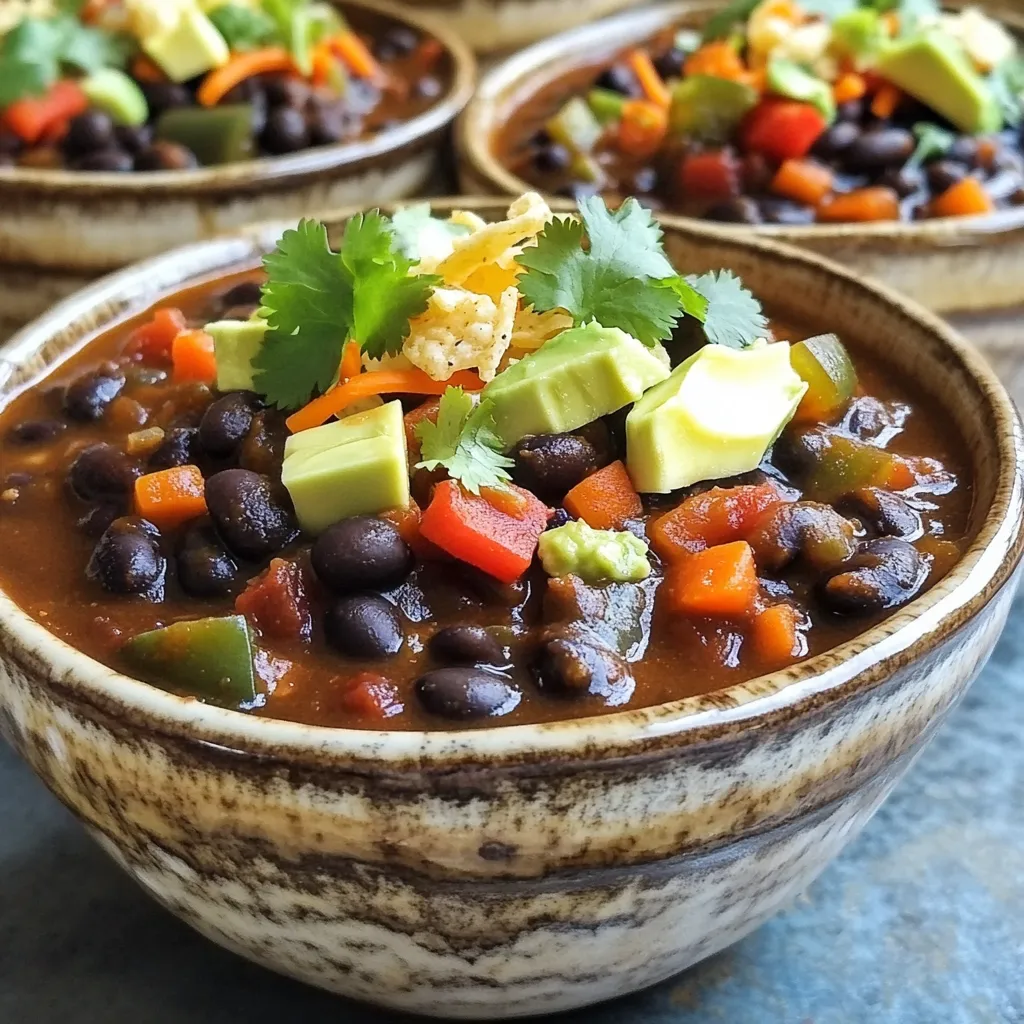
Are you ready to warm up your taste buds? My Slow Cooker Chipotle Black Bean Chili is the perfect dish
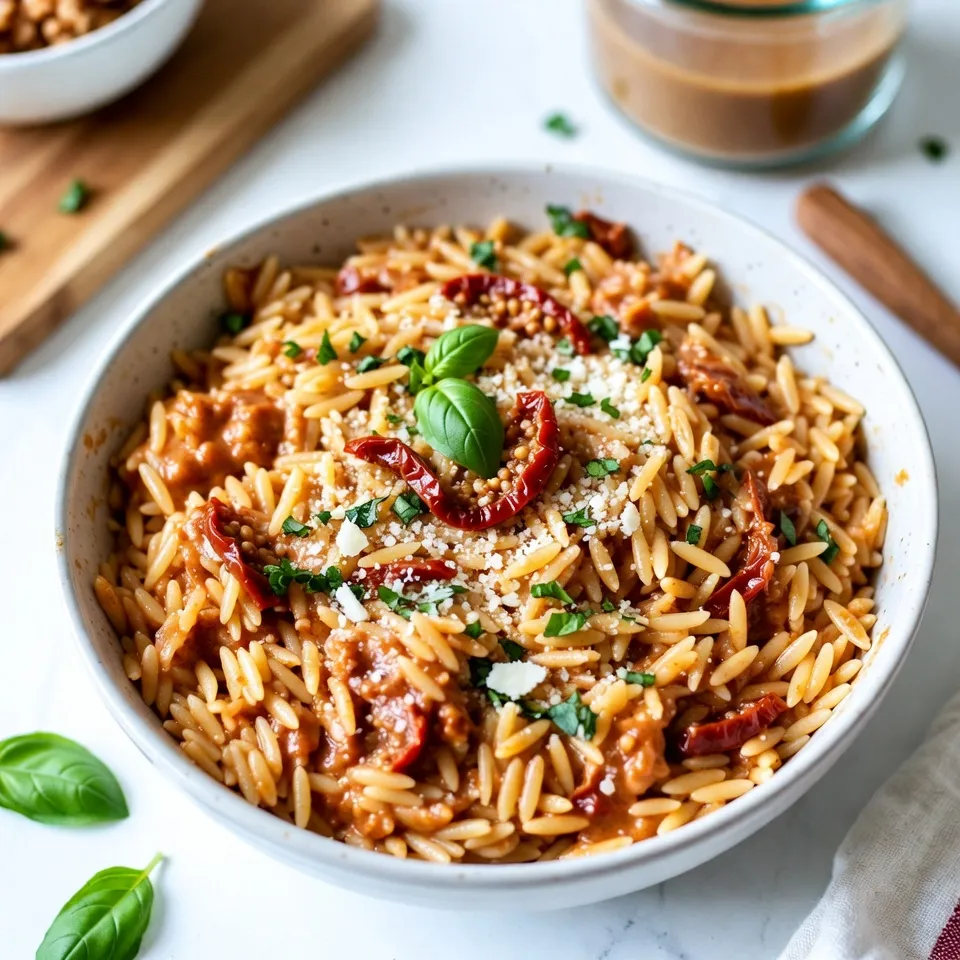
Are you ready to delight your taste buds with a creamy, savory dish? This Creamy Sun-Dried Tomato Orzo is a
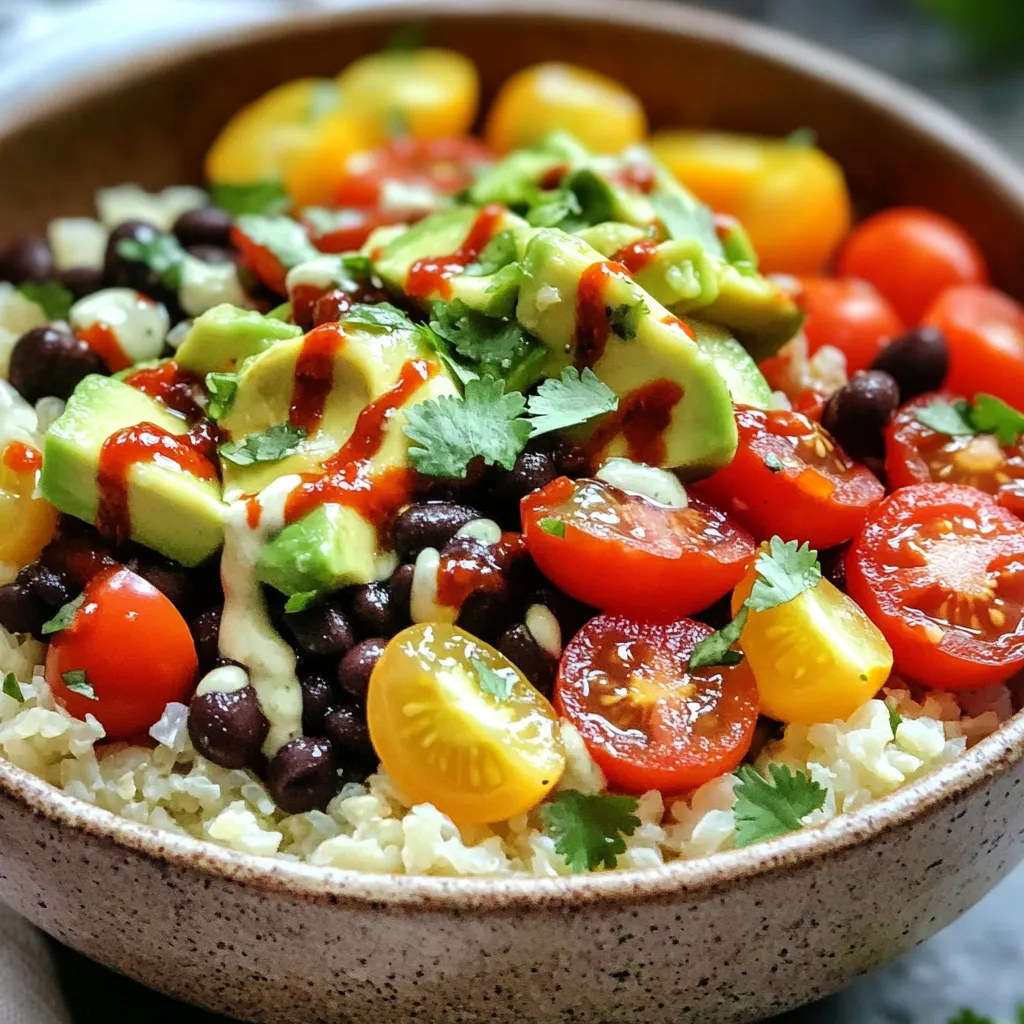
Are you ready to elevate your meal prep with a fresh twist? My Sriracha Lime Cauliflower Rice Bowls blend tasty
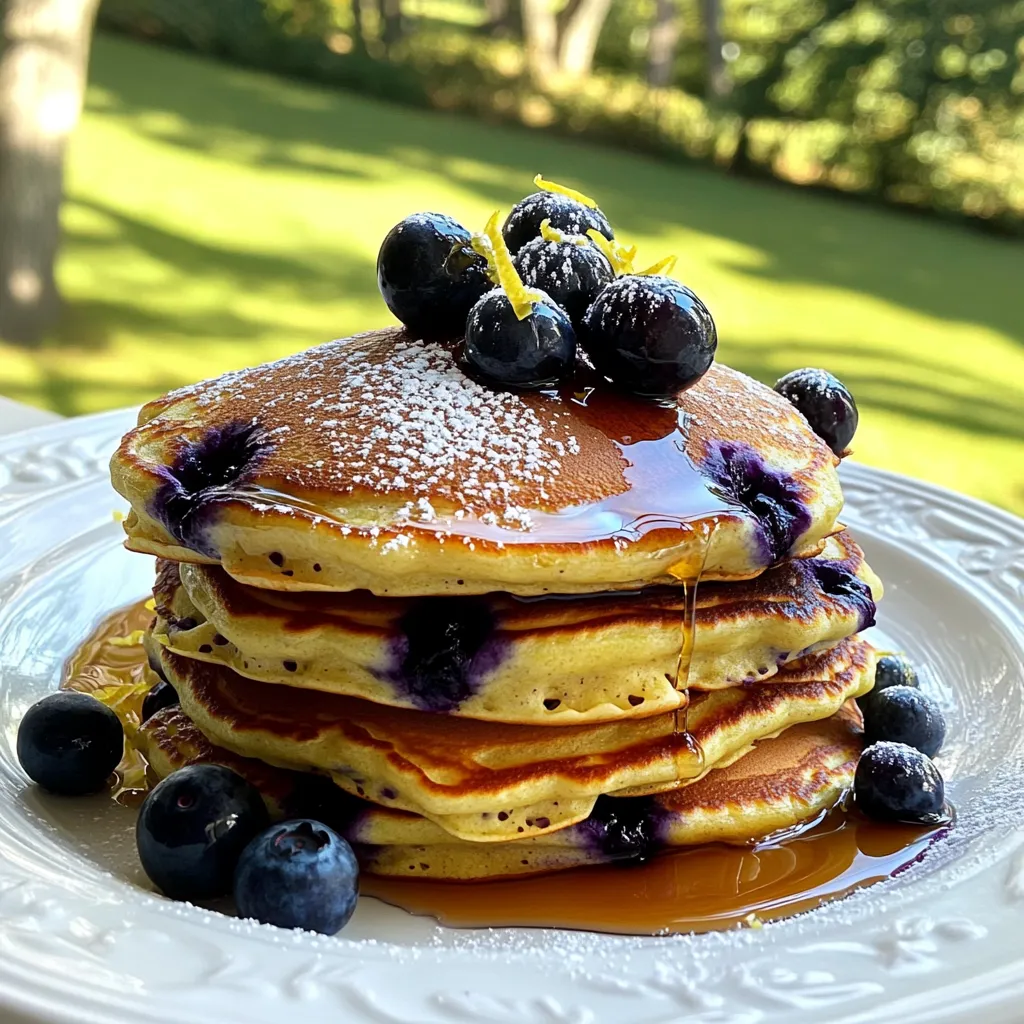
Imagine waking up to the sweet aroma of Lemon Blueberry Ricotta Pancakes filling your kitchen. These fluffy delights combine creamy