Introduction
There’s something undeniably charming about homemade pasta, especially when it comes to a dish as delightful as Beef & Parmesan Tortellini. This dish is a perfect representation of Italian culinary tradition, combining rich flavors and textures in a way that warms both the heart and the palate. The process of making tortellini from scratch is an experience that not only hones your cooking skills but also fills your kitchen with enticing aromas that evoke the warmth of an Italian kitchen.
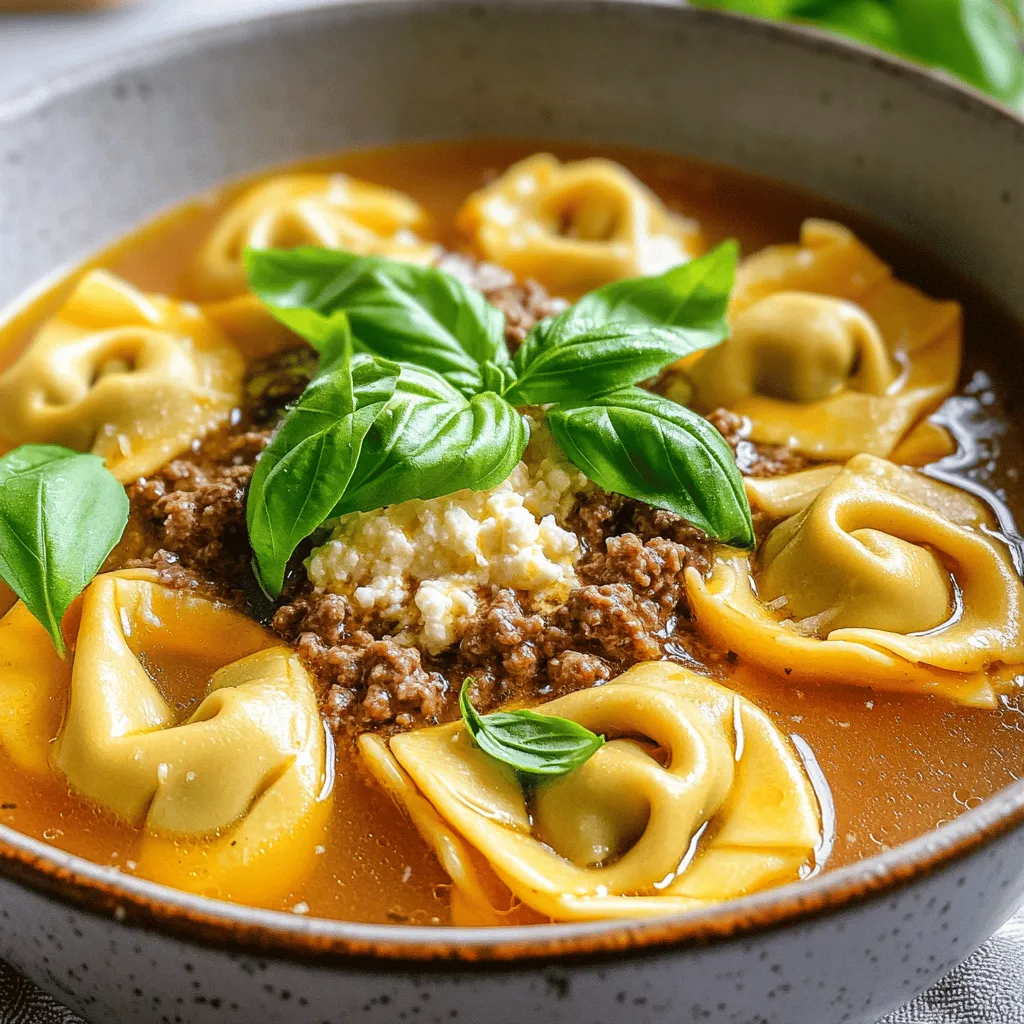
The appeal of Beef & Parmesan Tortellini lies not just in its flavor but also in the joy of creating something special from scratch. Imagine rolling out fresh dough, crafting little pockets filled with a savory mixture of ground beef and creamy cheeses, and then simmering them in a rich broth. This recipe is perfect for family gatherings, special occasions, or simply as a comforting meal on a chilly evening.
As we delve into this recipe, prepare to embrace the joy of cooking. Each step is a celebration of culinary craftsmanship, from the kneading of the dough to the careful folding of the tortellini. So, roll up your sleeves, gather your ingredients, and let’s embark on this delicious journey into homemade pasta-making!
Understanding the Ingredients
To create the perfect Beef & Parmesan Tortellini, understanding the ingredients is key. Each component plays a vital role in contributing to the overall flavor, texture, and authenticity of the dish. Here’s a closer look at the essential ingredients you’ll need:
All-Purpose Flour
All-purpose flour serves as the foundation for our tortellini dough. It provides the necessary structure and elasticity, allowing the pasta to hold its shape once filled. When selecting flour, opt for a high-quality brand to ensure a smooth dough that can be rolled thinly without tearing. A good dough consistency is crucial, as it sets the stage for the overall texture of the tortellini.
Eggs
Eggs are a key ingredient in pasta-making, acting as a binder that enriches the dough. They add moisture and fat, resulting in a tender and flavorful pasta. When selecting eggs, try to use fresh, organic ones if possible, as they can enhance the taste and richness of your tortellini.
Ground Beef
At the heart of our filling is ground beef, which provides a robust and savory flavor. Opt for lean ground beef for a healthier option, but ensure it still has enough fat content to maintain moisture and enhance flavor during the cooking process. The quality of the meat is essential; sourcing from a trusted butcher can make a significant difference in the final dish.
Parmesan and Ricotta
These two cheeses are integral to achieving the signature creaminess and depth of flavor in our tortellini filling. Parmesan adds a sharp, nutty flavor, while ricotta contributes a light, creamy texture that balances the richness of the beef. Look for freshly grated Parmesan and high-quality ricotta for the best results; these small details elevate the dish to another level.
Herbs and Spices
A blend of herbs and spices adds depth and complexity to our filling. Garlic is a must for its aromatic qualities, while oregano provides a hint of earthiness. Freshly cracked black pepper enhances the flavors and adds a touch of warmth. You can also consider adding a pinch of nutmeg to the filling, which complements the dairy and meat beautifully.
Beef Broth
Finally, beef broth is essential for cooking our tortellini. It serves as the flavorful base for simmering the pasta, infusing it with rich, savory notes. Homemade broth is ideal, but if you’re short on time, high-quality store-bought broth will still work wonders. The broth not only enhances the taste but also creates a comforting sauce that brings the entire dish together.
Step-by-Step Guide to Making Beef & Parmesan Tortellini
Now that we’ve explored the ingredients, let’s dive into the step-by-step process of making Beef & Parmesan Tortellini. This section will guide you through each stage, emphasizing the importance of technique and timing to achieve the best results.
Making the Dough
1. Gather Your Ingredients: Start by measuring out 2 cups of all-purpose flour and creating a mound on a clean work surface. Make a well in the center of the flour, creating a crater-like shape to hold the eggs.
2. Add the Eggs: Crack two large eggs into the well. Using a fork, gently beat the eggs, gradually incorporating the flour from the edges of the well. Be careful not to break the walls of the flour; you want to maintain the structure while mixing.
3. Knead the Dough: Once the dough begins to form, use your hands to bring it together. Knead the dough for about 8-10 minutes until it becomes smooth and elastic. If the dough is too sticky, sprinkle a little more flour as needed. The goal is to achieve a soft, pliable dough that isn’t too dry or too sticky.
4. Rest the Dough: Wrap the kneaded dough in plastic wrap or cover it with a clean kitchen towel. Allow it to rest at room temperature for at least 30 minutes. This resting period is crucial as it relaxes the gluten, making the dough easier to roll out.
5. Roll Out the Dough: After resting, divide the dough into quarters. Keep the pieces you’re not currently using covered to prevent them from drying out. Use a rolling pin or a pasta machine to roll the dough as thin as possible, about 1/16 inch thick. Dust with flour to prevent sticking, and cut the rolled dough into squares or circles, depending on your preferred tortellini shape.
Preparing the Filling
1. Cook the Ground Beef: In a skillet over medium heat, add a drizzle of olive oil. Once hot, add 1 pound of ground beef and cook until browned, breaking it apart with a spatula. Drain any excess fat.
2. Add Garlic and Spices: Once the beef is cooked, add minced garlic (about 2-3 cloves), salt, black pepper, and oregano. Cook for an additional minute until the garlic becomes fragrant.
3. Combine with Cheeses: In a mixing bowl, combine the cooked beef mixture with 1 cup of ricotta cheese and ½ cup of grated Parmesan cheese. Mix well until all ingredients are evenly incorporated. Taste and adjust seasoning if needed.
Filling the Tortellini
1. Fill the Dough: Take a square or round piece of dough and place about 1 teaspoon of the filling in the center. Be careful not to overfill, as this can cause the tortellini to burst during cooking.
2. Seal the Tortellini: Moisten the edges of the dough with a little water. Fold the dough over the filling to create a triangle (if using squares) or to form a half-moon (if using circles). Press firmly to seal, ensuring there are no air pockets inside.
3. Shape the Tortellini: For traditional tortellini, bring the two corners of the triangle together and pinch them to form a ring. If you’re using circles, fold them in half and twist the ends together. Repeat this process until all the dough and filling are used.
Cooking the Tortellini
1. Prepare the Broth: In a large pot, bring 4 cups of beef broth to a gentle boil. You can also add a bay leaf or sprigs of fresh herbs for added flavor if you like.
2. Cook the Tortellini: Gently drop the tortellini into the boiling broth. Cook them for about 4-5 minutes, or until they float to the surface and are tender. Fresh tortellini cooks much faster than dried pasta, so keep a close eye on them.
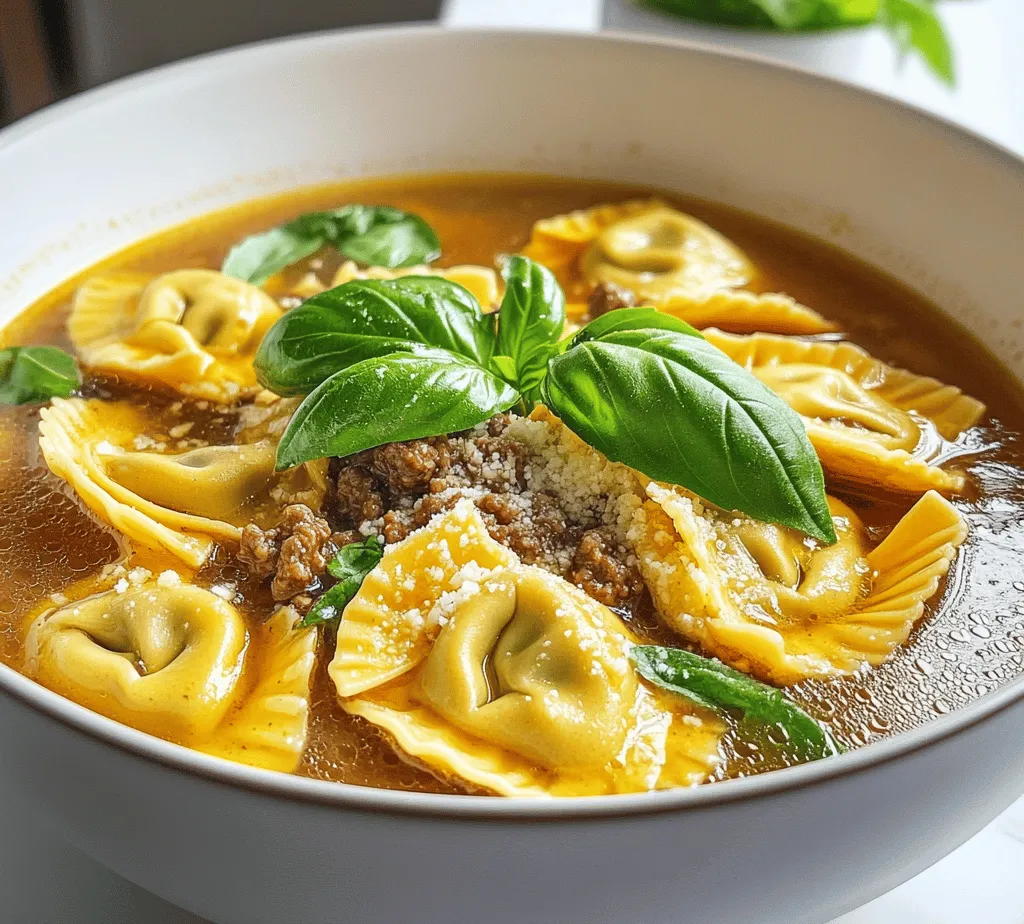
3. Serve and Enjoy: Once cooked, remove the tortellini from the broth using a slotted spoon. Serve immediately in bowls with a ladle of broth over the top. Garnish with additional grated Parmesan cheese and fresh herbs for a touch of elegance.
With these detailed steps, you’re well on your way to creating your own Beef & Parmesan Tortellini Delight. This dish not only showcases the joy of cooking but also brings the warmth of Italian tradition into your home. Stay tuned for more tips and variations that can elevate your cooking experience even further!
Preparing the Filling
The foundation of any great tortellini lies in its filling, and for our Beef & Parmesan Tortellini Delight, you will want to achieve a perfectly browned beef that is infused with savory flavors. Start by selecting high-quality ground beef, preferably 80/20 for the right balance of flavor and moisture.
1. Browning the Beef: Heat a skillet over medium-high heat and add a tablespoon of olive oil. Once hot, add the ground beef. Use a wooden spoon to break it apart as it cooks. Allow the beef to sear without constant stirring, which helps develop a rich, deep flavor. Cook until browned, about 5-7 minutes. Don’t rush this step; the browning is crucial for flavor.
2. Seasoning and Combining Flavors: Once the beef is browned, drain any excess fat. Add finely chopped onions, minced garlic, and a pinch of salt and pepper. Cook for an additional 2-3 minutes until the onions become translucent. You can also incorporate fresh herbs like parsley or thyme for added depth. Finally, stir in grated Parmesan cheese, allowing it to melt slightly and mix with the beef. This will create a rich, cheesy filling that’s packed with flavor.
Rolling the Dough
With the filling ready, it’s time to roll out the dough. This step requires patience and a little bit of technique, but it’s immensely satisfying.
1. Dough Thickness: Divide your dough into smaller sections to make it easier to handle. Keep the unused portions covered to prevent them from drying out. Using a rolling pin or a pasta machine, roll the dough to about 1/16 inch thickness. The dough should be thin enough to see your hand through it but thick enough to hold the filling without tearing.
2. Handling the Dough: As you roll, dust the surface with flour to prevent sticking. If you’re using a pasta machine, start with the widest setting and gradually move to thinner settings. Ensure the dough remains even in thickness, as this will help with even cooking later on.
Forming the Tortellini
Shaping tortellini is an art that can seem daunting at first, but with practice, you’ll master it.
1. Cutting the Dough: Use a sharp knife or a round pastry cutter to cut the rolled-out dough into circles, about 3 inches in diameter. You can also use a floured glass to achieve uniformity.
2. Filling and Shaping: Place about a teaspoon of the beef filling in the center of each circle. Carefully fold the dough over the filling to create a half-moon shape. Press the edges firmly to seal, ensuring there are no air pockets. To create the traditional tortellini shape, bring the two ends of the half-moon together and pinch them to form a ring.
3. Visual Cues: Look for the dough to be smooth and well-sealed without any openings. If the edges don’t stick, you can use a little water to moisten them before sealing. Aim for a slight sheen on the dough, which indicates the right moisture level.
Cooking the Tortellini
Cooking your tortellini correctly is crucial for achieving that perfect bite.
1. Understanding Doneness: Bring a large pot of salted water to a rolling boil. Carefully drop the tortellini into the boiling water, being cautious not to overcrowd the pot. Fresh tortellini will typically cook in 3-5 minutes. They are done when they float to the surface and have a tender bite.
2. Cooking in Broth: For an elevated experience, consider cooking your tortellini in a rich broth instead of plain water. This not only enhances the flavor but also adds moisture to the pasta. Simply bring your broth to a simmer and cook the tortellini as directed.
The Art of Homemade Pasta
Tortellini is not just a dish; it’s a cultural experience deeply rooted in Italian cuisine.
1. Cultural Significance: Originating from the Emilia-Romagna region of Italy, tortellini represents the heart of traditional Italian cooking. It’s often associated with family gatherings and celebrations. The art of making tortellini has been passed down through generations, symbolizing love and community.
2. Making Pasta from Scratch: The tradition of making pasta from scratch offers a tactile and rewarding cooking experience. The process requires patience and attention, allowing you to appreciate the ingredients and the final product fully.
3. Variations and Adaptations: While our recipe features beef and Parmesan, tortellini can be filled with various ingredients, including cheese, spinach, or vegetables. You can also experiment with sauces, ranging from classic marinara to creamy Alfredo, allowing for endless creativity in your kitchen.
Serving Suggestions and Pairings
Presentation can elevate your dish, making it even more enjoyable to eat.
1. Garnishing: Consider garnishing your Beef & Parmesan Tortellini with freshly chopped herbs, such as basil or parsley. A sprinkle of additional grated Parmesan cheese or a drizzle of high-quality olive oil can also enhance the visual appeal.
2. Suggested Side Dishes and Beverages: Pair your tortellini with a light salad, such as arugula with a lemon vinaigrette, to balance the richness of the dish. A glass of Chianti or a crisp Pinot Grigio complements the flavors beautifully.
3. Meal Occasions: This dish is perfect for family dinners, where everyone can gather around the table, but it also shines on special occasions like anniversaries or holiday feasts. Its comforting nature makes it a go-to recipe for any gathering.
Nutritional Information
Understanding the nutritional profile of your dish can help you make informed choices.
1. Calories and Macronutrients: On average, a serving of Beef & Parmesan Tortellini contains approximately 350-400 calories, depending on the portion size and specific ingredients used. The breakdown typically includes around 25g of protein, 40g of carbohydrates, and 15g of fat.
2. Balanced Nutrition: This dish provides a great balance of protein from the beef and cheese, carbohydrates from the pasta, and healthy fats. The homemade aspect allows you to control the quality of ingredients, ensuring a wholesome meal.
3. Homemade vs. Store-Bought: While store-bought tortellini can be convenient, homemade options tend to be fresher, tastier, and free of preservatives. The labor of love that goes into making your own tortellini is reflected in the flavor and texture of the dish.
Conclusion
Making Beef & Parmesan Tortellini from scratch is not just about satisfying your hunger; it’s about the joy of cooking and the comfort of sharing a meal with loved ones. The process is a journey that connects you to Italian culinary traditions and allows you to explore your creativity in the kitchen.
We encourage you to try this recipe and embrace the art of homemade pasta. Enjoy the process of rolling, shaping, and cooking your tortellini, and relish the satisfaction of serving a dish that is both delicious and steeped in tradition. Homemade meals create lasting memories, and there’s nothing quite like the comfort of a warm bowl of tortellini shared with family and friends.