Introduction
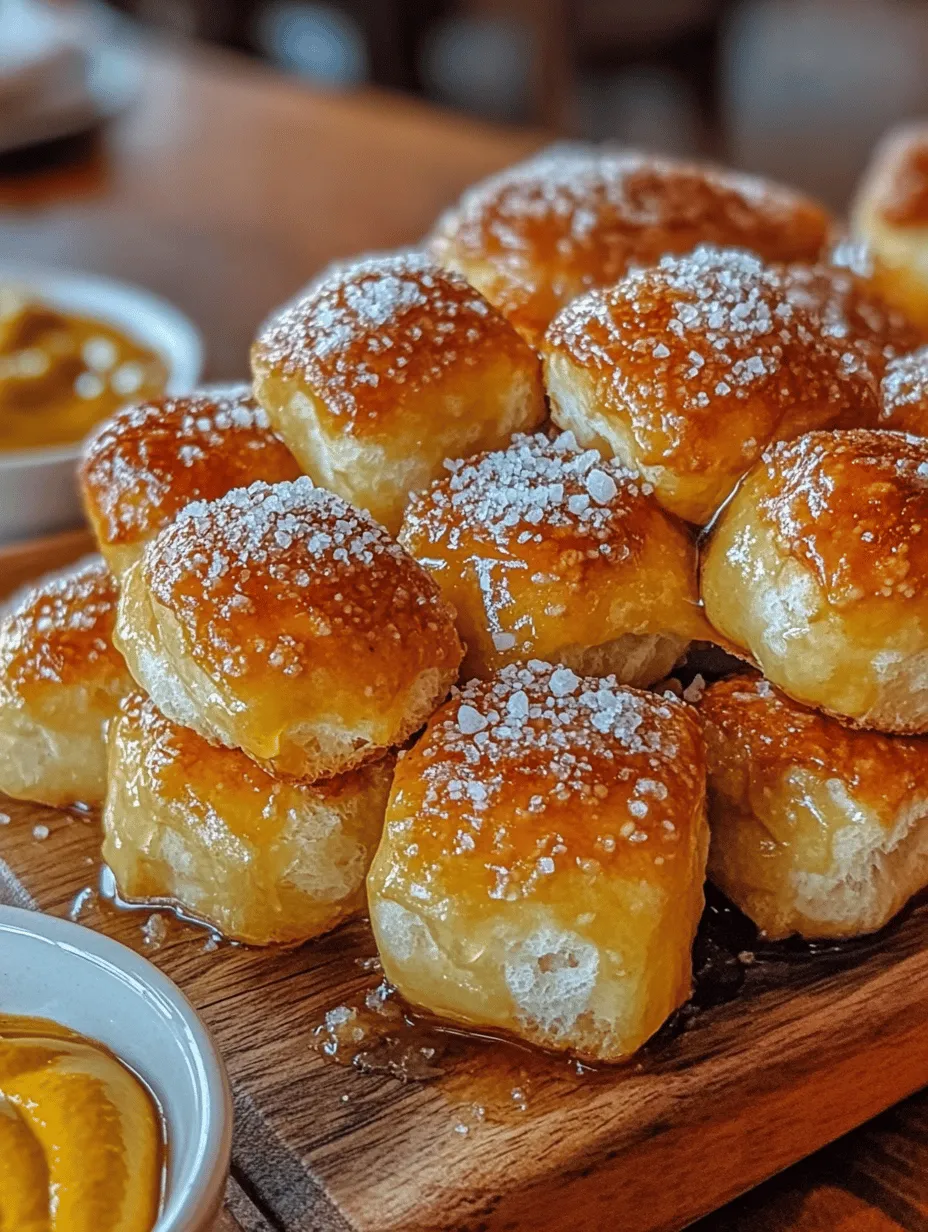
Pretzel bites have become a beloved snack and appetizer, captivating food lovers with their unique flavor and texture. These delightful morsels are not only perfect for game day gatherings and parties but also make for a satisfying treat enjoyed anytime, anywhere. The allure of pretzel bites lies in their soft, chewy interior and golden-brown exterior, which can be perfectly complemented with a variety of dips—cheese sauce, mustard, or even a sweet cinnamon sugar mix.
While you can easily find pretzel bites in stores or at restaurants, nothing compares to the experience of making them fresh at home. The aroma of baking bread fills your kitchen, and the satisfaction of pulling a batch of warm, buttery pretzel bites from the oven is unparalleled. Homemade pretzel bites allow you to control the ingredients, ensuring they are fresh and tailored to your taste preferences.
In this recipe, we will guide you through the steps to create your own Buttery Soft Pretzel Bites Delight. With a few simple ingredients and our straightforward instructions, you’ll be able to enjoy this classic treat right from your own oven. Whether you’re a seasoned baker or a novice in the kitchen, this recipe promises to be a fun and rewarding culinary adventure.
Understanding the Ingredients
The magic of pretzel bites begins with a few key ingredients that work together to create that iconic flavor and texture. Let’s dive into each component and understand their roles in crafting your buttery soft pretzel bites.
Warm Water
Warm water is essential for activating the yeast. The ideal temperature for yeast activation is around 110°F (43°C). If the water is too hot, it can kill the yeast, preventing it from rising; if it’s too cold, the yeast may not activate properly. The warm water helps create a cozy environment for the yeast to thrive, leading to a fluffy and airy dough.
Active Dry Yeast
Active dry yeast is a crucial ingredient in the recipe, responsible for fermentation and leavening. When activated by warm water, the yeast begins to consume the sugars in the dough, producing carbon dioxide gas. This gas forms bubbles within the dough, leading to its rise. A successful activation is indicated by the yeast bubbling and foaming after a few minutes in warm water, showing that it is alive and ready to work its magic.
Granulated Sugar
Granulated sugar serves two important purposes in this recipe. First, it acts as food for the yeast, helping it to activate and grow. Second, sugar enhances the flavor of the pretzel bites, adding a subtle sweetness that balances the salty notes of the recipe. The small amount of sugar used will make a noticeable difference in the overall taste of your pretzel bites.
All-Purpose Flour
Choosing the right flour is vital for achieving the best dough consistency. All-purpose flour is ideal for this recipe because it has the right balance of protein and starch, providing the structure needed for the pretzel bites. The flour absorbs the liquid and binds the ingredients together, creating a smooth and elastic dough that can be easily shaped. Make sure to measure your flour accurately, as too much can lead to a dry dough.
Unsalted Butter
Unsalted butter is significant for adding richness and flavor to your pretzel bites. The fat in the butter contributes to a tender texture, making each bite soft and enjoyable. Using unsalted butter allows you to control the saltiness of the final product, as you’ll be adding kosher salt separately.
Kosher Salt
Kosher salt is an essential ingredient that enhances the overall flavor of the pretzel bites. It helps balance the sweetness from the sugar and contributes to the classic pretzel taste. When sprinkled on top of the pretzel bites before baking, kosher salt adds a delightful crunch and savory note that elevates the snack.
Baking Soda
Baking soda plays a unique role in the pretzel-making process. After shaping the dough into bites, they are briefly boiled in a water and baking soda solution before baking. This step is crucial as it gives the pretzel bites their distinctive dark brown color and chewy texture. The alkaline nature of baking soda causes the Maillard reaction during baking, creating that signature pretzel crust.
Egg Wash
An egg wash is applied to the pretzel bites before baking to achieve a beautiful golden color and shiny finish. The egg wash can be made by whisking together an egg with a tablespoon of water or milk. This step not only enhances the visual appeal of the pretzel bites but also contributes to a slightly richer flavor.
Coarse Sea Salt
Finally, coarse sea salt is used as a finishing touch. Sprinkling it on top of the pretzel bites before baking adds an extra layer of flavor and a delightful crunch. The larger salt crystals stand out visually and provide a satisfying contrast to the soft interior of each bite.
Preparing to Bake
Before diving into the actual baking process, it’s essential to prepare your kitchen and gather your materials. Creating the right environment for rising dough can significantly impact your results.
Setting the Scene
To ensure your dough rises effectively, find a warm, draft-free area in your kitchen. Yeast thrives in warm conditions, so consider turning on your oven for a few minutes and then turning it off, or placing the dough near a warm stove. You can even create a makeshift proofing box by placing a bowl of hot water in your oven or microwave alongside the dough to maintain a cozy atmosphere.
Accurate Measurements
Accurate measurements are crucial for baking success, especially with yeast dough. Use a kitchen scale if possible for precise measurements, particularly for flour, as it can vary in density. When measuring flour using cups, scoop the flour into the measuring cup with a spoon and level it off with a knife rather than packing it down, which can lead to excess flour and a tough dough.
Required Kitchen Tools
Having the right kitchen tools can streamline the process and make your baking experience enjoyable. Here’s a list of essential tools you’ll need for making buttery soft pretzel bites:
– Mixing bowls: A large bowl for mixing the dough and a smaller bowl for the egg wash.
– Measuring cups and spoons: For precise measurements of ingredients.
– Kitchen scale: Optional, but helpful for weighing flour and ensuring accuracy.
– Stand mixer or dough whisk: A stand mixer with a dough hook can make mixing easier, but a whisk works well for hand mixing too.
– Slotted spoon: For transferring pretzel bites from the boiling water to the baking sheet.
– Baking sheets: To bake the pretzel bites, line them with parchment paper for easy cleanup.
– Pastry brush: For applying the egg wash to the pretzel bites.
Step-by-Step Instructions for Buttery Soft Pretzel Bites
Now that you understand the ingredients and have set the scene for baking, let’s walk through the step-by-step instructions for making buttery soft pretzel bites.
Activating the Yeast
1. Start by measuring out 1 cup of warm water (around 110°F or 43°C) and pour it into a mixing bowl.
2. Sprinkle 2 teaspoons of active dry yeast and 1 tablespoon of granulated sugar over the water. Give it a gentle stir to combine.
3. Let the mixture sit for about 5-10 minutes. During this time, you should see bubbles and foam forming on the surface, indicating that the yeast is active and ready to use. If you don’t see any bubbles, your yeast may be inactive, and you’ll need to start over with fresh yeast.
This marks the perfect beginning to your journey in creating homemade buttery soft pretzel bites. Stay tuned for the next steps, where we will guide you through mixing the dough and shaping your pretzel bites, ensuring you have the best experience possible in your kitchen.

Mixing the Dough: Techniques to Ensure a Smooth Dough
To achieve that perfect buttery soft pretzel bite, the first step is mixing the dough. Begin by combining the dry ingredients: flour, sugar, and salt. It’s essential to use high-quality bread flour as it contains more protein than all-purpose flour, resulting in a chewier texture that is characteristic of pretzels. In a separate bowl, dissolve the yeast in warm water (about 110°F or 43°C) and let it sit for about 5 minutes until frothy. This activation of the yeast is crucial for the dough’s rise.
Once the yeast is active, gradually mix it into the dry ingredients. A stand mixer fitted with a dough hook can facilitate this process, ensuring an even consistency. If you are mixing by hand, use a wooden spoon to combine the ingredients until they form a shaggy dough. The goal here is to achieve a smooth mixture with no dry flour remaining.
Kneading the Dough: Importance of Kneading and Tips to Achieve the Right Consistency
Kneading is a fundamental step in developing gluten, which gives pretzel bites their desirable chewy texture. Transfer the dough to a lightly floured surface and knead for about 8-10 minutes. Use the heel of your hand to push the dough away from you, fold it back over itself, and rotate it 90 degrees. Repeat this process until the dough becomes smooth and elastic.
You can also perform the “windowpane test” to check for the right consistency. Take a small piece of dough and stretch it out gently; if it forms a thin membrane without tearing, it’s ready for the next step. If the dough feels too sticky, sprinkle in more flour a little at a time, but be cautious not to add too much, as it can alter the pretzel’s texture.
Letting It Rise: Ideal Conditions for Dough Rising, Including Time and Temperature
Once kneaded, place the dough in a greased bowl, cover it with a clean kitchen towel or plastic wrap, and let it rise in a warm, draft-free environment. The ideal temperature for dough rising is around 75°F to 80°F (24°C to 27°C). This could be your kitchen counter or an oven preheated to the lowest setting and then turned off. Allow the dough to rise for about 1 to 1.5 hours until it doubles in size.
If you’re short on time, you can speed up the process by placing the dough in a slightly warmer spot, but be careful not to overheat it, as this can kill the yeast.
Preparing the Baking Soda Solution: Explanation of the Science Behind This Step
The next crucial step in creating classic pretzel bites is preparing the baking soda solution. This step is essential for giving pretzels their distinctive crust and flavor. Boil about 4 quarts of water in a large pot and add ½ cup of baking soda. The science here involves the alkaline solution from the baking soda, which causes the Maillard reaction during baking, leading to a beautifully browned exterior.
Make sure to stir the mixture well to dissolve the baking soda, as it can clump together. Be cautious when adding baking soda, as it will bubble up vigorously.
Shaping the Pretzel Bites: Tips on Cutting and Shaping for Uniformity
Once the dough has risen, punch it down gently to release air bubbles and turn it out onto a lightly floured surface. Divide the dough into equal pieces, about 1-inch squares or slightly larger, depending on your preferred size. Using your hands, roll each piece into a small ball and then shape it into a bite-sized pretzel by twisting the ends together into a knot shape.
For uniformity, you can use a kitchen scale to weigh each piece of dough, ensuring they are all the same size. This not only enhances the presentation but also ensures even baking.
Boiling the Pretzel Bites: Importance of This Step for Achieving the Classic Pretzel Texture
Once shaped, it’s time to boil the pretzel bites in the baking soda solution. Carefully drop them into the boiling water, making sure not to overcrowd the pot. Boil them for about 30 seconds to 1 minute, turning them halfway through. This process is critical as it sets the outer layer of the pretzels, contributing to the chewy texture and characteristic crust.
After boiling, use a slotted spoon to remove the pretzel bites and place them on a parchment-lined baking sheet. Be sure to allow them to drain a bit before proceeding to the next step.
Applying Egg Wash and Salt: Techniques for Even Coverage
To achieve a beautiful golden-brown finish, apply an egg wash to the boiled pretzel bites. Whisk together one egg with a tablespoon of water to create a smooth mixture. Using a pastry brush, gently coat the tops of each pretzel bite with the egg wash, ensuring even coverage. This not only enhances color but also helps the coarse salt stick better.
Sprinkle the pretzel bites generously with coarse sea salt, or you can experiment with flavored salts for a unique twist.
Baking: How to Tell When the Pretzel Bites Are Done
Preheat your oven to 425°F (220°C). Bake the pretzel bites for about 12-15 minutes or until they are golden brown. The high temperature is key to achieving that perfect crust. To tell if they are done, look for a deep golden color and listen for a hollow sound when you tap the bottom of a pretzel bite.
Once baked, remove them from the oven and allow them to cool slightly on the baking sheet before transferring them to a wire rack.
Buttering the Bites: The Finishing Touch for Flavor
As soon as the pretzel bites come out of the oven, melt some unsalted butter and brush it over the warm bites for a rich finish. This step not only adds flavor but also gives them a beautiful sheen. You can also sprinkle additional salt if desired, enhancing the pretzel flavor even further.
Serving Suggestions
When it comes to serving buttery soft pretzel bites, the possibilities are endless. Pair them with a variety of dips to elevate the snacking experience. Classic options include:
– Mustard: A tangy yellow mustard or a spiced brown mustard adds a zesty contrast.
– Cheese Dip: A warm, gooey cheese sauce, perhaps infused with jalapeños for a kick, is a crowd-pleaser.
– Honey Mustard: A blend of honey and mustard offers a sweet and savory option.
– Guacamole or Salsa: For a twist, serve with guacamole or a fresh salsa for a surprising flavor profile.
For beverages, pretzel bites pair well with:
– Beer: The traditional choice, especially with lagers or ales.
– Soda: A refreshing soft drink can complement the salty pretzel bites.
– Iced Tea: Sweet or unsweetened iced tea offers a refreshing counterpoint.
In terms of presentation, consider serving the pretzel bites in a rustic basket lined with a cloth napkin. This adds a touch of charm and makes them perfect for gatherings or parties. For an extra flourish, you can present them with a selection of dips in small bowls around the basket.
The Cultural Significance of Pretzel Bites
Pretzels have a rich history that dates back to ancient times, originally believed to have originated in Europe. The twist shape is thought to represent arms crossed in prayer, making them a symbol of spirituality. Over the centuries, pretzels have evolved from a simple bread product into various forms, including the beloved snack-sized pretzel bites we know today.
These delightful bites are often served at popular occasions such as game days, movie nights, and festive gatherings. Their versatility and shareability make them a favorite among both adults and children. Recently, the trend of homemade snacks has surged, with more people opting to create their own versions of popular treats, including pretzel bites, allowing for customization and freshness.
Nutritional Information
Homemade pretzel bites offer the advantage of knowing exactly what goes into your snack. A typical serving of pretzel bites contains carbohydrates, proteins, and fats, contributing to a satisfying treat. While the exact nutritional information will vary based on the specific recipe and ingredients used, you can tailor your pretzel bites to fit dietary preferences. For instance, using whole wheat flour increases fiber content, while reducing the salt can cater to those monitoring sodium intake.
Conclusion
Crafting homemade buttery soft pretzel bites is not only a delightful culinary experience but also a rewarding way to enjoy this classic snack. The joy of kneading dough, boiling bites, and watching them rise in the oven is unparalleled. Plus, the satisfaction of sharing these warm, flavorful treats with family and friends is a wonderful way to connect over food.
Don’t hesitate to experiment with different flavors and dips to personalize your pretzel bites. Whether you stick to the classic recipe or venture into new territory with ingredients, the process of baking and sharing food is always a gratifying experience. So gather your ingredients, roll up your sleeves, and enjoy the process of creating your own buttery soft pretzel bites. Your taste buds will thank you.