Introduction
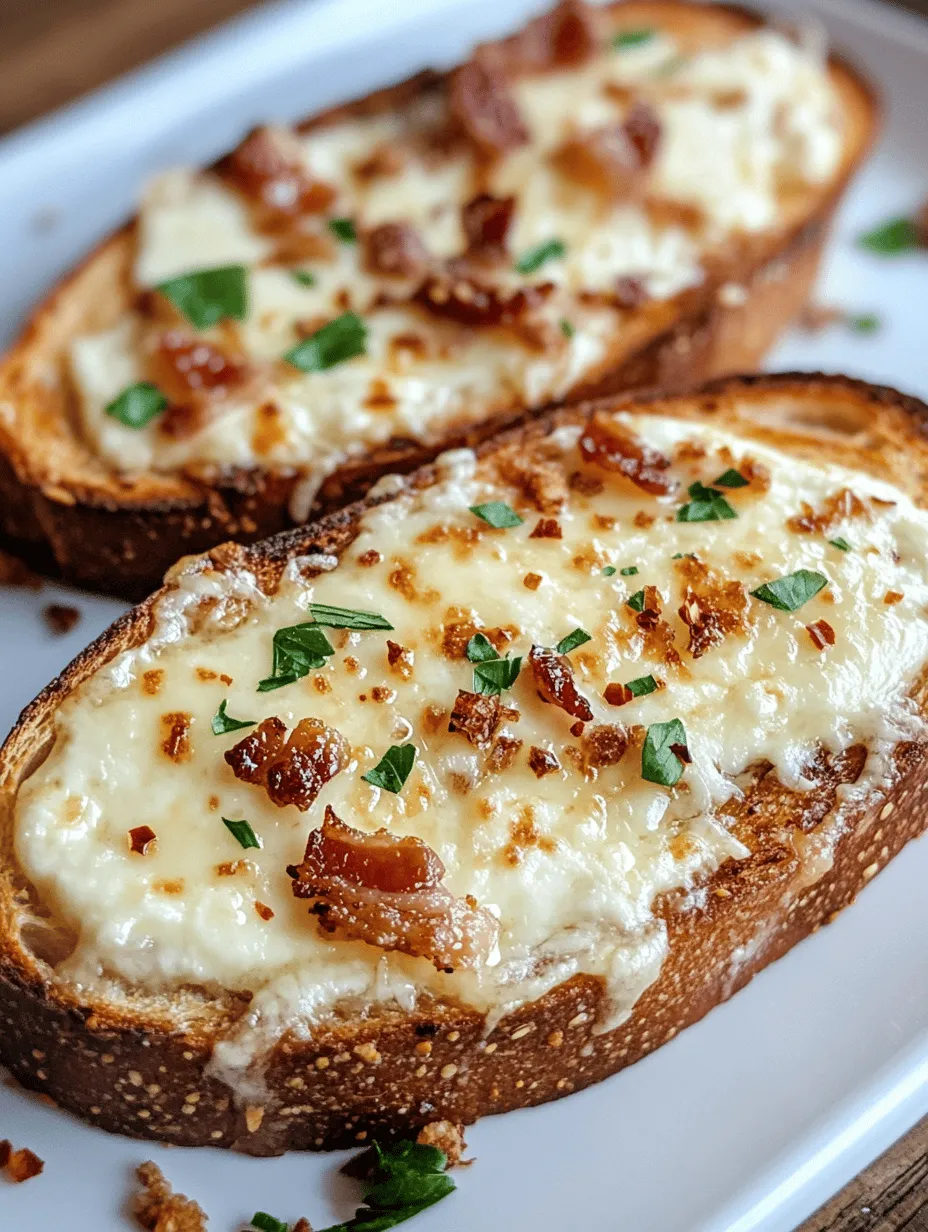
In the realm of culinary delights, few dishes captivate the taste buds quite like cheesy toast recipes. They are versatile, comforting, and can be easily customized to suit various tastes and occasions. Among the myriad of cheesy toast variations, the Cheesy Bacon Garlic Toast stands out as a fan favorite, combining the savory essence of crispy bacon with the rich, gooey goodness of melted cheese and the aromatic punch of garlic. This delightful treat serves as the perfect appetizer for gatherings, a satisfying snack for movie nights, or even an indulgent side dish to accompany your favorite meals.
The irresistible combination of crispy bacon, gooey melted cheese, and fragrant garlic creates a flavor explosion that is hard to resist. Whether you’re entertaining guests or simply treating yourself, Cheesy Bacon Garlic Toast is a guaranteed crowd-pleaser that will have everyone coming back for seconds. In this article, we will explore the key ingredients that make this dish special and guide you through the step-by-step process of creating this delicious treat in your own kitchen.
Understanding the Ingredients
To craft the ultimate Cheesy Bacon Garlic Toast, it’s essential to understand the role of each ingredient in this mouthwatering recipe. Here’s a closer look at the key components that bring this dish to life.
Sourdough Bread
The foundation of any great toast is, of course, the bread. For this recipe, sourdough bread is highly recommended due to its unique flavor and texture. Sourdough is characterized by its tangy taste, which contrasts beautifully with the richness of the cheese and bacon. Additionally, its chewy crust and airy interior make it ideal for toasting, ensuring that each bite is satisfying.
When selecting sourdough bread for your Cheesy Bacon Garlic Toast, it’s best to opt for thick-cut slices. Thick slices not only provide a sturdy base to hold the toppings but also allow for a delightful crunch without becoming overly dry. The added thickness means that you can enjoy a perfect balance of crispy edges and soft, flavorful centers.
Bacon
Bacon plays a pivotal role in this recipe, contributing a savory depth of flavor and a satisfying crunch. The smoky, salty notes of bacon complement the creamy cheese and aromatic garlic, making each bite an explosion of taste. When choosing bacon for your Cheesy Bacon Garlic Toast, it’s important to select high-quality options. Look for bacon that has a good balance of meat and fat, as this will ensure maximum flavor and texture.
For the best results, consider using thick-cut bacon. Thick slices will render more fat as they cook, resulting in crispy edges and a chewy, flavorful center. Additionally, cooking bacon until it reaches a perfect crispness will elevate the overall texture of your toast.
Cheeses
Cheese is, of course, the star of the show when it comes to cheesy toast. For this recipe, a combination of mozzarella and Parmesan cheese is recommended.
Mozzarella cheese is known for its incredible melting qualities, making it the ideal choice for achieving that gooey, stretchy texture we all crave in cheesy dishes. When melted, mozzarella becomes wonderfully creamy and envelops the other ingredients in a blanket of cheesy goodness.
Parmesan cheese, on the other hand, adds a depth of flavor that complements the mozzarella beautifully. With its nutty and salty profile, Parmesan enhances the overall taste of the Cheesy Bacon Garlic Toast and brings a sophisticated touch to this indulgent snack. When combining these two cheeses, you’ll achieve a perfect balance of texture and flavor.
Garlic and Herbs
Garlic is a crucial ingredient in this recipe, providing a robust and aromatic flavor that elevates the dish. While you can use garlic powder in a pinch, fresh garlic is highly recommended for its vibrant taste and aroma. Fresh garlic releases essential oils that add an unbeatable depth of flavor, making your Cheesy Bacon Garlic Toast truly irresistible.
In addition to garlic, fresh herbs such as parsley play an important role in enhancing both flavor and presentation. Parsley adds a touch of freshness that brightens the dish and contrasts beautifully with the rich, cheesy elements. Furthermore, the vibrant green color of parsley adds visual appeal, making your toast look as good as it tastes.
Butter and Seasonings
Butter is essential for achieving the perfect golden-brown crust on your Cheesy Bacon Garlic Toast. Using unsalted butter allows you to control the salt levels in the dish, ensuring that the flavors are perfectly balanced. The butter not only aids in browning but also adds a rich, creamy flavor that enhances the overall experience.
To add a little extra kick to your toast, consider incorporating red pepper flakes into the mix. This optional ingredient introduces a subtle heat that complements the other flavors without overpowering them. A sprinkle of red pepper flakes can transform your Cheesy Bacon Garlic Toast from delicious to downright addictive.
Step-by-Step Instructions
Now that you understand the importance of each ingredient, it’s time to dive into the step-by-step instructions for creating your Cheesy Bacon Garlic Toast. The first step in this delectable process is cooking the bacon to perfection.
Cooking the Bacon
1. Select Your Bacon: Start by choosing high-quality thick-cut bacon. The quality of your bacon will greatly impact the flavor of your Cheesy Bacon Garlic Toast, so don’t skimp on this ingredient.
2. Preheat Your Oven: Preheat your oven to 400°F (200°C). Cooking bacon in the oven allows for even cooking and crispiness, making it a hands-off approach that frees you up to prepare other ingredients.
3. Prepare for Baking: Line a baking sheet with aluminum foil or parchment paper for easy cleanup. Place a wire rack on top of the baking sheet. This allows the fat to drip off while the bacon cooks, ensuring maximum crispiness.
4. Arrange the Bacon: Lay the bacon strips out in a single layer on the wire rack. Be sure not to overlap the strips, as this will prevent them from cooking evenly.
5. Bake the Bacon: Place the baking sheet in the preheated oven and bake for 15-20 minutes, or until the bacon reaches your desired level of crispiness. Keep an eye on it, as cooking times can vary depending on the thickness of the bacon and your oven.
6. Drain and Cool: Once the bacon is done, carefully remove it from the oven and transfer the strips to a plate lined with paper towels to absorb any excess grease. Allow the bacon to cool slightly before chopping it into bite-sized pieces for topping your toast.
With the bacon cooked to crispy perfection, you’re well on your way to crafting the ultimate Cheesy Bacon Garlic Toast. In the following sections, we will explore how to assemble the toast, layer on the delicious toppings, and achieve that perfect melt in the oven. Stay tuned for more detailed instructions and tips to ensure your Cheesy Bacon Garlic Toast is a hit at your next gathering!
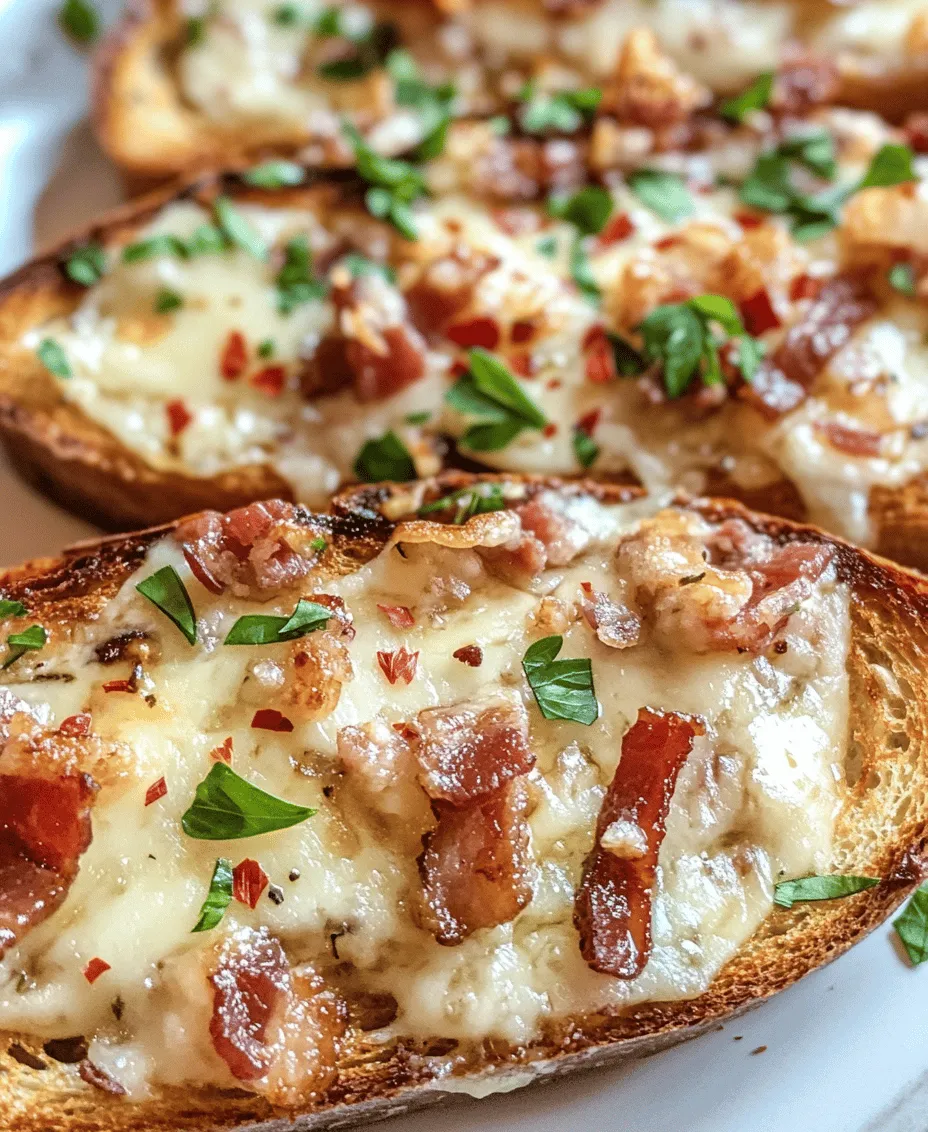
Tips for Draining and Chopping Bacon Effectively
To achieve the perfect Cheesy Bacon Garlic Toast, starting with the bacon is crucial. Here are some tips to drain and chop bacon effectively:
1. Choose the Right Bacon: Opt for thick-cut bacon, as it provides a hearty texture and flavor. Thin bacon can become overly crispy and lose its chewiness.
2. Cook the Bacon Properly: Cook the bacon in a skillet over medium heat. This allows the fat to render slowly, resulting in crispy bacon without burning. Avoid overcrowding the pan to ensure even cooking.
3. Draining the Fat: Once the bacon is cooked to your desired crispiness, use a slotted spoon to transfer it to a plate lined with paper towels. This will absorb excess grease and keep the bacon crispy.
4. Chopping Techniques: Allow the bacon to cool slightly before chopping. Use a sharp knife to cut the bacon strips into bite-sized pieces. For even distribution on your toast, aim for uniformity in size.
Making the Garlic Butter
The garlic butter is the star of the show, enhancing the flavors of the bacon and cheese. Here’s how to create the perfect blend:
1. Ingredients Needed:
– 1 cup unsalted butter, softened
– 4-6 cloves garlic, minced
– 1 tablespoon fresh parsley, chopped (optional)
– Salt and pepper to taste
2. Mixing Process:
– In a medium-sized bowl, combine the softened butter and minced garlic. Using a fork or a hand mixer, blend them until the garlic is evenly distributed throughout the butter.
– If desired, add chopped parsley for a fresh flavor and vibrant color.
– Season the mixture with a pinch of salt and pepper. Taste and adjust the seasoning as needed.
This garlic butter can be made ahead of time and stored in the refrigerator for up to a week, making it a convenient option for quick meal prep.
Flavor Variations to Consider
While the classic bacon and cheese combination is undeniably delicious, consider these flavor variations to elevate your Cheesy Bacon Garlic Toast:
– Herbs: Add dried oregano, thyme, or basil to the garlic butter for an aromatic touch.
– Spices: A pinch of cayenne pepper or red pepper flakes can introduce a delightful heat.
– Cheese Varieties: Experiment with different types of cheese, such as feta, gouda, or pepper jack, for unique flavor profiles.
– Add-ons: Consider adding caramelized onions, sun-dried tomatoes, or roasted red peppers to the toast for added depth.
Preparing the Toast
Before assembling your Cheesy Bacon Garlic Toast, it’s essential to prepare the bread and the baking environment correctly:
1. Preheating the Oven: Preheat your oven to 375°F (190°C). This temperature ensures that the toast becomes golden and crispy without burning.
2. Preparing the Baking Sheet: Line a baking sheet with parchment paper for easy cleanup and to prevent the toast from sticking. You can also use a silicone baking mat for a non-stick surface.
3. Spreading Garlic Butter: Take your garlic butter and use a butter knife or spatula to spread a generous layer on each slice of bread. Ensure that the butter reaches the edges to maximize flavor.
Assembling the Toast
Now that your garlic butter is ready and the bread is prepared, it’s time to assemble your Cheesy Bacon Garlic Toast:
1. Distributing Bacon and Cheese: Evenly distribute the chopped bacon over the garlic buttered slices. Follow this by sprinkling a generous amount of shredded cheese on top. For an appealing presentation, try to ensure that each slice has a balance of bacon and cheese.
2. Adjusting Cheese Quantities: Depending on your cheese preference, feel free to adjust the quantity. If you love a gooey cheese pull, don’t shy away from adding extra cheese.
Baking the Toast
Baking is where the magic happens. Here’s how to ensure your toast comes out perfectly:
1. Baking Time and Temperature: Place the assembled toast in the preheated oven and bake for about 10-15 minutes, or until the cheese is melted and bubbly, and the edges of the bread are golden brown.
2. Visual Cues: Keep an eye on the toast during the last few minutes of baking. The cheese should start to turn a light golden color, and the bread should be crispy yet not overdone.
Serving Suggestions
Once your Cheesy Bacon Garlic Toast is out of the oven, it’s time to serve! Here are some ideas to enhance your dining experience:
1. Garnishing the Toast: For a pop of color and freshness, garnish with additional chopped parsley or chives. A light sprinkle of grated cheese can elevate the presentation.
2. Pairing Suggestions: This toast pairs wonderfully with a variety of beverages. Consider serving it with a cold beer, a refreshing iced tea, or even a robust red wine. For dips, marinara sauce or garlic aioli complements the flavors beautifully.
3. Creative Serving Ideas: For gatherings or parties, cut the toast into bite-sized pieces to create a delightful appetizer. Arrange them on a platter with toothpicks for easy serving, or serve alongside a charcuterie board for an impressive spread.
Nutritional Information
Understanding the nutritional aspects of your Cheesy Bacon Garlic Toast can help you make informed choices:
– Calories and Macronutrients: Each serving of Cheesy Bacon Garlic Toast contains approximately 300-400 calories, depending on the amount of butter, bacon, and cheese used. The macronutrient breakdown typically includes:
– Protein: 12-15g
– Carbohydrates: 30-35g
– Fat: 20-25g
– Dietary Modifications: For those seeking lighter options or vegetarian alternatives, consider using a plant-based butter, vegan cheese, and meat substitutes like tempeh or mushrooms to replicate the bacon flavor.
Conclusion
Cheesy Bacon Garlic Toast is a delightful fusion of flavors and textures, combining crispy bacon, rich garlic butter, and gooey cheese atop perfectly toasted bread. It’s an ideal dish for casual gatherings, cozy nights in, or any occasion calling for comfort food.
We encourage you to try this recipe for your next event and to explore the various flavor variations and personal touches you can add. Whether you stick to the classic combination or venture into new territory, this toast is sure to impress your guests and satisfy your cravings. Enjoy the process, and don’t forget to share your delicious creations!
