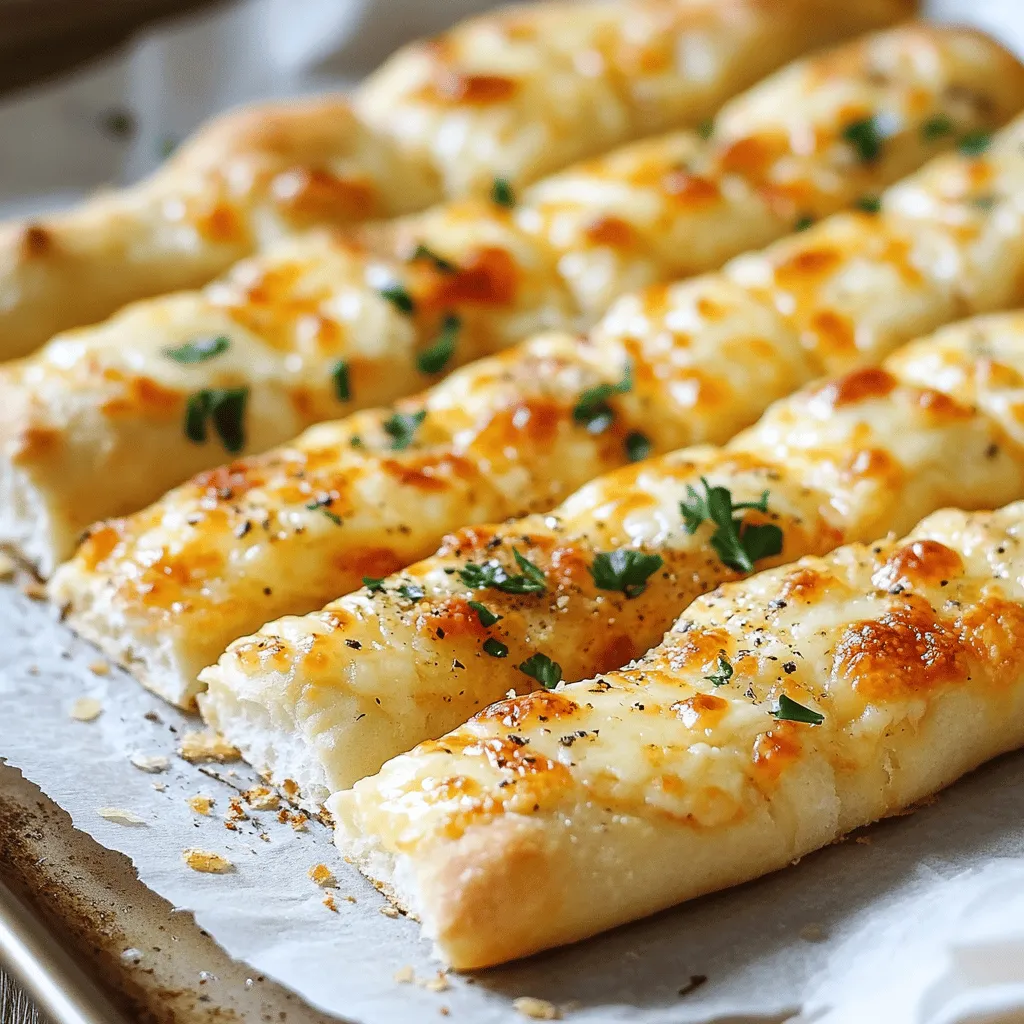
In the world of comfort food, few things can rival the allure of freshly baked cheesy breadsticks. These delectable treats have a way of bringing people together, whether enjoyed as a snack, a side dish, or a delightful appetizer. With their crispy exterior and gooey, melted cheese interior, cheesy breadsticks are a staple in many households, particularly when gathering around the dinner table or hosting a movie night. This recipe, aptly named “Cheesy Breadsticks Extravaganza,” combines the satisfying texture of homemade dough with the irresistible flavors of mozzarella and Parmesan cheese. Enhanced by aromatic herbs and spices, these breadsticks are sure to become a beloved addition to your culinary repertoire.
The origin of cheesy breadsticks can be traced back to Italy, where bread and cheese are celebrated as essential components of the cuisine. They have since evolved into various forms across the globe, often served alongside pasta dishes or as a standalone snack. This particular recipe takes inspiration from traditional Italian flavors while adding a modern twist that is sure to please any crowd. Whether you are a seasoned cook or a beginner in the kitchen, this guide will take you through each step of the process, from gathering your ingredients to baking these mouthwatering cheesy breadsticks.
Understanding the Ingredients
Before diving into the preparation of cheesy breadsticks, it is essential to understand the key ingredients that will contribute to the overall flavor, texture, and success of this recipe. Each component plays a vital role in creating the perfect cheesy breadstick.
Key Ingredients for Cheesy Breadsticks
– All-Purpose Flour: This is the foundation of your dough, providing structure and texture. It is versatile and readily available, making it the ideal choice for this recipe. The gluten content in all-purpose flour will help create a chewy texture in the breadsticks.
– Active Dry Yeast: Yeast is responsible for the dough’s rise, creating light and fluffy breadsticks. When activated properly, it helps develop the airy structure that you want in your breadsticks. Make sure to use fresh yeast for the best results.
– Olive Oil: This ingredient adds moisture to the dough and contributes to a rich flavor. It also helps create a golden, crispy crust on the breadsticks when baked.
– Mozzarella Cheese: Known for its melting quality and mild flavor, mozzarella is the main cheese used in this recipe. It provides that gooey, stretchy texture that is characteristic of cheesy breadsticks.
– Parmesan Cheese: This cheese adds a sharp, nutty flavor that complements the mozzarella. When combined, these two cheeses create a delightful contrast in taste that elevates the overall flavor profile of the breadsticks.
Flavor Enhancers
To take your cheesy breadsticks to the next level, consider incorporating the following flavor enhancers:
– Garlic Powder: This ingredient infuses the breadsticks with a savory aroma and a hint of garlic flavor that pairs perfectly with cheese.
– Dried Oregano and Basil: These classic Italian herbs bring depth to the flavor profile, evoking the essence of authentic Italian cuisine. They add a fragrant and earthy quality to the breadsticks.
– Red Pepper Flakes: For those who enjoy a bit of heat, red pepper flakes can be added to the dough or sprinkled on top before baking. This optional ingredient adds a spicy kick that balances the richness of the cheese.
Preparing for Success
Before embarking on the journey to create your cheesy breadsticks, it’s crucial to have all your equipment and tools ready. Proper preparation will ensure a smooth cooking process and a successful outcome.
Equipment and Tools You’ll Need
– Mixing Bowls: You’ll need a couple of mixing bowls for combining ingredients and preparing the dough.
– Baking Sheet: This is essential for baking the breadsticks. Make sure it’s large enough to accommodate all the breadsticks without overcrowding.
– Rolling Pin: A rolling pin will be helpful for rolling out the dough to the desired thickness before cutting it into breadsticks.
– Parchment Paper: To prevent sticking and ensure easy cleanup, line your baking sheet with parchment paper. This will also help the breadsticks bake evenly.
– Kitchen Towel: A kitchen towel will be used to cover the dough during the rising process, helping to retain warmth and moisture.
Tips for Ingredient Quality
The quality of your ingredients will significantly impact the final result of your cheesy breadsticks. Here are some tips to keep in mind:
– Choosing the Right Yeast: Look for active dry yeast that is fresh and properly stored. This will ensure that your yeast is active and capable of making your dough rise. Always check the expiration date before use.
– Cheese Selection: Opt for high-quality mozzarella and Parmesan cheese for the best flavor and texture. Freshly grated cheese will melt more efficiently and enhance the overall taste of the breadsticks.
Step-by-Step Instructions
Now that you have a solid understanding of the ingredients and the necessary equipment, it’s time to begin preparing your cheesy breadsticks. Follow these detailed steps to create a delicious batch that will impress your family and friends.
Preparing the Dough
1. Activate the Yeast: Start by combining warm water (about 110°F or 43°C), sugar, and active dry yeast in a mixing bowl. Stir gently and let it sit for about 5-10 minutes until it becomes frothy. This step is crucial to ensure that your yeast is alive and active.
2. Combine the Ingredients: In a large mixing bowl, combine the all-purpose flour, garlic powder, dried oregano, dried basil, and salt. Mix the dry ingredients thoroughly to ensure even distribution of flavors.
3. Mix the Wet and Dry Ingredients: Once the yeast mixture is frothy, add it to the bowl with the dry ingredients along with the olive oil. Using a wooden spoon or your hands, mix until the dough starts to come together.
4. Knead the Dough: Transfer the dough onto a lightly floured surface and knead for about 5-7 minutes until it’s smooth and elastic. If the dough is too sticky, sprinkle a little more flour as needed. Kneading helps develop the gluten, which is essential for a good texture.
5. First Rise: Place the kneaded dough in a lightly greased bowl, cover it with a kitchen towel, and let it rise in a warm place for about 1 hour, or until it has doubled in size. This step allows the yeast to work its magic, creating a light and airy dough.
6. Prepare for Shaping: Once the dough has risen, punch it down gently to release the air. Transfer it back to a floured surface and roll it out into a rectangular shape, about ½ inch thick. The thickness will determine how chewy or crispy your breadsticks will be, so adjust according to your preference.
As you prepare your cheesy breadsticks, take a moment to appreciate the wonderful aromas that fill your kitchen. The combination of warm dough, melting cheese, and fragrant herbs will have everyone eagerly anticipating the final result. Stay tuned for the next part of this article, where we will explore how to shape the breadsticks, add the cheesy topping, and bake them to perfection!
Kneading the Dough
Kneading is a critical step in bread making, as it develops gluten, giving the breadsticks their desirable chewy texture. To knead the dough effectively, you’ll want to begin by dusting a clean surface with a bit of flour to prevent sticking. Take the risen dough and gently place it on the floured surface. With your palms, start pushing the dough away from you, then fold it back over itself. Rotate the dough a quarter turn and repeat the process. This should take about five minutes of consistent kneading. You’ll know the dough is ready when it feels smooth and elastic to the touch. It should spring back when lightly pressed, indicating that the gluten has formed properly.
Allowing the Dough to Rise
After kneading the dough, it’s time to let it rise. This process is crucial for achieving light and fluffy breadsticks. Place the kneaded dough in a greased bowl, making sure to coat all sides to prevent sticking. Cover the bowl with a clean kitchen towel or plastic wrap to create a warm environment for the dough to rise. Find a warm spot in your kitchen, such as near an oven or a sunny window, and let the dough rise for about one hour. During this time, it should double in size, indicating that the yeast is active and the dough is ready for shaping.
Shaping and Topping the Breadsticks
Rolling Out the Dough
Once the dough has risen, it’s time to shape it into breadsticks. Start by punching the dough down gently to release any trapped air bubbles. Then, transfer the dough back onto a lightly floured surface. Roll it out into a rectangle, approximately ½ inch thick. The thickness of the dough will play a significant role in the final texture of your breadsticks; thicker dough will yield softer breadsticks, while thinner dough will provide a crunchier bite. Use a rolling pin to ensure even thickness across the entire surface, making sure to dust with flour as needed to prevent sticking.
Cutting the Dough
Next, it’s time to cut the rolled-out dough into strips. Using a sharp knife or a pizza cutter, slice the dough into your desired width. Traditional breadsticks are usually about 1 inch wide, but you can make them thinner or thicker based on personal preference. Keep in mind that the size will influence the baking time and overall presentation. Once cut, gently lift the strips and place them on a prepared baking sheet lined with parchment paper.
Creating the Cheesy Topping
For the pièce de résistance, create the cheesy topping that will elevate your breadsticks. In a mixing bowl, combine shredded mozzarella cheese, grated Parmesan cheese, and your choice of seasonings, such as garlic powder, Italian herbs, or crushed red pepper flakes for a bit of heat. This mixture will provide a flavor explosion with every bite. Generously sprinkle the cheese mixture over the cut strips of dough, ensuring that each piece is well-coated. This not only adds a delightful cheesy flavor but also creates a beautiful golden crust during baking.
Baking the Cheesy Breadsticks
Preheating the Oven
Before placing your cheesy breadsticks in the oven, preheat it to 450°F (230°C). A hot oven is essential to ensure that the breadsticks bake evenly and develop that sought-after golden crust. Preheating typically takes about 10-15 minutes, so it’s a good idea to start this process while preparing your breadsticks.
Baking Time and Technique
Once your oven is preheated, carefully place the baking sheet with the breadsticks inside. Bake them for approximately 12-15 minutes, or until they are golden brown and the cheese is bubbling. Keep a close eye on them in the last few minutes of baking, as oven temperatures can vary, and you don’t want to risk burning your delicious creations. When done, remove the breadsticks from the oven and let them cool on the baking sheet for a few minutes before transferring them to a wire rack.
Serving Suggestions
Garnishing and Presentation
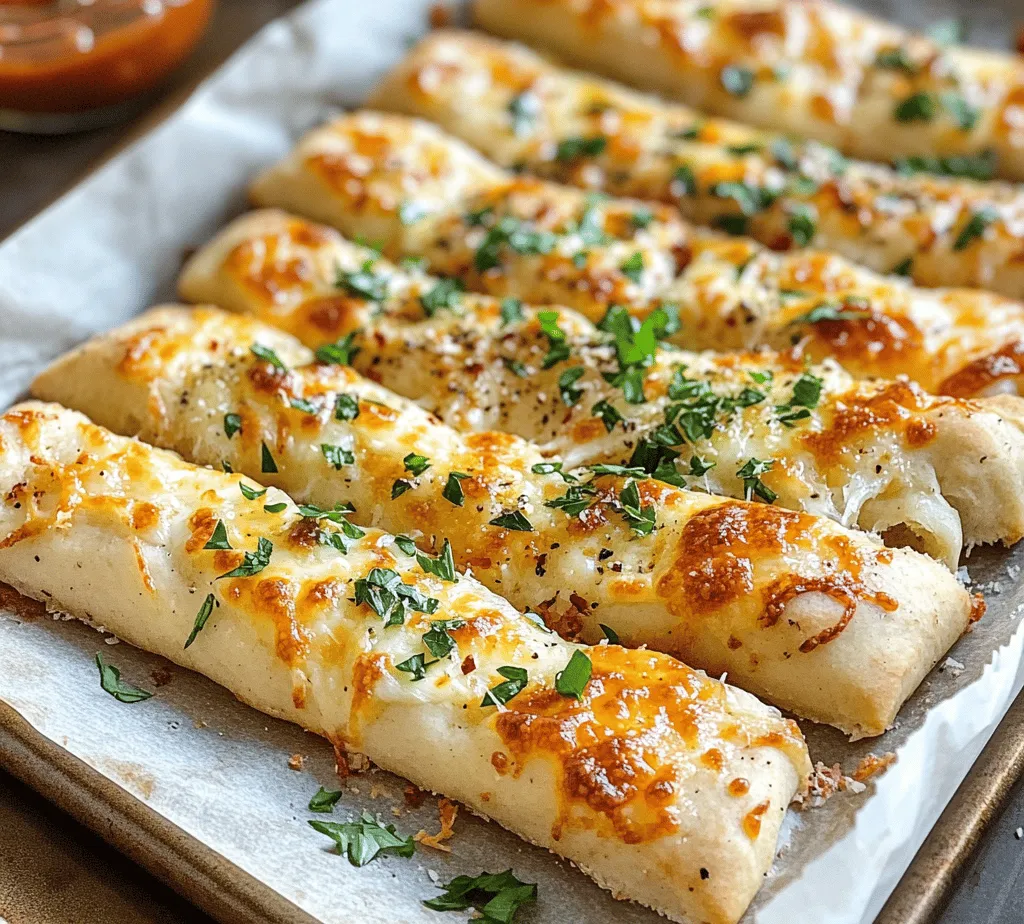
To make your Cheesy Breadsticks truly irresistible, consider garnishing them before serving. Allow the breadsticks to cool for a few minutes, then sprinkle fresh parsley over the top for a pop of color and freshness. This not only enhances the visual appeal but also adds a subtle herbaceous note that complements the cheesy goodness.
Ideal Accompaniments
These cheesy breadsticks are perfect on their own, but they can also be served alongside marinara sauce for dipping. The tangy sauce provides a delightful contrast to the richness of the cheese and the warm breadsticks, enhancing the overall flavor experience. You could also offer a side of garlic butter or ranch dressing for additional dipping options, making your cheesy breadsticks an even more appealing snack or appetizer.
Nutritional Information
Breakdown of Serving Size
Understanding the nutritional value of your homemade cheesy breadsticks can help you enjoy them guilt-free. Each serving, which is approximately one breadstick, typically contains around 120-150 calories, depending on the thickness and amount of cheese used. The breadsticks also provide a satisfying balance of carbohydrates, protein, and fats, making them a delightful option for any meal or snack. Additionally, with the inclusion of cheese, you’re getting a good source of calcium and protein, which is beneficial for bone health and muscle maintenance.
Conclusion
The Cheesy Breadsticks Extravaganza is more than just a recipe; it’s an invitation to indulge in the warm, comforting flavors of homemade breadsticks that are perfect for any occasion. With simple ingredients and straightforward steps, you can create a delicious treat that will impress your family and friends. Whether served as an appetizer, a side dish, or a snack, these cheesy delights are sure to be a hit. Embrace the joy of baking and savor every cheesy bite! This recipe not only brings people together but also fills your kitchen with the irresistible aroma of freshly baked bread, making it a must-try for any home cook. So roll up your sleeves and get ready to enjoy the ultimate cheesy experience!