Introduction
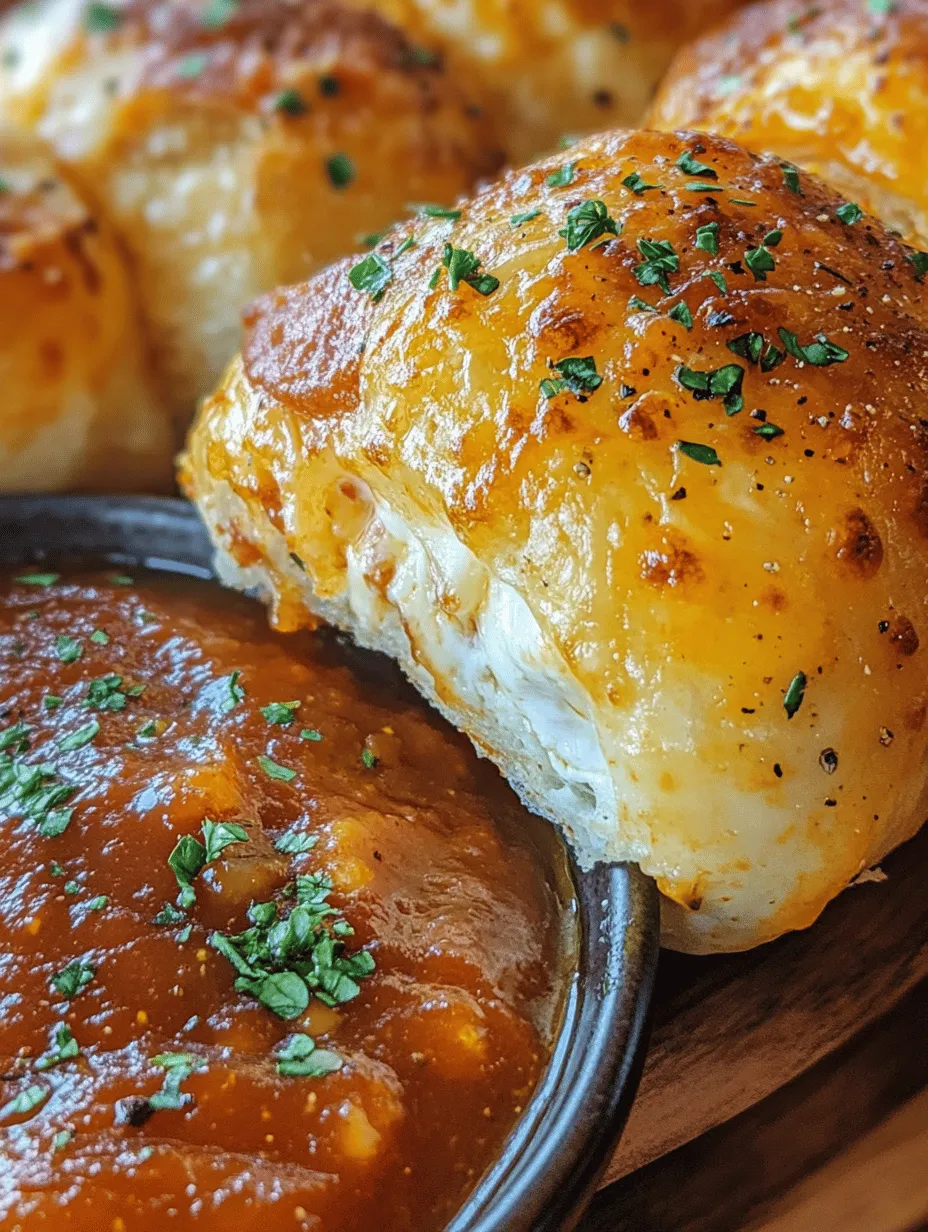
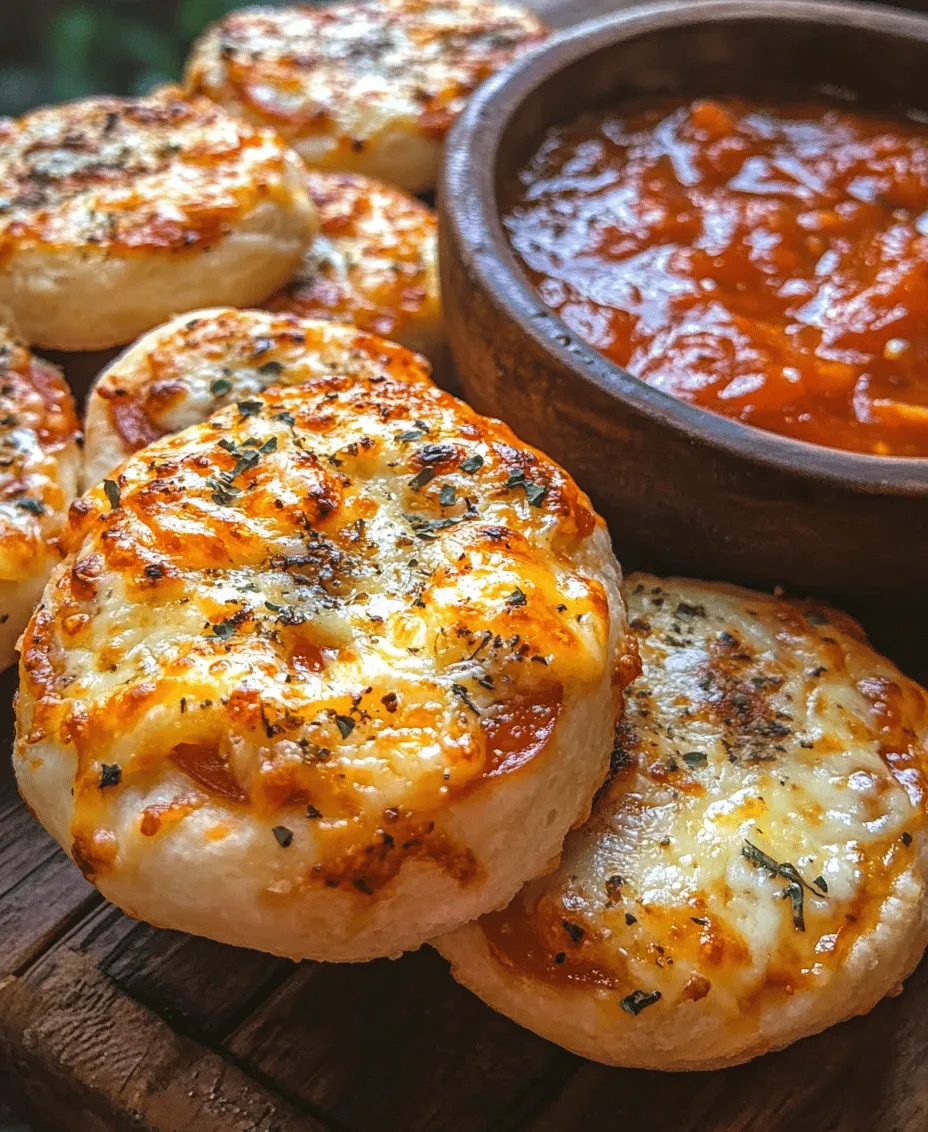
In the world of culinary delights, snack foods hold a special place, especially during social gatherings. Whether it’s a family game night, a weekend barbecue, or a festive holiday party, snacks bring people together, sparking joy and conversation. Among the myriad of finger foods available, Cheesy Pepperoni Rolls stand out as a favorite for many. These delightful rolls offer the perfect combination of rich cheese, savory pepperoni, and a golden, crispy crust that makes them irresistible.
What makes Cheesy Pepperoni Rolls a go-to option for gatherings? They’re not only packed with flavor but are also incredibly easy to prepare. Using simple, readily available ingredients, you can whip up a batch of these scrumptious rolls in no time, impressing your guests with minimal effort. The blend of gooey mozzarella, zesty pepperoni, and aromatic seasonings creates a snack that’s sure to satisfy even the pickiest of eaters.
In this article, we will explore the ingredients that make Cheesy Pepperoni Rolls a crowd-pleaser and guide you through the preparation steps to ensure your rolls turn out perfectly every time.
Understanding the Ingredients
To create the ultimate Cheesy Pepperoni Rolls, it’s essential to understand the ingredients that contribute to their delightful flavor and texture. Let’s break down the main components that you’ll need for this recipe.
Refrigerated Pizza Dough
The base of our Cheesy Pepperoni Rolls is refrigerated pizza dough. This ingredient is a game-changer for home cooks, offering convenience and versatility. Most grocery stores carry pre-made pizza dough, which saves you the time and effort of making it from scratch. This dough rolls out beautifully, providing a flaky and chewy texture that complements the fillings perfectly. If you’re feeling adventurous, you can make your own pizza dough, but the store-bought option is quick and reliable.
Shredded Mozzarella Cheese
Quality cheese is one of the cornerstones of a great Cheesy Pepperoni Roll, and shredded mozzarella cheese reigns supreme in this recipe. Known for its excellent meltability and mild flavor, mozzarella creates that gooey texture that we all crave in cheesy dishes. Opt for a high-quality brand, as the flavor and texture of your rolls will greatly benefit from it. For an extra flavor boost, consider using a blend of mozzarella and provolone cheese.
Sliced Pepperoni
Pepperoni is the star of these rolls, bringing a spicy, savory punch that pairs beautifully with the cheese. There are various types of pepperoni available, from traditional to spicy, and even turkey or plant-based options for those with dietary restrictions. When choosing your pepperoni, consider the flavor profile you want to achieve. A classic pepperoni will give you that familiar taste, while spicy varieties can elevate the rolls with added heat.
Grated Parmesan Cheese
In addition to mozzarella, grated Parmesan cheese plays an essential role in enhancing the overall flavor and texture of the Cheesy Pepperoni Rolls. Its sharp, nutty taste adds a depth of flavor that complements the richness of the mozzarella and the spiciness of the pepperoni. Sprinkle some grated Parmesan on top of the rolls before baking for an added layer of flavor.
Italian Seasoning and Garlic Powder
To elevate the flavor profile of your Cheesy Pepperoni Rolls, we incorporate Italian seasoning and garlic powder. Italian seasoning, a blend of herbs like oregano, basil, and thyme, infuses the rolls with a delightful aroma and taste that evokes the essence of Italian cuisine. Garlic powder adds a savory kick, enhancing the overall flavor without overwhelming the other ingredients. Together, these spices create a well-rounded taste that will have your guests coming back for seconds.
Egg Wash and Olive Oil
Achieving a beautiful golden-brown finish on your rolls is essential for both aesthetics and flavor. An egg wash, made by whisking an egg with a splash of water, is brushed onto the dough before baking. This technique helps the rolls develop a rich, glossy crust. Additionally, drizzling olive oil over the rolls before baking adds a touch of richness and helps them crisp up nicely in the oven.
Marinara Sauce
No Cheesy Pepperoni Roll is complete without a dipping sauce, and marinara sauce is the perfect accompaniment. Its tangy, rich flavor complements the cheesy rolls beautifully. You can use store-bought marinara or make your own for a more homemade touch. For added flair, consider adding crushed red pepper flakes or fresh basil to your marinara sauce for an extra burst of flavor.
Step-by-Step Preparation
Now that we’ve covered the ingredients, let’s delve into the step-by-step preparation of your Cheesy Pepperoni Rolls. Follow these instructions closely, and you’ll be on your way to creating a delicious snack that’s sure to impress.
Preparing the Dough
1. Preheat the Oven: Start by preheating your oven to 375°F (190°C). This ensures that your rolls will bake evenly and develop that golden crust.
2. Roll Out the Pizza Dough: On a lightly floured surface, unroll your refrigerated pizza dough. Gently stretch and roll it out using a rolling pin, aiming for a rectangular shape. The dough should be about ¼ inch thick. This thickness allows the rolls to bake evenly while still being soft and chewy.
3. Tips for Achieving the Right Thickness: If the dough feels too elastic and keeps springing back, let it rest for a few minutes before rolling it out again. This resting period allows the gluten in the dough to relax, making it easier to shape.
Layering the Ingredients
1. Evenly Distributing the Cheese and Pepperoni: Once your dough is rolled out, it’s time to layer the fillings. Start by sprinkling a generous amount of shredded mozzarella cheese evenly over the surface of the dough, leaving a small border around the edges. Next, add a layer of sliced pepperoni on top of the cheese. Make sure to distribute the pepperoni evenly to ensure every bite is full of flavor.
2. Adding the Seasonings: To enhance the taste of your rolls, sprinkle the Italian seasoning and garlic powder over the cheese and pepperoni. This step is crucial in building layers of flavor that will make your rolls stand out. Feel free to adjust the amount of seasoning based on your personal taste preferences.
Rolling and Cutting
1. Rolling the Dough: With the fillings in place, it’s time to roll the dough. Starting from one edge of the rectangle, carefully lift the dough and begin to roll it tightly into a log shape. Make sure to roll it evenly to prevent any gaps in the filling.
2. Sealing the Edges: Once the dough is fully rolled, pinch the edges together to seal the filling inside. For added security, you can lightly brush water along the edges before sealing. This helps the dough stick together and prevents it from unrolling during baking.
3. Cutting into Rolls: Using a sharp knife or a pizza cutter, slice the rolled dough into even pieces, about 1 to 2 inches thick. This will give you perfectly portioned rolls that are easy to bake and serve. Place the cut rolls seam-side down on a parchment-lined baking sheet to prevent sticking.
With these initial steps, you’re well on your way to creating delicious Cheesy Pepperoni Rolls that will delight your family and friends. Keep reading for more detailed instructions on how to achieve the perfect bake, along with tips for serving and storing these delightful snacks.
Importance of Seasoning
Seasoning is a crucial element in elevating the flavor profile of any dish, and Cheesy Pepperoni Rolls are no exception. A well-seasoned filling can transform these rolls from ordinary to extraordinary. The primary seasonings typically include salt, pepper, garlic powder, and Italian herbs like oregano and basil. These ingredients not only enhance the natural flavors of the cheese and pepperoni but also add depth and complexity to each bite.
When preparing the filling, sprinkle a pinch of salt and a dash of pepper to balance the richness of the cheese and the savory notes of the pepperoni. Adding garlic powder introduces an aromatic quality that complements the other ingredients beautifully. If you desire a little heat, consider incorporating red pepper flakes for a subtle kick. Remember, the key is to season thoughtfully; you want to enhance the flavors without overpowering them.
Rolling and Cutting the Dough
Once your dough has risen and is ready to work with, the next step is rolling and cutting it appropriately. Start by lightly flouring your work surface to prevent the dough from sticking. Take your dough and gently punch it down to release any air bubbles before rolling it out into a rectangle, approximately 12 inches by 18 inches. A rolling pin works best for this task, but you can also use your hands to stretch the dough if you prefer.
When rolling the dough, aim for an even thickness of about ¼ inch. This thickness ensures that the rolls cook uniformly and that the filling does not overflow. Once the dough is rolled out, it’s time to spread your cheese and pepperoni mixture evenly over the surface, leaving a small border around the edges. This border will help seal the rolls once they are rolled up, preventing any of the delicious filling from leaking out during baking.
To roll the dough tightly, start from one of the longer edges and gently but firmly roll it towards the opposite edge. The goal is to create a log-like shape. A tight roll ensures that the structure holds during baking, resulting in beautifully swirled rolls. Once the dough is fully rolled, use a sharp knife or pizza cutter to slice the log into approximately 1 to 1.5-inch thick pieces. This size is ideal for achieving a perfect balance of dough and filling in each bite.
Baking the Cheesy Pepperoni Rolls
Prepping the Baking Sheet
Before baking, prepare your baking sheet to ensure that your Cheesy Pepperoni Rolls come out perfectly. Line the baking sheet with parchment paper, which is essential for easy cleanup and prevents the rolls from sticking. Parchment paper not only provides a non-stick surface but also promotes even browning, which is crucial for achieving that golden, crispy exterior. If you don’t have parchment paper on hand, lightly grease the baking sheet with cooking spray or olive oil to prevent sticking.
Egg Wash and Olive Oil Application
Enhancing the visual appeal and texture of your rolls can be easily achieved with an egg wash. To create an egg wash, beat one egg with a tablespoon of water or milk. This mixture can be brushed onto the tops of the rolls just before baking. The egg wash gives the rolls a beautiful golden color and a shiny finish once baked, making them more appetizing.
In addition to the egg wash, drizzling a little olive oil on top of the rolls prior to baking can further enhance their flavor and texture. The oil adds richness and encourages browning, contributing to a slightly crispier crust. Simply brush or drizzle a small amount of olive oil over the rolls to achieve this effect.
Baking Time and Temperature
The baking temperature and time play a significant role in the final outcome of your Cheesy Pepperoni Rolls. Preheat your oven to 375°F (190°C). This temperature is ideal for allowing the dough to rise slightly while also ensuring the cheese melts and becomes bubbly.
Place the baking sheet in the oven and bake for approximately 20-25 minutes, or until the rolls are golden brown and the cheese is bubbling. Keep an eye on them towards the end of the baking time; if they are browning too quickly, you can cover them loosely with aluminum foil to prevent burning. Once baked, allow the rolls to cool for a few minutes on the baking sheet before transferring them to a wire rack. This brief cooling period helps to set the cheese and makes them easier to handle.
Serving Suggestions
Cheesy Pepperoni Rolls are a versatile dish that shines at various occasions. They are perfect for parties, game nights, or casual gatherings with family and friends. Their finger-food nature makes them excellent appetizers or snacks that everyone can enjoy without the need for utensils.
To elevate the serving experience, consider pairing your rolls with a variety of dipping sauces. Marinara sauce is a classic choice, providing a tangy complement to the cheesy richness. For those who enjoy a bit of heat, a spicy arrabbiata sauce or sriracha ranch dressing can add an exciting twist. Additionally, a creamy garlic dipping sauce can enhance the overall flavor profile and provide a delightful contrast to the savory rolls.
Presentation is key when serving your Cheesy Pepperoni Rolls. Arrange them on a large platter, and consider garnishing with fresh herbs like parsley or basil for a pop of color. You can also serve them alongside small bowls of your chosen dipping sauces for added visual appeal.
Nutritional Information
Being mindful of the nutritional content of your dishes can enhance your overall cooking experience. Each serving of Cheesy Pepperoni Rolls (approximately 2 rolls) contains an estimated 250-300 calories, depending on the specific ingredients used. They typically offer around 15 grams of fat, 20 grams of carbohydrates, and 10 grams of protein.
For those with dietary preferences or restrictions, there are several ways to modify this recipe. To create a vegetarian version, simply substitute the pepperoni with your favorite vegetables, such as bell peppers, mushrooms, or spinach. You can also experiment with different types of cheese, such as mozzarella or gouda, for varied flavor profiles.
If you’re looking for a gluten-free alternative, consider using a gluten-free pizza dough mix available at many grocery stores. Be sure to check the labels for any other ingredients that may contain gluten to ensure a safe meal for gluten-sensitive diners.
Conclusion
Cheesy Pepperoni Rolls are a delightful treat that combines the irresistible flavors of melted cheese and savory pepperoni, all wrapped in a soft, golden crust. This recipe is a must-try for cheese lovers and is incredibly easy to prepare, making it perfect for both novice cooks and seasoned chefs alike.
The joy of sharing these delicious snacks with friends and family is unforgettable. Whether you’re hosting a gathering or simply indulging in a cozy night at home, these rolls are sure to be a hit. Don’t be afraid to unleash your creativity; experiment with different fillings, dips, and seasonings to make this recipe your own. Embrace the joy of cooking and enjoy the delicious results!