Introduction
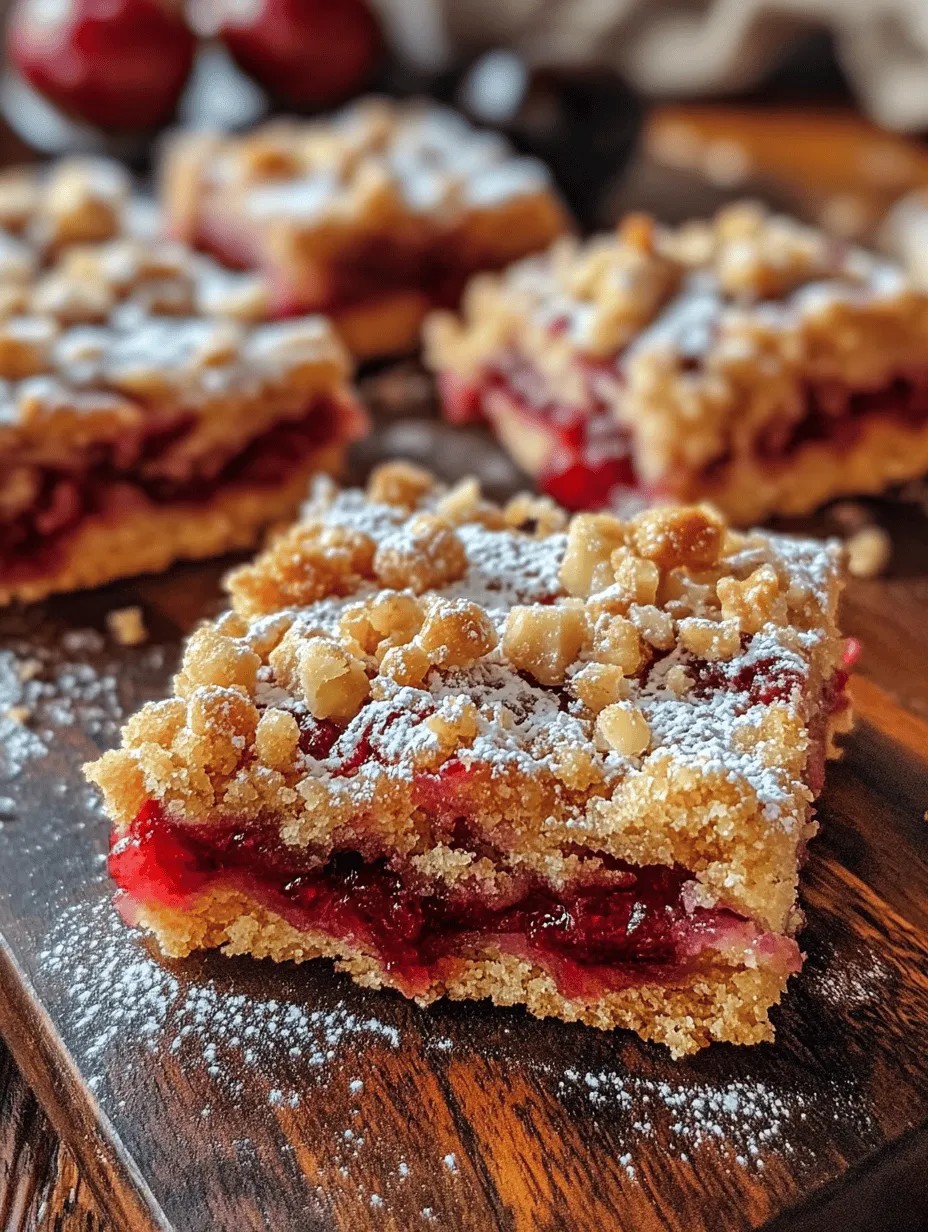
Cherry Bliss Bars are an irresistible dessert that captures the essence of summer in every bite. With their rich, buttery crust and a luscious cherry filling, these bars are perfect for any occasion, from casual family gatherings to elegant dinner parties. Their vibrant color and mouthwatering flavor make them a standout treat that will have everyone reaching for seconds.
The joy of creating these Cherry Bliss Bars lies not only in their delightful taste but also in the satisfaction of using high-quality, fresh ingredients. There’s something magical about homemade desserts that store-bought options just can’t replicate. When you prepare Cherry Bliss Bars in your kitchen, you’re not just making a dessert; you’re crafting a moment that friends and family will cherish.
The Allure of Cherry Bliss Bars
Cherry desserts have a rich history that dates back to the early American settlers who brought cherry trees to the New World. Over the centuries, cherry-based recipes have become a beloved staple in many households, often associated with nostalgia and comfort. From classic cherry pies to cobblers and tarts, cherries have established themselves as a versatile fruit that can be enjoyed in myriad ways.
What sets Cherry Bliss Bars apart from other cherry desserts is their unique combination of textures and flavors. The contrast between the crumbly, buttery crust and the sweet, tangy cherry filling creates a symphony of taste that will delight your palate. Additionally, the bars are easy to slice and serve, making them a convenient option for parties or potlucks.
One of the best features of this recipe is its adaptability. While cherries are the star of this dish, you can easily substitute them with other fruits, such as blueberries, raspberries, or peaches, depending on what’s in season or your personal preference. This versatility allows you to enjoy the bliss of these bars year-round, no matter the time or occasion.
Ingredients Breakdown
To create the perfect Cherry Bliss Bars, you’ll need a selection of key ingredients, each playing a crucial role in achieving the desired flavor and texture. Here’s a closer look at what you’ll need:
– All-Purpose Flour: This serves as the base for the crust, providing structure and a tender crumb. When combined with other ingredients, it forms a delightful foundation for the bars.
– Rolled Oats: Adding rolled oats to the crust introduces a hearty texture and a boost of nutrition. They lend a pleasant chewiness that contrasts beautifully with the smooth cherry filling.
– Brown Sugar: Brown sugar brings sweetness and moisture to the crust, thanks to its molasses content. This not only enhances the flavor but also helps to keep the bars moist and tender.
– Baking Soda & Salt: These essential leavening agents ensure that the crust rises properly while balancing the flavors. The salt enhances the sweetness of the sugar, creating a well-rounded taste.
– Unsalted Butter: The rich creaminess of unsalted butter binds the ingredients together while imparting a rich flavor. Using unsalted butter allows for better control over the overall saltiness of the dessert.
– Vanilla Extract: A must-have flavor enhancer, vanilla extract elevates the taste of the Cherry Bliss Bars, giving them a warm, aromatic quality that pairs perfectly with the fruit.
– Cherry Pie Filling: The star ingredient, cherry pie filling, can be sourced either from a can for convenience or made from scratch for a fresher taste. This filling provides the bars with their signature flavor and beautiful color.
– Cornstarch: This thickening agent helps to stabilize the cherry filling, ensuring that it holds its shape when baked. It prevents the filling from becoming too runny, allowing for neat, tidy slices.
– Lemon Juice: A splash of lemon juice adds brightness and acidity, enhancing the overall flavor profile of the bars. The acidity helps to balance the sweetness of the cherries.
– Almond Extract: For an extra layer of flavor, almond extract is a delightful addition. It pairs wonderfully with cherries, providing a unique twist that elevates the dish.
– Nuts: Optional nuts, such as chopped almonds or walnuts, can be added for a crunchy texture and additional nutrition, giving the bars an extra dimension of flavor and crunch.
Preparing the Cherry Bliss Bars
Now that we have a comprehensive understanding of the ingredients, it’s time to roll up your sleeves and start making these delightful Cherry Bliss Bars. Follow these step-by-step instructions to ensure your bars turn out perfectly every time.
Step 1: Preheat the Oven
Begin by preheating your oven to 350°F (175°C). Preheating the oven is an essential step in baking, as it ensures that your bars cook evenly and develop a beautifully golden crust.
Step 2: Prepare the Baking Dish
While the oven is warming up, take a 9×13-inch baking dish and lightly grease it with cooking spray or butter. This will prevent the bars from sticking and make them easier to remove once they’re baked.
Step 3: Mix the Dry Ingredients
In a large mixing bowl, combine 2 cups of all-purpose flour, 1 cup of rolled oats, 1 cup of brown sugar, 1 teaspoon of baking soda, and ½ teaspoon of salt. Use a whisk to thoroughly mix the dry ingredients, ensuring that they are evenly distributed.
Step 4: Incorporate the Butter
Next, melt 1 cup of unsalted butter in a microwave-safe bowl or on the stovetop. Once melted, pour the butter into the dry ingredient mixture while stirring continuously. The heat from the butter will help to bind the ingredients together, creating a crumbly texture.
Step 5: Add Vanilla Extract
After incorporating the butter, add 1 teaspoon of vanilla extract to the mixture. Stir well to combine, allowing the vanilla flavor to infuse the crust.
Step 6: Press the Crust Mixture
Take about two-thirds of the crust mixture and press it evenly into the bottom of the prepared baking dish. Use the back of a measuring cup or your hands to ensure an even layer across the base.
Step 7: Prepare the Cherry Filling
In a separate bowl, combine 1 can (about 21 ounces) of cherry pie filling, 1 tablespoon of cornstarch, 1 tablespoon of lemon juice, and ½ teaspoon of almond extract. Gently mix the ingredients together, being careful not to break up the cherries too much.
Step 8: Assemble the Bars
Once the crust is pressed into the baking dish, pour the cherry filling over the crust, spreading it out evenly with a spatula. Then, crumble the remaining crust mixture over the top of the cherry filling, ensuring that it covers the filling evenly but allows some cherry peeks through.
Step 9: Bake the Bars
Place the baking dish in the preheated oven and bake for 30-35 minutes, or until the top is golden brown and the cherry filling is bubbly. The aroma that fills your kitchen during baking will be absolutely enticing.
Step 10: Cool and Slice
Once baked, remove the Cherry Bliss Bars from the oven and allow them to cool in the baking dish for at least 10 minutes. Afterward, transfer them to a wire rack to cool completely. Once cooled, slice the bars into squares or rectangles and serve them fresh.
With these detailed steps, you’re well on your way to creating a delightful batch of Cherry Bliss Bars that will impress your family and friends alike. Keep an eye out for part two of this article, where we’ll explore tips for achieving the best results and answer some common questions about this delicious dessert.
Detailed Preparation of the Crust
To create the perfect crust for your Cherry Bliss Bars, start by preheating your oven to 350°F (175°C). This ensures that your crust will bake evenly. In a mixing bowl, combine the dry ingredients: all-purpose flour, rolled oats, brown sugar, and salt. If you desire a nutty flavor, consider adding finely chopped nuts such as walnuts or pecans to the mixture.
Next, cut cold butter into small cubes and add it to the dry ingredients. Using a pastry cutter or your fingers, work the butter into the mixture until it resembles coarse crumbs. The key here is to not overwork the butter; you want small pieces that will create a flaky texture once baked. If you’re looking for a vegan alternative, substitute the butter with coconut oil or a plant-based butter substitute.
Once your mixture is ready, press it firmly into the bottom of a greased 9×13-inch baking dish. Make sure to spread it evenly, covering the entire bottom. Use the flat bottom of a measuring cup to pack it down tightly; this helps create a sturdy base for your bars. Bake the crust in your preheated oven for about 15-20 minutes until it turns golden brown. Keep an eye on it to avoid over-baking, which can lead to a dry crust.
Making the Cherry Filling
While the crust is baking, it’s time to prepare the cherry filling. Start by pitting fresh cherries or using frozen cherries for convenience. If you use frozen cherries, let them thaw and drain excess juice to prevent a watery filling. Place the cherries in a medium saucepan over medium heat, adding sugar, cornstarch, and a splash of lemon juice. The sugar enhances the sweetness, while the cornstarch serves as a thickening agent.
Stir the mixture gently, allowing it to cook for about 5-7 minutes. You’ll notice the cherries begin to soften and release their juices. The goal is to achieve a thick, jam-like consistency. If the filling appears too runny, let it simmer for a few more minutes. Once ready, remove it from heat and allow it to cool slightly before layering it onto the crust.
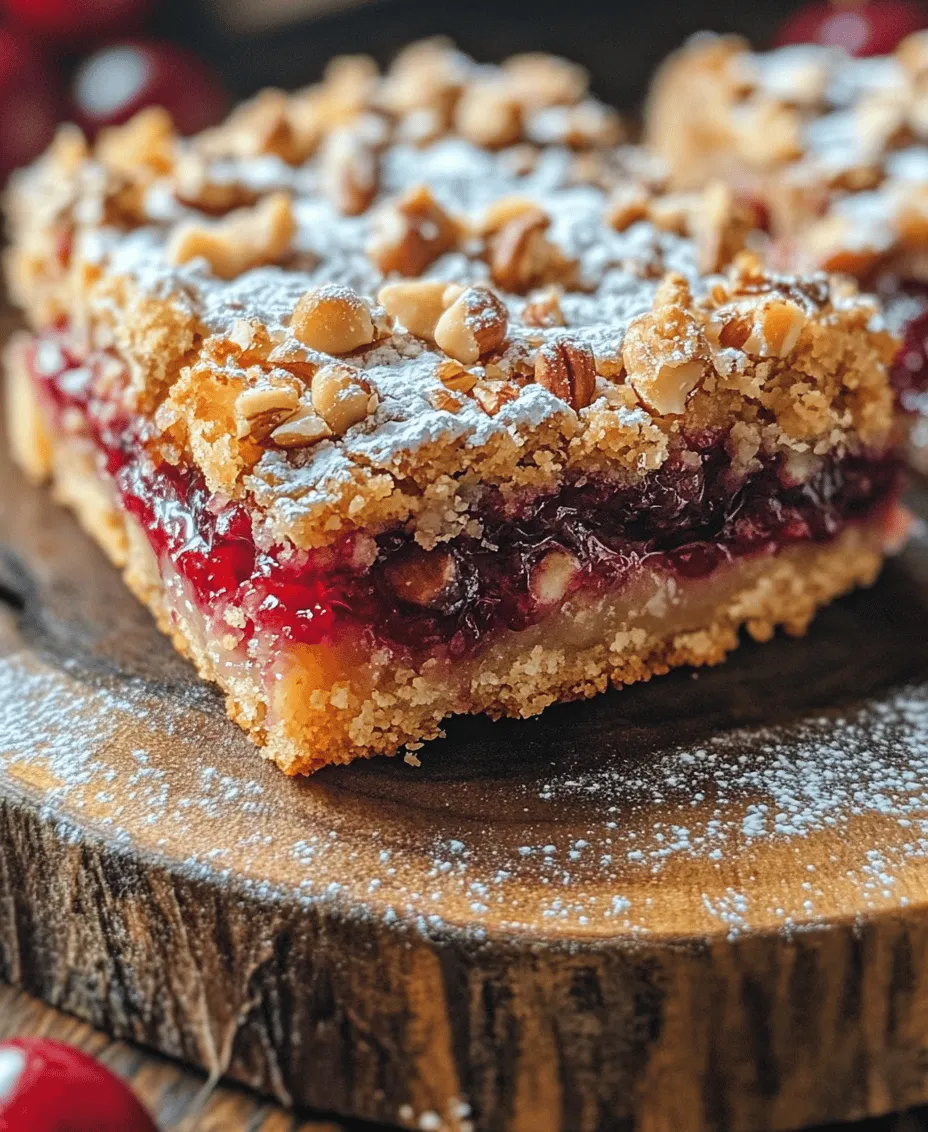
Layering the Filling and Topping
With both the crust and filling prepared, it’s time to assemble your Cherry Bliss Bars. Carefully spread the cherry filling over the baked crust, ensuring even distribution. Use a spatula to gently smooth it out, reaching the corners of the dish. This step is crucial for ensuring every bite has a balanced flavor of cherries and crust.
Next, prepare the topping by combining additional oats, flour, brown sugar, and a bit of melted butter in a separate bowl. Mix until crumbly, and then sprinkle this mixture over the cherry filling. This will create a delightful crumb topping that adds texture and flavor to your bars. Bake the assembled dish in the oven for another 25-30 minutes, or until the topping is golden brown.
Baking Process
To determine when your Cherry Bliss Bars are ready, look for a golden crust and bubbly filling. The edges should be slightly firm, and you might see some bubbling around the edges of the filling. Insert a toothpick into the topping; if it comes out clean or with just a few moist crumbs, your bars are done. Allow the bars to cool in the pan for about 10-15 minutes before transferring them to a wire rack to cool completely. This cooling step is essential for the filling to set, making it easier to slice later.
Cooling and Slicing
Once your bars have cooled down to room temperature, it’s time to slice them. Use a sharp knife for clean cuts, and lightly score the bars before cutting all the way through. This prevents the topping from crumbling too much. For the best presentation, refrigerate the bars for an hour before slicing; this will help them hold their shape and make them easier to serve.
Flavor Profile and Variations
Cherry Bliss Bars are a delightful combination of sweet, tart, and nutty flavors. The tartness of the cherries balances perfectly with the sweetness of the brown sugar and the wholesome nuttiness from the oats in the crust and topping. Each bite offers a satisfying crunch from the topping combined with the soft, luscious cherry filling.
Possible Variations
If you’re feeling adventurous, consider substituting the cherries in this recipe with other fruits. Blueberries, peaches, or even mixed berries can offer a unique twist on this classic dessert. Each fruit brings its distinct flavor, so feel free to experiment based on seasonal availability or personal preference.
For those with dietary restrictions, gluten-free alternatives for the crust are readily available. Substitute the all-purpose flour with a gluten-free flour blend, and ensure the oats are certified gluten-free. Additionally, for a vegan version, you can swap out the eggs and butter for flax eggs and plant-based butter, maintaining the integrity of the recipe while catering to your dietary needs.
Creative serving suggestions can elevate these bars even further. Pair them with a scoop of vanilla ice cream or a dollop of whipped cream for an indulgent treat. Alternatively, serve them warm with a drizzle of chocolate sauce for a decadent dessert.
Nutritional Insights
When it comes to nutrition, Cherry Bliss Bars offer a balanced treat. Each serving typically contains around 200-250 calories, depending on the portion size and ingredients used. Cherries are low in calories and rich in antioxidants, vitamins, and minerals, contributing to overall health benefits. The oats in the crust provide dietary fiber, promoting digestive health and keeping you fuller for longer.
It’s important to consider dietary restrictions with this recipe. For those avoiding gluten, opt for gluten-free oats and flour alternatives. If you are nut-sensitive, simply omit any nuts from the crust or topping. These bars can easily be tailored to suit various dietary preferences while still being delicious.
The Perfect Occasion for Cherry Bliss Bars
Cherry Bliss Bars are versatile and suitable for a variety of occasions. They are a fantastic addition to picnics, potlucks, and family gatherings, where their portability makes them easy to share. You can also make them for holiday celebrations, serving them as a festive dessert that everyone will enjoy.
For maximum appeal, present the bars beautifully. Arrange them on a platter and sprinkle powdered sugar on top for a touch of elegance. Pair them with fresh cherries or mint leaves for added visual interest. Consider serving them alongside beverages like iced tea or lemonade to complement their sweet and tart flavors.
Conclusion
In summary, Cherry Bliss Bars are not just a treat; they are a delightful culinary experience that brings together the best of flavors and textures. Their versatility allows for various adaptations, making them suitable for any occasion. Whether you are baking for a family gathering or simply indulging in a homemade dessert, this recipe is sure to please.
We encourage you to try your hand at making these Cherry Bliss Bars and to enjoy the process of baking. There’s something incredibly rewarding about sharing homemade treats with loved ones, creating memories around the table. So gather your ingredients, roll up your sleeves, and let the aromas of baking fill your kitchen. Your family and friends will thank you for these irresistible bars!


