Introduction
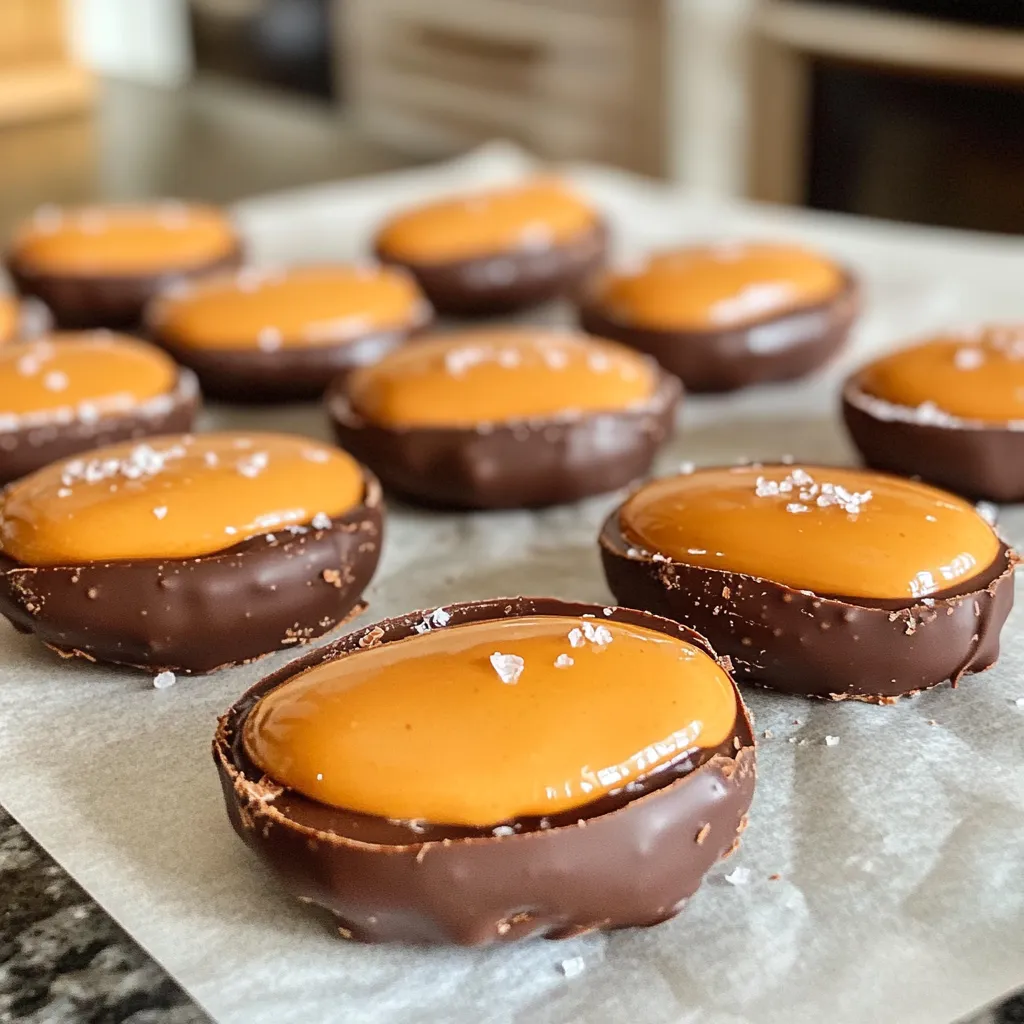
There are few combinations in the culinary world that evoke as much delight as chocolate and peanut butter. The rich, creamy texture of peanut butter beautifully complements the sweet, decadent allure of chocolate, resulting in a mouthwatering experience that is hard to resist. This pairing becomes even more exciting during the Easter season when homemade treats take center stage, bringing a sense of nostalgia and joy to families everywhere.
Imagine the thrill of crafting your very own chocolate-covered peanut butter eggs, a treat that not only satisfies your sweet tooth but also brings warmth and joy to your celebrations. In this article, we will guide you through a straightforward recipe for making these delightful chocolate-covered peanut butter eggs. Not only will we cover the ingredients you need, but we will also provide step-by-step instructions to ensure your creation is a hit among family and friends.
The Joy of Homemade Treats
In a world where convenience often trumps quality, the joy of making treats at home is a refreshing escape. Homemade goodies carry a personal touch that store-bought options simply cannot replicate. When you take the time to create something from scratch, you infuse it with care and creativity, making it all the more special.
Picture gathering in the kitchen with loved ones, laughter filling the air as you share stories and create memories while whipping up these delectable treats. Whether it’s a family tradition or a new adventure, baking together fosters connections that last a lifetime. Each bite of your chocolate-covered peanut butter eggs will not only be a taste experience but a reminder of those cherished moments spent together.
Moreover, making treats at home allows you to customize recipes to match your personal taste preferences. Want to add a hint of sea salt for that perfect sweet and salty balance? Or perhaps you prefer a richer chocolate coating? The possibilities are endless, and the freedom to experiment is part of the fun.
Ingredients Breakdown
To create the perfect chocolate-covered peanut butter eggs, it’s essential to understand the role of each ingredient in the recipe. Let’s break down the components that will elevate your treats from ordinary to extraordinary.
Creamy Peanut Butter
The star of this recipe is undoubtedly creamy peanut butter. Its smooth texture and rich flavor serve as the foundation for the filling. When choosing peanut butter, opt for a brand that you enjoy eating on its own, as the flavor will shine through in your finished product. Creamy peanut butter ensures that your filling is easy to mix and shape, providing that delightful, velvety mouthfeel.
Unsalted Butter
Adding unsalted butter to the peanut butter mixture enhances the creaminess and overall mouthfeel of the filling. It contributes a richness that balances the sweetness of the powdered sugar, resulting in a well-rounded flavor profile. Using unsalted butter also allows you to control the saltiness of your mixture, making it easier to adjust according to your taste.
Powdered Sugar
Powdered sugar is key to sweetening the mixture and ensuring a smooth texture. Unlike granulated sugar, powdered sugar dissolves easily, which is crucial when mixing with the peanut butter and butter. This ingredient adds just the right amount of sweetness without clumping, allowing for a silky filling that melts in your mouth.
Vanilla Extract
A splash of vanilla extract adds depth and warmth to the flavor of your peanut butter eggs. This simple ingredient enhances the overall taste, creating a more complex and satisfying experience with each bite. Choose pure vanilla extract for the best flavor, as it brings a richness that imitation vanilla cannot match.
Salt
While it may seem counterintuitive to add salt to a sweet treat, a pinch of salt is essential in balancing flavors. Salt enhances the sweetness of the sugar while providing a subtle savory note that elevates the overall taste. It accentuates the nutty flavor of the peanut butter and rounds out the richness of the chocolate coating, making the flavors pop.
Semi-Sweet Chocolate Chips
The crowning glory of this recipe is the semi-sweet chocolate chips, which form the delicious outer coating. The sweetness of the chocolate perfectly complements the creamy peanut butter filling, creating a harmonious blend that is simply irresistible. Semi-sweet chocolate is an excellent choice for dipping because it melts beautifully and sets with a glossy finish.
Coconut Oil (Optional)
While not mandatory, adding a little coconut oil to your chocolate can improve the consistency and smoothness of your coating. Coconut oil helps the chocolate melt more evenly, making it easier to dip your peanut butter eggs without clumping. It also adds a subtle richness that enhances the overall flavor. If you choose to use coconut oil, opt for refined coconut oil to keep the flavor neutral.
Step-by-Step Instructions for Preparation
Now that we’ve gathered our ingredients and understood their roles, it’s time to get started on preparing the chocolate-covered peanut butter eggs. Follow these clear and comprehensive instructions to ensure your treats turn out perfectly.
Mixing the Base
Begin by mixing the creamy peanut butter and unsalted butter in a large mixing bowl. Using a hand mixer or a stand mixer, beat the two ingredients together until they form a smooth and creamy mixture. This process typically takes about 2-3 minutes. The key here is to ensure that the peanut butter and butter are well combined, creating a luscious base for your filling.
Sweetening the Mixture
Once your peanut butter and butter are mixed to perfection, it’s time to add the powdered sugar. Gradually sift in the powdered sugar, about a cup at a time, while continuing to mix on low speed. This gradual incorporation prevents a sugar cloud from forming and ensures that the mixture remains smooth. Continue mixing until all the powdered sugar is fully combined and the mixture is sweetened to your liking. Taste the mixture to ensure it has the desired level of sweetness.
Chilling for Firmness
After achieving the perfect consistency, cover the bowl with plastic wrap and place it in the refrigerator. Chilling the mixture for at least 30 minutes is crucial, as it helps firm up the filling, making it easier to shape into eggs later. This step is essential for achieving the right texture, so don’t rush it!
Shaping the Eggs
Once the mixture has chilled, it’s time to shape the eggs. Using a small cookie scoop or your hands, portion out the peanut butter mixture and roll it into egg shapes. Aim for uniformity in size to ensure even coating later on. Place the shaped eggs on a parchment-lined baking sheet, leaving a little space between each one. You should have about 12-15 eggs, depending on the size you choose.
Freezing for Stability
To ensure your chocolate coating adheres properly, it’s important to freeze the shaped eggs for about 15-20 minutes. Freezing solidifies the peanut butter filling, making it easier to dip in chocolate without losing shape. Once they are firm, you are ready to proceed with the chocolate coating, which will elevate your homemade treats to a whole new level.
With these initial steps complete, you’re well on your way to creating delectable chocolate-covered peanut butter eggs that will impress everyone at your Easter gathering. Stay tuned for the next part of the article, where we will cover the chocolate dipping process and additional tips to perfect your treats.
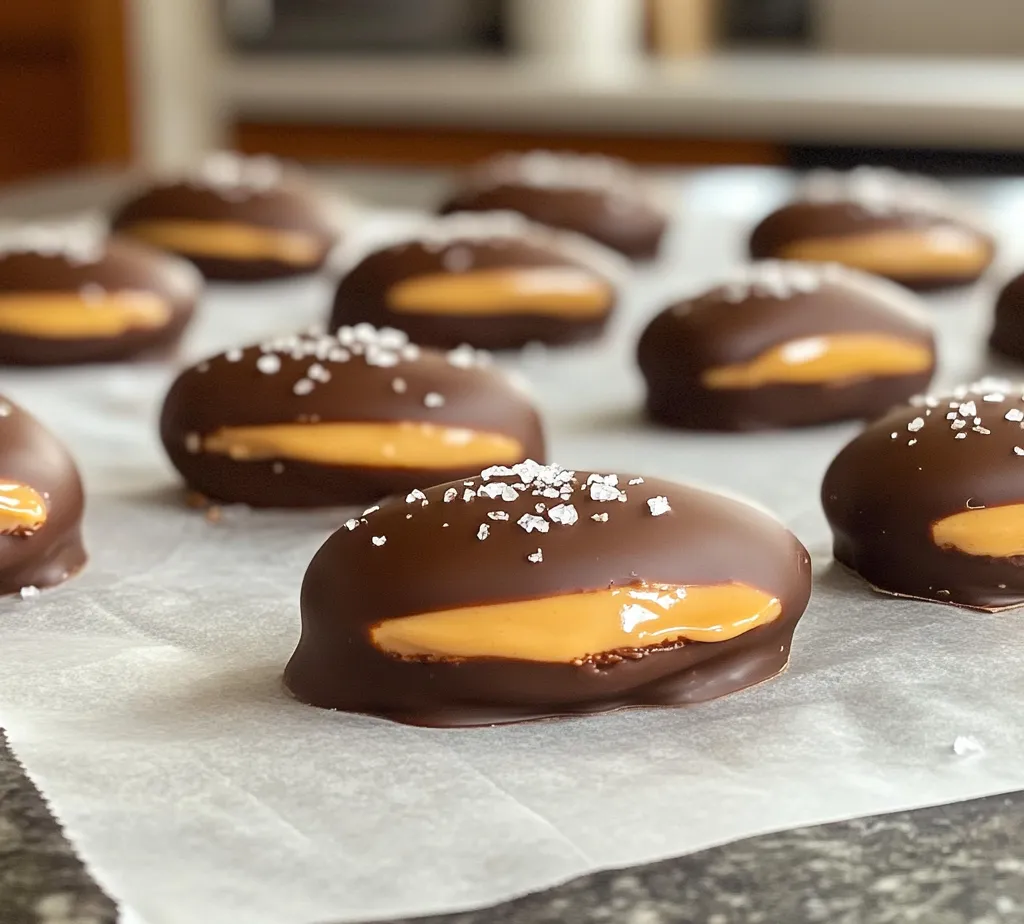
Melting Chocolate: Tips for Achieving a Smooth, Glossy Chocolate Coating
To achieve that perfect smooth and glossy chocolate coating on your peanut butter eggs, the process of melting the chocolate is crucial. Here are some tips to ensure your chocolate melts beautifully:
1. Choose the Right Chocolate: For coating, high-quality chocolate chips or bars are recommended. Dark chocolate, milk chocolate, or even white chocolate can work, depending on your preference.
2. Use a Double Boiler: This method helps to control the temperature of the chocolate and prevent it from burning. Fill a pot with a couple of inches of water and bring it to a simmer. Place a heatproof bowl over the pot, ensuring it does not touch the water. Add your chocolate to the bowl and stir gently until melted.
3. Microwave Method: If you prefer a quicker option, you can melt chocolate in the microwave. Place the chocolate in a microwave-safe bowl and heat in 30-second increments, stirring in between until smooth. Be cautious not to overheat, as chocolate can seize quickly.
4. Avoid Moisture: Ensure all utensils and bowls are completely dry, as moisture can cause the chocolate to seize and become grainy.
5. Add a Bit of Oil: If you desire a thinner consistency, consider adding a teaspoon of coconut oil or vegetable oil per cup of chocolate. This will give you a smoother coating and a glossy finish.
Dipping Technique: Detailed Instructions on How to Coat Eggs Evenly
Now that you have your chocolate ready, it’s time to coat your peanut butter eggs. Follow these detailed steps for an even and smooth finish:
1. Prepare a Cooling Rack: Line a baking sheet with parchment paper and place a cooling rack on top. This will allow excess chocolate to drip off and help maintain the shape of your eggs.
2. Dipping the Eggs: Using a fork or dipping tool, pick up one peanut butter egg at a time. Gently dip the egg into the melted chocolate, ensuring it’s completely submerged. Allow it to sit for a moment to let excess chocolate drip off.
3. Coat Evenly: If needed, use a spoon to drizzle chocolate over any exposed areas, ensuring an even coat. Be careful not to overdo it; a thin layer is often sufficient.
4. Set on the Rack: Once coated, carefully lift the egg out of the chocolate and place it on the cooling rack. Repeat the process for all eggs.
5. Chill to Set: Allow the chocolate to set at room temperature for a few minutes, then transfer the tray to the refrigerator for about 30 minutes until the chocolate hardens completely.
Finishing Touches: Optional Toppings for Added Flavor and Visual Appeal
Once your chocolate-covered peanut butter eggs are set, you can elevate them further with some finishing touches:
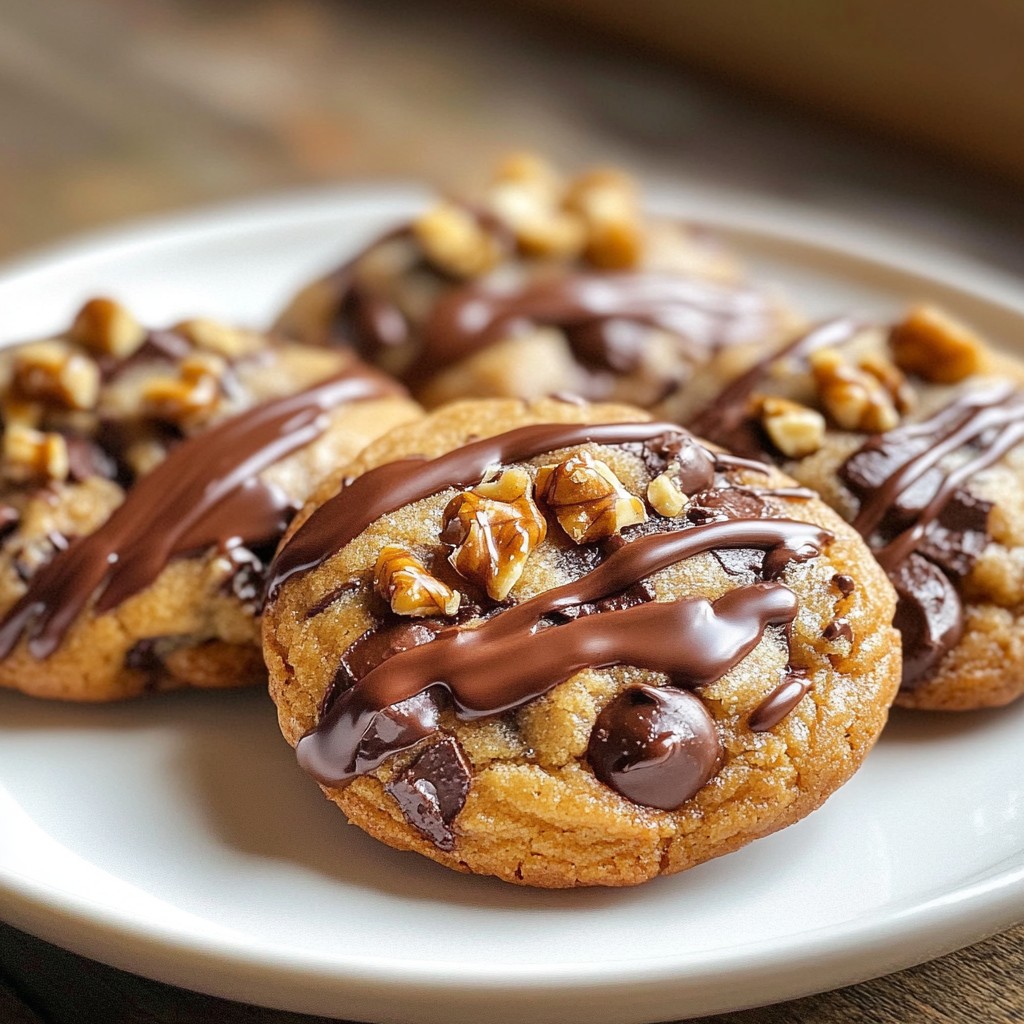
1. Drizzled Chocolate: Melt a contrasting chocolate (e.g., white chocolate over dark chocolate) and use a fork to drizzle it over the set chocolate eggs for a decorative touch.
2. Sprinkles or Nuts: While the chocolate is still wet, sprinkle on colorful sprinkles or finely chopped nuts (like peanuts or almonds) for added texture and flavor.
3. Cocoa Powder or Sea Salt: Dusting the eggs with cocoa powder or a sprinkle of flaky sea salt can add a sophisticated flavor contrast.
The Art of Presentation
Presenting your chocolate-covered peanut butter eggs beautifully can enhance the overall experience, whether you are serving them at a gathering or gifting them.
Creative Plating Ideas for Serving
– Rustic Presentation: Arrange the eggs on a wooden serving board with some fresh fruit or edible flowers for a rustic feel.
– Cupcake Liners: Place each egg in a colorful cupcake liner and arrange them on a decorative platter for a fun touch.
– Tiered Stand: Use a tiered dessert stand to display your eggs, adding height and elegance to your presentation.
Suggestions for Festive Packaging if Gifting
– Cellophane Bags: Place the eggs in clear cellophane bags tied with a ribbon for a simple yet elegant gift.
– Decorative Boxes: Use small decorative boxes lined with tissue paper to present the eggs as a thoughtful gift.
– Customized Labels: Create personalized labels with a sweet message to make your gift more special.
The Importance of Aesthetics in Food Presentation
The way food is presented can significantly impact the dining experience. A beautifully arranged plate not only enhances the visual appeal but also increases the anticipation and enjoyment of the dish. With chocolate-covered peanut butter eggs, the glossy finish and creative presentation will surely impress your guests and make the treat even more delightful.
Nutritional Information
Understanding the nutritional aspects of your homemade chocolate-covered peanut butter eggs is essential for enjoying them mindfully.
Overview of Nutritional Aspects of the Recipe
This recipe is rich in flavor and provides a satisfying treat. However, it is important to note that they are indulgent and should be enjoyed in moderation. Here is a general breakdown of the nutritional values per serving (one egg):
– Calories: Approximately 150-200 calories
– Fat: 10-12 grams (depending on the type of chocolate used)
– Protein: 4-5 grams (primarily from the peanut butter)
– Carbohydrates: 15-20 grams
Discussion on Indulgences Versus Moderation
While these chocolate-covered peanut butter eggs are a delightful treat, it is important to practice moderation. Enjoying them as a special dessert or during festive occasions can make them even more enjoyable without compromising your dietary goals.
Highlighting the Use of Quality Ingredients for Better Health Benefits
Using high-quality ingredients, such as natural peanut butter and dark chocolate, can provide added health benefits. Dark chocolate, for instance, is known to be rich in antioxidants, while natural peanut butter offers healthy fats and protein. Choosing quality ingredients not only enhances the flavor but also contributes positively to your overall nutritional intake.
Variations and Customizations
One of the best aspects of making chocolate-covered peanut butter eggs is the ability to customize the recipe to suit different tastes. Here are some ideas for variations:
Swapping Out Peanut Butter for Other Nut Butters
If you’re not a fan of peanut butter, consider using almond butter, cashew butter, or sunflower seed butter. Each nut butter brings a unique flavor profile and can cater to different dietary preferences.
Adding Flavorings
Experiment with flavoring your peanut butter mixture. A dash of cinnamon, vanilla extract, or espresso powder can provide a delightful twist that complements the chocolate.
Experimenting with Different Types of Chocolate
While milk chocolate is a classic choice, dark chocolate provides a rich, deep flavor, and white chocolate adds a sweet creaminess. Each type of chocolate can create a different experience, so feel free to mix and match to find your favorite combination.
Suggestions for Incorporating Nuts or Crunchy Toppings
For those who enjoy a bit of crunch, consider adding finely chopped nuts or crispy rice cereal to the peanut butter mixture for added texture. You can also roll the finished eggs in crushed nuts, coconut flakes, or even sprinkles for an extra layer of flavor.
Cultural Significance and History
Chocolate-covered treats have a rich history and play a significant role in various cultures, especially around festive occasions.
Brief Exploration of the Cultural Significance of Eggs
In many cultures, eggs symbolize new life and rebirth, making them particularly significant during springtime celebrations like Easter. The tradition of decorating eggs dates back centuries, and chocolate eggs have become a beloved treat during this time.
Historical Context of Chocolate-Covered Treats
Chocolate has been consumed for thousands of years, originally as a beverage in ancient Mesoamerican cultures. The evolution of chocolate into solid form led to the creation of countless confections, including chocolate-covered treats that are now staples in many cultures.
Fun Facts About Peanut Butter
Peanut butter has a storied history, with its rise in popularity tracing back to the 19th century when it was first patented. Today, it is a beloved ingredient in both savory and sweet dishes, cherished for its creamy texture and rich flavor.
Conclusion
Making homemade chocolate-covered peanut butter eggs is not just about creating a delicious treat; it’s about the joy and satisfaction that come from crafting something special from scratch. These eggs are perfect for sharing with friends and family, bringing people together over a sweet indulgence. The emotional connection food creates is profound, making it a wonderful way to celebrate occasions and create lasting memories.
So, gather your ingredients, unleash your creativity, and enjoy the process of making these delightful chocolate-covered peanut butter eggs. Whether you savor them yourself or share them with loved ones, they are sure to bring smiles and satisfaction to everyone involved. Happy cooking!
