Introduction
S’mores have long been a cherished treat, evoking memories of summer nights spent around crackling campfires, where friends and family gather to share laughter and stories. Traditionally made by roasting marshmallows over an open flame and sandwiching them between two graham crackers with a piece of chocolate, this delightful combination has transformed over the years, inspiring a myriad of dessert variations. From s’mores bars to s’mores brownies, the versatility of this beloved treat knows no bounds. Among the most indulgent adaptations is the S’mores Cookie Cup, a clever twist that combines the comforting familiarity of cookies with the nostalgic flavors of classic s’mores.
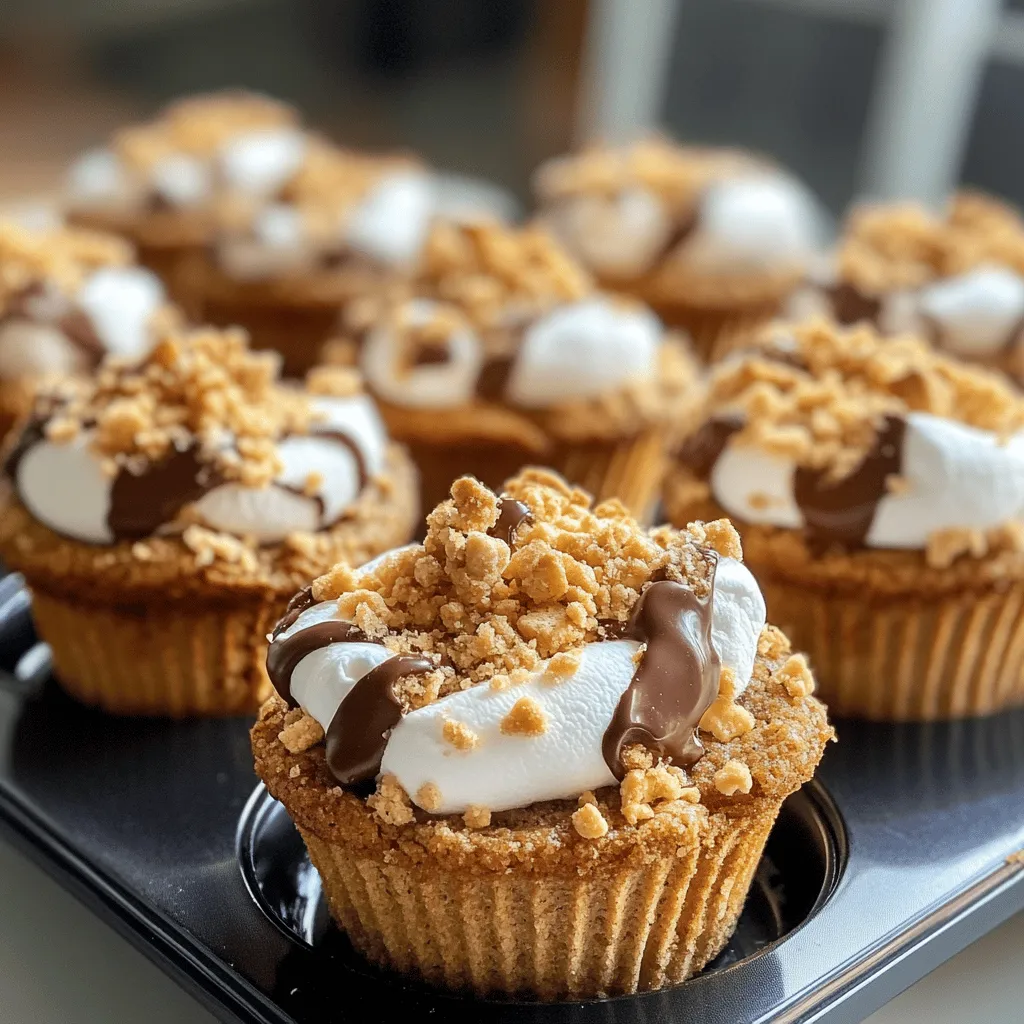
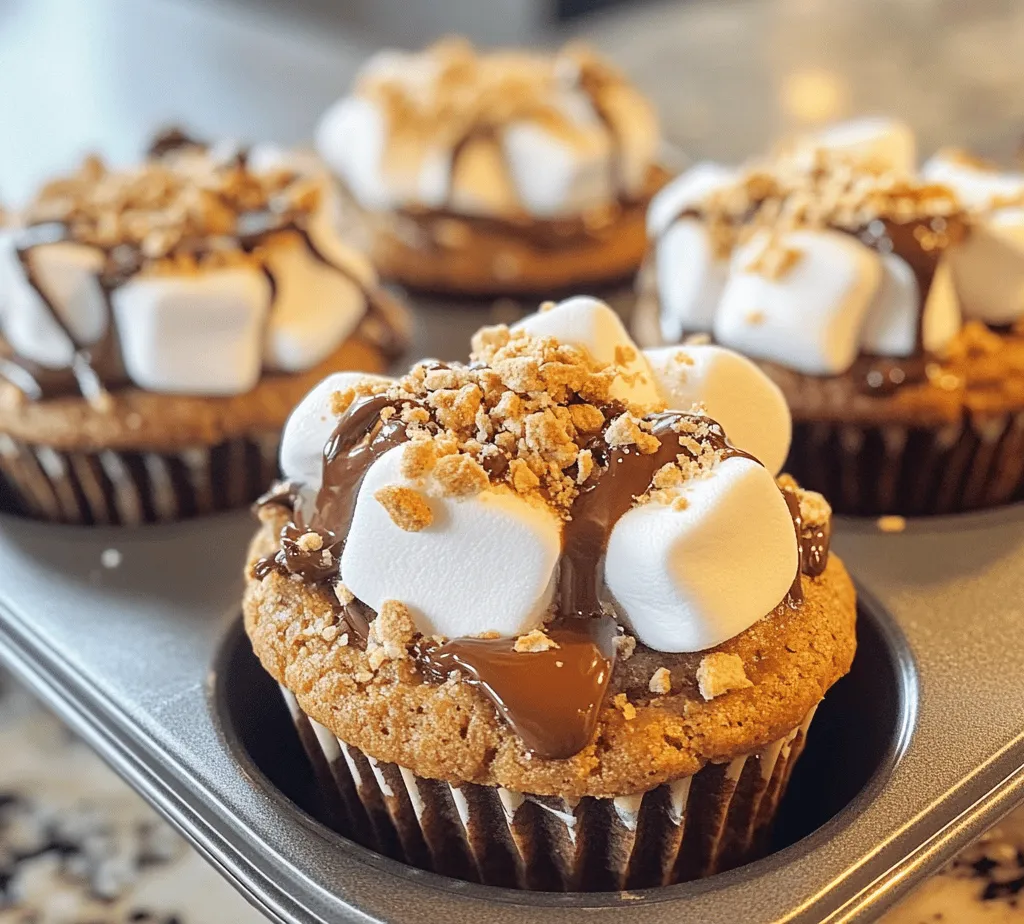
S’mores Cookie Cups are the ultimate fusion of cookie goodness and the iconic campfire dessert. These adorable, bite-sized treats feature a soft, chewy cookie base cradling a gooey, melted chocolate center and topped with toasted marshmallows. The appeal of this recipe lies not only in its delectable taste but also in its simplicity. Perfectly suited for gatherings, parties, or even a cozy night in, S’mores Cookie Cups are easy to make and sure to impress. Whether you’re a seasoned baker or a novice in the kitchen, this recipe will guide you through creating a unique flavor profile that captures the essence of summer in every delicious bite.
The Allure of S’mores
Historically, s’mores date back to the early 20th century, with their first recorded mention in a Girl Scouts cookbook published in 1927. The name “s’mores” is believed to be a contraction of “some more,” reflecting the irresistible nature of these treats that leave you wanting additional helpings. Traditionally made with graham crackers, chocolate bars, and marshmallows, this delightful combination embodies the spirit of outdoor adventures and childhood nostalgia.
The ingredients that compose a traditional s’more are simple yet effective. The graham cracker provides a subtle sweetness and crisp texture, while the chocolate adds richness and depth. The marshmallow, when toasted to perfection, brings a creamy texture and an inviting, caramelized flavor that ties the components together. Over the years, creative bakers have taken these classic elements and reimagined them in countless ways, leading to the delightful S’mores Cookie Cup. This unique dessert captures the essence of s’mores while offering a new and exciting format that is perfect for sharing.
Understanding the Ingredients
To create the perfect S’mores Cookie Cups, it’s essential to understand the role of each ingredient in the recipe. Here’s a breakdown of the key components that contribute to the flavor and texture of these delectable treats:
All-Purpose Flour
All-purpose flour is the backbone of most cookie recipes, providing structure and stability. Its gluten content helps create a chewy texture, which is essential for the cookie cups. When measured accurately and combined with the other ingredients, it ensures the cookie cups hold their shape while remaining tender and delicious.
Baking Soda and Salt
Baking soda acts as a leavening agent, helping the cookie cups rise and achieve a light, fluffy texture. It also enhances the browning of the cookies, contributing to their appealing golden color. Salt, though often overlooked, plays a crucial role in balancing sweetness and enhancing the overall flavor of the cookies. A pinch of salt can elevate the taste, making the chocolate and graham cracker flavors pop.
Butter and Sugars
Butter is a key player in creating the rich, moist texture of the cookie dough. It not only adds flavor but also helps to bind the ingredients together. The combination of granulated sugar and brown sugar contributes to the cookie’s sweetness and chewiness. Brown sugar, with its molasses content, adds a hint of caramel flavor that perfectly complements the s’mores profile.
Eggs and Vanilla
Eggs serve as a binding agent in the dough, helping to create a cohesive mixture. They also contribute to the cookie’s structure and moisture. Vanilla extract adds depth and enhances the overall flavor profile, making the cookies even more irresistible.
Chocolate Chips
When it comes to chocolate, the choice of chips significantly impacts the final taste and texture of the S’mores Cookie Cups. Semi-sweet chocolate chips are often preferred for their balanced flavor, but milk chocolate or dark chocolate can be used depending on personal preference. The melted chocolate creates a luscious center that mimics the classic s’mores experience.
Crushed Graham Crackers and Marshmallows
To truly recreate the s’mores flavor, crushed graham crackers are incorporated into the cookie dough. They add a delightful crunch and subtle sweetness reminiscent of the original treat. Mini marshmallows are essential for achieving that gooey, toasted finish that makes s’mores so special. When baked, they melt and caramelize, creating a delicious topping that completes the cookie cups.
Step-by-Step Preparation of S’mores Cookie Cups
Prepping the Kitchen: Setting the Stage
Before diving into the recipe, it’s important to prep your kitchen for a seamless baking experience. Start by preheating your oven to 350°F (175°C). Preheating is crucial as it ensures that the cookies bake evenly, allowing them to rise properly and develop a golden brown color.
Next, prepare a muffin tin by greasing it or lining it with muffin liners. This will help prevent the cookie cups from sticking and make for easier removal once they’re baked. Having all your ingredients measured and ready to go will streamline the process, making it more enjoyable and efficient.
Mixing Dry Ingredients: The Foundation of Flavor
In a medium-sized bowl, combine the all-purpose flour, baking soda, and salt. Whisk them together until evenly mixed. Properly mixing your dry ingredients before adding them to the wet mixture helps ensure that the baking soda and salt are evenly distributed throughout the dough. This step is essential for achieving a consistent flavor and texture in the final product.
Creaming the Butter and Sugars: Achieving the Right Consistency
In a large mixing bowl, use an electric mixer to cream together the softened butter, granulated sugar, and brown sugar. Start on a low speed to prevent sugar from flying everywhere, then gradually increase to medium speed. Creaming the butter and sugars together is a vital step in cookie baking as it incorporates air into the mixture, resulting in a light and fluffy texture. Beat the mixture until it becomes pale and creamy, which usually takes about 2-3 minutes.
Adding Eggs and Vanilla: Binding and Flavor Enhancement
Once the butter and sugars are well combined, it’s time to incorporate the eggs and vanilla extract. Add the eggs one at a time, mixing well after each addition to ensure they are fully integrated into the dough. This step is essential for binding the ingredients together and contributing to the overall structure of the cookie cups.
After the eggs are mixed in, add the vanilla extract and continue to mix until fully incorporated. The aroma of vanilla will enhance the flavor profile of your S’mores Cookie Cups, making them even more enticing.
With the wet ingredients thoroughly combined, you’re ready to move on to the next steps in creating these irresistible cookie cups. The combination of flavors and textures is sure to delight both your taste buds and your guests, making S’mores Cookie Cups a must-have treat for any occasion.
Stay tuned for the continuation of this delicious recipe, where we will dive deeper into the assembly and baking process, ensuring you achieve the perfect S’mores Cookie Cups every time.
Combining Mixtures: The Art of Mixing
Creating the perfect S’mores Cookie Cups begins with a well-executed mixing process. Combining the ingredients properly is crucial to ensuring a consistent texture and flavor throughout your cookie cups. Start by creaming together your butter and sugars until the mixture is light and fluffy. This process incorporates air, which contributes to the overall rise and texture of your cookies.
Tips for Avoiding Overmixing for a Soft Cookie
One of the most common pitfalls in baking is overmixing the dough. To avoid this, mix the ingredients just until they are combined. Overmixing can lead to tough cookies due to the development of gluten. Aim for a smooth, cohesive dough without any flour streaks. If you notice your dough becoming too elastic, stop mixing immediately. Remember, a little bit of texture in the dough is perfectly fine and can enhance the cookie’s final structure.
Folding in Chocolate and Graham Crackers: Creating the Perfect Dough
Once your basic dough is ready, it’s time to fold in the chocolate and graham cracker pieces. This step is essential for ensuring that your cookie cups have the classic s’mores flavor profile.
Techniques for Evenly Distributing Mix-Ins Without Overworking the Dough
To fold in the chocolate chips and crushed graham crackers without overworking the dough, use a spatula or wooden spoon. Gently lift the dough from the bottom and fold it over the mix-ins. Rotate the bowl as you do this to ensure the chocolate and graham crackers are evenly distributed throughout the dough. The goal is to see a few chunks of chocolate and pieces of graham cracker peeking through the dough, which will give your cookie cups a delightful texture and visual appeal.
Shaping the Cookie Cups: Crafting the Perfect Vessel
Now that you have your dough prepared, it’s time to shape it into cookie cups. This step is vital as it forms the vessel that will hold the gooey marshmallow and chocolate center.
Guidance on Shaping and Pressing the Dough into Muffin Cups to Create Wells
Using a muffin tin, scoop out a portion of the dough (about a tablespoon) and roll it into a ball. Place the ball in a muffin cup and use your fingers to press the dough into the sides and bottom, creating a well in the center. Be sure to leave enough thickness at the bottom so that the cookie cups hold their shape while baking. Aim for an even layer to ensure that all cookie cups bake uniformly.
Baking to Perfection: Timing and Temperature
The baking process is critical for achieving the perfect texture in your S’mores Cookie Cups.
Insight into Baking Times and the Importance of Slightly Underbaking
Preheat your oven to 350°F (175°C). Bake the cookie cups for about 10-12 minutes, or until the edges are golden brown. It’s essential to keep a close eye on them, as you want to slightly underbake the centers. Removing the cookie cups from the oven while they are still slightly soft in the middle will allow them to settle and firm up as they cool, resulting in a chewy texture that contrasts beautifully with the crispy edges.
The Marshmallow Magic: Transforming the Cookie Cups
While the cookie cups are baking, prepare for the marshmallow topping that will turn these treats into true S’mores delights.
Techniques for Adding Marshmallows and Achieving That Gooey Texture
Once your cookie cups have baked to perfection, remove them from the oven and let them cool for about 5 minutes. This cooling time is essential; it allows the cookie to set and makes them easier to handle. After the brief cooling period, place a marshmallow half, cut side down, into the center of each cookie cup.
Return the muffin tin to the oven for an additional 2-3 minutes, just long enough for the marshmallows to puff up and become gooey. Keep an eye on them to ensure they don’t burn. If you prefer a toasted marshmallow finish, you can use a kitchen torch to lightly toast the tops after baking.
Final Touches: Cooling and Garnishing
After your marshmallows have achieved that perfect gooey texture, it’s time to let your cookie cups cool completely in the muffin tin.
Importance of Cooling and Garnishing for Presentation and Taste
Cooling is essential as it allows the flavors to meld together, enhancing the overall taste. Once cooled, consider garnishing your S’mores Cookie Cups with a sprinkle of crushed graham crackers and a drizzle of melted chocolate for an added layer of flavor and visual appeal. This not only enhances the s’mores experience but also makes your cookie cups Instagram-worthy.
Satisfying Your Sweet Tooth: Flavor Profile and Texture
The S’mores Cookie Cups combine flavors and textures that satisfy any sweet tooth.
Analysis of the Balance Between the Sweetness of Chocolate and the Slight Saltiness of the Cookie
The cookie itself has a subtle saltiness that beautifully balances the sweetness of the chocolate and the sugary marshmallows. This contrast enhances the overall flavor profile, making each bite an indulgent experience.
Description of the Textures: Crispy Edges, Gooey Center, and Toasted Marshmallow Topping
As you bite into the cookie cup, the crispy edges give way to a soft, chewy center filled with melted chocolate and gooey marshmallow. The toasted marshmallow topping adds a delightful layer of texture and flavor, reminiscent of classic campfire s’mores.
How the Crushed Graham Crackers Enhance the Overall Experience
The crushed graham crackers throughout the dough provide a satisfying crunch that complements the soft interior. This unique combination of textures and flavors creates a well-rounded dessert that is both nostalgic and indulgent.
Serving Suggestions
S’mores Cookie Cups are incredibly versatile and can be enjoyed on various occasions.
Ideas for Pairing S’mores Cookie Cups with Beverages
For the perfect pairing, consider serving your cookie cups with a glass of cold milk. The creamy texture of milk contrasts beautifully with the rich flavors of the cookie cups. Alternatively, a hot cup of coffee can provide a delightful balance, enhancing the chocolate notes in the dessert.
Occasions Where the Cookie Cups Shine: Parties, Movie Nights, etc.
These cookie cups are ideal for parties, movie nights, or any gathering where you want to impress your guests with a delightful dessert. Their bite-sized nature makes them perfect for sharing, and they are sure to be a hit among both kids and adults alike.
Presentation Tips for Making the Cookie Cups Visually Appealing
To elevate your presentation, consider arranging the cookie cups on a decorative platter, garnished with mini chocolate bars and extra marshmallows. You can also use colorful cupcake liners to add a pop of color to your display, making them even more inviting.
Nutritional Overview
While S’mores Cookie Cups are undoubtedly a treat, it’s essential to consider their nutritional aspects.
Brief Discussion on the Nutritional Aspects of S’mores Cookie Cups
Each cookie cup is rich in flavor but also high in sugar and calories. Enjoy them in moderation, especially if you are keeping an eye on your dietary intake.
Considerations for Dietary Preferences: Gluten-Free Alternatives, Sugar Substitutes
For those with dietary restrictions, you can easily modify this recipe. Substitute all-purpose flour with gluten-free flour blends to create a gluten-free version that everyone can enjoy. Additionally, consider using sugar substitutes like coconut sugar or stevia for a healthier alternative without sacrificing flavor.
Conclusion
Making S’mores Cookie Cups is a delightful and indulgent treat that brings the nostalgic flavors of campfire s’mores into an easy-to-eat form. With the right techniques, you can craft cookie cups that are crispy on the outside, chewy on the inside, and filled with gooey marshmallows and rich chocolate.
As you explore this recipe, don’t hesitate to get creative with variations. Consider adding peanut butter chips, swapping the chocolate for white chocolate, or mixing in different flavored extracts to personalize your cookie cups.
The timeless appeal of s’mores in various forms continues to capture hearts, and these S’mores Cookie Cups are no exception. Embrace the joy of baking and enjoy the delicious results with friends and family!
