Introduction
As the leaves turn golden and the air becomes crisp, the unmistakable aroma of pumpkin spice begins to fill our kitchens, signaling the arrival of fall. This seasonal flavor has transcended its humble beginnings to become a beloved staple in homes and coffee shops alike, capturing the essence of autumn in every bite. Among the myriad of pumpkin spice-inspired treats, the Pumpkin Spice Dream Cookies stand out as a perfect addition to your fall and holiday gatherings. These cookies not only embody the warm, comforting flavors of the season but also come with a delightful twist: a luscious brown butter frosting that transforms an ordinary cookie into an extraordinary experience.
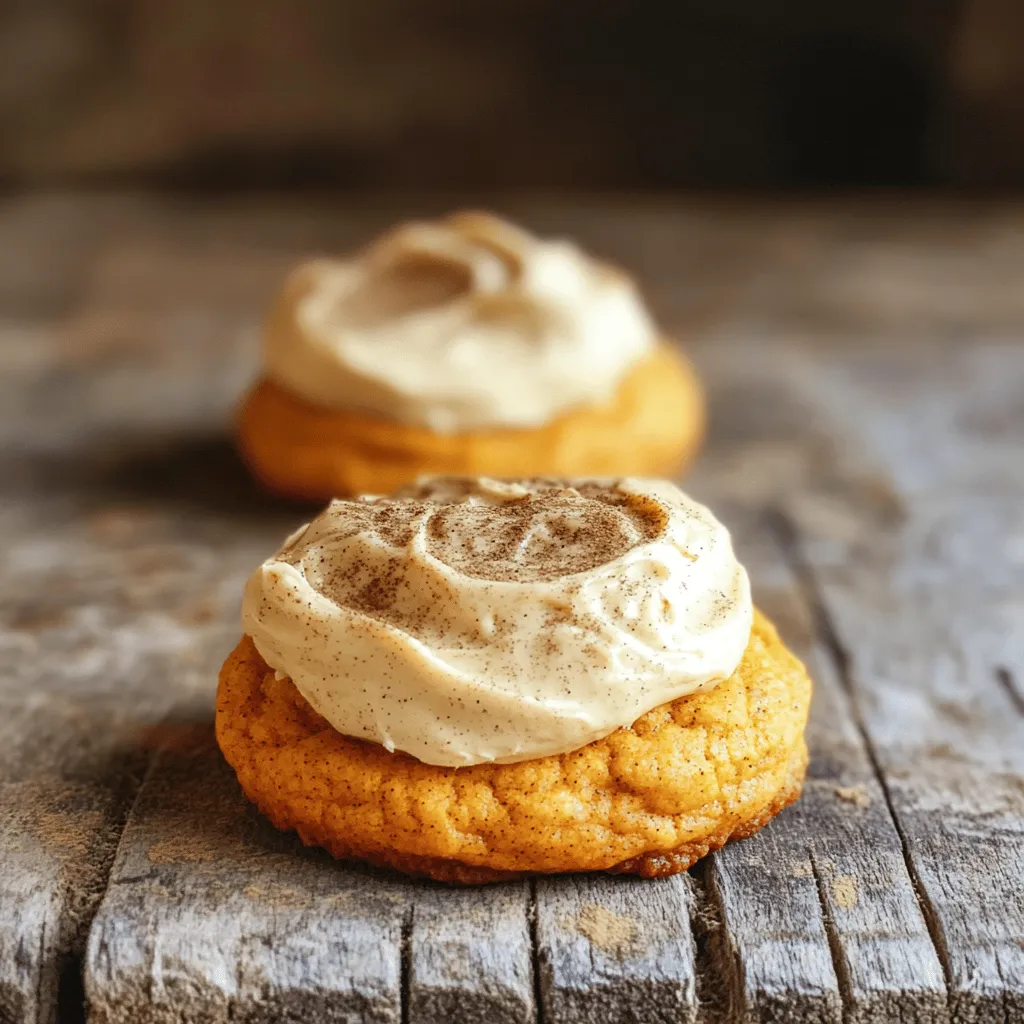
Imagine soft, chewy cookies infused with the rich essence of pumpkin and a medley of spices that dance on your palate. Then, picture a velvety frosting that adds a nutty depth and luxurious texture, elevating each bite to something truly special. Whether you are hosting a festive gathering or simply indulging in a cozy evening at home, these Pumpkin Spice Dream Cookies are sure to impress everyone around the table.
Understanding the Ingredients
To create the perfect Pumpkin Spice Dream Cookies with Brown Butter Frosting, it’s essential to understand the role of each ingredient. This knowledge not only aids in crafting the recipe but also allows for adjustments based on personal preferences or dietary needs.
Pumpkin Puree
At the heart of our cookies is pumpkin puree, which not only lends its characteristic flavor but also contributes to the cookie’s delightful texture. Pumpkin is rich in nutrients, including vitamins A and C, making it a healthy choice for baking. The moisture from the pumpkin puree helps keep the cookies soft and tender, resulting in a melt-in-your-mouth experience that is hard to resist.
Sugars
The combination of granulated sugar and brown sugar is crucial for achieving the perfect balance of sweetness, flavor, and moisture in these cookies. Granulated sugar provides the necessary sweetness, while brown sugar, with its molasses content, adds a hint of caramel flavor and helps retain moisture. This combination creates a cookie that is not only sweet but also wonderfully chewy.
Butter
Butter plays a pivotal role in cookie baking, and in this recipe, we utilize softened butter for creaming with the sugars. Creaming the butter and sugars together creates air pockets that contribute to the cookie’s texture. However, the real star here is the brown butter used in the frosting. Brown butter brings a nutty aroma and rich flavor that enhances the overall taste of the cookies, making each bite a truly indulgent experience.
Spices
No pumpkin spice treat is complete without the warm, fragrant spices that define its flavor profile. In this recipe, we use a blend of cinnamon, nutmeg, and ginger. Cinnamon provides a warm sweetness, nutmeg adds a hint of earthiness, and ginger contributes a zesty kick that complements the pumpkin beautifully. This harmonious blend of spices is what gives these cookies their quintessential pumpkin spice flavor.
Flour and Leavening Agents
All-purpose flour serves as the foundation of the cookie dough, providing structure and stability. To achieve the ideal cookie consistency, we incorporate both baking soda and baking powder as leavening agents. Baking soda helps the cookies spread while providing a slight rise, while baking powder ensures they remain fluffy and tender. Together, they create a cookie that is both chewy and light.
Egg and Vanilla Extract
The egg in this recipe acts as a binding agent, holding the ingredients together and adding moisture. It also contributes to the overall richness of the cookie. Meanwhile, a splash of vanilla extract enhances the flavor profile, adding a subtle sweetness that perfectly complements the pumpkin and spices.
Step-by-Step Instructions
Now that we have a solid understanding of the ingredients, it’s time to dive into the preparation of our Pumpkin Spice Dream Cookies. Following a structured approach will ensure that your cookies come out perfectly every time.
Prepping the Kitchen
Before diving into the baking process, it’s important to set the stage for success. Start by preheating your oven to 350°F (175°C). This ensures that the cookies begin baking at the right temperature, resulting in optimal texture and flavor. While the oven is heating, prepare your baking sheets by lining them with parchment paper. This will prevent the cookies from sticking and allow for easy removal once they’re baked.
Making the Cookie Dough
1. Cream the Butter and Sugars: In a large mixing bowl, combine the softened butter, granulated sugar, and brown sugar. Using an electric mixer, beat the mixture on medium speed until it becomes light and fluffy, which typically takes about 2-3 minutes. This step is crucial as it incorporates air into the dough, contributing to the cookie’s texture.
2. Incorporate the Pumpkin: Once the butter and sugars are well combined, add the pumpkin puree and the egg. Mix on low speed until fully incorporated. It’s essential to ensure that the pumpkin is evenly distributed throughout the dough to achieve consistent flavor in every cookie.
3. Add Vanilla Extract: Pour in the vanilla extract and give the mixture another quick blend until combined. This addition enhances the overall flavor, providing a sweet and aromatic backdrop to the spices and pumpkin.
Combining Dry Ingredients
In a separate bowl, whisk together the all-purpose flour, baking soda, baking powder, cinnamon, nutmeg, and ginger. Whisking the dry ingredients ensures that the leavening agents and spices are evenly distributed throughout the flour. This step is key to achieving a uniform flavor and texture in the cookies.
Once the dry ingredients are thoroughly mixed, gradually add them to the wet pumpkin mixture. Use a spatula or wooden spoon to gently fold the dry ingredients into the wet ingredients until just combined. Be careful not to overmix; you want the dough to be cohesive but still slightly lumpy. Overmixing can lead to tough cookies.
Scooping Cookies
With your dough ready, it’s time to scoop out the cookies. Using a cookie scoop or a tablespoon, portion out the dough and place it on the prepared baking sheets, spacing them about 2 inches apart. This spacing is crucial as it allows the cookies to spread during baking without merging into one another. For added flair, you can lightly shape the dough balls into rounded mounds, which will help them maintain a nice shape while baking.
By following these steps, you’re well on your way to creating a batch of Pumpkin Spice Dream Cookies that will delight your family and friends. In the next section, we will delve into the baking process and the tantalizing brown butter frosting that completes these cookies. Stay tuned for the delicious details!
Baking Pumpkin Spice Dream Cookies
When it comes to baking Pumpkin Spice Dream Cookies, achieving the perfect texture is crucial. The optimal baking time typically ranges from 10 to 12 minutes at 350°F (175°C). However, the exact time can vary based on your oven’s characteristics and the size of your cookies. To check for doneness, look for the following signs:
– Edges: The edges should be lightly golden, while the centers remain soft and slightly underbaked. This will ensure that your cookies have a chewy texture once cooled.
– Surface: The tops of the cookies will appear set and may have a few small cracks, indicating they are ready to come out of the oven.
– Touch: If you gently press the center of a cookie and it springs back slightly, it’s a good sign that your cookies are done.
Once you’ve mastered the baking process, it’s essential to allow your cookies to cool completely before frosting them. This step is crucial; applying frosting to warm cookies can cause it to melt and slide off, ruining your beautiful creations.
Cooling and Frosting
After removing your cookies from the oven, transfer them onto a wire rack. This allows air to circulate around them, ensuring they cool quickly and evenly. Let the cookies cool for about 15 to 20 minutes until they are firm enough to frost. Now, let’s dive into the delicious world of brown butter frosting, which adds an irresistible flavor and creamy texture that pairs beautifully with the warm spices of the cookies.
The Art of Brown Butter Frosting
Browning Process:
To achieve that perfect nutty flavor that brown butter frosting is known for, start by melting unsalted butter in a saucepan over medium heat. As it melts, it will begin to foam. Keep stirring continuously; this is where the magic happens. Pay close attention to the color and aroma. You’re looking for a deep golden brown hue and a rich, nutty scent. Be careful not to let it burn—if you see dark specks forming or the aroma becomes bitter, you may need to start over.
Combining Ingredients for the Frosting:
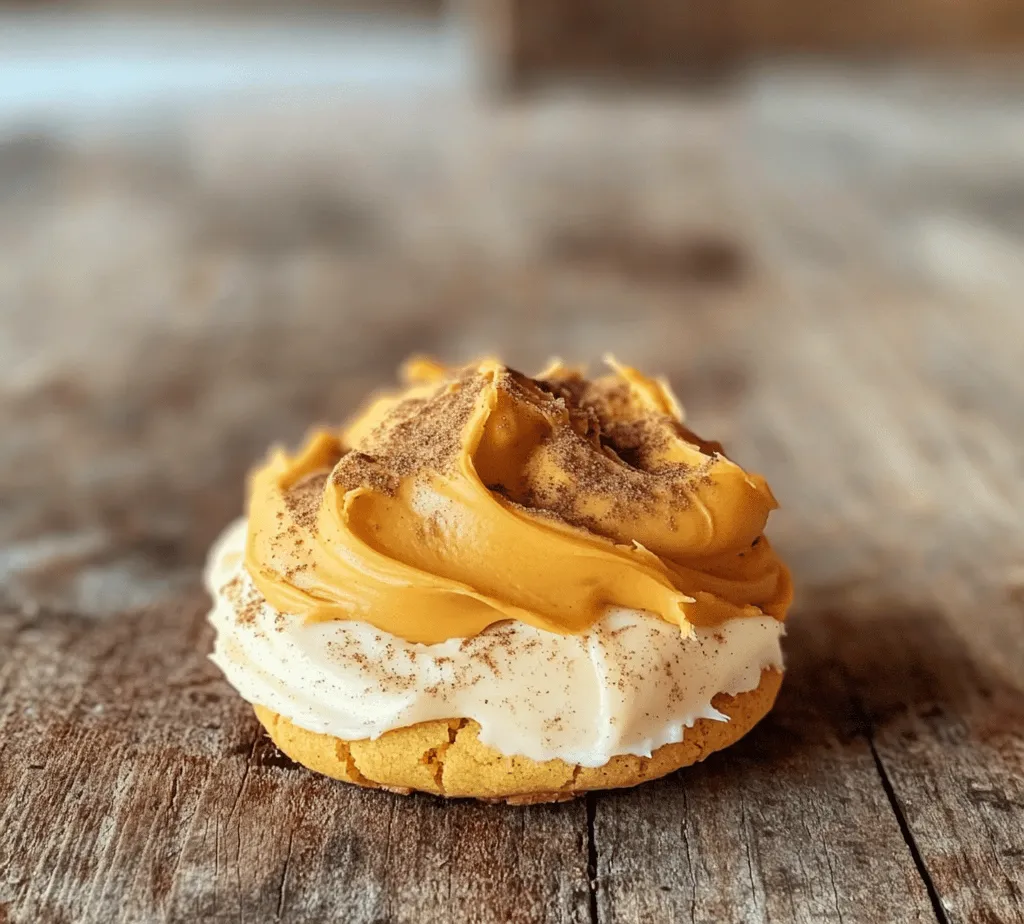
Once your butter is perfectly browned, remove it from the heat and allow it to cool slightly. In a mixing bowl, combine the browned butter with powdered sugar, vanilla extract, and a pinch of salt. You may add a tablespoon of milk or heavy cream to achieve the desired spreading consistency. Mix until smooth; the frosting should be thick yet spreadable. If it’s too thick, add another splash of milk. If it’s too thin, incorporate more powdered sugar until you reach the ideal consistency.
Tips for Decorating Cookies with Frosting:
– Spreading Technique: Use a small offset spatula or the back of a spoon to evenly spread the frosting on each cookie. Start from the center and work your way out to the edges for a smooth finish.
– Piping Options: For a more decorative look, transfer the frosting to a piping bag fitted with a round or star tip. This allows for intricate designs and patterns on your cookies.
– Garnishing: Consider finishing your frosted cookies with a sprinkle of cinnamon or a few pecans for an extra touch of flair and flavor.
Serving Suggestions
Now that your Pumpkin Spice Dream Cookies are beautifully frosted, it’s time to think about presentation and serving. Here are some delightful ways to showcase your cookies at gatherings:
– Platter Presentation: Arrange your cookies on a rustic wooden board or a decorative platter. Adding a few fall-themed decorations, like mini pumpkins or leaves, can create a seasonal centerpiece.
– Individual Wrapping: For a personal touch, wrap each cookie in clear cellophane and tie with twine. This makes for perfect party favors or thoughtful gifts.
Pairing Options:
To elevate the experience of enjoying these cookies, consider which beverages pair best with their flavors. A few excellent choices include:
– Coffee: A warm cup of coffee, particularly a latte or cappuccino, complements the spices beautifully.
– Tea: Chai tea or spiced apple cider enhances the cozy fall experience.
– Milk: For a classic pairing, a glass of cold milk never goes out of style and balances the sweetness of the cookies.
Storage Tips:
To keep your Pumpkin Spice Dream Cookies fresh and maintain their delightful texture:
– Airtight Containers: Store your cookies in an airtight container at room temperature for up to a week.
– Freezing: If you want to enjoy them later, freeze the baked cookies without frosting in a single layer on a baking sheet. Once frozen, transfer them to a freezer-safe bag or container. They can last up to three months. When you’re ready to enjoy, thaw them at room temperature and frost as desired.
Nutritional Insights
As with any indulgent treat, it’s important to consider the nutritional profile of your Pumpkin Spice Dream Cookies. Here’s a quick overview:
– Calories: Each cookie is indulgent, so moderation is key.
– Nutritional Benefits: The pumpkin puree contributes fiber and vitamins, while the spices used can provide antioxidant properties.
Enjoying these cookies can be a balanced experience when shared among friends and family during the festive season. If you’re looking to cater to dietary preferences, consider the following variations:
– Gluten-Free: Substitute all-purpose flour with a gluten-free flour blend designed for baking.
– Vegan Options: Replace the butter with coconut oil or a vegan butter substitute and use a flaxseed egg instead of a regular egg for a plant-based treat.
Conclusion
Baking Pumpkin Spice Dream Cookies is not just about creating a delicious treat; it’s an experience filled with warmth, flavor, and nostalgia. The process of mixing the ingredients, the delightful aroma wafting through your kitchen, and the joy of frosting and decorating each cookie come together to create cherished moments. Sharing these cookies with loved ones during the fall season enhances the joy of the occasion, making every bite a reminder of the beauty of homemade treats.
Embrace the seasonal flavors and take the time to create your own Pumpkin Spice Dream Cookies. They are sure to become a beloved addition to your fall baking repertoire, bringing comfort and happiness to your gatherings and celebrations. So gather your ingredients, get baking, and enjoy the delightful experience of creating and sharing these delicious cookies!


