Introduction
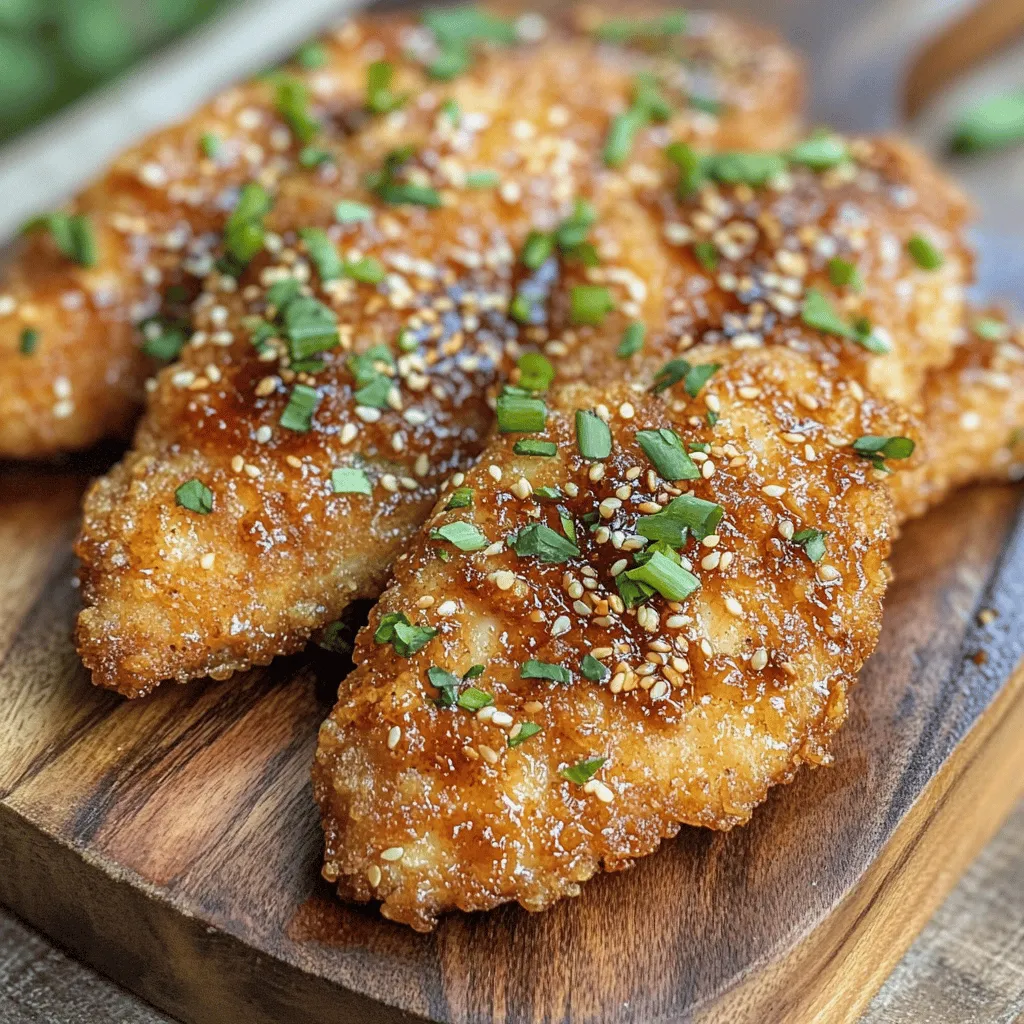
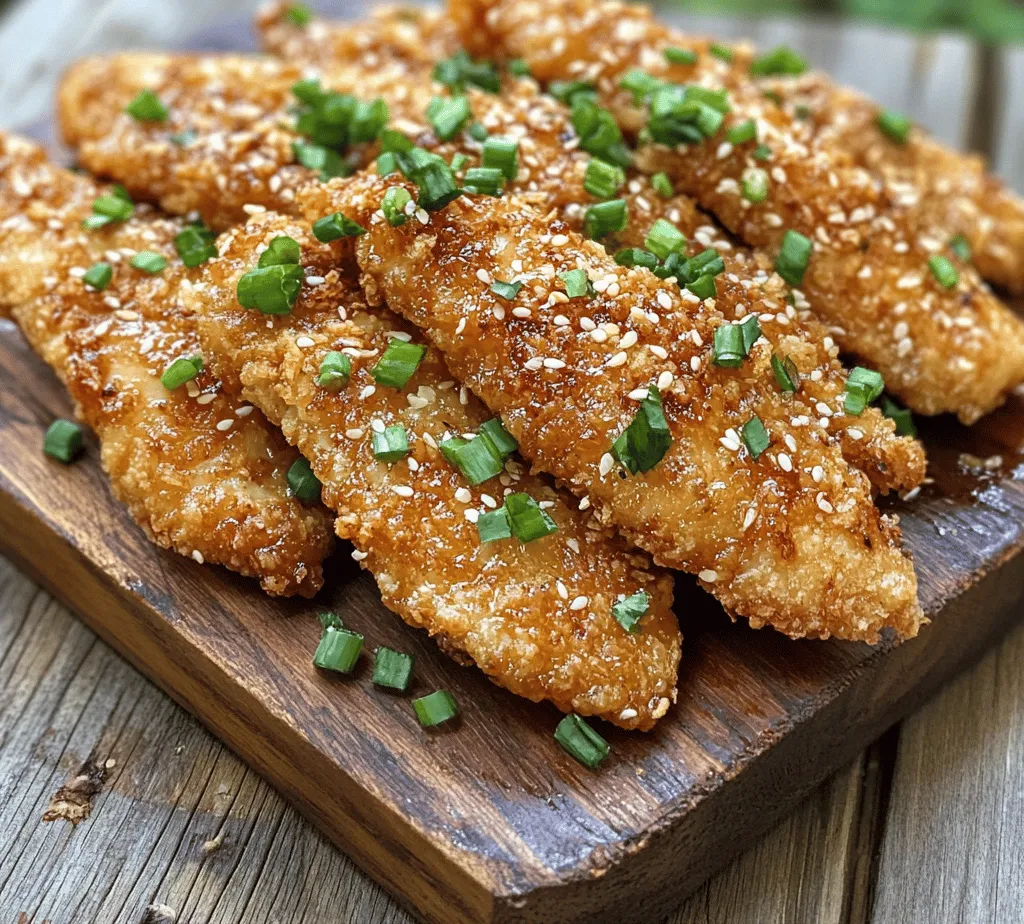
When it comes to comfort food, few dishes can rival the allure of crispy chicken tenders. These Honey Garlic Crispy Chicken Tenders take the classic favorite to a whole new level. Imagine biting into a perfectly golden-brown chicken tender, its crunch giving way to tender, juicy meat, all enveloped in a deliciously sweet and savory honey garlic sauce. Whether served as an appetizer, a delightful snack, or the star of your family dinner, this dish is sure to impress.
The versatility of Honey Garlic Crispy Chicken Tenders is one of their most appealing traits. They can be enjoyed on their own, dipped in your favorite sauces, or paired with a side of vegetables or fries. What’s more, this recipe is designed to be easy and accessible, making it suitable for both novice cooks looking to impress their guests and seasoned chefs aiming for a quick but flavorful meal.
In this article, we will delve into the specifics of what makes these chicken tenders so irresistible, explore the key ingredients that contribute to their flavor and texture, and provide a step-by-step guide to preparing them at home.
Understanding the Ingredients
To craft the perfect Honey Garlic Crispy Chicken Tenders, it’s essential to understand the role each ingredient plays in the overall dish. The combination of quality ingredients not only enhances the flavor but also ensures a delightful texture that will keep everyone coming back for more.
Chicken Tenders
At the heart of this recipe are chicken tenders, which are the tender, juicy strips of chicken found on the underside of the breast. These cuts are ideal for this dish for several reasons. First, their natural tenderness means that they cook quickly and remain juicy, making them perfect for frying. Additionally, chicken tenders are convenient to work with; they require minimal preparation and are easy to handle, which is perfect for quick weeknight dinners or casual gatherings.
Buttermilk
Buttermilk plays a crucial role in the marinating process of these chicken tenders. By soaking the chicken in buttermilk before cooking, you allow the acid in the buttermilk to break down the proteins in the chicken, resulting in a more tender and flavorful final product. Buttermilk also adds a subtle tanginess that beautifully complements the sweetness of the honey garlic sauce. For the best results, aim to marinate the chicken for at least 30 minutes, but overnight marination can yield even more tender and flavorful tenders.
Seasoning Blends
The flavor profile of Honey Garlic Crispy Chicken Tenders is elevated by a blend of seasonings. Key players include garlic powder, onion powder, and smoked paprika.
– Garlic Powder: This ingredient not only enhances the overall flavor of the chicken but also aligns perfectly with the later addition of fresh garlic in the sauce.
– Onion Powder: This adds a subtle sweetness and depth, complementing the garlic without overpowering it.
– Smoked Paprika: Known for its rich, smoky flavor, smoked paprika contributes a delightful warmth and complexity that balances the dish.
These seasonings create a flavorful foundation that permeates the chicken, ensuring every bite is a burst of flavor.
Breading Components
Achieving that perfect crunch on the outside of the chicken tenders is all about the breading. This recipe uses a combination of all-purpose flour and panko breadcrumbs.
– All-Purpose Flour: This serves as the initial coating, helping the egg wash adhere to the chicken.
– Panko Breadcrumbs: Known for their larger, flakier texture, panko breadcrumbs create a light and airy crunch that elevates the tenders. For those who enjoy a bit of heat, adding optional cayenne pepper to the breadcrumb mixture can provide a delightful kick that pairs well with the sweetness of the honey.
Honey Garlic Sauce
The pièce de résistance of this recipe is undoubtedly the honey garlic sauce. This irresistible sauce is a harmonious blend of honey, garlic, soy sauce, and apple cider vinegar, creating a balance of sweetness, saltiness, and tanginess.
– Honey: The star ingredient, honey not only provides sweetness but also helps the sauce adhere to the chicken tenders, creating a sticky, delicious coating.
– Garlic: Fresh minced garlic amplifies the flavor, adding a robust, aromatic quality that pairs beautifully with the honey.
– Soy Sauce: This ingredient adds depth and umami, making the sauce more complex and savory.
– Apple Cider Vinegar: A splash of apple cider vinegar introduces a tangy note that balances the sweetness of the honey and the saltiness of the soy sauce.
Together, these ingredients create a sauce that transforms simple chicken tenders into a dish that feels gourmet, yet is incredibly easy to prepare at home.
Step-by-Step Preparation Guide
Now that we’ve explored the ingredients, let’s dive into the process of preparing these Honey Garlic Crispy Chicken Tenders. This comprehensive guide will walk you through each step to ensure your tenders turn out perfectly every time.
Marinating the Chicken
1. Prepare the Marinade: In a large mixing bowl, combine buttermilk, garlic powder, onion powder, smoked paprika, salt, and pepper. Whisk together until well blended.
2. Add the Chicken: Place the chicken tenders in the bowl, ensuring that each piece is fully submerged in the marinade. This is critical for flavor penetration and tenderness.
3. Marinate: Cover the bowl with plastic wrap and refrigerate. Ideally, let the chicken marinate for at least 30 minutes; however, for maximum flavor and tenderness, marinating for 2-4 hours is recommended. If you have time, overnight marination is even better.
4. Prepare for Bread Coating: After marinating, remove the chicken from the refrigerator. Let it sit at room temperature for about 10-15 minutes, which helps in achieving a more even cooking temperature.
Setting Up the Breading Station
1. Gather Your Ingredients: Set up a workstation with three shallow dishes. In the first dish, add all-purpose flour mixed with a pinch of salt and pepper. In the second dish, whisk together eggs and a splash of water to create an egg wash. In the third dish, combine panko breadcrumbs with any additional seasonings you desire, such as cayenne pepper for heat.
2. Coat the Chicken: Take each marinated chicken tender and first dredge it in the flour mixture, shaking off any excess. Next, dip it into the egg wash, allowing any extra to drip off, and finally, coat it thoroughly with the panko breadcrumb mixture. Make sure the tenders are well-coated for the best crunch.
3. Rest Before Cooking: Place the breaded chicken tenders on a wire rack or a lined baking sheet. Allow them to rest for about 10 minutes. This step helps the breading adhere better during frying and contributes to a crispier texture.
This detailed preparation ensures that your Honey Garlic Crispy Chicken Tenders are not only flavorful but also achieve the perfect balance of crunch and tenderness. In the following sections, we will explore the frying process and the creation of the mouthwatering honey garlic sauce that takes these tenders over the top. Stay tuned for the next part of this delicious journey!
Preparing the Breading Station
To achieve that perfect crispy texture for your honey garlic crispy chicken tenders, it’s essential to set up an efficient breading station. This process will not only streamline your cooking but will also ensure that each piece of chicken is evenly coated.
1. Gather Your Ingredients: Start by placing your flour, beaten eggs, and breadcrumbs in three separate shallow bowls. This arrangement allows for easy access and minimizes mess as you coat the chicken tenders.
2. Season the Flour: To elevate the flavor of your breading, mix in a teaspoon of salt, a teaspoon of garlic powder, and a pinch of pepper into the flour. This step adds an extra layer of seasoning that complements the honey garlic sauce beautifully.
3. Prepare the Chicken: Make sure your chicken tenders are thawed (if previously frozen) and patted dry with paper towels. This will help the breading adhere better.
4. Set Up Your Work Area: Position the bowls in an assembly line: flour first, then egg, and finally breadcrumbs. Place a plate at the end of the line to hold the coated chicken tenders. This organization is key to maintaining a clean workspace and ensures that your breading process is smooth and efficient.
Breading Process
Now that your station is ready, let’s dive into the coating method, which is crucial for achieving that coveted crispy finish.
Step 1: Dredge in Flour
Take a chicken tender and dip it into the seasoned flour, ensuring it is fully coated. Shake off any excess flour; this layer forms the base for the egg to adhere to.
Step 2: Dip in Egg
Next, transfer the floured chicken into the beaten eggs. Make sure it’s well-coated on all sides, allowing the egg wash to create a sticky surface for the breadcrumbs.
Step 3: Coat with Breadcrumbs
Finally, roll the chicken tender in the breadcrumbs. Press down gently to ensure the breadcrumbs adhere well. The thicker the layer of breadcrumbs, the crunchier the final product will be. Repeat this process for each chicken tender, placing them on the plate once coated.
Frying Techniques
Frying is where the magic happens, transforming your breaded chicken tenders into crispy, golden delights. Here’s how to do it right.
1. Choose the Right Oil: Use a high smoke point oil like vegetable, canola, or peanut oil for frying. These oils can handle high temperatures without burning, making them ideal for achieving that crispy exterior.
2. Heat the Oil: In a deep frying pan or Dutch oven, pour enough oil to submerge the chicken tenders about halfway. Heat the oil over medium-high heat until it reaches 350°F (175°C). Use a kitchen thermometer to accurately gauge the temperature, as this is crucial for even cooking.
3. Fry in Batches: Carefully add a few chicken tenders to the hot oil, ensuring not to overcrowd the pan. Overcrowding can lower the oil temperature, leading to greasy, soggy tenders. Fry in batches for about 4-5 minutes on each side, or until they are golden brown and cooked through (internal temperature should reach 165°F or 74°C).
4. Drain Excess Oil: Once cooked, remove the chicken tenders and place them on a paper towel-lined plate to absorb any excess oil. This step helps maintain their crispiness.
Making the Honey Garlic Sauce
While your chicken is frying, it’s the perfect time to prepare the honey garlic sauce. This sauce is the star of the dish, adding a sweet and savory flavor profile that elevates your tenders.
1. Gather Ingredients: You’ll need 1/2 cup of honey, 1/4 cup of soy sauce, 3 cloves of minced garlic, and 1 teaspoon of grated ginger for the sauce. You can also add a pinch of red pepper flakes for a hint of heat, if desired.
2. Combine Ingredients: In a small saucepan, combine the honey, soy sauce, minced garlic, and grated ginger. Stir well to mix the ingredients.
3. Cook the Sauce: Place the saucepan over medium heat and bring the mixture to a gentle simmer. Allow it to cook for about 3-5 minutes, stirring frequently. The sauce will thicken slightly as it heats. Keep an eye on it to prevent burning; you want to achieve a syrupy consistency.
4. Remove from Heat: Once the sauce has thickened to your liking, remove it from the heat and let it cool slightly. This sauce will add a glossy finish to your chicken tenders.
Coating the Chicken
Now that your chicken tenders are fried and the honey garlic sauce is ready, it’s time to coat the tenders.
1. Toss in Sauce: In a large mixing bowl, add the fried chicken tenders. Pour the honey garlic sauce over the tenders, ensuring they are all covered. Use tongs or a spatula to gently toss the chicken in the sauce until they are evenly coated.
2. Let It Sit: Allow the coated chicken tenders to sit for a couple of minutes. This resting time helps the sauce adhere better to the chicken, ensuring every bite is flavorful.
Serving Suggestions
Honey garlic crispy chicken tenders are versatile and can be served in a variety of ways. Here are some ideas to enhance your serving experience.
Serving Styles
– Main Dish: Serve the chicken tenders on a large platter with a side of steamed vegetables or rice for a complete meal.
– Appetizer: Place the tenders on a small plate with toothpicks for easy eating at gatherings or parties.
– Party Platter: Create a party platter by arranging the tenders alongside various dipping sauces like ranch, barbecue, or extra honey garlic sauce.
Garnishes
To elevate the visual appeal of your dish, consider garnishing with sesame seeds and finely chopped green onions. These additions not only enhance the flavor but also add a pop of color to your presentation.
Accompaniments
Pair your chicken tenders with side dishes that complement their flavors. Some excellent options include:
– Coleslaw: The crunch of coleslaw adds a refreshing contrast to the crispy tenders.
– Sweet Potato Fries: The sweetness of the fries pairs nicely with the honey garlic sauce.
– Steamed Broccoli: For a healthier option, steamed broccoli adds a nutritious touch and balances the meal.
Nutritional Information
When it comes to enjoying your honey garlic crispy chicken tenders, being mindful of nutritional information can help you incorporate them into your dietary plans. Here’s a general overview:
– Calories: Approximately 350-400 calories per serving (3-4 tenders).
– Protein: Around 25 grams of protein, making this dish a good source of lean protein.
– Fats: Contains about 15-20 grams of fat, depending on the frying method and oil used.
– Carbohydrates: Roughly 30 grams of carbohydrates, primarily from the breading.
This dish can fit into various dietary preferences, including family meals or special occasions. For a lighter version, consider baking the tenders instead of frying, which will lower the calorie count while still delivering on flavor.
Conclusion
In summary, honey garlic crispy chicken tenders are a delightful addition to any meal. Their irresistible combination of crispiness and sweet-savory flavor makes them a hit with both kids and adults alike. With a straightforward preparation process, you can easily whip up this dish for a quick weeknight dinner or a special occasion. The joy of cooking is amplified when you see the smiles on your loved ones’ faces as they savor each bite. So gather your ingredients, set up your breading station, and dive into making these delicious tenders. You won’t be disappointed!
