When summer heat hits, you want a treat that’s cool and easy. These No-Bake Mini Banana Cream Pies hit the spot! I’ll guide you through simple steps to make these delightful desserts that require no oven. With fresh bananas and rich cream, they’re perfect for any gathering. Ready to impress your friends and family? Let’s dive into the delicious world of mini pies that take no time but deliver big smiles!
Ingredients
List of Ingredients
To make No-Bake Mini Banana Cream Pies, gather these items:
– 1 cup graham cracker crumbs
– 4 tablespoons unsalted butter, melted
– 2 tablespoons granulated sugar
– 2 ripe bananas, sliced
– 1 cup vanilla pudding mix
– 2 cups whole milk
– 1 teaspoon vanilla extract
– 1 cup whipped topping (store-bought or homemade)
– Chocolate shavings or cocoa powder for garnish
Measurement Conversions
If you need to convert measurements, here are some quick tips:
– 1 cup = 8 fluid ounces
– 4 tablespoons = 1/4 cup
– 2 tablespoons = 1 ounce
– 2 cups = 16 fluid ounces
– 1 teaspoon = 1/3 tablespoon
Suggested Brands for Ingredients
Choosing quality ingredients helps your pies taste better. Here are some brands I trust:
– Graham Cracker Crumbs: Nabisco or Honey Maid
– Unsalted Butter: Land O’Lakes or Kerrygold
– Granulated Sugar: Domino or C&H
– Vanilla Pudding Mix: Jell-O or Royal
– Whipped Topping: Cool Whip or Reddi-wip
Using these brands can enhance your cooking experience. For the best results, stick to trusted brands that you enjoy.
Step-by-Step Instructions
Preparation of Crust
Start by making the crust for your mini pies. In a medium bowl, add 1 cup of graham cracker crumbs. Next, pour in 4 tablespoons of melted unsalted butter. Then add 2 tablespoons of granulated sugar. Mix these ingredients until they blend well.
Once mixed, press the crumb mixture firmly into the bottom and sides of 6 mini pie dishes or a muffin tin. Make sure it is packed tightly. This helps the crust hold its shape. Set it aside while you prepare the filling.
Making the Pudding Mixture
Now, it’s time to make the pudding. Take a separate bowl and add 1 cup of vanilla pudding mix. Pour in 2 cups of whole milk and 1 teaspoon of vanilla extract. Use a whisk to mix these together for about 2 minutes. You want it to thicken nicely.
Once thickened, your pudding is ready for the next step. This creamy filling is what makes the pies so delightful.
Assembling the Mini Pies
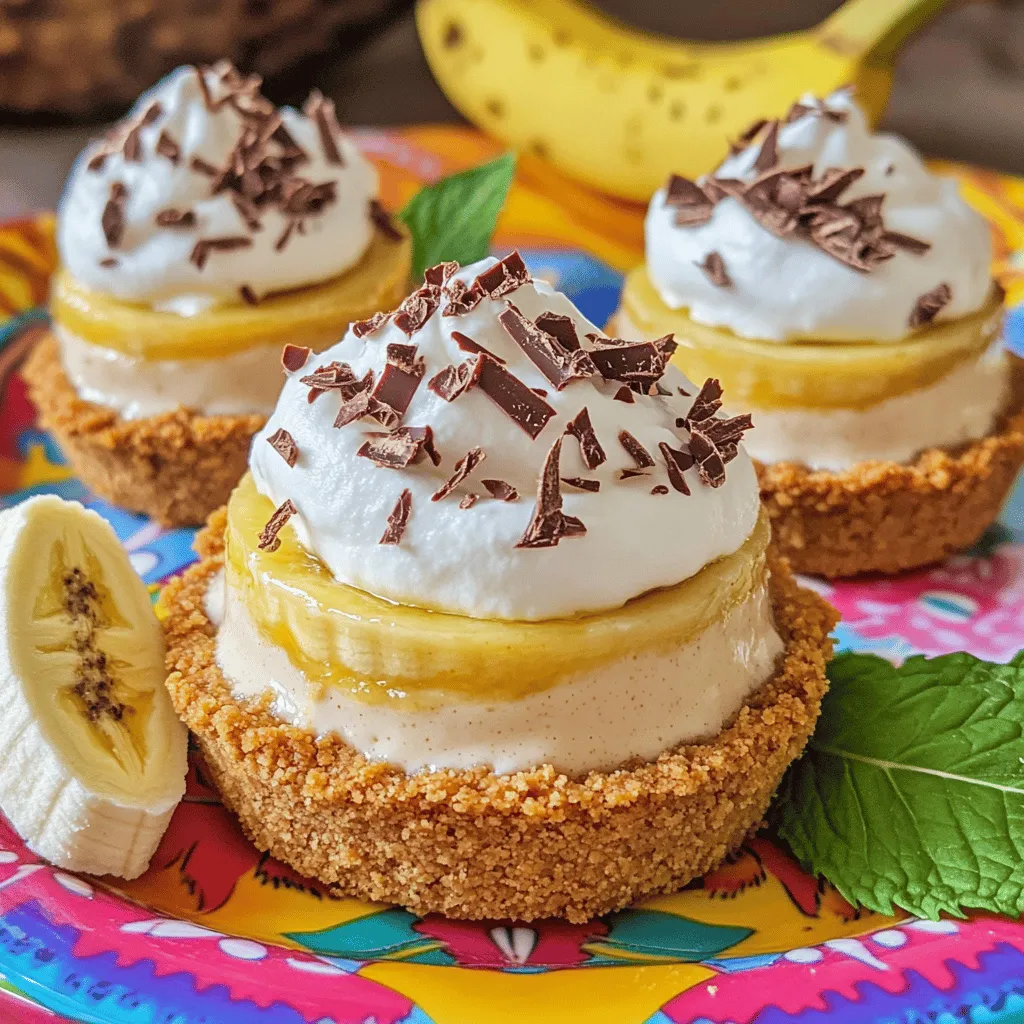
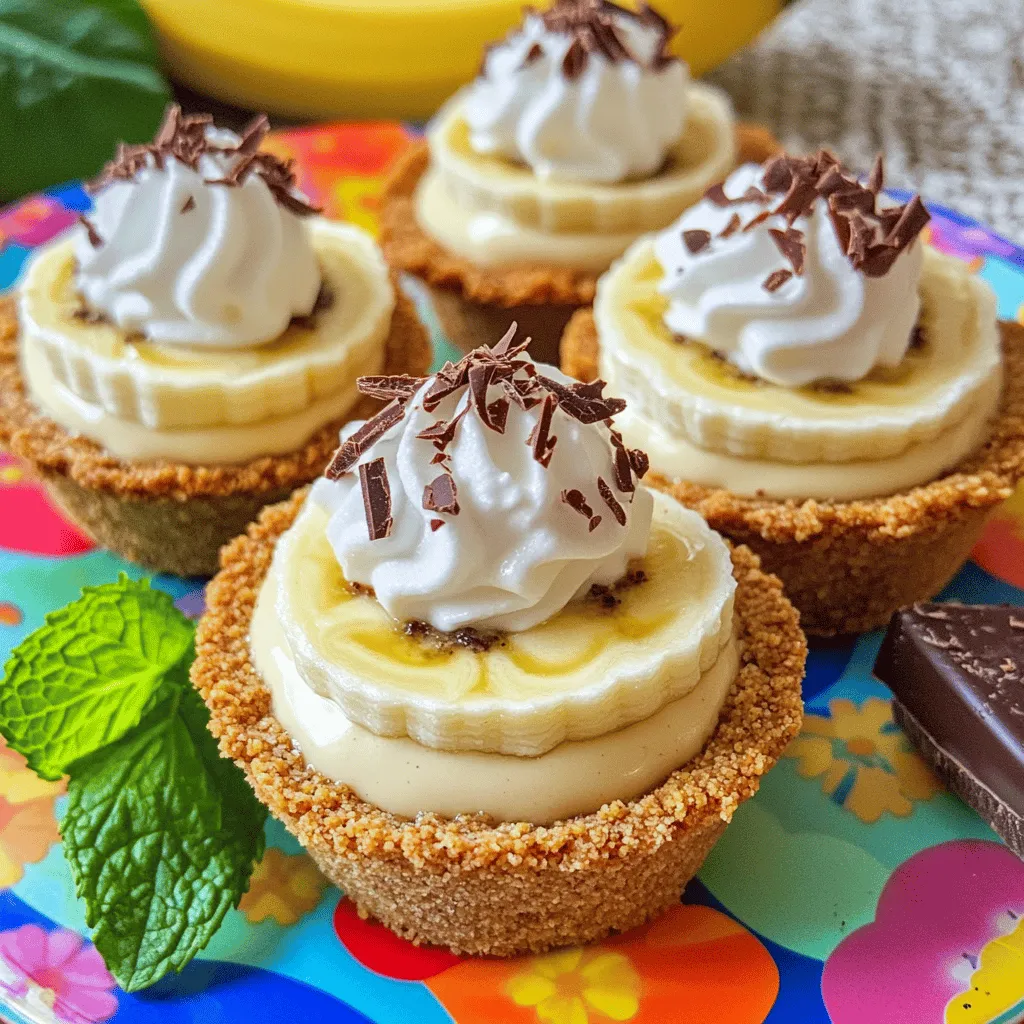
Let’s put everything together! Spoon a layer of the pudding mixture into each graham cracker crust. Fill them halfway. Now, take 2 ripe bananas and slice them. Place a few banana slices on top of the pudding in each pie.
Next, add another layer of pudding on top of the bananas until the crust is almost full. This second layer adds more creaminess and flavor.
After assembling, cover the pies with plastic wrap. Refrigerate them for at least 2 hours. This chilling time helps the pies set. When ready, top each mini pie with a dollop of whipped topping. You can use store-bought or homemade.
For a fun finish, sprinkle chocolate shavings or cocoa powder on top. These small touches make your mini pies look amazing!Enjoy your delicious no-bake mini banana cream pies!
Tips & Tricks
How to Avoid Soggy Crusts
To keep your crust crisp, use fresh graham cracker crumbs. Mix them with melted butter and sugar well. Press the mixture tightly into the pie dishes. The tighter it is, the better it holds up. Chill the crust for at least 30 minutes before adding the pudding. This step helps set the crust and keeps it firm.
Perfecting the Pudding Texture
For smooth pudding, mix the pudding powder with cold milk. Whisk it for about two minutes until it thickens. The key is to avoid lumps. Use a whisk or electric mixer for the best results. If you want a creamier texture, add a splash of vanilla extract. This adds flavor and richness to your pudding.
When to Add Banana Slices
Add banana slices right before you layer the pudding. If you add them too early, they can brown and change the taste. Place a few slices on top of the pudding layer. Then, add another layer of pudding. This keeps them fresh and tasty. For extra flavor, sprinkle some lemon juice on the bananas. It helps keep them bright and delicious.
Variations
Alternative Crust Options
You can switch up the crust for these mini pies. Try using Oreo crumbs for a chocolate twist. You can also use almond flour for a gluten-free option. If you want a nutty flavor, consider crushed pecans or walnuts. Each of these options adds a unique taste and texture to your dessert.
Flavor Variations (Chocolate, Peanut Butter)
Love chocolate? Mix in cocoa powder with the pudding for a rich, chocolatey pie. You can even layer in chocolate pudding instead of vanilla. If you are a peanut butter fan, stir some creamy peanut butter into the vanilla pudding. This adds a lovely nutty flavor that pairs well with bananas. You can also drizzle melted chocolate or peanut butter on top for an extra treat.
Health-Conscious Swaps (Sugar-Free Pudding, Coconut Whipped Cream)
For a healthier version, opt for sugar-free pudding mix. This swap helps reduce sugar while keeping the taste. You can also use almond milk or coconut milk instead of whole milk. For a dairy-free option, try coconut whipped cream instead of traditional whipped topping. This adds a rich flavor and creamy texture without dairy.
Storage Info
Best Way to Store Mini Pies
To keep your no-bake mini banana cream pies fresh, store them in the fridge. Place them in an airtight container. This will prevent them from picking up other smells and flavors. If you don’t have a container, cover them with plastic wrap. Make sure the wrap is tight to avoid air exposure.
Shelf Life in the Refrigerator
These mini pies last about three days in the refrigerator. After that, they may lose flavor and texture. The bananas can turn brown, too. Always check for any signs of spoilage before serving. If they look or smell off, it’s best to discard them.
Freezing Tips for Mini Pies
You can freeze mini banana cream pies, but it requires some care. First, wrap each pie tightly in plastic wrap. Then, place them in a freezer-safe bag or container. They can stay frozen for up to a month. When ready to eat, thaw them in the fridge overnight. Avoid microwaving them, as this can change the texture of the pudding. For the best results, serve them cold after thawing.
FAQs
Can I use different fruits in this recipe?
Yes, you can use different fruits! Try strawberries, peaches, or blueberries. Each fruit adds a unique flavor and color. Just slice or chop them as you like. Layer them in the same way as the bananas. This keeps the mini pies fresh and fun.
How long do these mini pies need to chill?
These mini pies need to chill for at least two hours. This time lets the pudding set properly. If you want them extra firm, chill them longer. Just keep them covered in the fridge. It helps keep them fresh and tasty.
Can I make this recipe ahead of time?
Yes, you can make these mini pies ahead of time! They are great for parties. You can prepare them a day in advance. Just store them in the fridge until you are ready to serve. This makes them a perfect stress-free dessert for gatherings.
In this blog post, I shared how to make delicious mini pies with simple steps. We covered ingredients, including measurement conversions and brand suggestions. You learned how to prepare the crust and pudding, plus tips for assembly. I offered tricks to avoid soggy crusts and ways to enhance flavor. Don’t forget about storage options to keep your mini pies fresh. Enjoy these treats any time, and remember you can customize them to fit your taste! Try different fruits or flavors to make each pie unique. Happy baking!


