Craving a quick dessert that hits the sweet spot? Try my Peanut Butter Chocolate Chip Mug Cake! It’s easy to make and takes just minutes. With rich chocolate and creamy peanut butter, this treat will satisfy your sweet tooth in no time. Whether you want a cozy night in or a simple snack, this mug cake is your perfect solution. Let's get cooking and enjoy this delightful treat together!
Why I Love This Recipe
- Quick and Easy: This mug cake can be ready in just a few minutes, making it the perfect treat for when you need something sweet without the hassle of baking.
- Decadent Flavor: The combination of chocolate and peanut butter creates a rich and indulgent flavor that satisfies any dessert craving.
- Customizable: You can easily modify this recipe by adding your favorite mix-ins, such as nuts or different types of chocolate, to make it your own.
- Single Serving: This recipe makes just one serving, so you can enjoy a delicious dessert without the temptation of leftovers.
Ingredients
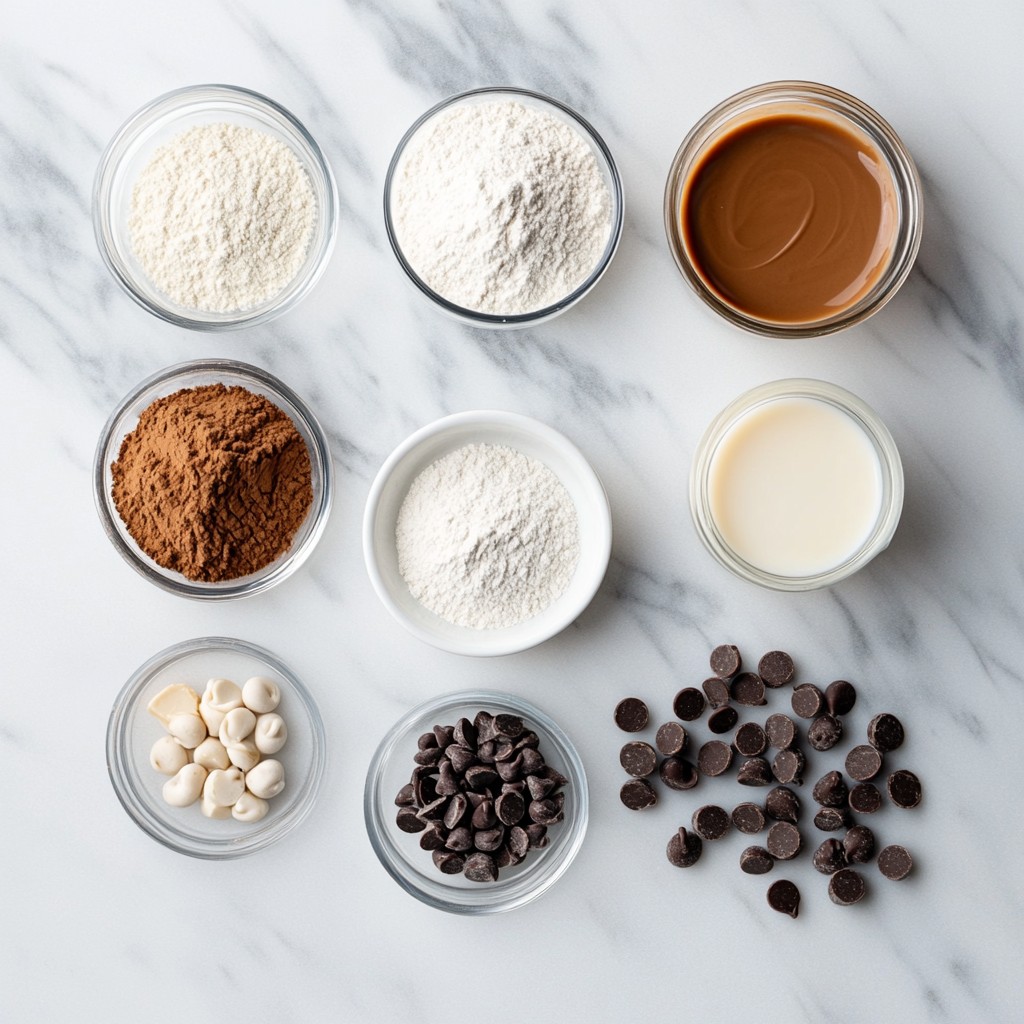
To make your Peanut Butter Chocolate Chip Mug Cake, you need just a few simple ingredients. Here’s what you will need:
- 4 tablespoons all-purpose flour
- 3 tablespoons granulated sugar
- 2 tablespoons unsweetened cocoa powder
- 1/4 teaspoon baking powder
- 1/4 cup milk (or any dairy-free alternative)
- 2 tablespoons creamy peanut butter
- 1/2 teaspoon vanilla extract
- 2 tablespoons chocolate chips (semi-sweet or dark)
- A pinch of salt
These ingredients create a rich, chocolatey delight that warms the soul. The peanut butter adds a creamy texture and flavor that pairs perfectly with chocolate. Each ingredient plays a key role in making your mug cake fluffy and delicious.
Using all-purpose flour gives the cake structure, while sugar sweetens it just right. Cocoa powder adds a deep chocolate taste, and baking powder helps the cake rise. The milk, combined with peanut butter, creates a moist batter. Vanilla extract enhances the flavors, while chocolate chips provide those sweet surprises in every bite. Don’t forget the salt; it balances all the flavors perfectly!
With just these ingredients, you can create a quick and tasty treat in minutes.
Step-by-Step Instructions
Preparation of Dry Ingredients
First, grab a microwave-safe mug. In the mug, add 4 tablespoons of all-purpose flour. Next, toss in 3 tablespoons of granulated sugar. Then, add 2 tablespoons of unsweetened cocoa powder. Don’t forget 1/4 teaspoon of baking powder and a pinch of salt. Mix these dry ingredients well. This step is key for a smooth mug cake.
Combining Wet Ingredients
Now, it’s time for the wet mix. Pour in 1/4 cup of milk. You can use dairy-free milk if you want. Next, add 2 tablespoons of creamy peanut butter. Finally, include 1/2 teaspoon of vanilla extract. Stir all these together until you get a smooth batter. Make sure there are no lumps in your mix.
Cooking the Mug Cake
Once your batter is ready, gently fold in 2 tablespoons of chocolate chips. This adds rich flavor. Now, place the mug in the microwave. Cook it for about 1 minute and 30 seconds. Keep an eye on the mug cake. Microwaves can vary, so check if it has risen and looks set. After cooking, let it cool for a minute. Enjoy your mug cake straight from the mug!
Tips & Tricks
How to Avoid Overcooking
To keep your mug cake soft, watch the time closely. Start with one minute and thirty seconds. Every microwave works a bit differently. If it looks set but still jiggles slightly, it’s done. Letting it cool for a minute will help, too. This way, you can enjoy a moist cake.
Enhancing Flavor with Toppings
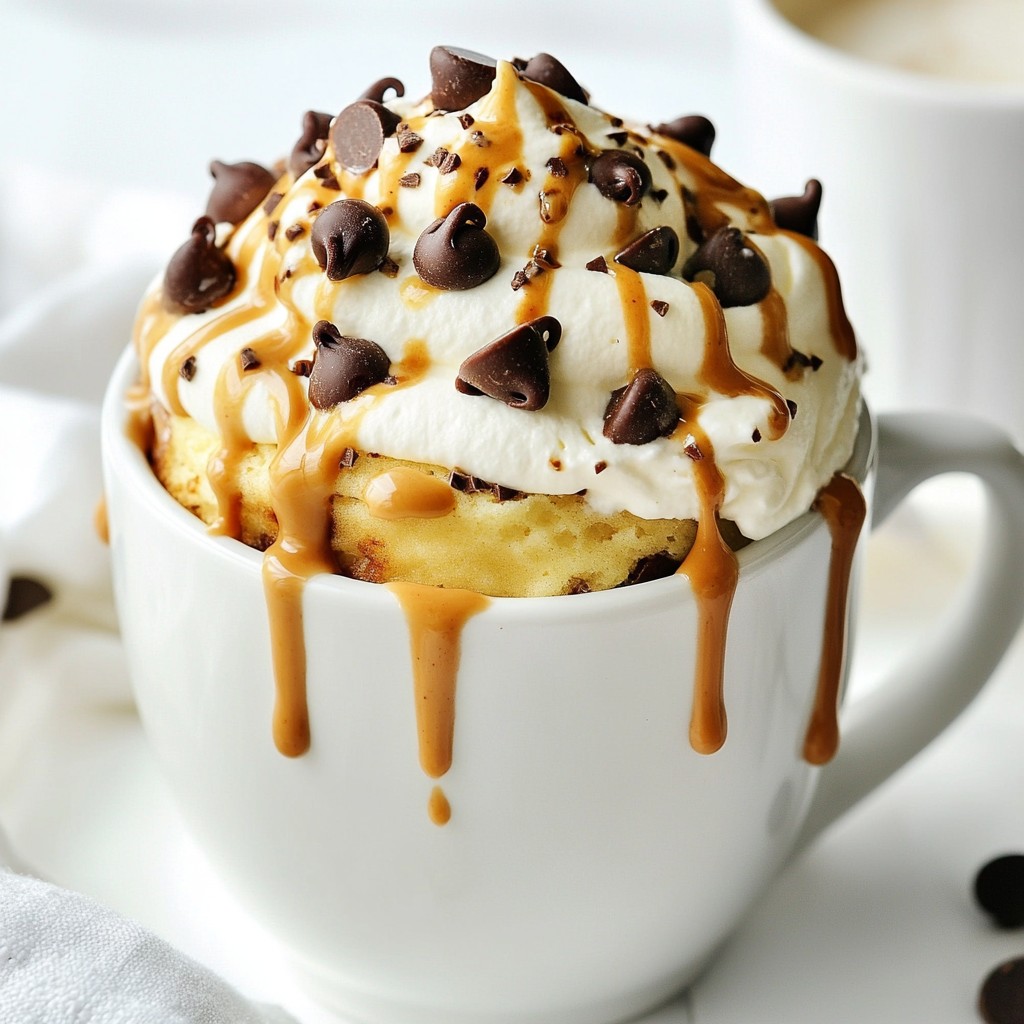
Toppings can really elevate your mug cake. You can sprinkle extra chocolate chips on top for sweetness. A dollop of whipped cream adds creaminess. Try drizzling warm peanut butter or chocolate sauce over it. Fresh fruit like bananas or strawberries also works well. These toppings make your cake even more fun to eat.
Storing Leftovers or Unused Batter
If you have leftover mug cake, store it in an airtight container. Keep it in the fridge for up to two days. Reheat it in the microwave for about ten seconds before enjoying again. If you have unused batter, you can store it in the fridge too. Just make sure to cover it well. Use it within a day for the best taste.
Pro Tips
- Adjust Cooking Time: Depending on your microwave's wattage, you may need to adjust the cooking time. Start with 1 minute and increase in 10-second increments if needed. Keep an eye on it to prevent overcooking.
- Experiment with Nut Butters: While peanut butter is delicious, try substituting with almond or cashew butter for a different flavor profile. Each nut butter offers a unique taste and texture!
- Mix-Ins Galore: Don’t hesitate to add other mix-ins like chopped nuts, dried fruit, or even a dollop of Nutella for an extra treat. Get creative with your flavors!
- Perfect Serving Size: This recipe is designed for one, but you can easily double or triple the ingredients to make multiple mug cakes. Just ensure you use larger mugs and adjust the cooking time accordingly.
Variations
Gluten-Free Options
You can make this mug cake gluten-free. Simply swap all-purpose flour for a gluten-free blend. Look for blends that contain rice flour, tapioca, and potato starch. These work well for baking. Using a gluten-free flour blend keeps the texture light and fluffy.
Nut-Free Substitute Ideas
If you need a nut-free version, use sun butter or soy nut butter. These spreads mimic peanut butter's creaminess. They add a nice flavor without using nuts. Just ensure your chocolate chips are also nut-free.
Flavor Additions
You can get creative with flavors! Add sprinkles for fun, or mix in chopped nuts. Try using white chocolate chips for a different taste. You can even add a dash of cinnamon for warmth. A dollop of whipped cream on top makes it extra special. Enjoy your mug cake with these tasty twists!
Storage Info
Refrigeration Guidelines
Store your peanut butter chocolate chip mug cake in the fridge if you have leftovers. Place it in an airtight container. The cake stays fresh for up to two days. Before eating, check for any signs of spoilage.
Freezing the Cake
You can freeze this mug cake if you want to save it for later. Wrap the cooled cake tightly in plastic wrap. Then, place it in a freezer-safe bag or container. It can last for about a month in the freezer. When you’re ready to eat, thaw it in the fridge overnight.
Reheating Instructions
To enjoy your mug cake again, reheat it in the microwave. Heat it for about 15 to 20 seconds. Check if it's warm enough. If not, heat it in short bursts. This way, you keep it moist and tasty. Enjoy it warm for the best flavor!
FAQs
How do I know when my mug cake is done?
You can tell your mug cake is done when it has risen and looks set. It should not jiggle in the middle. You can also insert a toothpick into the center. If it comes out clean, your cake is ready. Microwave times vary, so check it after one minute. If it needs more time, add ten-second intervals until done.
Can I use different types of nut butter?
Yes, you can use different nut butters in this recipe. Almond butter, cashew butter, or sunflower seed butter work well too. Just keep in mind that the flavor will change a bit. Each nut butter has its own taste, which will add a unique twist to your cake.
What can I do if I don't have a microwave?
If you don’t have a microwave, you can bake the mug cake in a small oven. Preheat your oven to 350°F (175°C). Pour the batter into an oven-safe mug or ramekin. Bake for about 15 to 20 minutes. Keep an eye on it, and check for doneness with a toothpick.
You can make a delicious mug cake with simple ingredients and steps. We covered all you need, from mixing dry and wet ingredients to cooking in the microwave. I shared tips on avoiding overcooking and how to store leftovers. You can even try fun variations like gluten-free or nut-free options. With this guide, you can enjoy a quick, tasty treat anytime. Now it’s your turn to make and enjoy your very own mug cake!


