Do you want a fun and tasty dessert that impresses everyone? Let’s dive into the world of Red Velvet Cake in a Jar! This delightful creation offers a delicious twist on a classic favorite. It’s perfect for parties, gifts, or just a sweet treat at home. By following my simple steps, you’ll create beautiful layers that taste as amazing as they look. Let’s get started and unlock the secrets to this charming dessert!
What Are the Essential Ingredients for Making Red Velvet Cake in a Jar?
Red velvet cake is a showstopper. It has a rich color and a soft texture. To make red velvet cake in a jar, you need several key ingredients. Here’s what you will use:
– 1 ½ cups all-purpose flour
– 1 cup granulated sugar
– 1 teaspoon cocoa powder
– 1 teaspoon baking soda
– ½ teaspoon salt
– 1 cup vegetable oil
– 1 cup buttermilk
– 2 large eggs
– 2 tablespoons red food coloring
– 1 teaspoon vanilla extract
– ½ teaspoon white vinegar
– 8 oz cream cheese
– ½ cup powdered sugar
Each ingredient plays a special role in the flavor and texture. Flour gives the cake its body. Sugar adds sweetness, while cocoa powder gives a hint of chocolate. Baking soda helps the cake rise. Salt enhances all flavors.
Oil keeps the cake moist. Buttermilk adds a rich taste and tender crumb. Eggs bind everything together. The red food coloring is what makes it special. It gives that beautiful red hue! Vanilla extract adds warmth, and vinegar balances the flavors.
If you have dietary needs, you can make some swaps. For a gluten-free option, use almond or coconut flour. You can replace buttermilk with oat milk mixed with a little vinegar. Use egg replacers if you want a vegan cake.This way, you can create your own red velvet cake in a jar. Enjoy the process!
How Do You Prepare Red Velvet Cake for Jarring?
To prepare red velvet cake for jarring, follow some simple steps. First, you need to bake the cake. Preheat your oven to 350°F (175°C). Grease and flour two 8-inch round pans.
What Are the Steps to Bake the Cake Before Layering?
In a large bowl, mix the dry ingredients. This includes flour, sugar, cocoa powder, baking soda, and salt. In another bowl, whisk the wet ingredients. Combine vegetable oil, buttermilk, eggs, red food coloring, vanilla, and vinegar. Slowly add the wet mix to the dry mix. Stir gently until just combined. Do not overmix. Then, divide the batter into the prepared pans. Bake for 25-30 minutes. Check with a toothpick; it should come out clean when done.
What Tips Should Beginners Follow for Successful Baking?
For successful baking, measure your ingredients carefully. Use room temperature eggs and buttermilk for best results. Always preheat your oven to ensure even baking. Keep an eye on the time but also check the cake with a toothpick. Once baked, let the cakes cool for ten minutes in the pans. Then, transfer them to a wire rack to cool completely.
How Do You Properly Cool and Crumble the Cake?
Once the cakes are cool, it’s time to crumble them. Take the cooled cake and break it into small pieces in a large bowl. Make sure the pieces are not too big; smaller crumbles layer better in the jars. After crumbling, you can start layering your cake in jars. Use cream cheese frosting between the layers for a tasty treat.
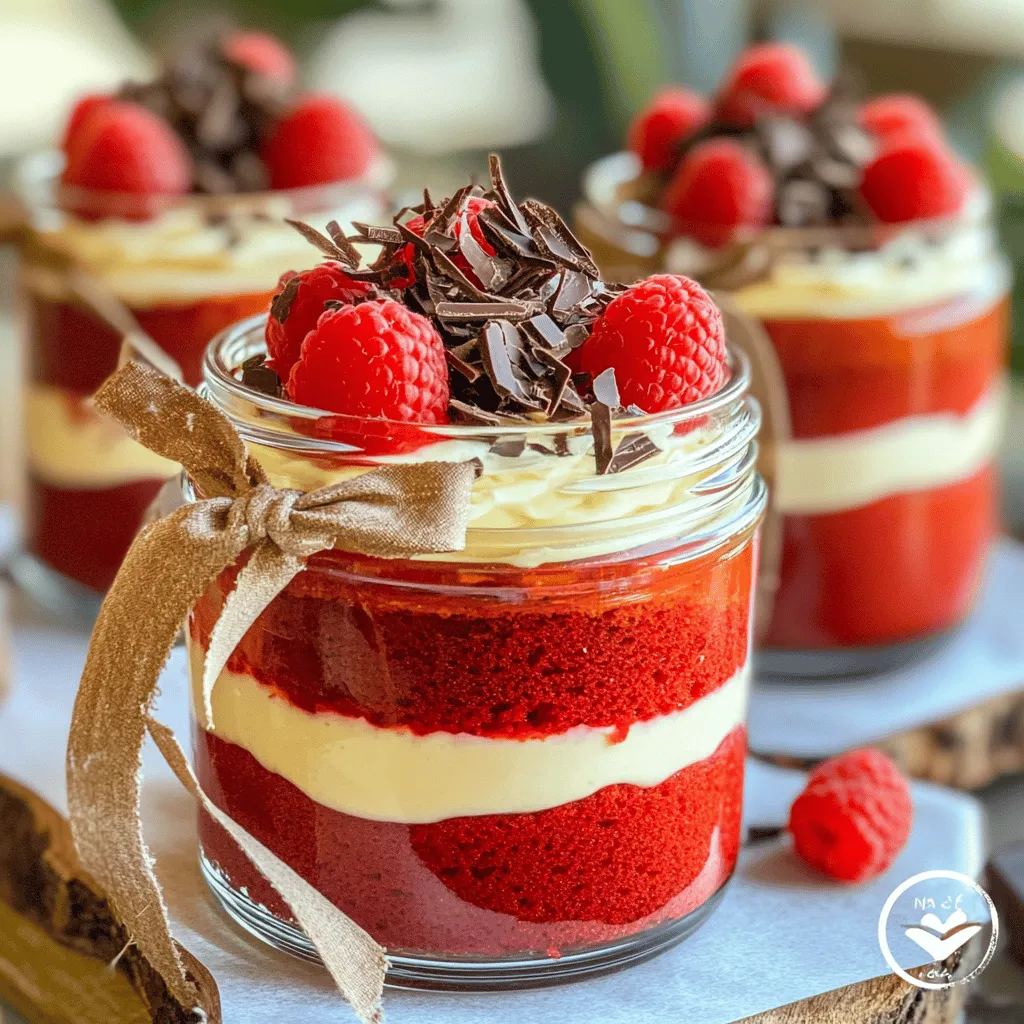
How Do You Layer a Cake in a Jar?
Layering cake in a jar is fun and simple. Start with small pieces of cake. Use a spoon to place the cake crumbs in the jar. Press gently to create a flat layer. Next, add a layer of frosting. Use a piping bag or a spoon for this step. Spread a nice, thick layer over the cake.
What Is the Best Technique for Layering Cake and Frosting?
To layer cake and frosting well, keep the layers even. Use equal amounts of cake and frosting. This balance makes each bite tasty. After the first layer, repeat the process. Continue layering until you reach the top of the jar. Finish with a frosting layer. This creates a beautiful look.
How Can You Create Visually Appealing Layers?
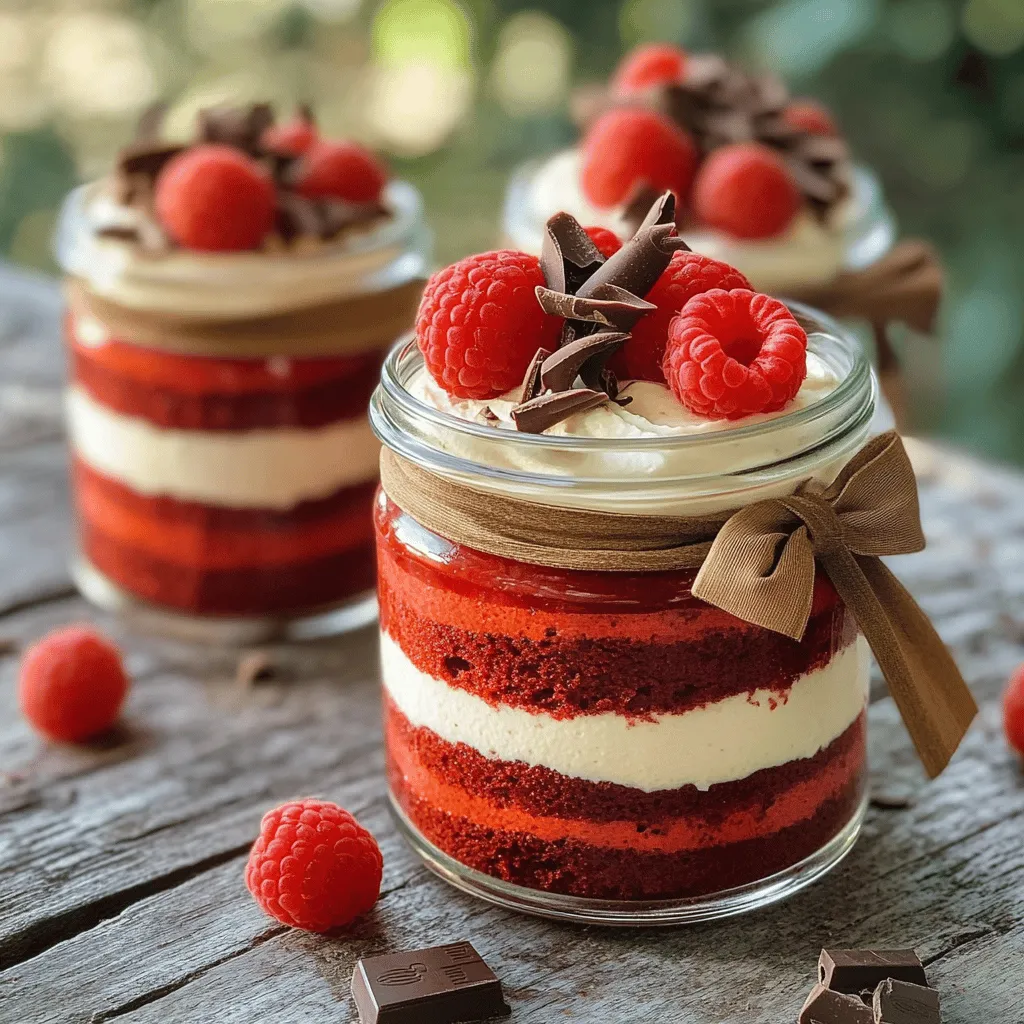
For visually appealing layers, use contrasting colors. Red velvet and white cream cheese look great together. You can also add some texture. Try crumbling extra cake on top of the frosting. It adds height and interest. Use clear jars. They let the layers shine through.
What Creative Layering Ideas Can Enhance Your Presentation?
Get creative with your layers! You can add fruit, like fresh raspberries. They add color and flavor. Try using chocolate shavings as a topping too. For a fun twist, mix in some nuts or sprinkles. You can also use different flavors of frosting. All these ideas make your dessert unique.
What Are Some Variations of Red Velvet Cake in a Jar?
Red velvet cake in a jar is fun and easy to make. You can try many red velvet cake variations. First, consider flavor variations. Instead of just cream cheese frosting, you can use chocolate ganache. This adds a rich taste. You can also mix in orange zest or almond extract for a twist.
Next, think about personalizing your cake in a jar. You can add layers of fruit. Fresh berries or banana slices add color and flavor. You could also use different cake bases. Try using a gluten-free flour mix for a gluten-free treat.
Now, let’s explore festive ideas for seasonal celebrations. For Christmas, use red and green sprinkles on top. In fall, add pumpkin spice to the cake mix. This gives a cozy feel. You can also decorate jars with themed ribbons. This adds a special touch for gifts or parties.With these creative dessert ideas, your red velvet cake in a jar will stand out.
What Are the Best Serving Suggestions for Cake in a Jar?
Serving cake in a jar is fun and easy. Each jar gives an individual dessert serving. This makes it perfect for gatherings. Guests love having their own jar without sharing. You can stack layers high. It looks pretty and tasty.
At parties, place jars on a table. Guests can grab one as they mingle. Use assorted jars for a fun twist. You can mix sizes or colors. This adds a festive feel to any event.
Gifting cake in a jar is a creative idea. You can give them for birthdays, holidays, or any special occasion. Wrap jars with ribbons. This makes them look extra special. You can even add a tag with a sweet note.
Leftover cake in a jar can last a while. Store them in the fridge. They stay fresh for up to a week. Just seal the jars tightly. If you see any moisture, use a paper towel to soak it up. This keeps your dessert tasty and safe.
To enjoy your creation, serve it chilled. You can add extra toppings like fresh raspberries or chocolate shavings. These small touches make each bite delightful.
How Can You Decorate Your Red Velvet Cake in a Jar?
When you make red velvet cake in a jar, decoration is key. You want it to look as good as it tastes.
What Toppings Work Best for Red Velvet Cake in a Jar?
The best toppings for red velvet cake are simple yet elegant. Cream cheese frosting is a must. It adds rich flavor. Fresh raspberries or strawberries bring a splash of color. You can also use chocolate shavings for a nice touch. Whipped cream is another great option. It makes the dessert feel light and fluffy.
How Can You Use Colors and Themes to Enhance the Presentation?
Colors can make your cake jars pop. Red velvet’s deep red pairs well with white frosting. You can add green mint leaves for contrast. If it’s a special event, like a holiday, match the colors. Use red and green for Christmas or pastels for spring. This makes your dessert festive and fun.
What Are Some Easy Decoration Techniques for Beginners?
You don’t need to be a pro to decorate cake jars. Start by using a piping bag for frosting. It creates beautiful swirls and shapes. For a rustic look, use a spatula to spread frosting. You can also add toppings in layers for texture. Lastly, tie a ribbon around the jar. It adds charm and makes it gift-ready.
Red velvet cake in a jar is a fun and unique twist on a classic dessert. We explored key ingredients, preparation steps, and how to layer your cake for the best look. You can also try different flavors and personal touches to make it your own. Serving it at gatherings or gifting it adds a special touch. With these tips, you can impress everyone. Enjoy the process, and delight in the deliciousness of your creation!
