Are you ready to bake something delicious? This Savory Chocolate Chip Pumpkin Bread is a simple and easy recipe you’ll love. With warm spices and gooey chocolate chips, it’s perfect for any season. I’ll guide you through every step, from choosing ingredients to storing leftovers. Let’s dive into this tasty treat that’s sure to please everyone. Get your apron on—fun and flavor are just a recipe away!
Why I Love This Recipe
- Moist and Flavorful: This chocolate chip pumpkin bread is incredibly moist thanks to the pumpkin puree, making it a delightful treat any time of year.
- Perfect for Fall: The combination of warm spices like cinnamon and nutmeg gives this bread an inviting flavor that embodies the essence of fall.
- Easy to Make: The recipe is straightforward and requires minimal effort, perfect for both beginner and experienced bakers alike.
- Customizable: You can easily add your favorite mix-ins, like walnuts or different types of chocolate, to make it your own!
Ingredients
Essential Ingredients for Chocolate Chip Pumpkin Bread
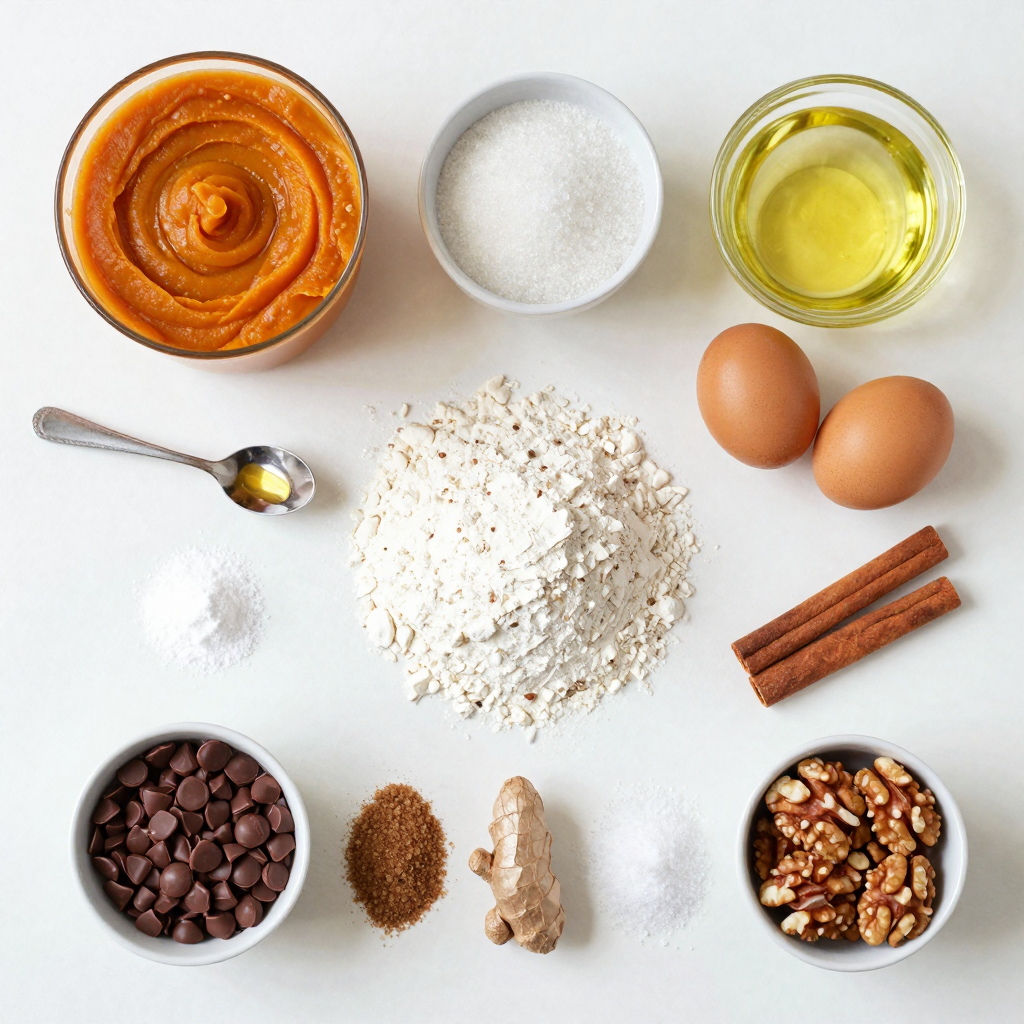
To make chocolate chip pumpkin bread, gather these key items:
– 1 cup canned pumpkin puree
– 1/2 cup granulated sugar
– 1/2 cup brown sugar, packed
– 1/2 cup vegetable oil
– 2 large eggs
– 1 teaspoon vanilla extract
– 1 1/2 cups all-purpose flour
– 1 teaspoon baking soda
– 1/2 teaspoon baking powder
– 1 teaspoon ground cinnamon
– 1/2 teaspoon ground nutmeg
– 1/4 teaspoon ground ginger
– 1/2 teaspoon salt
– 1 cup semi-sweet chocolate chips
– 1/2 cup chopped walnuts (optional)
These ingredients create a moist, sweet, and rich loaf of bread. The chocolate chips blend perfectly with the warm spices, making each bite delightful.
Optional Add-ins and Variations
For more flavor, try these fun add-ins:
– Dried cranberries
– Chopped pecans instead of walnuts
– A dash of pumpkin spice mix
– A splash of orange juice for a citrus note
These options add different textures and flavors. Feel free to mix and match based on your taste.
Ingredient Substitutions
Not everyone has every ingredient on hand. Here are some easy swaps:
– Use applesauce instead of vegetable oil for fewer calories.
– Substitute honey or maple syrup for sugar for a natural sweetener.
– Swap all-purpose flour with gluten-free flour for a gluten-free option.
These substitutes work well and can change the bread’s taste and texture. Experiment to find your favorite version.
Step-by-Step Instructions
Preparing the Batter
To start, gather all your ingredients. This makes it easier to work. First, preheat your oven to 350°F (175°C). Grease a 9×5 inch loaf pan or use parchment paper. In a large bowl, mix 1 cup of pumpkin puree, 1/2 cup of granulated sugar, and 1/2 cup of brown sugar. Add 1/2 cup of vegetable oil, 2 large eggs, and 1 teaspoon of vanilla extract. Whisk until it is smooth and blended well.
In another bowl, combine 1 1/2 cups of all-purpose flour, 1 teaspoon of baking soda, and 1/2 teaspoon of baking powder. Add 1 teaspoon of ground cinnamon, 1/2 teaspoon of ground nutmeg, 1/4 teaspoon of ground ginger, and 1/2 teaspoon of salt. Mix these dry ingredients together. Slowly add the dry mix to the wet mix, stirring gently. Stop when the batter is just combined. It is okay if there are lumps. Now fold in 1 cup of semi-sweet chocolate chips and 1/2 cup of chopped walnuts, if you want.
Baking Process
Pour the batter into the loaf pan you prepared. Use a spatula to smooth the top. Place the pan in the oven and bake for 55-60 minutes. The aroma will fill your kitchen! Make sure to set a timer as it bakes.
Checking for Doneness
To see if your bread is ready, take a toothpick and insert it in the center. If it comes out clean, your bread is done! If it has batter on it, give it more time. Remove the pan from the oven and let it cool for about 10 minutes. Then, transfer the bread to a wire rack to cool completely.
Pro Tips
- Use Fresh Pumpkin: For a richer flavor, consider using fresh roasted pumpkin instead of canned puree.
- Don’t Overmix: Gently fold the batter to keep the bread light and fluffy; overmixing can lead to a dense texture.
- Chocolate Chip Variations: Experiment with different types of chocolate chips, like dark or white chocolate, for unique flavor profiles.
- Storage Tips: Store leftover bread in an airtight container at room temperature for up to 3 days, or freeze for longer storage.
Tips & Tricks
Common Mistakes to Avoid
One big mistake is overmixing the batter. This can make your bread dense and tough. Mix until just combined. Another mistake is not checking the oven temperature. Always use an oven thermometer. This helps ensure your bread bakes evenly. Also, don’t skip the cooling step. Letting the bread cool helps it set and taste better.
How to Achieve the Perfect Texture
To get a soft and moist texture, use canned pumpkin puree. It’s smoother and richer than fresh pumpkin. Make sure to measure your flour correctly. Too much flour can make the bread dry. I like to spoon the flour into the measuring cup and level it off with a knife. Lastly, adding chocolate chips not only gives flavor but also adds moisture.
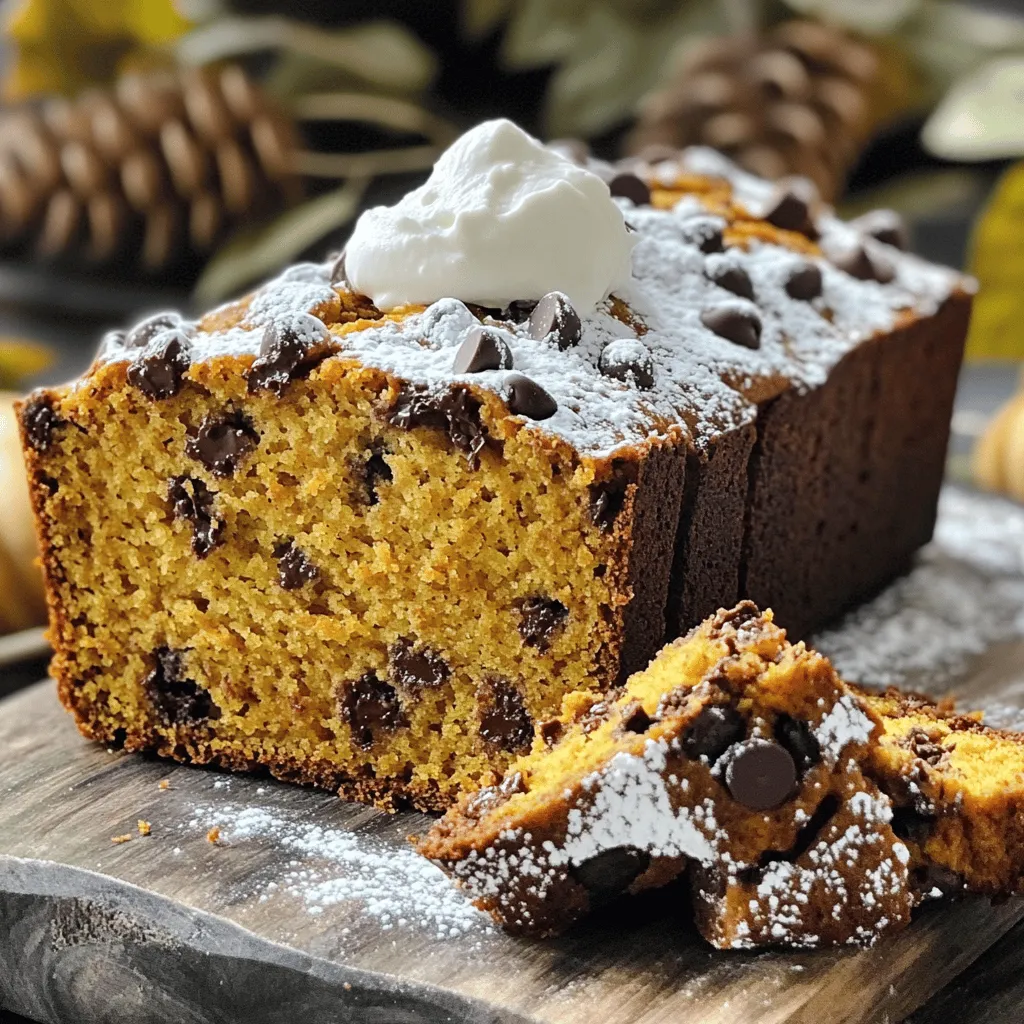
Decorating and Serving Suggestions
For a pretty touch, dust the bread with powdered sugar before serving. Serve it warm or at room temperature. You can also add a dollop of whipped cream on top for extra sweetness. If you want something crunchy, sprinkle chopped nuts on top. This adds texture and makes it look fancy.
Variations
Chocolate Chip Pumpkin Bread with Nuts
You can add nuts to your chocolate chip pumpkin bread for extra crunch. Chopped walnuts or pecans work great. They add a nice texture and flavor. Just fold in half a cup of your chosen nuts into the batter. This simple step makes every bite more interesting.
Gluten-Free Options
Want a gluten-free version? You can use gluten-free flour blends instead of all-purpose flour. Look for blends that contain rice flour, tapioca starch, and xanthan gum. These blends mimic regular flour well. Follow the same steps in the recipe for a delicious result. Just make sure all other ingredients are also gluten-free.
Spiced Pumpkin Bread Alternatives
For a twist, add more spices to your bread. Try adding cloves or allspice to enhance the flavor. You can also mix in a bit of cocoa powder for a rich taste. Use one to two tablespoons of cocoa powder and reduce the flour by the same amount. This keeps the balance right while giving you a new flavor. Enjoy exploring these fun variations!
Storage Info
How to Store Leftover Chocolate Chip Pumpkin Bread
To keep your chocolate chip pumpkin bread fresh, wrap it well. Use plastic wrap or aluminum foil. Store it at room temperature for up to three days. For longer storage, place it in the fridge. This will help it last for about a week. Make sure it cools completely before wrapping. If you keep it warm, it can get soggy.
Freezing Instructions for Longer Shelf Life
Freezing is a great option if you want to save some for later. First, let the bread cool completely. Then, wrap it tightly in plastic wrap. After that, place it in a freezer bag. Label the bag with the date. Your bread can stay frozen for up to three months. When you’re ready to eat it, just take it out and let it thaw in the fridge overnight.
Reheating Tips for Best Flavor
Reheating your chocolate chip pumpkin bread is easy. Slice a piece and place it in the microwave for about 15 seconds. This warms it nicely without drying it out. You can also use an oven. Preheat it to 350°F (175°C) and heat the bread for about 10 minutes. This keeps it soft and tasty. Enjoy it warm for the best flavor!
FAQs
How do I know when my chocolate chip pumpkin bread is done?
You know your chocolate chip pumpkin bread is done when a toothpick comes out clean. Insert the toothpick in the center of the loaf. If it has wet batter on it, bake a little longer. The top should be golden brown, and the sides will pull away slightly from the pan. Trust your senses; the aroma will fill your kitchen, hinting that it’s almost ready.
Can I use fresh pumpkin instead of canned?
Yes, you can use fresh pumpkin instead of canned. To do this, start by roasting your pumpkin. Cut it in half, remove the seeds, and bake it at 350°F for about an hour. Once cool, scoop out the flesh and puree it until smooth. Measure one cup of this puree for your recipe. Fresh pumpkin adds a unique flavor and texture, giving your bread a homemade touch.
What can I serve with chocolate chip pumpkin bread?
You can serve chocolate chip pumpkin bread in many ways. Here are some tasty options:
– A dollop of whipped cream for extra creaminess.
– A sprinkle of powdered sugar for a sweet touch.
– Cream cheese spread for a savory contrast.
– Hot coffee or tea to warm up your day.
Feel free to mix and match these ideas to suit your taste. Enjoy your delicious chocolate chip pumpkin bread with your favorite sides!
You learned about making delicious chocolate chip pumpkin bread. We covered essential ingredients, optional add-ins, and substitutions. The step-by-step process made it easy to bake. Tips helped you avoid common mistakes and achieve the perfect texture. You discovered fun variations and learned how to store leftovers.
In closing, this bread is fun to make and share. Enjoy your baking journey, and let your creativity shine!


