Introduction
Chili oil is a culinary treasure that adds a kick to dishes across various cuisines, particularly in Asian cooking. Its allure lies not just in its heat, but also in the depth of flavor it brings to food. From drizzling over dumplings to enhancing stir-fries, chili oil has carved out a special place in the pantry of home cooks and professional chefs alike. While store-bought options are convenient, nothing compares to the freshness and custom flavor profile of a homemade batch.
Creating your own spicy garlic chili oil allows you to control the ingredients, ensuring that you use only the freshest and most flavorful components. This homemade version is not just a condiment; it’s a versatile cooking ingredient that can elevate your dishes with its rich, aromatic essence. What makes this recipe particularly special is its robust flavor profile, featuring the perfect balance of heat from dried red chili flakes and the aromatic punch of fresh garlic.
As you embark on this culinary journey, prepare to unlock the full potential of this spicy oil, which complements everything from roasted vegetables to grilled meats, and even enhances your favorite pizza or pasta. With a handful of simple ingredients and a short preparation time, you can craft an unforgettable chili oil that will have your taste buds dancing.
Understanding the Key Ingredients
To make the perfect spicy garlic chili oil, it is essential to understand the role each ingredient plays in creating that signature flavor. Here’s a breakdown of the key components:
Vegetable Oil
The base of any chili oil is the vegetable oil used. The best types of oil for this recipe include canola or sunflower oil. These oils have a neutral flavor, allowing the spices and aromatics to shine without interference.
The role of oil in flavor extraction is crucial; it acts as a medium that absorbs the essence of the garlic, chili flakes, and any additional flavors you choose to include. When heated, the oil releases its aromatic properties, making it a vital ingredient for achieving that rich, spicy flavor profile characteristic of chili oil.
Garlic
Fresh garlic is one of the stars of this recipe. Its pungent flavor not only enhances the oil’s taste but also contributes to its aromatic qualities. When infused in hot oil, garlic becomes fragrant and slightly sweet, creating a beautiful balance with the heat of the chili flakes.
Using fresh garlic rather than powdered forms is critical for a robust flavor. Fresh garlic provides a depth and complexity that pre-packaged options simply cannot match. Plus, it offers a range of health benefits, including anti-inflammatory properties and potential immune system support.
Dried Red Chili Flakes
The heart of chili oil is, of course, the dried red chili flakes. The type and quality of chili flakes you choose will significantly affect the heat level and flavor of the final product. Options like crushed red pepper or Korean gochugaru offer different heat profiles and taste notes, from mild warmth to intense spiciness.
Selecting high-quality dried chili flakes is paramount for maximum flavor. Look for vibrant, deep red flakes that are aromatic, indicating freshness. When they are infused in oil, they release their oils, imparting both color and heat to your chili oil.
Sesame Seeds and Fresh Ginger (Optional)
While the core recipe focuses on garlic and chili flakes, adding optional ingredients like sesame seeds and fresh ginger can elevate the flavor even further. Sesame seeds add a nutty richness and a delightful crunch, enhancing the texture of your chili oil.
Fresh ginger contributes a warm, zesty kick that pairs beautifully with the garlic and chili. If you enjoy a more complex flavor profile, consider incorporating these ingredients for an extra layer of taste.
Salt and Black Peppercorns
Seasoning is key to balancing flavors in any dish, and chili oil is no exception. Salt helps to enhance the overall taste, bringing out the natural sweetness of the garlic and the heat of the chili.
Using whole black peppercorns can provide a robust taste that ground pepper may lack. As the peppercorns infuse in the hot oil, they release their essential oils, adding depth and complexity to your chili oil. This simple step can make a world of difference in the final flavor.
Step-by-Step Guide to Making Spicy Garlic Chili Oil
Now that you understand the importance of each ingredient, let’s move on to the preparation and cooking process. Making spicy garlic chili oil is straightforward and requires minimal equipment. Follow these steps to create your own batch:
Step 1: Gather Your Ingredients
Before you begin cooking, ensure you have all the necessary ingredients on hand. Here’s a quick list to get you started:
– 1 cup vegetable oil (canola or sunflower)
– 1 head of fresh garlic, peeled and minced
– 1/2 cup dried red chili flakes (adjust based on your heat preference)
– 2 tablespoons sesame seeds (optional)
– 1 tablespoon fresh ginger, minced (optional)
– 1 teaspoon salt
– 1 teaspoon whole black peppercorns
Step 2: Prepare the Garlic
Start by peeling and mincing the garlic. The size of the minced garlic will affect how strong its flavor becomes in the oil, so aim for small, even pieces. This will ensure that it infuses evenly, providing a consistent garlic flavor throughout the oil.
Step 3: Heat the Oil
In a medium saucepan, pour in the vegetable oil and place it over medium heat. It’s crucial to monitor the temperature during this step. You want the oil to be hot enough to release the flavors of the garlic and chili without burning them.
Step 4: Add the Garlic
Once the oil begins to shimmer, carefully add the minced garlic. Stir it gently to ensure even cooking. Keep a close eye on it, as garlic can burn quickly. You’re looking for a golden-brown color, which should take about 2-3 minutes. The aroma will fill your kitchen, signaling that you’re on the right track.
Step 5: Incorporate Chili Flakes and Optional Ingredients
Once the garlic is golden, remove the saucepan from the heat. Now, add the dried red chili flakes, sesame seeds, and fresh ginger (if using). Stir the mixture well, allowing the residual heat to release the flavors from the chili and optional ingredients.
Step 6: Seasoning
Next, add the salt and whole black peppercorns to the mixture. Stir again, ensuring that everything is well combined. The oil will start to take on a vibrant red hue, indicating that the chili flakes are infusing their heat into the oil.
Step 7: Let It Cool
After mixing, let the chili oil cool to room temperature. This cooling process allows the flavors to meld even further. Once cooled, transfer your spicy garlic chili oil to a clean, airtight jar. It can be stored in the refrigerator for up to a month, though it’s unlikely to last that long given its deliciousness!
By following these steps, you’ll soon have a jar of homemade spicy garlic chili oil that not only enhances your dishes but also brings a sense of satisfaction from having made it yourself. The beauty of homemade chili oil lies in its flexibility; feel free to adjust the heat level or add other ingredients to fit your personal taste preferences.
Stay tuned for the next part of this article, where we’ll explore more tips for best results, variations, and common questions about this delightful condiment.
Detailed Instructions for Heating Oil and Cooking Garlic
To begin making your Spicy Garlic Chili Oil, you will need to carefully heat the oil and cook the garlic to ensure that the flavors meld beautifully without compromising the taste with burnt bits. Start by choosing a neutral oil with a high smoke point, such as vegetable oil or grapeseed oil. These oils will not overpower the spices and will serve as the perfect base for your chili oil.
1. Heat the Oil: In a small saucepan, pour in 1 cup of your selected oil. Set the saucepan over medium heat. It’s crucial to monitor the heat closely; the goal is to infuse the oil without reaching a smoking point.
2. Add the Garlic: Once the oil is warm (but not smoking), carefully add 10-12 cloves of minced garlic. Stir the garlic gently into the oil, ensuring it is evenly distributed. This is where the magic begins, as the garlic will start to infuse the oil with its pungent aroma and flavor.
Tips for Avoiding Burnt Garlic and Achieving a Perfect Golden Brown Color
The key to achieving that perfect golden brown garlic without burning it lies in your technique:
– Low and Slow: Maintain a lower heat setting as the garlic cooks. Too high of heat will lead to rapid cooking, resulting in burnt garlic. Aim for a gentle simmer rather than a vigorous boil.
– Constant Stirring: Stir the garlic continuously using a wooden spoon or silicone spatula. This ensures even cooking and prevents any pieces from sticking to the bottom of the pan and burning.
– Watch for Color Change: Cook the garlic until it turns a light golden brown. This typically takes around 5-7 minutes. Keep a close eye on it, as the transition from golden to burnt can happen rapidly.
Infusing the Oil with Spices
Once the garlic has reached that desirable golden hue, it’s time to infuse the oil with spices to give it that signature kick.
1. Add the Chili Flakes: Remove the saucepan from heat, and immediately stir in 2-3 tablespoons of red chili flakes (adjust to your desired spice level). The residual heat will help release the essential oils from the chili flakes, imparting their heat into the oil.
2. Simmering Process: Return the saucepan to low heat for an additional 2-3 minutes. This simmering step is crucial as it allows the flavors to blend perfectly. You’ll notice the oil turning a deep red hue as the chili flakes infuse their color and spiciness.
3. Adjusting Spice Levels: If you prefer a milder oil, reduce the amount of chili flakes. Conversely, for an extra spicy kick, consider adding dried bird’s eye chilies or a dash of cayenne pepper. Taste testing will help you get the heat just right.
Cooling and Storing
Once you’ve achieved the desired flavor profile, it’s vital to cool the oil properly before transferring it for storage.
1. Cooling the Oil: Remove the saucepan from the heat and let the oil cool to room temperature. This step is critical as hot oil can create pressure in a sealed container, leading to spills or accidents.
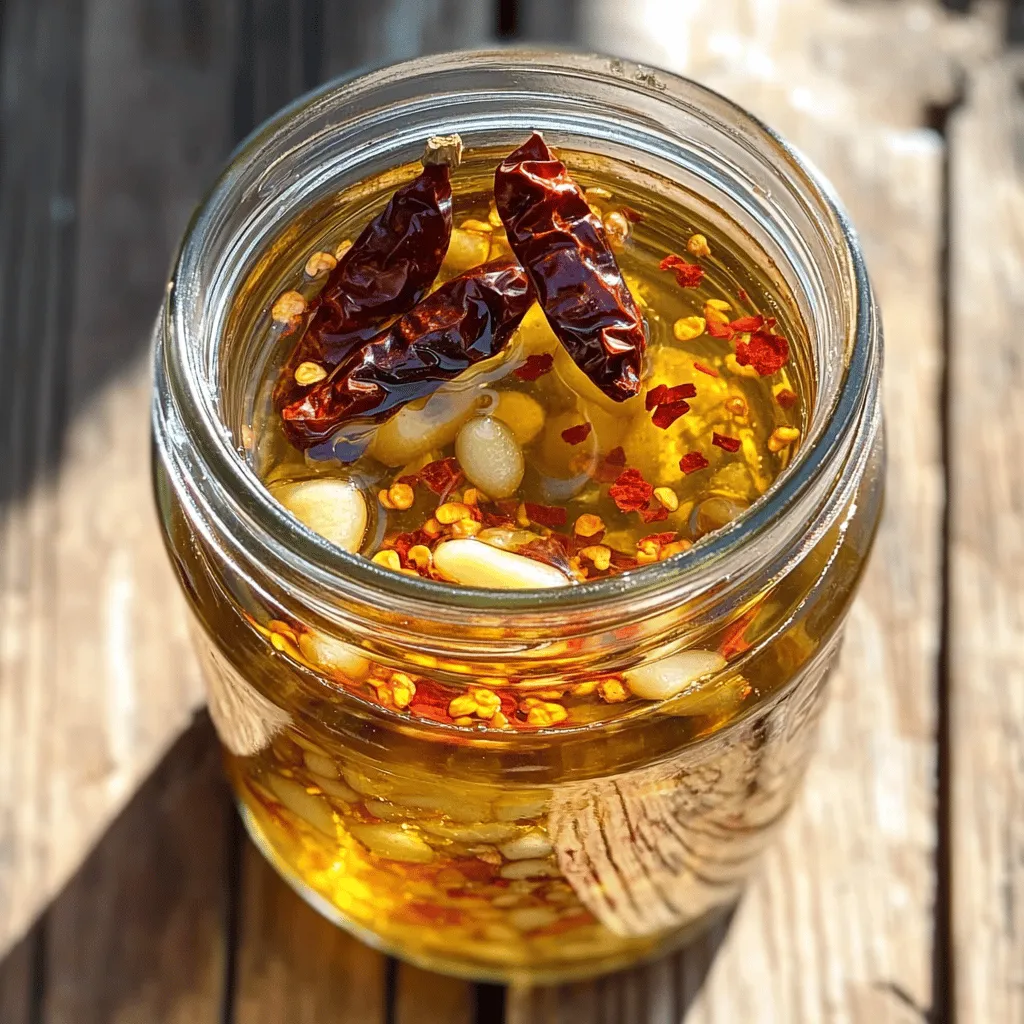
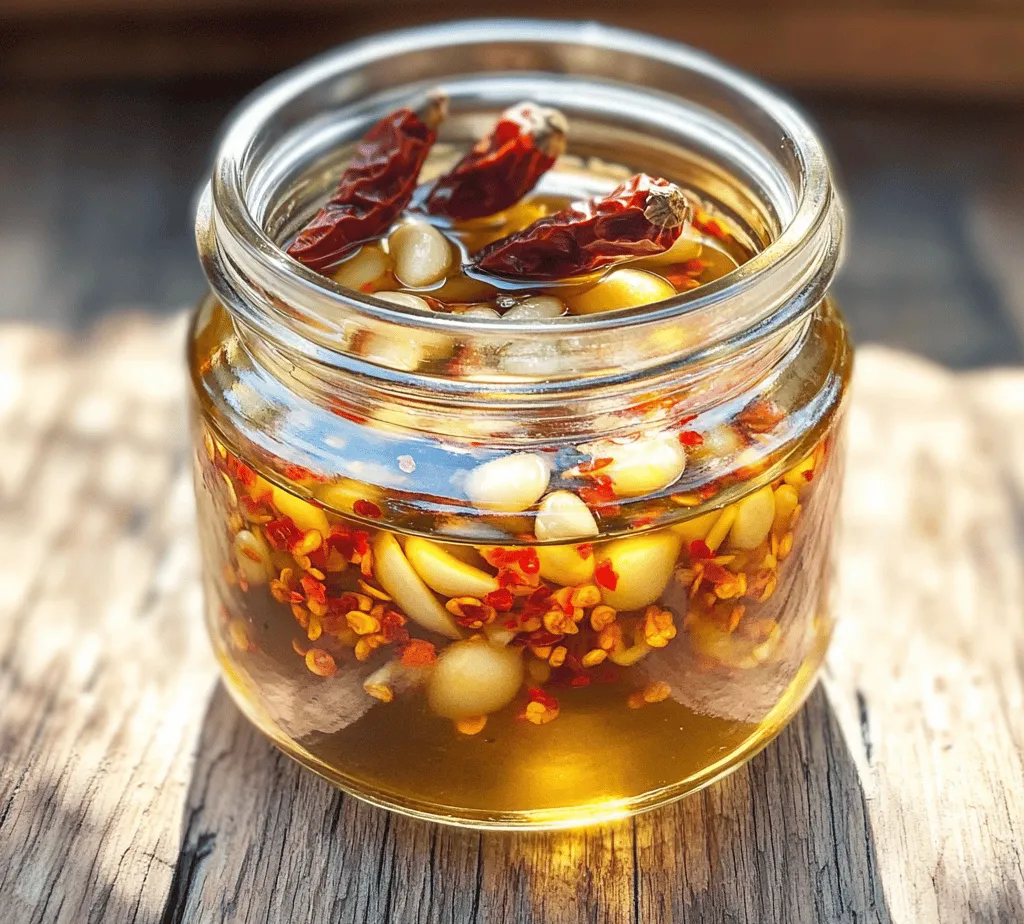
2. Straining the Oil: After the oil has cooled, use a fine mesh strainer or cheesecloth to strain out the garlic and chili flakes. You can choose to leave some chili flakes in for added flavor and visual appeal, but ensure that most of the solids are removed to prolong shelf life.
3. Best Practices for Storage: Transfer the strained chili oil into a clean, dry glass jar or bottle. Seal it tightly and store it in a cool, dark place or the refrigerator. The oil can last for up to a month when stored properly.
Presentation and Serving Suggestions
Attractive Storage Ideas
Using clear glass jars not only showcases the vibrant colors of your chili oil but also elevates its aesthetic appeal in your kitchen. You can enhance the visual aspect by filling the jar with whole dried chilies or sprigs of fresh herbs such as thyme or rosemary for a rustic look.
Culinary Uses
Spicy Garlic Chili Oil is incredibly versatile and can elevate a variety of dishes. Here are some culinary applications to consider:
– Stir-Fries: Drizzle your chili oil over stir-fried vegetables or meats for a flavor boost. It can also serve as a base for sautéing ingredients.
– Pizza and Pasta: A light drizzle of the chili oil over pizza or pasta can add a delightful kick that complements the savory flavors beautifully.
– Dipping Sauce: Pair your chili oil with soy sauce or vinegar for a delicious dipping sauce for dumplings, spring rolls, or even fresh bread.
– Marinades: Incorporate your chili oil into marinades for meats or tofu, infusing them with rich, spicy flavors before grilling or baking.
Nutritional Benefits of Spicy Garlic Chili Oil
The ingredients in Spicy Garlic Chili Oil not only provide tantalizing flavors but also come with a host of health benefits:
– Garlic Benefits: Garlic is renowned for its health-promoting properties, including immune support and cardiovascular health. It contains allicin, a compound known for its anti-inflammatory effects.
– Chili Peppers: The capsaicin found in chili peppers has been studied for its potential metabolism-boosting effects and its ability to aid in weight loss. It may also provide pain relief and improve digestion.
By incorporating Spicy Garlic Chili Oil into a balanced diet, you can enjoy not just the flavor but also the nutritional benefits it brings to the table.
Conclusion
Creating your own Spicy Garlic Chili Oil is a rewarding process that opens the door to a world of flavor possibilities. With its perfect balance of heat and garlic richness, this homemade condiment is sure to become a staple in your culinary repertoire.
As you experiment with various dishes, you’ll find that this chili oil enhances not only the taste but also the overall experience of your meals. Whether drizzled on pizza, mixed into pasta, or used as a marinade, the flavor versatility of this oil is unmatched.
Encourage your friends and family to explore this easy-to-make recipe and enjoy the satisfaction of crafting a delicious condiment right in their own kitchens. With just a few simple ingredients, you can elevate your everyday dishes and impress your guests with the bold flavors of your homemade Spicy Garlic Chili Oil. Enjoy the journey of flavor exploration, and savor the delight of creating something unique and delicious at home.