Introduction
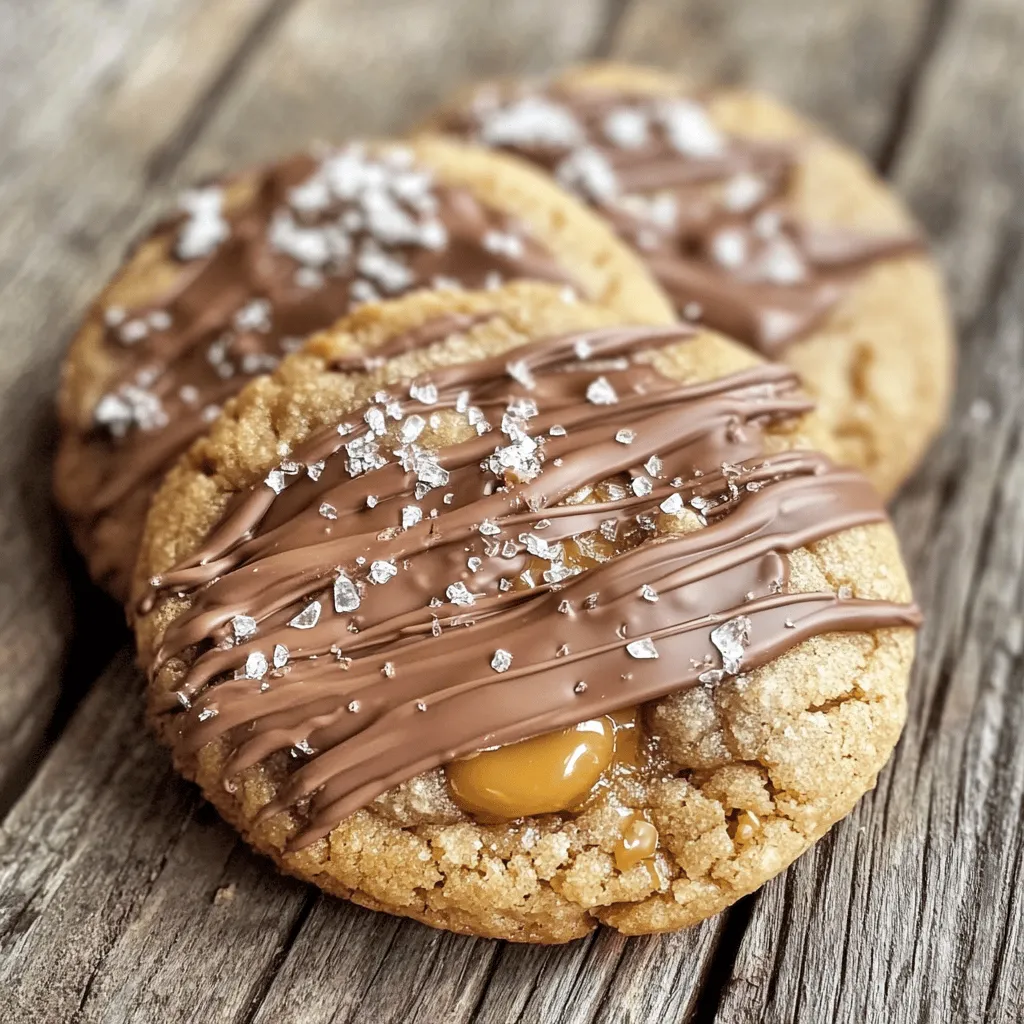
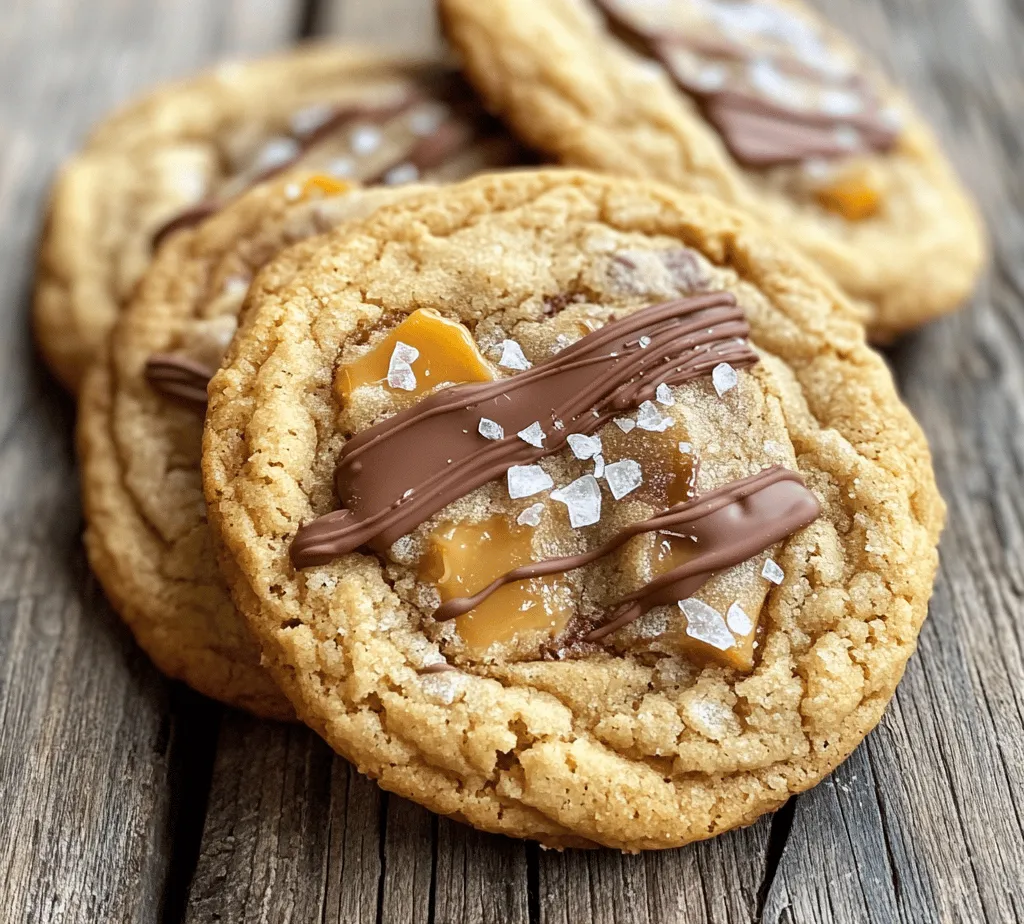
If you’re a cookie enthusiast with a penchant for indulgent treats, you’re in for a real delight with these Twix-inspired caramel crunch cookies. These cookies embody the beloved flavors of the classic Twix candy bar, featuring a buttery cookie base, a luscious caramel layer, and a smooth chocolate topping. Each bite offers a tantalizing blend of textures and flavors that are sure to please any sweet tooth.
Homemade cookies have a unique charm that goes beyond just their taste— they evoke feelings of warmth, nostalgia, and togetherness. Whether it’s a family gathering, a holiday celebration, or simply a weekend baking project, the act of baking cookies brings people together. The aroma that wafts through your kitchen while these cookies bake is enough to draw in friends and family, igniting memories of joyful moments shared over delicious treats.
In this article, we will take you through every step of crafting these delightful Twix-inspired caramel crunch cookies. We’ll delve into the recipe, break down the ingredients to understand their roles, and provide detailed step-by-step instructions to ensure you achieve cookie perfection. Along the way, we’ll also share some tips and tricks to elevate your cookie game, making these treats a star attraction at your next gathering.
Understanding the Twix-Inspired Concept
So, what exactly makes these cookies reminiscent of the iconic Twix bar? The secret lies in the harmonious combination of a buttery cookie, rich caramel, and smooth chocolate that layers together to create a symphony of flavors. Each element plays a crucial role in replicating the essence of Twix while adding a unique homemade charm.
The cookie base is soft yet slightly crisp, providing the perfect foundation for the indulgent toppings. The caramel layer is where the magic happens; it’s gooey, sweet, and adds a delightful chewiness that perfectly contrasts the cookie’s texture. Topping it all off is a generous drizzle of chocolate that not only enhances the flavor but also gives these cookies a stunning visual appeal.
Caramel and chocolate desserts have garnered immense popularity across various cultures. From classic confections to modern pastries, the combination is celebrated for its rich, comforting taste. By creating a cookie inspired by this classic duo, we tap into a universal love for sweet treats that resonate with many—a testament to the timeless allure of chocolate and caramel.
Ingredients Breakdown
Before diving into the preparation, it’s essential to familiarize ourselves with the ingredients that make up these tasty cookies. Each component is vital in achieving the desired flavor and texture, so let’s break them down.
Cookie Base Ingredients
1. Butter: The star of the cookie base, butter adds richness and depth of flavor. Using unsalted butter allows you to control the overall saltiness of your cookies.
2. Sugars: A blend of granulated sugar and brown sugar will give your cookies the perfect balance of sweetness and moisture. Brown sugar contributes to a chewier texture thanks to its molasses content.
3. Eggs: Eggs act as a binding agent, helping to hold the ingredients together while also adding moisture. Using room temperature eggs ensures a smoother mixing process.
4. Flour: All-purpose flour is the backbone of any cookie recipe. It provides structure and helps create that perfect cookie texture. Measuring flour accurately is crucial; too much can lead to dense cookies.
5. Baking Soda: This leavening agent helps create a light and airy cookie. It reacts with the acidic components in the brown sugar, providing lift.
6. Salt: A small amount of salt enhances the flavors in the cookie, balancing the sweetness and bringing out the richness of the butter.
Caramel Layer Ingredients
1. Soft Caramel Candies: These are the heart of the caramel layer. Look for high-quality soft caramel candies that will melt easily and become gooey when heated.
2. Heavy Cream: Incorporating heavy cream into the caramel helps achieve a smooth and silky texture. It adds richness and ensures that the caramel isn’t overly sticky or hard.
Chocolate Topping Ingredients
1. Semi-Sweet Chocolate Chips: These chips are ideal for melting, providing a rich chocolate flavor that complements the sweetness of the cookie and caramel.
2. Vegetable Oil: Adding a touch of vegetable oil to the melted chocolate gives it a glossy finish and makes it easier to drizzle over the cookies. This not only enhances the appearance but also improves the texture.
By understanding the roles of each ingredient, you can appreciate the thought that goes into crafting these Twix-inspired caramel crunch cookies. Now that we have a grasp of what we’ll be working with, let’s move on to the exciting part—preparing the cookie dough.
Step-by-Step Instructions for Twix-Inspired Caramel Crunch Cookies
Preparing the Cookie Dough
1. Creaming the Butter and Sugars: Start by preheating your oven to 350°F (175°C). In a large mixing bowl, add the softened unsalted butter, granulated sugar, and brown sugar. Using an electric mixer, cream the butter and sugars together on medium speed until light and fluffy, which usually takes about 2-3 minutes. This step is crucial as it incorporates air into the mixture, contributing to a lighter cookie texture.
2. Incorporating the Eggs: Once the butter and sugar are well combined, add the room temperature eggs one at a time, mixing until fully incorporated after each addition. This helps develop the structure of the cookie and ensures even distribution of moisture.
3. Combining Dry Ingredients: In a separate bowl, whisk together the all-purpose flour, baking soda, and salt. Gradually add the dry ingredients to the wet mixture, stirring just until combined. Be careful not to overmix, as this can result in tough cookies.
4. Chilling the Dough: For the best results, consider chilling the dough for at least 30 minutes. This step allows the flavors to meld and helps prevent the cookies from spreading too much while baking. Wrap the dough in plastic wrap and place it in the refrigerator.
Baking the Cookies
1. Scoop and Shape: Once the dough is chilled, remove it from the refrigerator. Using a cookie scoop or a tablespoon, portion out the dough onto a parchment-lined baking sheet, spacing them about 2 inches apart. If desired, you can gently flatten the tops of the cookie dough balls for a more even bake.
2. Baking Time: Place the baking sheet in the preheated oven and bake for 10-12 minutes, or until the edges are lightly golden while the centers remain slightly soft. Remember that the cookies will continue to cook a bit after being removed from the oven, so it’s better to underbake them slightly than to overbake.
3. Cooling: Once baked, allow the cookies to cool on the baking sheet for about 5 minutes before transferring them to a wire rack to cool completely. This helps them set without becoming overly firm.
As you can see, the initial steps of preparing the dough and baking the cookies are straightforward but crucial for achieving the perfect Twix-inspired caramel crunch cookie. Following these instructions will set the foundation for the delicious caramel and chocolate layers to come. Stay tuned for the next part, where we’ll dive into creating the caramel layer and chocolate topping, bringing these cookies to life!
Signs to Look For When Determining if Cookies Are Baked Correctly
Baking cookies can sometimes feel like a delicate balancing act, especially when aiming for that perfect texture. Here are some signs to help you determine if your Twix-inspired caramel crunch cookies are baked correctly:
1. Color: Baked cookies should have a golden-brown color around the edges while remaining slightly paler in the center. This is an indicator that the cookies are cooked through but not overdone.
2. Texture: Gently press down on the center of the cookie. If it springs back, they are likely done. If the impression remains, they may need more time in the oven.
3. Edges: The edges should appear set and slightly crisp, while the center should look a bit soft and not shiny. This is crucial for achieving that chewy yet crunchy texture reminiscent of a Twix.
4. Smell: The aroma of freshly baked cookies should fill your kitchen, indicating that the sugars are caramelizing, and the cookies are nearing completion.
5. Cooling: Remember that cookies will continue to cook slightly after being pulled from the oven due to residual heat, so it’s best to err on the side of slightly underbaked for a chewier result.
Preparing the Caramel Layer
Creating the caramel layer is one of the most exciting parts of making these cookies, and it requires some attention to detail to ensure it’s both delicious and perfectly textured.
Techniques for Melting Caramel Without Burning
1. Use Low Heat: When melting your caramel, always use low to medium heat. This prevents the sugars from burning and ensures a smooth melt. Avoid high heat, which can cause the sugar to scorch.
2. Stir Constantly: Use a silicone spatula or wooden spoon to stir the caramel as it melts. This helps distribute the heat evenly and prevents any one spot from getting too hot.
3. Temperature Control: If you have a candy thermometer, aim for a temperature of around 240°F (116°C) for a soft caramel consistency. This temperature will ensure that your caramel is thick enough to hold its shape without being too hard.
4. Avoid Water Contact: Keep water away from your caramel mixture. Water can cause sugar to crystallize, leading to a grainy texture.
The Significance of Achieving the Right Consistency for the Caramel Layer
The right consistency of caramel is crucial. It should be thick enough to hold its shape when spread on the cookies but still gooey enough to create that delightful stretchy texture. If your caramel is too runny, it will slide off the cookies; if it’s too thick, it may crack when bitten into. Aim for a consistency that allows it to spread evenly across the cookie surface without overwhelming it.
Assembling the Cookies
Once your cookies are baked and your caramel is prepared, it’s time to bring everything together.
Instructions on How to Evenly Distribute Caramel on Each Cookie
1. Spoon Method: Use a teaspoon to scoop a small amount of caramel. Start by placing it in the center of each cookie.
2. Spread with a Knife: Using a small offset spatula or the back of the spoon, gently spread the caramel towards the edges of the cookie, allowing it to cover the surface evenly.
3. Layer Thickness: Aim for about 1 to 2 tablespoons of caramel per cookie, adjusting based on your preference for sweetness and texture.
Tips for Allowing the Caramel to Spread Without Making a Mess
– Use Warm Caramel: Ensure that your caramel is still warm when applying it to the cookies. Cold caramel can harden quickly, making it difficult to spread.
– Work Quickly: Caramel can set fast, so work swiftly once it’s off the heat.
– Avoid Overfilling: Leave a small border around the edges of the cookie to prevent the caramel from spilling over.
Making the Chocolate Topping
The chocolate topping adds the final touch to your Twix-inspired cookies, creating a deliciously rich layer.
Step-by-Step Melting Process for Chocolate Chips with Safety Tips
1. Choose Your Chocolate: You can use milk chocolate, dark chocolate, or even white chocolate, depending on your taste preference.
2. Double Boiler Method: Fill a saucepan with about an inch of water and bring it to a simmer. Place a heatproof bowl on top, ensuring it doesn’t touch the water. Add your chocolate chips and stir until melted.
3. Microwave Method: Alternatively, you can melt chocolate in the microwave. Place chocolate chips in a microwave-safe bowl, heat in 30-second intervals, stirring in between until fully melted.
4. Safety Tips: Be careful not to overheat the chocolate, as it can seize. If this happens, add a teaspoon of vegetable oil or shortening to help restore it to a smooth consistency.
Methods for Achieving a Beautiful Drizzle Effect
1. Use a Piping Bag: Once your chocolate is melted, transfer it to a piping bag or a zip-top bag with the corner snipped off. Hold the bag over the cookies and drizzle back and forth for a lovely design.
2. Spoon Drizzle: You can also use a spoon to drizzle chocolate over the cookies; simply dip the spoon into the chocolate and flick your wrist to create a lovely pattern.
Cooling and Serving
Once your cookies are assembled, cooling is a vital step before indulging.
Importance of Cooling Methods for the Chocolate Layer
1. Room Temperature: Allow the cookies to cool at room temperature on a wire rack. This helps prevent condensation, which can make the chocolate layer soggy.
2. Refrigeration: For quicker setting, you can place the cookies in the refrigerator for about 15-20 minutes. This will help the chocolate to harden and make for easier handling.
Suggestions for Serving and Pairing the Cookies
These cookies are perfect for any occasion, whether it’s a casual gathering, a bake sale, or a cozy night in. Here are some serving suggestions:
– With Milk: Serve alongside a glass of cold milk to complement the rich flavors.
– Dessert Platter: Arrange on a dessert platter with other treats like brownies or fruit tarts for a delightful variety.
– Coffee Pairing: Pair with a cup of coffee or espresso to enhance the flavors of the chocolate and caramel.
Variations and Customizations
One of the best things about baking is the ability to customize your creations. Here are some ideas to make your Twix-inspired cookies even more exciting:
– Add Nuts: Consider folding in some chopped nuts like pecans or walnuts into the cookie dough for an added crunch and flavor.
– Different Chocolate Types: Experiment with different types of chocolate. Dark chocolate offers a rich, bold flavor, while white chocolate adds a creamy sweetness.
– Flavor Infusions: Incorporate flavors such as sea salt on top of the caramel for a salted caramel twist, espresso powder in the batter for a mocha flavor, or peppermint extract for a holiday-themed cookie.
Storage and Shelf Life
To ensure your cookies remain fresh and delicious, proper storage is essential.
Best Practices for Storing Cookies to Maintain Freshness
1. Airtight Containers: Store the cookies in an airtight container at room temperature to maintain their softness.
2. Layering: If stacking cookies, place parchment paper between layers to prevent sticking.
3. Cool Completely: Ensure that the cookies are completely cooled before storing to avoid condensation, which can lead to sogginess.
Discussion on Freezing Cookies and Caramel for Longer Shelf Life
1. Freeze Cookies: To extend the shelf life, you can freeze the cookies. Place them in a freezer-safe bag or container, separating layers with parchment paper. They can last up to three months in the freezer.
2. Caramel Storage: If you have leftover caramel, store it in an airtight container in the fridge for up to a week. You can also freeze it in small portions for future use.
Conclusion
Making Twix-inspired caramel crunch cookies is not just a baking project; it’s a delightful experience that brings together the warmth of the kitchen and the joy of indulging in a sweet treat. With the perfect balance of buttery cookie, gooey caramel, and rich chocolate, these cookies are sure to impress family and friends alike.
Baking is a wonderful way to share moments with loved ones, whether it’s hosting a fun bake-off or simply enjoying the process together. So gather your ingredients, roll up your sleeves, and embark on this delicious adventure! The joy of baking—and enjoying—these cookies is something to cherish, making them a perfect treat for any occasion.


