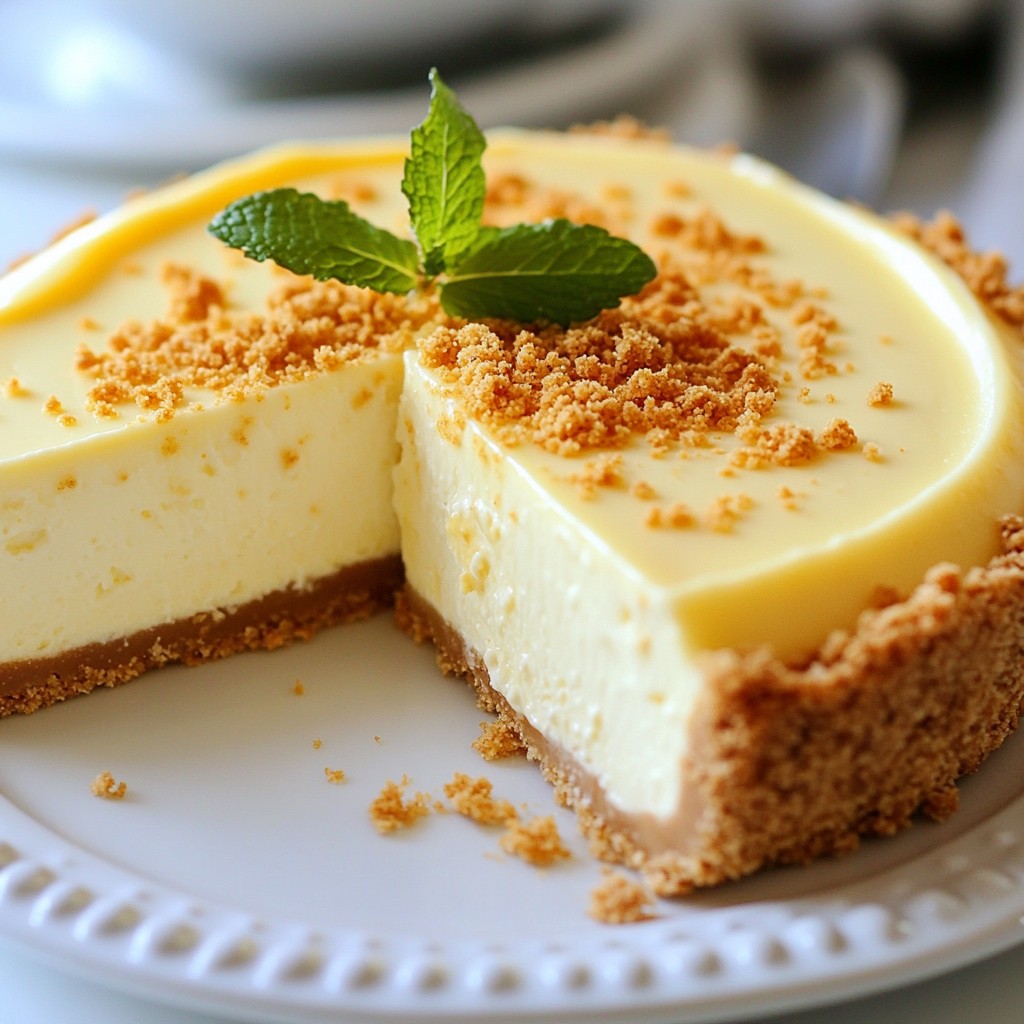
If you're craving a sweet treat that's easy to make, try my Vanilla Bean Cheesecake. This creamy dessert uses simple ingredients like cream cheese, vanilla bean paste, and a buttery crust. In this post, I'll share my foolproof recipe, step-by-step instructions, and helpful tips. Plus, I'll show you easy variations to fit any diet! Let’s dive in and create a dessert that will impress everyone!
Why I Love This Recipe
- Decadent Flavor: This cheesecake boasts a rich and creamy texture, balanced perfectly with the aromatic notes of vanilla bean, making every bite a heavenly experience.
- Simple Ingredients: With just a handful of pantry staples, this recipe allows anyone to create a gourmet dessert that impresses without the fuss.
- Perfect for Any Occasion: Whether it's a birthday, holiday, or just a weeknight treat, this cheesecake fits seamlessly into any celebration or casual gathering.
- Customizable Toppings: Serve it plain, or elevate it with fresh berries, chocolate drizzle, or whipped cream to suit your taste and elevate its presentation.
Ingredients
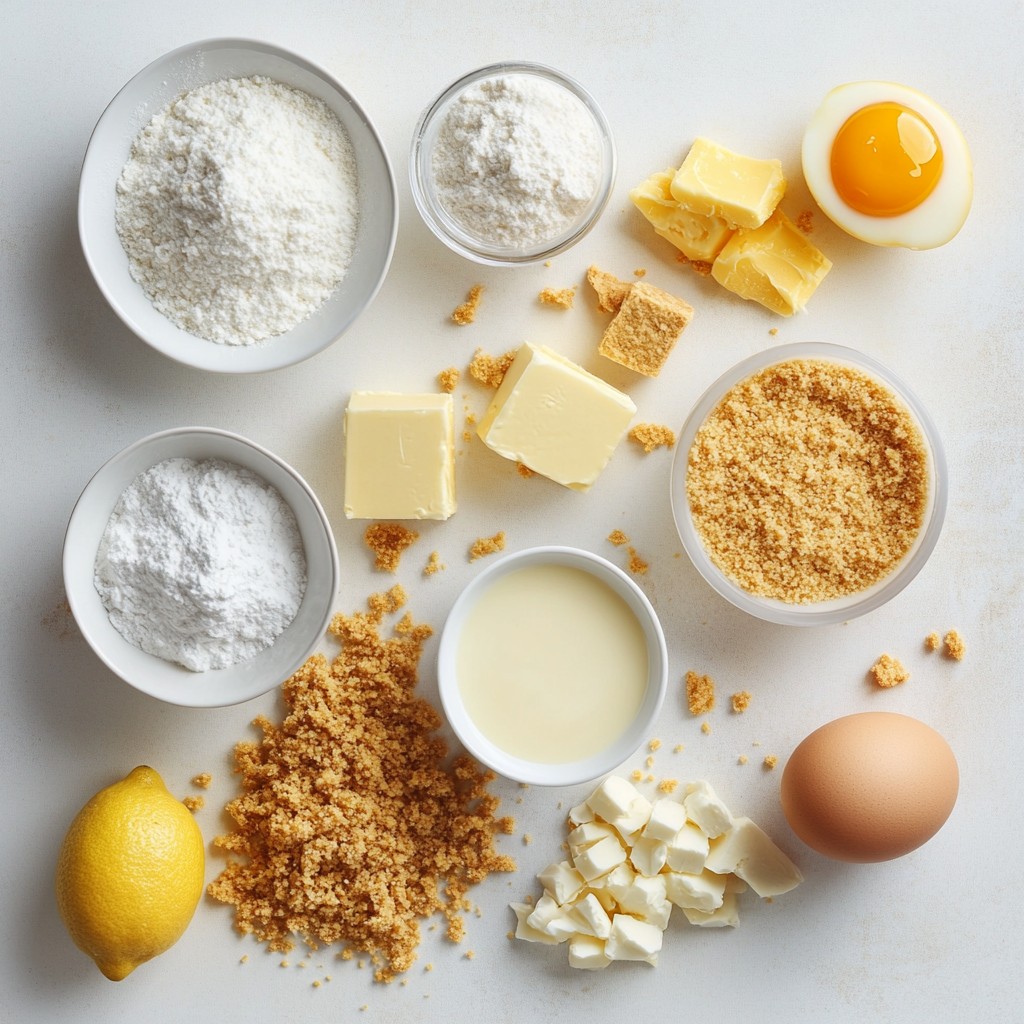
To make a perfect vanilla bean cheesecake, gather these ingredients:
- 1 ½ cups graham cracker crumbs
- ½ cup unsalted butter, melted
- 1 cup granulated sugar
- 3 (8-ounce) packages cream cheese, softened
- 1 tablespoon vanilla bean paste
- 2 teaspoons vanilla extract
- 3 large eggs
- 1 cup sour cream
- 2 tablespoons all-purpose flour
- 1 teaspoon lemon zest (optional, for brightness)
These ingredients work together to create a rich, creamy dessert. The graham cracker crumbs form a delicious crust. The cream cheese provides a smooth texture. Vanilla bean paste gives a stronger vanilla flavor than extract.
The eggs help bind the filling together. Sour cream adds a nice tang. Flour thickens the filling, making it just right. Lemon zest is optional but adds a refreshing touch.
Using high-quality ingredients makes a big difference in taste. Look for real vanilla bean paste and fresh cream cheese. With these ingredients, you can create a cheesecake that everyone will love.
Step-by-Step Instructions
Preparation Steps
1. Preheat the Oven: Start by preheating your oven to 325°F (160°C). This step is key for even baking.
2. Prepare the Crust: In a medium bowl, mix together 1 ½ cups of graham cracker crumbs, ½ cup of melted unsalted butter, and 2 tablespoons of granulated sugar. Press this mixture firmly into the bottom of a 9-inch springform pan. Bake the crust for 10 minutes, then take it out and let it cool slightly.
3. Mix the Cheesecake Filling: In a large bowl, use an electric mixer to beat 3 packages of softened cream cheese until smooth. Gradually add 1 cup of granulated sugar, mixing well until combined.
Baking the Cheesecake
1. Add Vanilla and Eggs: Beat in 1 tablespoon of vanilla bean paste and 2 teaspoons of vanilla extract. Then, add 3 large eggs, one at a time. Mix well after each one to keep it smooth.
2. Incorporate the Sour Cream and Flour: Gently mix in 1 cup of sour cream and 2 tablespoons of all-purpose flour. If you want, fold in 1 teaspoon of lemon zest for a fresh touch.
3. Bake the Cheesecake: Pour the filling over the cooled crust. Smooth the top with a spatula. Bake in the oven for 55-60 minutes. The edges should be set, but the center can still jiggle a little.
Chilling and Serving
1. Cool Down: After baking, turn off the oven and crack the door. Let the cheesecake cool inside for 1 hour. This helps stop cracks from forming.
2. Chill: Afterward, put the cheesecake in the refrigerator for at least 4 hours. For best results, chill it overnight. This helps the flavors develop and the cheesecake to set.
3. Serve: When ready to serve, run a knife around the edge of the pan before releasing the springform. Slice into pieces and serve plain or with fresh berries or whipped cream. For a fancy touch, drizzle with chocolate sauce or add a mint leaf for garnish.
Tips & Tricks
Baking Tips
- Important temperature considerations: Always preheat your oven to 325°F (160°C). This step sets the stage for even baking. A hot oven helps your cheesecake rise properly and cook through.
- How to prevent cracks in the cheesecake: To avoid cracks, cool your cheesecake slowly. After baking, turn off the oven and crack the door. Let it sit for an hour before removing it. This gradual cooling prevents sudden temperature changes that cause cracks.
- Perfecting the crust texture: For a great crust, mix graham cracker crumbs and melted butter well. Press it firmly into the pan. Bake it for 10 minutes to create a crisp base. This step adds flavor and stability to your cheesecake.
Serving Suggestions
- Best toppings and accompaniments: Fresh berries, whipped cream, or a fruit sauce pair well with vanilla bean cheesecake. These toppings add color and flavor. Try a drizzle of chocolate or raspberry sauce for extra flair.
- Presentation ideas for guests: For a stunning presentation, slice your cheesecake neatly. Serve it on a beautiful plate. Add a sprinkle of crushed graham crackers and a mint leaf on top. This simple touch makes your dessert look fancy.
Pro Tips
- Use Room Temperature Ingredients: Make sure your cream cheese, eggs, and sour cream are at room temperature before mixing. This helps achieve a smoother and creamier texture.
- Don't Overmix: When adding the eggs and sour cream, mix just until incorporated. Overmixing can lead to a dense cheesecake.
- Prevent Cracking: Allow the cheesecake to cool slowly in the oven with the door ajar. This gradual cooling helps prevent cracks on the surface.
Variations
No-Bake Vanilla Bean Cheesecake
To make a no-bake vanilla bean cheesecake, you need some slight changes to the recipe. Here is what you need:
- 1 ½ cups graham cracker crumbs
- ½ cup unsalted butter, melted
- 1 cup granulated sugar
- 3 (8-ounce) packages cream cheese, softened
- 1 tablespoon vanilla bean paste
- 2 teaspoons vanilla extract
- 1 cup heavy cream
- 2 tablespoons powdered sugar
Instructions for the No-Bake Version:
1. Prepare the Crust: Mix graham cracker crumbs with melted butter and 2 tablespoons of sugar. Press this into a 9-inch springform pan. Chill for 30 minutes.
2. Make the Filling: In a bowl, beat softened cream cheese and granulated sugar until smooth. Add vanilla bean paste and vanilla extract to the mix.
3. Whip the Cream: In another bowl, whip the heavy cream with powdered sugar until soft peaks form.
4. Combine: Gently fold the whipped cream into the cream cheese mixture.
5. Chill: Spread the filling over the crust. Chill in the fridge for at least 4 hours or until set.
Vegan Vanilla Bean Cheesecake
For a vegan version, swap out the dairy ingredients. Here’s what you will need:
- 1 ½ cups graham cracker crumbs
- ½ cup coconut oil, melted
- 1 cup coconut sugar
- 3 (8-ounce) packages vegan cream cheese, softened
- 1 tablespoon vanilla bean paste
- 2 teaspoons vanilla extract
- 1 cup coconut cream
- 2 tablespoons cornstarch
Instructions for the Vegan Cheesecake:
1. Prepare the Crust: Combine graham cracker crumbs with melted coconut oil and 2 tablespoons of coconut sugar. Press this mix into a 9-inch springform pan.
2. Make the Filling: Beat the vegan cream cheese and coconut sugar until creamy. Stir in the vanilla bean paste and vanilla extract.
3. Add Coconut Cream: Mix in the coconut cream and cornstarch until smooth.
4. Fill the Pan: Pour the mixture over the crust. Smooth it out with a spatula.
5. Chill: Refrigerate for at least 4 hours or overnight until firm.
Flavored Variations
You can easily add different flavors to your cheesecake. Here are some fun ideas:
- Fruits: Blend in fruit purees, like raspberry or strawberry, for a fruity twist.
- Extracts: Use almond or lemon extracts instead of vanilla for a unique flavor.
- Chocolate: Melt chocolate and fold it into the filling for a chocolate vanilla bean cheesecake.
These variations keep your cheesecake exciting and fresh for any occasion!
Storage Info
Storing the Cheesecake
To keep your cheesecake fresh, store it in the fridge. Use a tight container to seal it well. This helps keep moisture inside. You can also cover it with plastic wrap. Make sure it’s not touching the cheesecake to avoid sticking.
If you want to save some for later, freezing is a good option. To freeze, wrap the cheesecake tightly in plastic wrap. Then, place it in a freezer-safe container or bag. This helps keep the taste and texture. It can last up to three months in the freezer.
Shelf Life
How long will cheesecake last in the fridge? Your delicious cheesecake can last about five to seven days in the fridge. Keep an eye on it and try to eat it within that time.
Signs of spoilage include a change in color or smell. If you see any mold or if the texture feels off, throw it away. Always trust your senses when checking food. Enjoy your cheesecake while it’s fresh!
FAQs
Common Questions
What is the difference between vanilla bean paste and vanilla extract? Vanilla bean paste has real vanilla seeds. It gives a stronger flavor. Vanilla extract is liquid and less intense. Both can work, but paste adds visual appeal.
Can I use low-fat cream cheese? Yes, you can use low-fat cream cheese. This will change the taste and texture a bit. The cheesecake may not be as rich and creamy.
How do I know when the cheesecake is done baking? Check the edges. They should be set, while the center jiggles slightly. It will firm up as it cools.
What can I substitute if I don’t have sour cream? Greek yogurt is a great substitute. It adds creaminess and tang. You can also use cream cheese or a mix of milk and lemon juice.
Additional Tips
How do I serve vanilla bean cheesecake? Serve it chilled. You can add fresh berries or whipped cream. Drizzle with chocolate or raspberry sauce for flair.
Can I make this cheesecake ahead of time? Yes, you can make it a day in advance. Just let it chill overnight. This helps the flavors blend and improves the texture.
Cheesecake can be simple and fun to make. This guide covered all key steps, from gathering the right ingredients to baking and chilling. I shared tips to help you avoid cracks and perfect your crust. You can explore tasty variations, including no-bake and vegan options. Remember to store your cheesecake properly, as freshness matters. With this knowledge, you can create delightful cheesecakes for any occasion. Enjoy making and sharing your delicious treats!


