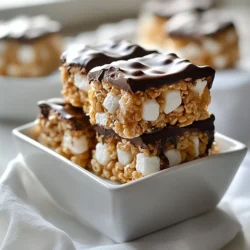
Peanut Butter Chocolate Rice Krispie Treats
Delicious and chewy treats made with Rice Krispies, peanut butter, and chocolate.
Ingredients
- 4 cups Rice Krispies cereal
- 1 cup creamy peanut butter
- 1 cup semi-sweet chocolate chips
- 1 2 cup unsalted butter
- 1 cup mini marshmallows
- 1 teaspoon vanilla extract
- 1 pinch salt
Instructions
- In a large saucepan over medium heat, melt the unsalted butter. Once melted, stir in the creamy peanut butter until well combined and smooth.
- Add the mini marshmallows to the peanut butter mixture. Stir continuously until the marshmallows have completely melted and the mixture is smooth.
- Remove the saucepan from heat and quickly stir in the vanilla extract and a pinch of salt.
- Gradually fold in the Rice Krispies cereal until evenly coated with the peanut butter mixture, ensuring no cereal is left dry.
- In a separate microwave-safe bowl, melt the semi-sweet chocolate chips in the microwave in 30-second intervals, stirring until smooth.
- Pour half of the cereal mixture into a greased 9x13 inch baking dish, pressing it down firmly with a spatula.
- Drizzle half of the melted chocolate over the first layer of Rice Krispies.
- Spoon the remaining cereal mixture on top, pressing it down once more. Finally, drizzle the rest of the melted chocolate over the top layer, smoothing it out as needed.
- Allow the treats to cool at room temperature for about 30 minutes, or until the chocolate is set.
- Once set, cut into squares and enjoy!
Notes
Allow treats to cool completely before cutting for best results.