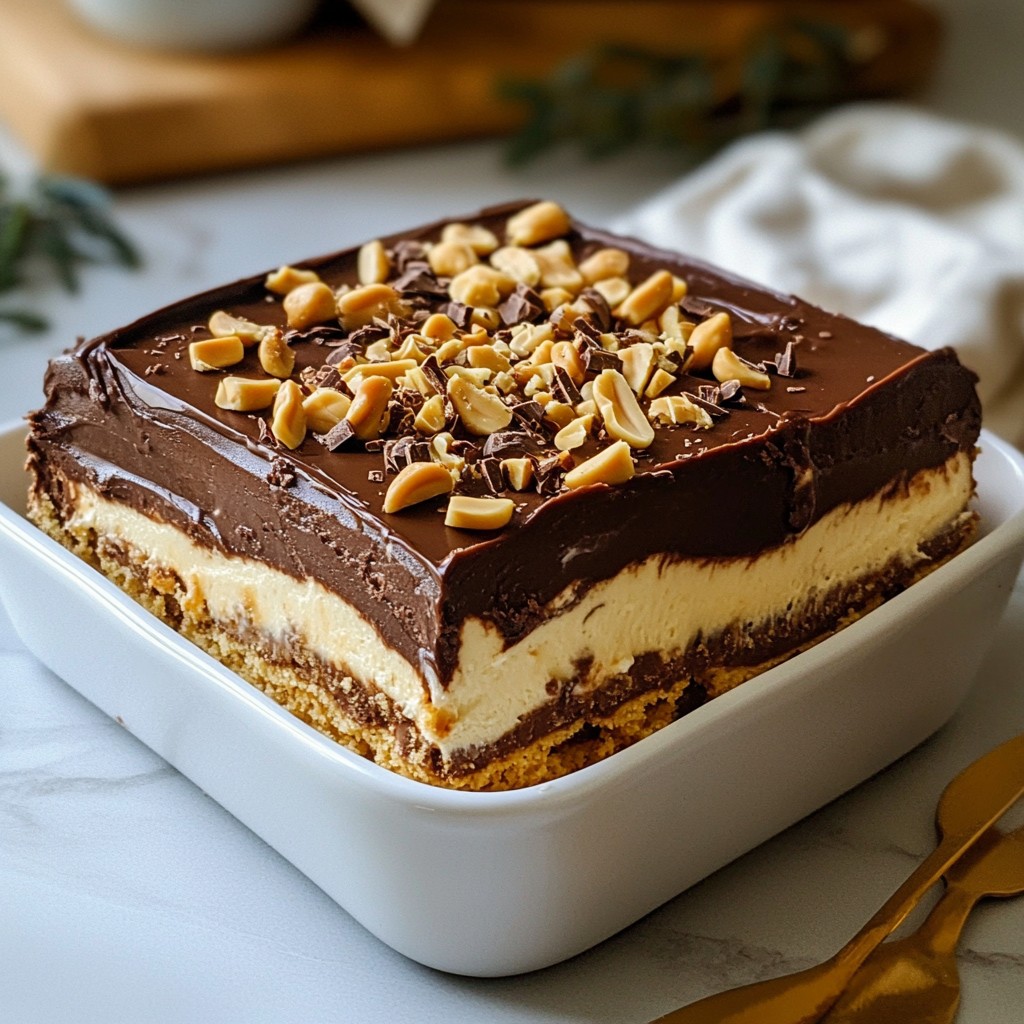
If you love the classic combo of chocolate and peanut butter, then this Chocolate Peanut Butter Icebox Cake is a must-try! I promise to guide you through each simple step, from gathering your ingredients to serving the perfect slice. This no-bake dessert is not only easy to make but also a delightful treat that will impress your family and friends. Ready for the sweet journey ahead? Let's dive into this irresistible delight!
Why I Love This Recipe
- Decadent Flavor Combination: This icebox cake perfectly balances the rich, creamy peanut butter with the smooth, luscious chocolate, creating a dessert that is truly indulgent.
- No-Bake Convenience: With minimal cooking required, this recipe is ideal for hot days when you want something sweet without turning on the oven.
- Make-Ahead Delight: This cake can be prepared in advance and stored in the refrigerator, making it a perfect option for gatherings and parties.
- Customizable Presentation: Add your favorite toppings, like crushed peanuts or chocolate shavings, to personalize the cake and impress your guests.
Ingredients
Complete Ingredient List
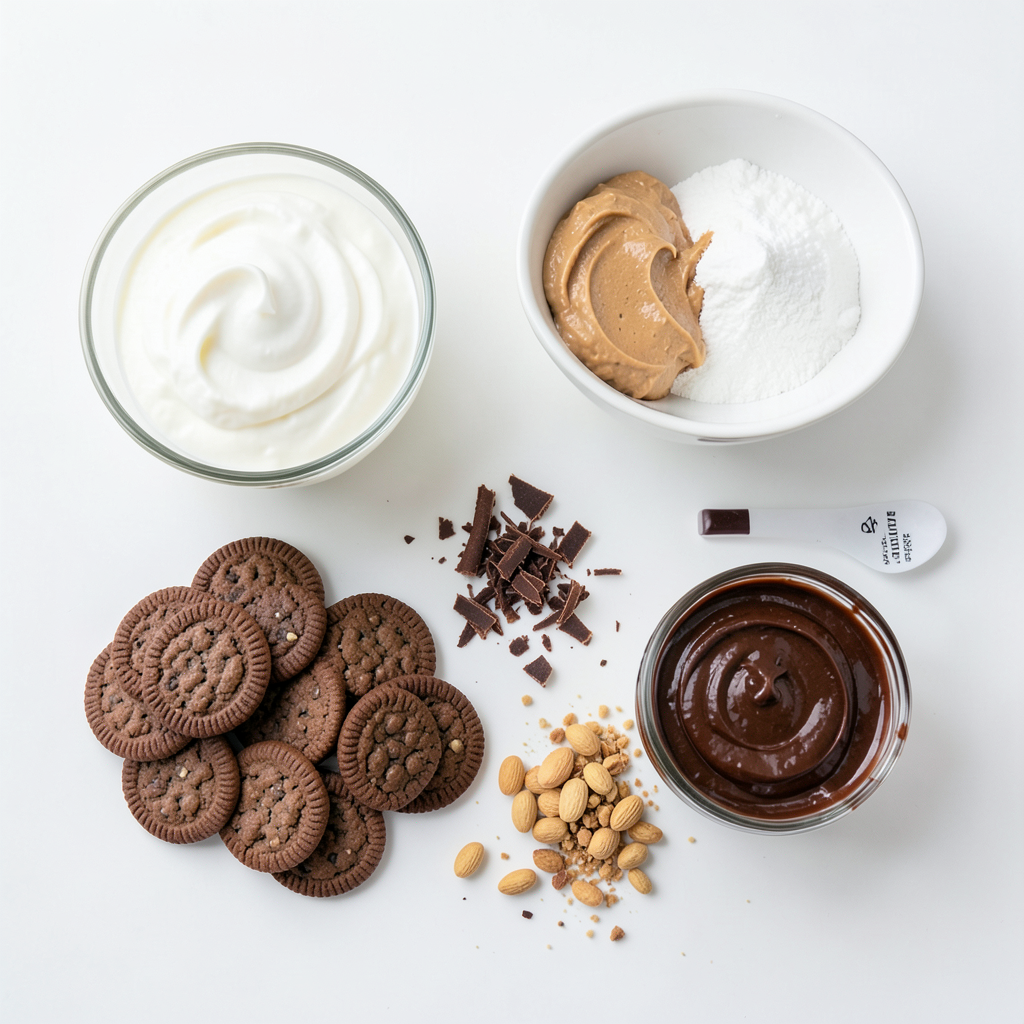
To make this Chocolate Peanut Butter Icebox Cake, gather these ingredients:
- 2 cups heavy whipping cream
- 1 cup creamy peanut butter
- 1 cup powdered sugar
- 1 teaspoon vanilla extract
- 24 chocolate wafer cookies
- 1 cup chocolate ganache (store-bought or homemade)
Optional Garnishes
You can make your cake even more special with these garnishes:
- Crushed peanuts
- Chocolate shavings
These add crunch and a pop of flavor. They make the cake look stunning too!
Ingredient Substitutions
If you need to change things up, here are some great swaps:
- Use almond butter instead of peanut butter for a nutty twist.
- Swap heavy cream with coconut cream for a dairy-free option.
- Try maple syrup instead of powdered sugar for a natural sweetener.
These substitutions keep the spirit of the cake while fitting your needs.
Step-by-Step Instructions
Preparation of Peanut Butter Mixture
Start by grabbing a large mixing bowl. Add 2 cups of heavy whipping cream. Use a mixer to whip the cream until soft peaks form. This should take about 3 to 5 minutes. In another bowl, mix 1 cup of creamy peanut butter, 1 cup of powdered sugar, and 1 teaspoon of vanilla extract. Blend this until it is smooth and creamy. Now, gently fold the whipped cream into the peanut butter mixture. Do this slowly so you keep the air in the whipped cream. Your mixture should be light and fluffy.
Assembling the Icebox Cake
Next, take a 9x9-inch baking dish. Place a layer of 24 chocolate wafer cookies on the bottom. Make sure to cover the entire base. Spread one-third of the peanut butter-cream mixture over the cookies. Then, drizzle a layer of 1 cup of chocolate ganache on top. Repeat these layers two more times. Make sure to end with the peanut butter-cream mixture on top. This gives a nice finish.
Refrigeration and Serving Tips
Cover the dish tightly with plastic wrap. Place it in the refrigerator for at least 4 hours, or overnight. This allows the cookies to soften and absorb flavors. When you are ready to serve, take it out and sprinkle crushed peanuts and chocolate shavings on top. This adds texture and looks great. Use a sharp knife to slice it into squares. Enjoy your delicious creation!
Tips & Tricks
Achieving the Perfect Whipped Cream
To make great whipped cream, start with cold tools. Chill your mixing bowl and beaters for best results. Use heavy whipping cream. Whip the cream until soft peaks form. This means the cream holds its shape but is still smooth. Overwhipping can turn it into butter. If this happens, add a splash of cream and mix gently.
Ensuring Layers Stay Distinct
For clear layers, work quickly when building the cake. Use a spatula to spread the peanut butter-cream mixture evenly. When adding each layer, make sure to cover the wafer cookies fully. This keeps the layers from blending. Let the cake chill for at least four hours. Overnight chilling helps the cookies absorb moisture and flavors.
Common Mistakes to Avoid
Don't skip the chilling step. If you serve it too soon, the layers will be messy. Avoid using low-fat cream. It won't whip up as well and can affect the texture. Make sure to measure your ingredients carefully. Too much peanut butter can make the filling too thick. Lastly, be patient when garnishing. Adding crushed peanuts and chocolate shavings right before serving makes it look fresh and tempting.
Pro Tips
- Use Cold Ingredients: For best results, make sure your heavy cream and mixing bowls are chilled. This will help the cream whip up faster and achieve more volume.
- Layering Technique: When layering the cookies and peanut butter mixture, ensure an even distribution for a consistent taste in every bite. Don’t rush this step!
- Chill Time: Allowing the cake to chill overnight will enhance the flavors and ensure the cookies soften perfectly. Patience pays off!
- Garnish Wisely: For an elegant touch, consider adding a drizzle of extra chocolate ganache and a sprinkle of flaky sea salt along with the crushed peanuts and chocolate shavings.
Variations
Different Flavors to Try
You can switch up the flavor of your Chocolate Peanut Butter Icebox Cake in fun ways. Try using different cookies, like graham crackers or Oreos. For a fruity twist, layer in fresh banana slices or strawberries. You might also experiment with flavored peanut butter, like chocolate or honey. Each choice can create a new taste experience.
Healthier Ingredient Options
To make this dessert a bit healthier, consider low-fat whipping cream. You can also use natural peanut butter, which has no added sugar. For a lower sugar option, try a sugar substitute for the powdered sugar. Almond milk can replace some of the cream if you want a lighter version.
How to Customize for Dietary Needs
If you have dietary needs, it's easy to adapt this recipe. For a gluten-free version, choose gluten-free cookies. You can use dairy-free cream and peanut butter if you need a vegan option. Just check the labels to ensure all ingredients fit your needs. This way, everyone can enjoy this tasty treat!
Storage Info
Best Practices for Refrigeration
After making your Chocolate Peanut Butter Icebox Cake, you should store it in the fridge. Cover it tightly with plastic wrap. This keeps the cake fresh and prevents it from absorbing other smells in the fridge. The cool air helps the layers stay firm. Make sure to put it on a flat shelf for the best results.
Freezing and Thawing Instructions
You can freeze this cake if you want to save some for later. First, make sure it is well-wrapped in plastic wrap and then in aluminum foil. Label it with the date. To thaw, move it to the fridge for about 4-6 hours before you want to eat it. Avoid microwaving, as this can change the texture.
Shelf Life of the Icebox Cake
When stored properly, your Chocolate Peanut Butter Icebox Cake lasts about 5 days in the fridge. If you freeze it, it can stay good for up to 2 months. Keep an eye on it for any signs of freezer burn or off smells. Enjoy this treat while it is fresh for the best taste!
FAQs
Can I make this cake in advance?
Yes, you can make this cake a day ahead. It needs time to chill. Refrigerating allows the cookies to soften and soak up the flavors. The longer it sits, the better it tastes. Just cover it well with plastic wrap. This keeps it fresh and prevents it from absorbing any fridge smells.
How do I store leftovers?
Store any leftovers in the fridge. Use an airtight container or cover the dish tightly. This helps keep the cake creamy and delicious. It stays good for about three days. If you notice any change in texture or smell, it’s best to toss it.
Can I substitute the chocolate wafers with other cookies?
Absolutely! Feel free to use other cookies. Graham crackers work well for a different flavor. You can also try Oreos for extra chocolate kick. Just make sure the cookies are flat and not too soft. This way, they hold the layers together nicely.
We covered all the key parts of creating a delicious icebox cake. You learned about the best ingredients, step-by-step instructions, and helpful tips. I also shared tasty variations and storage advice. With these details, you can make a tasty treat for any occasion. Enjoy experimenting with flavors and impressing your friends. Remember, you can always adjust the recipe to fit your style and needs. Happy baking!