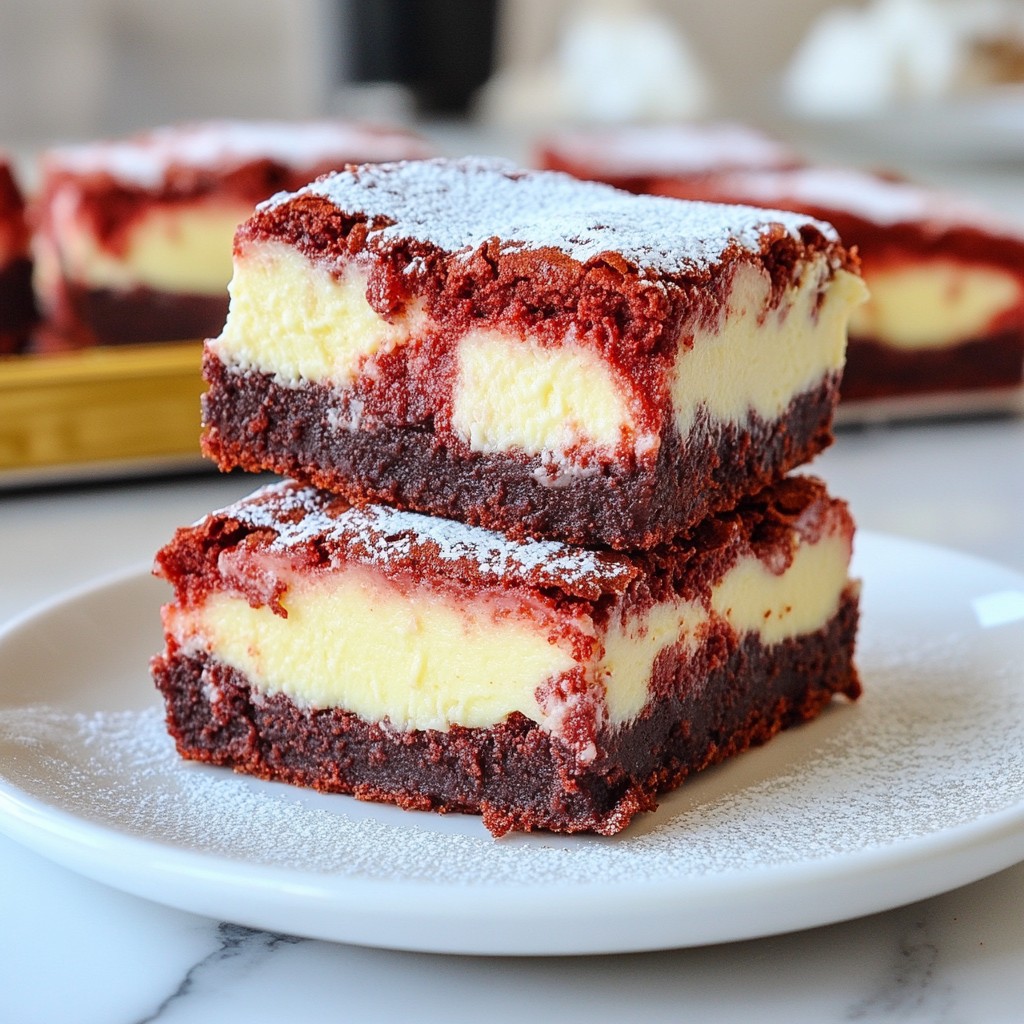
Are you ready to impress your friends with a dessert they'll crave? These Red Velvet Cheesecake Brownies combine rich chocolate flavors with creamy cheesecake swirls. It’s a match made in dessert heaven. In this easy recipe, I’ll guide you through simple steps and share tips to make these brownies truly special. Get your baking tools ready, because you’re about to create something delicious!
Why I Love This Recipe
- Decadent Flavor: The combination of rich red velvet and creamy cheesecake creates a dessert experience that is both indulgent and satisfying.
- Beautiful Presentation: The striking red and white marbled effect makes these brownies perfect for any occasion, especially festive celebrations.
- Easy to Make: With straightforward steps and common ingredients, these brownies are accessible for bakers of all skill levels.
- Perfectly Portionable: Cut into squares, these brownies are easy to serve and share, making them ideal for parties and gatherings.
Ingredients
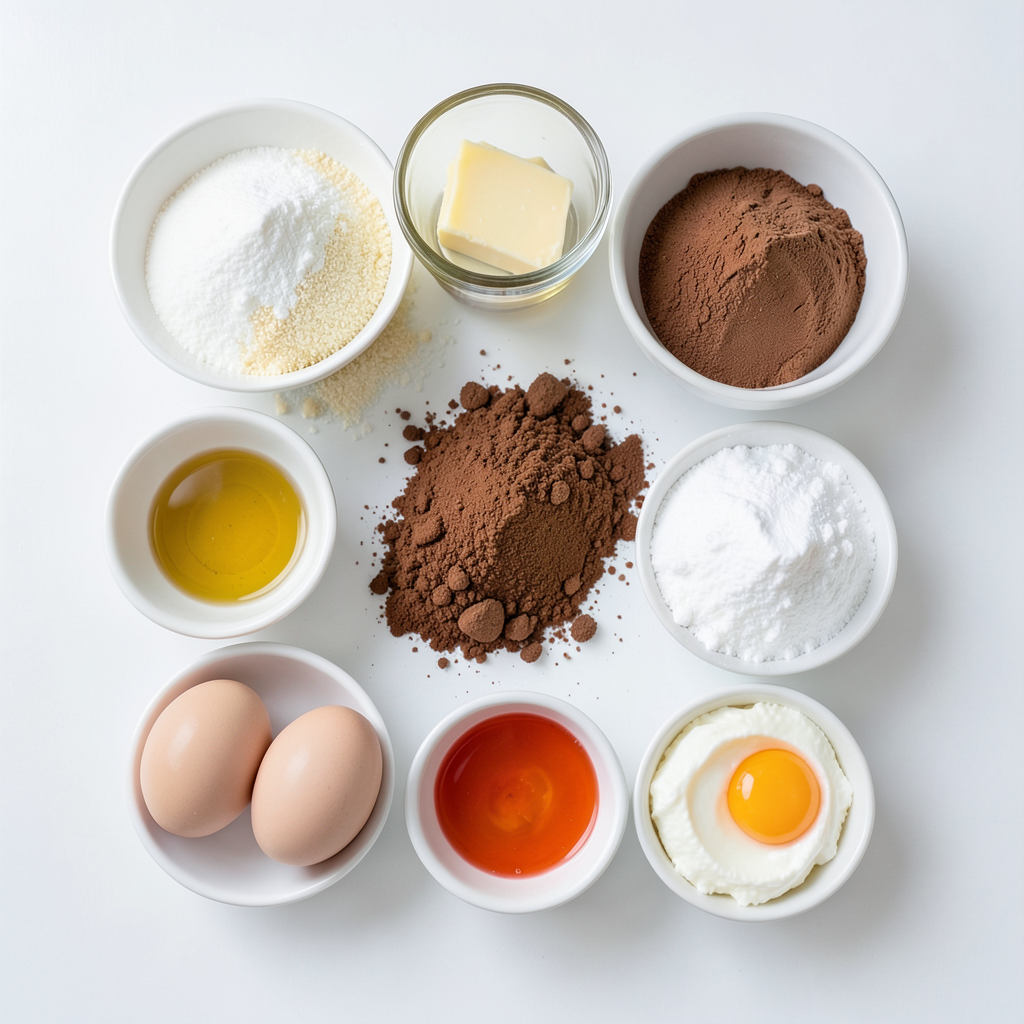
List of Ingredients for Red Velvet Cheesecake Brownies
- 1 cup (2 sticks) unsalted butter, melted
- 1 cup granulated sugar
- 1 cup brown sugar, packed
- 4 large eggs
- 2 teaspoons vanilla extract
- 1 ½ cups all-purpose flour
- 1 tablespoon unsweetened cocoa powder
- 1 teaspoon baking powder
- ½ teaspoon salt
- 1 tablespoon red food coloring
- 8 oz cream cheese, softened
- ½ cup powdered sugar
- 1 egg yolk
- 1 teaspoon vanilla extract (for cheesecake layer)
Measurement Details
When you measure your ingredients, be precise. Use measuring cups for dry goods and liquid measuring cups for liquids. For the butter, melt it first, then measure. This ensures you get the right amounts. For the red food coloring, one tablespoon will give a nice hue.
Ingredient Substitutions
You can make swaps if needed. Use coconut oil instead of butter for a dairy-free option. For the sugars, you can use all granulated sugar if brown is not available. If you want a lower-fat option, try Greek yogurt instead of cream cheese. The flavor may change a bit, but it will still taste good. If you want a gluten-free treat, use a gluten-free all-purpose flour blend.
Step-by-Step Instructions
Preheating the Oven and Preparing the Pan
First, you need to preheat your oven to 350°F (175°C). This step makes sure your brownies bake evenly. Next, grab a 9x13-inch baking pan. Grease it well, then line it with parchment paper. This will help you lift the brownies out easily after baking.
Mixing the Brownie Batter
In a large bowl, mix 1 cup of melted unsalted butter with 1 cup of granulated sugar and 1 cup of brown sugar. Stir them until they blend well. Then, add 4 large eggs one at a time. Beat in 2 teaspoons of vanilla extract. Make sure the mixture is smooth.
Now, in another bowl, whisk together 1 ½ cups of all-purpose flour, 1 tablespoon of unsweetened cocoa powder, 1 teaspoon of baking powder, and ½ teaspoon of salt. Slowly combine this dry mix with the wet mix. Stir until just combined.
Finally, add 1 tablespoon of red food coloring. Mix until the color is even throughout the batter.
Preparing the Cheesecake Layer
In a separate bowl, beat together 8 ounces of softened cream cheese and ½ cup of powdered sugar. Add 1 egg yolk and 1 teaspoon of vanilla extract. Beat until this mixture is smooth and creamy. This will create a rich cheesecake layer that pairs perfectly with the brownie base.
Layering and Swirling the Mixture
Pour half of the red velvet brownie batter into your prepared pan. Spread it evenly across the bottom. Next, spoon dollops of the cheesecake mixture over this layer. Then, pour the rest of the brownie batter on top, spreading it to cover the cheesecake layer fully.
Now comes the fun part! Use a knife or skewer to swirl the brownie and cheesecake layers together. This creates a beautiful marbled effect that looks as amazing as it tastes.
Baking the Brownies
Place the pan in your preheated oven. Bake for 30 to 35 minutes. To check if they are done, insert a toothpick into the center. If it comes out clean or with a few moist crumbs, your brownies are ready.
After baking, let the brownies cool in the pan for about 15 minutes. Then, carefully lift them out using the parchment paper. Allow them to cool completely on a wire rack before cutting into squares. Enjoy your delicious red velvet cheesecake brownies!
Tips & Tricks
How to Achieve the Perfect Swirl
To create a stunning swirl in your brownies, use a knife or skewer. After layering the brownie and cheesecake mixtures, gently drag the knife through both layers. Make sure to move in a figure-eight pattern. This method gives you a beautiful marbled look. Avoid overmixing, as it can blend the layers too much. You want clear lines of red velvet and creamy cheesecake.
Common Mistakes to Avoid
Be careful not to overbake your brownies. Check them at 30 minutes. A toothpick should come out with a few moist crumbs. Also, make sure your cream cheese is soft before mixing. Cold cream cheese will not blend smoothly, leading to lumps in your cheesecake layer. Lastly, don’t skip the parchment paper. It makes removing the brownies easy and keeps them intact.
Enhancing Flavor and Presentation
Try adding a splash of almond extract to the brownie batter for extra flavor. This small change can elevate the taste. For a lovely presentation, dust powdered sugar on top after cooling. You can also drizzle white chocolate ganache for a sweet finish. Serve these brownies warm with vanilla ice cream. The melting ice cream adds a delightful touch and balances the rich flavors.
Pro Tips
- Use Room Temperature Ingredients: Ensure your cream cheese and eggs are at room temperature for a smooth cheesecake layer. This helps to prevent lumps and ensures a creamy texture.
- Don't Overmix the Batter: Overmixing can lead to dense brownies. Mix until just combined for a light and fudgy texture.
- Check for Doneness Carefully: Use a toothpick to test for doneness, but remember a few moist crumbs are okay. This ensures your brownies remain fudgy rather than dry.
- Chill for Better Slicing: For cleaner slices, refrigerate the brownies for a couple of hours after cooling. This will make cutting easier and give you perfect squares.
Variations
Adding Nuts or Chocolate Chips
You can add nuts or chocolate chips to the brownie mix for extra flavor. Chopped walnuts or pecans add a nice crunch. If you love chocolate, mix in semi-sweet or dark chocolate chips. Add about ½ cup to the batter before you pour it into the pan. This gives your brownies a fun twist and a richer taste.
Gluten-Free Options
If you want gluten-free brownies, swap the all-purpose flour for a gluten-free blend. Many blends work well in baking. Look for one that has xanthan gum for the best results. This way, you can enjoy the same great taste without gluten. Just follow the same steps in the recipe.
Flavor Infusions (Mint, Orange, etc.)
You can change the flavor of your brownies too! For a minty kick, add 1 teaspoon of mint extract to the brownie mix. If you want a citrusy twist, try adding the zest of one orange. This brightens the flavor and makes it unique. Experiment with different flavors to find your favorite!
Storage Info
How to Store Leftover Brownies
To keep your brownies fresh, store them in an airtight container. Make sure they cool completely before placing them in the container. You can keep them at room temperature for up to three days. If you want them to last longer, refrigerate them. They will stay good for about a week in the fridge.
Freezing Instructions
Freezing is a great way to save brownies for later. First, cut them into squares. Wrap each square in plastic wrap. Then, place them in a freezer-safe bag or container. Label the bag with the date. You can freeze them for up to three months. When ready to eat, thaw them in the fridge overnight or at room temperature for a few hours.
Best Serving Practices After Storage
For the best taste, serve your brownies slightly warm. You can warm them in the microwave for about 10-15 seconds. This makes the cream cheese layer extra creamy. If you like, top them with a dusting of powdered sugar or a scoop of vanilla ice cream. Enjoy the rich flavors with each bite!
FAQs
Can I use a different type of food coloring?
Yes, you can use different food coloring. Gel food coloring works well, too. It gives a vibrant color without adding too much liquid. You can even use natural options like beet juice for a healthier choice.
How do I know when the brownies are done baking?
Check the brownies after 30 minutes. Insert a toothpick in the center. If it comes out clean or with a few moist crumbs, they are ready. Do not overbake them, or they will dry out.
Can I make these brownies ahead of time?
Absolutely! You can make them a day or two before. Just store them in an airtight container. Keep them at room temperature for the best taste.
What are some ideal pairings for Red Velvet Cheesecake Brownies?
These brownies pair well with many treats. Try serving them with a scoop of vanilla ice cream. Fresh berries also add a nice touch. A drizzle of white chocolate ganache makes them even more special.
In this blog post, I shared the key steps to bake Red Velvet Cheesecake Brownies. You learned about the essential ingredients, how to mix the batter, and layer it for a tasty treat. I shared tips to avoid mistakes and enhance your brownies. You can even try fun variations to make them your own. With this guide, you'll know how to store leftovers and answer common questions. Now, get baking and enjoy these delicious brownies!