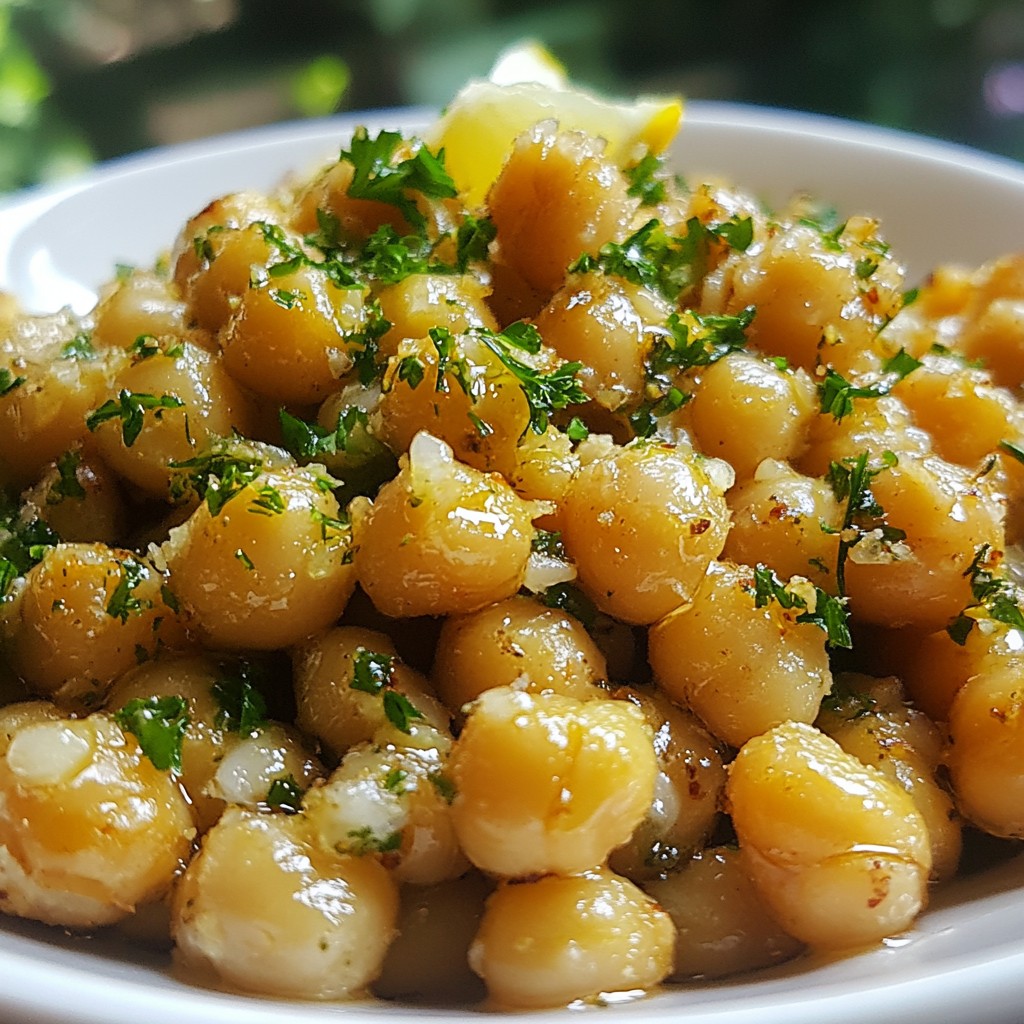
Craving a tasty snack that's crunchy and satisfying? You're in luck! My Easy Crispy Garlic Butter Chickpeas recipe gives you a delicious treat that's simple to make. With just a few ingredients like garlic, butter, and spices, you'll whip up a snack that pairs perfectly with your favorite dips or salads. Let’s dive into making these crunchy bites that promise to delight your taste buds!
Why I Love This Recipe
- Quick and Easy: This recipe comes together in just 40 minutes, making it a perfect choice for a quick snack or side dish.
- Crispy Texture: Patting the chickpeas dry and baking them creates a wonderfully crispy texture that is hard to resist.
- Flavor Explosion: The combination of garlic, smoked paprika, and cayenne pepper creates a flavor profile that is savory and slightly spicy.
- Versatile Dish: These crispy chickpeas can be enjoyed as a snack, added to salads, or used as a crunchy topping for soups.
Ingredients
Main Ingredients
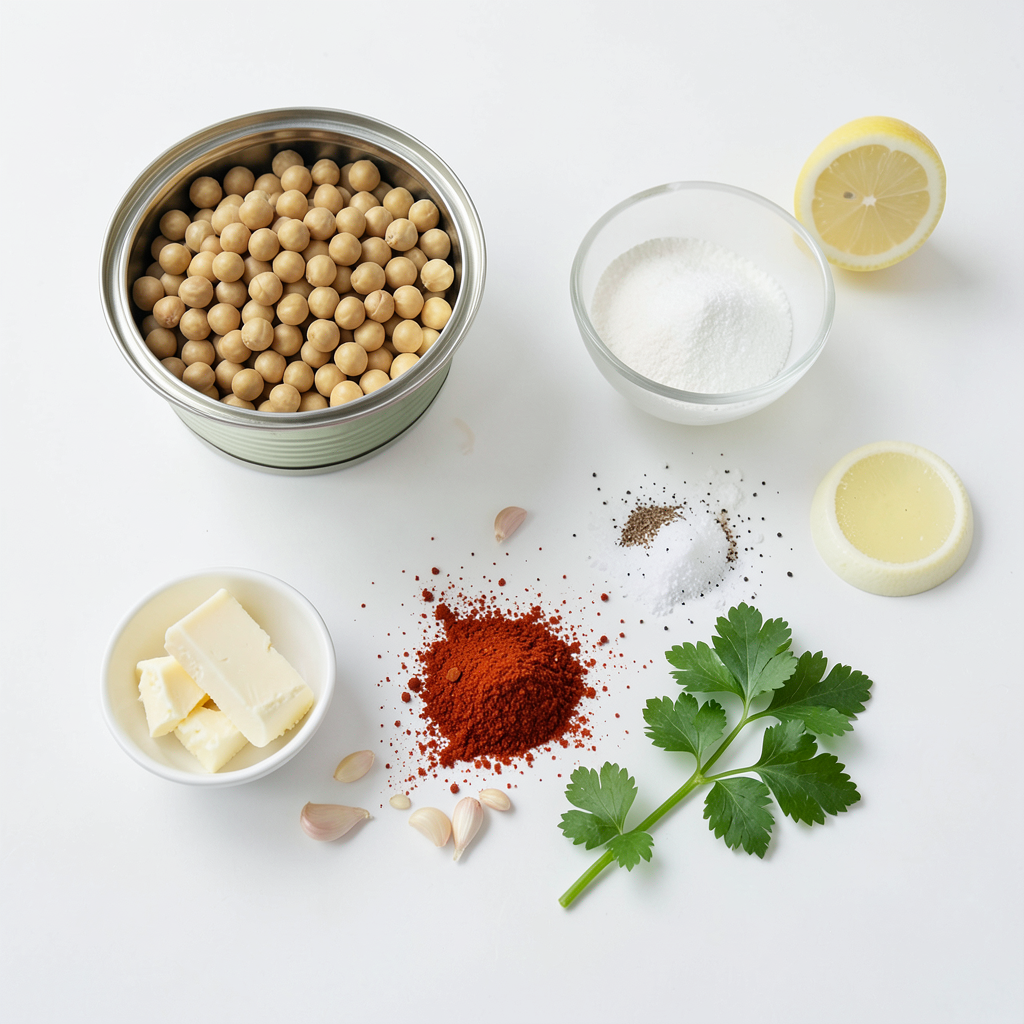
- 2 cans (15 oz each) chickpeas, rinsed and drained
- 4 tablespoons unsalted butter
- 5 cloves garlic, minced
Spice and Seasoning Ingredients
- 1 teaspoon smoked paprika
- 1/2 teaspoon cayenne pepper (optional, for heat)
- Salt and pepper to taste
Garnish and Flavor Enhancers
- 2 tablespoons fresh parsley, chopped (for garnish)
- Juice of 1 lemon
The main ingredients for Easy Crispy Garlic Butter Chickpeas include chickpeas, garlic, and butter. Chickpeas are the star here. They provide protein and fiber, making them a filling snack. I use unsalted butter for a rich flavor. Fresh garlic adds a punch. When you sauté it, it becomes fragrant and tasty.
The spices and seasonings are key to elevating this dish. Smoked paprika gives a warm, smoky flavor. If you want some heat, add cayenne pepper. Adjust salt and pepper to your taste for the perfect balance.
Garnishing with fresh parsley adds color and freshness. A squeeze of lemon juice brightens the dish. It enhances the flavors and makes everything pop. Together, these ingredients create a delicious and satisfying snack.
Step-by-Step Instructions
Preparation Steps
1. Preheat your oven to 400°F (200°C). This step is key for crispy chickpeas.
2. Pat the chickpeas dry with a towel. Remove all extra moisture. This helps them crisp up when baked.
Cooking Instructions
3. Melt the butter in a small saucepan over medium heat.
4. Sauté the garlic for 1-2 minutes. Stir it gently to avoid burning. You want it fragrant but not brown.
5. Remove from heat. Add smoked paprika, cayenne pepper (if you like heat), salt, and pepper. Mix well.
6. In a large bowl, toss the dried chickpeas with the garlic butter mixture. Coat them evenly for the best flavor.
Baking the Chickpeas
7. Spread the chickpeas in a single layer on a baking sheet lined with parchment paper. This helps with even cooking.
8. Bake for 25-30 minutes. Shake the pan halfway through to ensure they cook evenly. Look for a crispy, golden brown color.
Once out of the oven, you can add lemon juice and parsley as a finishing touch. Enjoy your tasty snack!
Tips & Tricks
Ensuring Crispy Chickpeas
To get crispy chickpeas, drying them is key. After rinsing, use a towel to pat them dry. Any extra moisture will make them soggy. This step helps create that wonderful crunch.
When you bake them, spread the chickpeas out in a single layer. This ensures hot air can circulate around each chickpea. Shake the pan halfway through baking. This helps them cook evenly and avoids any soft spots. Bake until they are golden brown and crisp.
Flavor Enhancements
You can boost the flavor of your chickpeas with more spices. Try adding garlic powder, onion powder, or even a hint of cumin. If you like heat, increase the cayenne pepper to your taste. You can also mix in some lemon zest for a fresh twist.
Feel free to adjust spice levels to suit your taste. If you prefer milder flavors, skip the cayenne. For a bolder taste, add more smoked paprika. The key is to experiment until you find your perfect blend.
Presentation Suggestions
These crispy chickpeas make a great snack on their own. You can serve them in a bowl or on a platter. Pair them with dips like hummus or tzatziki for added fun.
For garnishing, sprinkle chopped parsley on top. This adds a pop of color and freshness. A drizzle of lemon juice right before serving enhances the flavor. Enjoy them warm for the best taste!
Pro Tips
- Dry Chickpeas Thoroughly: Ensuring the chickpeas are completely dry before baking is essential for achieving that perfect crispy texture.
- Watch the Garlic: Be careful not to burn the garlic when sautéing; burnt garlic can turn bitter and affect the overall flavor of the dish.
- Adjusting Spice Levels: Feel free to adjust the cayenne pepper to suit your heat preference—omit it for a milder flavor or increase for a spicy kick!
- Garnish for Freshness: Adding fresh parsley and a squeeze of lemon juice at the end not only enhances flavor but also adds a beautiful pop of color.
Variations
Flavor Variations
You can change up your crispy garlic butter chickpeas easily. Here are some ideas:
- Adding herbs or spices: You can mix in herbs like thyme or rosemary. A dash of cumin adds warmth. For a zestier twist, try adding lemon zest or fresh dill. Each herb brings its own taste.
- Different oils for a twist: If you want a different flavor, swap butter for olive oil or coconut oil. Each oil gives a unique taste and can change the dish's feel.
Dietary Adjustments
You can also modify the recipe to fit different diets:
- Vegan alternatives: To make this dish vegan, simply replace the butter with vegan butter or olive oil. This keeps the flavor while making it plant-based.
- Gluten-free options: This recipe is naturally gluten-free. Just ensure your spices are free from gluten.
Serving Suggestions
These chickpeas can shine on their own or alongside other dishes:
- Pairing with dips or sauces: Serve them with hummus, tzatziki, or a spicy yogurt dip. The creamy dips balance the crunch of the chickpeas perfectly.
- Using as toppings for salads or soups: Sprinkle these crispy bites over salads for added crunch. They also make a great topping for soups, adding texture and flavor.
Storage Info
Storing Leftovers
To keep your crispy garlic butter chickpeas fresh, use airtight containers. Glass or plastic containers work well. Store them at room temperature for up to a day. If you want to keep them longer, place them in the fridge. They can last up to three days in the fridge. Remember, the longer they sit, the less crispy they become.
Reheating Tips
When you reheat chickpeas, aim to revive their crunch. The best way is to use an oven. Preheat the oven to 350°F (175°C). Spread the chickpeas on a baking sheet. Heat them for about 10 minutes. This method helps regain their crispiness. Avoid using a microwave, as it can make them soggy.
Freezing Chickpeas
If you want to freeze chickpeas, first cool them completely. Spread them on a baking sheet and freeze them for about an hour. Once frozen, transfer them to a freezer-safe bag. They can stay good for up to three months. To use, thaw them overnight in the fridge. Reheat them using the oven to keep them crunchy.
FAQs
How long do I bake chickpeas for crispy texture?
Bake chickpeas for 25-30 minutes at 400°F (200°C). This time helps them turn golden brown and crispy. Make sure to shake the pan halfway through. This step ensures even cooking.
Can I use dried chickpeas instead?
Yes, you can use dried chickpeas! First, soak them in water overnight. After soaking, boil them until tender, about 1 hour. Drain and dry them well before following the recipe. This will make them ready for baking and crisping.
What dishes pair well with crispy garlic butter chickpeas?
Crispy garlic butter chickpeas are great on their own. They also make a good topping for salads or soups. Serve them with dips like hummus or yogurt. You can even enjoy them as a snack with drinks. They add crunch and flavor to any meal!
We explored how to make crispy garlic butter chickpeas from scratch. The main ingredients, like chickpeas and garlic, create rich flavor. We covered step-by-step preparation and cooking steps for perfect texture. With tips for storage and reheating, you’ll always enjoy them fresh.
Experimenting with spices or serving these chickpeas in different ways can add fun. Enjoy creating your own twists and serving them as snacks or toppings. Your culinary journey with chickpeas can be both tasty and rewarding!