Craving a sweet treat that’s easy to make? You’re in the right place! These No-Bake Chocolate Peanut Butter Bars are simple to whip up and totally delicious. With just a few ingredients, you can create a satisfying dessert that pleases everyone. Whether you want a quick snack or a post-workout boost, these bars are perfect. Let’s dive into the recipe and make a treat you’ll love!
Why I Love This Recipe
- Quick and Easy: This recipe takes only 15 minutes of prep time, making it perfect for a delicious and healthy snack without the fuss.
- No Baking Required: With no need for an oven, you can whip these bars up any time, even on hot days when you want to avoid heating the kitchen.
- Nutritious Ingredients: Packed with rolled oats, peanut butter, and dark chocolate, these bars are not only tasty but also provide a good balance of protein and healthy fats.
- Customizable: You can easily modify this recipe by adding your favorite mix-ins like nuts, seeds, or even dried fruit to suit your taste.
Ingredients
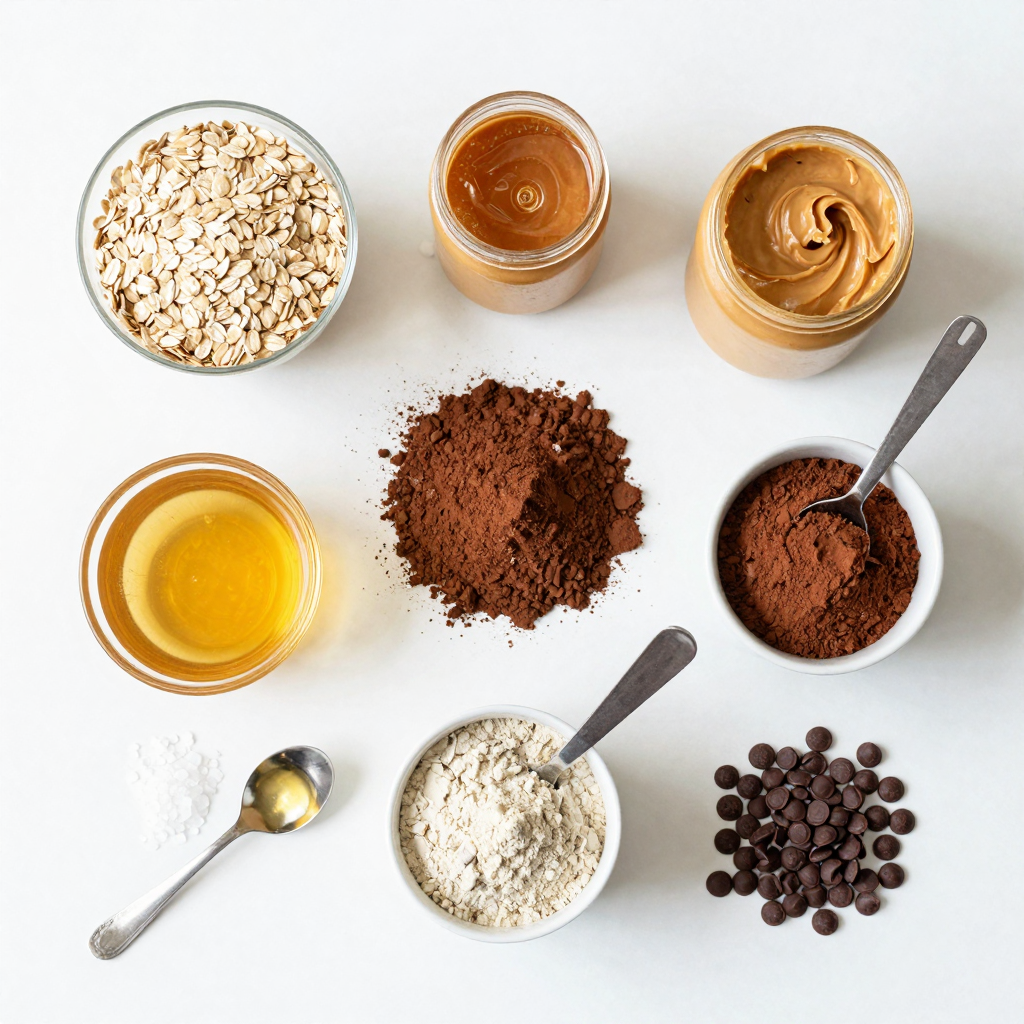
To make these no-bake chocolate peanut butter bars, you need simple ingredients. Each one plays a key role in flavor and texture. Here’s what you need:
– 1 cup rolled oats
– 1 cup natural peanut butter (smooth or crunchy)
– 1/2 cup honey or maple syrup
– 1/2 cup cocoa powder
– 1/2 cup protein powder (optional)
– 1 teaspoon vanilla extract
– 1/4 teaspoon salt
– 1/2 cup dark chocolate chips
Each ingredient adds something special. The rolled oats provide a chewy base. Peanut butter gives richness and creaminess. Honey or maple syrup adds sweetness and binds the bars. Cocoa powder gives that deep chocolate flavor.
Protein powder is optional but boosts nutrition. Vanilla extract adds a warm, sweet note. Salt enhances all the flavors. Dark chocolate chips offer a delightful burst of chocolate in every bite.
Using quality ingredients makes a big difference. I prefer natural peanut butter, as it has no added sugars or oils. You can also switch the sweeteners based on your taste.Enjoy the process!
Step-by-Step Instructions
Preparation of Dry Ingredients
First, gather your dry ingredients. In a large mixing bowl, add:
– 1 cup rolled oats
– 1/2 cup cocoa powder
– 1/2 cup protein powder (optional)
Mix these well. This helps ensure even flavor in every bite.
Mixing the Wet Ingredients
Next, it’s time for the wet ingredients. In a microwave-safe bowl, combine:
– 1 cup natural peanut butter
– 1/2 cup honey or maple syrup
– 1 teaspoon vanilla extract
– 1/4 teaspoon salt
Heat it in the microwave for 30 seconds. Stir until it’s smooth and creamy. This step makes mixing easier.
Combining All Ingredients
Pour the warm peanut butter mix over the dry ingredients. Stir it well. You want everything to blend together completely. Then, gently fold in:
– 1/2 cup dark chocolate chips
Make sure the chocolate chips are spread evenly. You want a bit of chocolate in every bar.
Setting the Mixture in the Pan
Line an 8×8 inch square pan with parchment paper. Leave some paper hanging over the edges. This helps remove the bars later. Press the mixture into the pan evenly. Use your hands or a spatula to compact it. Finally, place the pan in the refrigerator for at least 2 hours. This helps the bars set. When firm, lift them out and cut into bars. Enjoy your tasty treat!
Pro Tips
- Use Fresh Ingredients: Always opt for fresh rolled oats and high-quality peanut butter for the best flavor and texture.
- Experiment with Sweeteners: Feel free to substitute honey with maple syrup or agave nectar for a different sweetness profile.
- Chill for Better Texture: Allow the bars to chill longer than 2 hours for a firmer texture that’s easier to cut.
- Customize Your Mix-ins: Try adding nuts, seeds, or dried fruits to the mixture for added flavor and nutrition.
Tips & Tricks
Best Practices for Mixing
To get the best taste, mix the dry and wet parts well. Start with dry ingredients in a big bowl. Then, in a separate bowl, blend your wet ingredients. Warm the peanut butter mix to make it easy to stir. Ensure the peanut butter, honey, and vanilla are all smooth. Pour the wet mix over the dry mix. Stir until you see no dry bits left.
How to Store for Freshness
To keep your bars fresh, store them in an airtight container. Place them in the fridge for up to a week. If you want to keep them longer, freeze them. Wrap each bar in plastic wrap, then put them in a freezer bag. This way, you can enjoy a treat anytime!
Presentation Tips for Serving
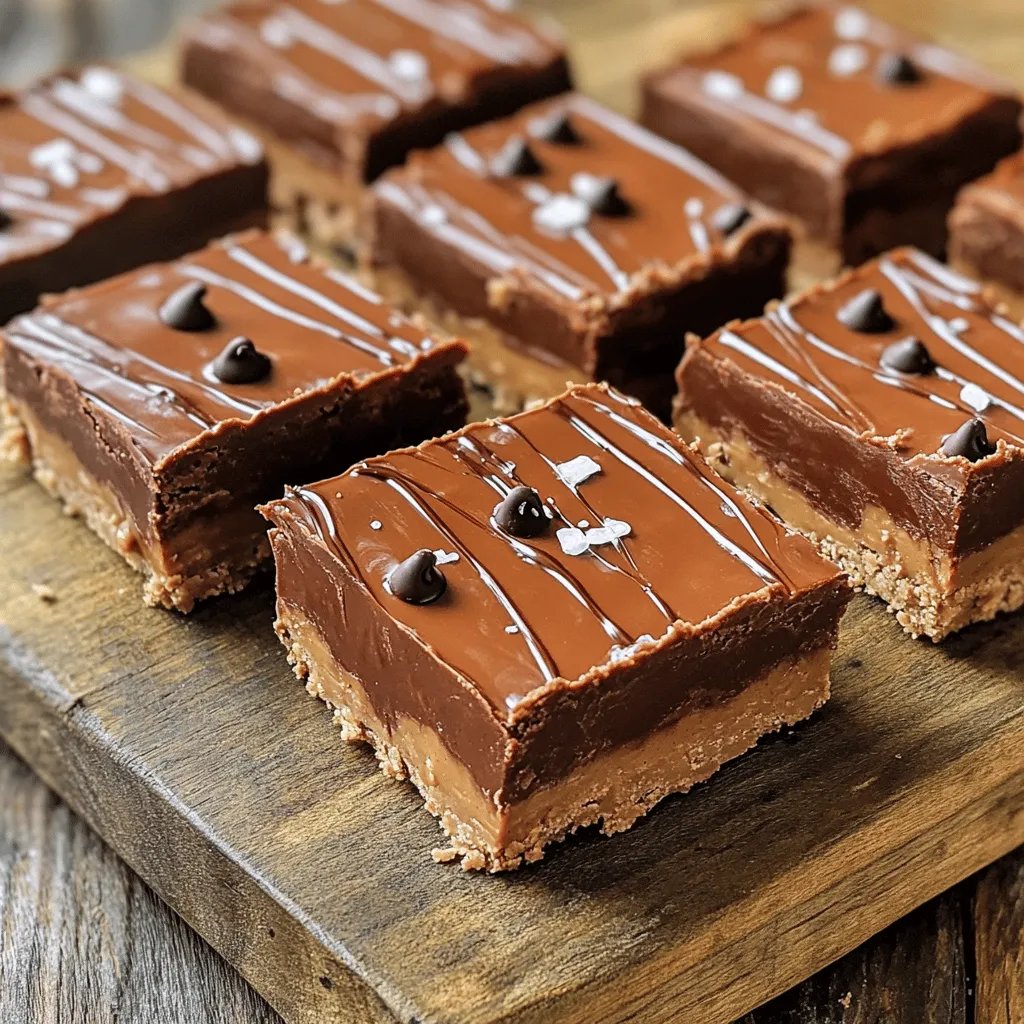
For a fancy look, use a wooden board to serve your bars. Cut them into neat pieces. Sprinkle a little sea salt on top for a fun touch. You can also drizzle melted dark chocolate over them. This makes them look as good as they taste!
Variations
Add-ins for Extra Flavor
You can easily change up the bars by adding fun mix-ins. Try adding chopped nuts like almonds or walnuts for crunch. Dried fruits like cranberries or raisins give a sweet touch. Seeds, such as chia or flax, boost nutrition. Coconut flakes can add a tropical twist. Each choice brings a new flavor to the bars.
Alternative Sweeteners
If you want to change the sweetness, there are great options. You can use agave nectar for a lighter taste. Brown rice syrup also works well and has a mild flavor. For a low-calorie option, consider stevia or monk fruit sweetener. These keep your bars sweet without the extra sugar.
Different Types of Nut Butters
Peanut butter is classic, but other nut butters are fun too. Almond butter provides a nutty taste and creaminess. Cashew butter is smooth and slightly sweet. Sunflower seed butter is a great nut-free choice. Each nut butter adds its own flavor and texture. Feel free to mix and match for your favorite version.
Storage Info
How to Store Leftovers
After making your no-bake chocolate peanut butter bars, you may have some left. To keep them fresh, store the bars in an airtight container. Place them in the refrigerator. This helps maintain their taste and texture. They will stay good for up to a week. If you want them to last longer, consider freezing them.
Freezing Instructions
To freeze your bars, first cut them into pieces. Wrap each piece in plastic wrap or parchment paper. Then, place them in a freezer-safe bag. Make sure to label the bag with the date. This way, you can keep track of how long they have been frozen. Your no-bake bars can last up to three months in the freezer. When ready to eat, just thaw them in the fridge overnight.
Shelf Life of No-Bake Bars
The shelf life of no-bake chocolate peanut butter bars is about one week in the fridge. If stored properly in the freezer, they can last for about three months. Always check for any signs of spoilage, like changes in smell or texture. Enjoy your tasty treats while they are fresh!
FAQs
Can I make these bars vegan?
Yes, you can easily make these bars vegan. Just swap honey for maple syrup. Use dark chocolate chips that are dairy-free. This simple change makes the recipe suitable for a vegan diet.
How do I customize these bars for different diets?
To customize these bars, consider these options:
– Use gluten-free oats for a gluten-free version.
– Choose a nut-free butter, like sunflower seed butter, for a nut-free option.
– Replace the protein powder with seeds or leave it out for a lighter treat.
These swaps make the bars fit many diets.
What can I use instead of peanut butter?
You can use other nut butters, such as almond or cashew butter. If you need a nut-free option, sunflower seed butter works well. Each choice will change the taste slightly, but all are tasty.
How long do no-bake chocolate peanut butter bars last?
These bars last up to a week in the fridge. Keep them in an airtight container. If you want to keep them longer, you can freeze them. Just wrap them well to avoid freezer burn.
You can create tasty no-bake chocolate peanut butter bars with simple ingredients and easy steps. We covered how to mix dry and wet ingredients and set them in a pan. Remember to store them well for maximum freshness. Feel free to add your favorite flavors or swap ingredients to fit your taste. These bars are perfect for snacks or dessert. With these tips in mind, you can enjoy a fun and healthy treat any time.


