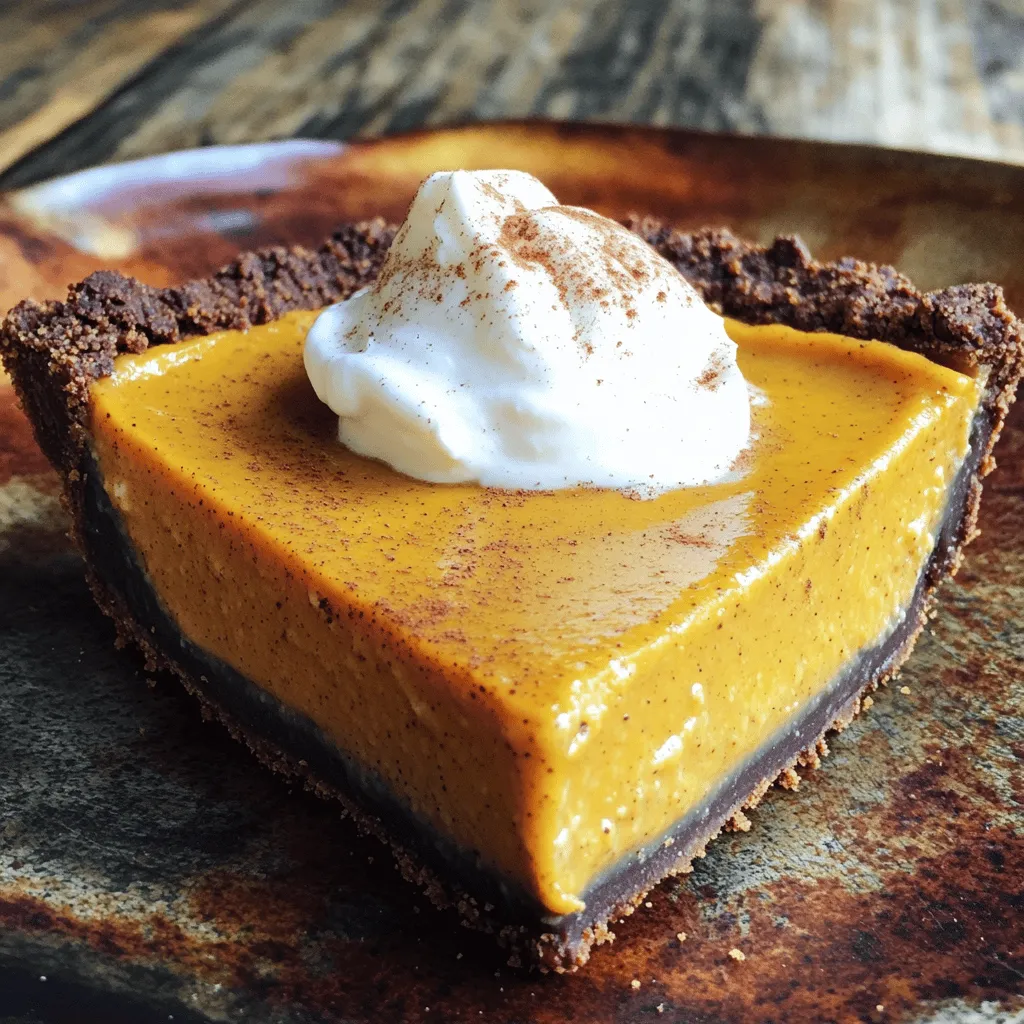
If you love pumpkin pie but dread turning on the oven, I’ve got the perfect solution for you: No Bake Pumpkin Pie! This delightful recipe brings all the rich flavors of fall without the hassle of baking. Follow my simple steps, and you’ll impress your friends and family with a creamy, delicious treat. Let’s dive into the ingredients and create a pie that’s both easy and fun!
Why I Love This Recipe
- Easy to Make: This no-bake pumpkin pie requires minimal effort and no oven time, making it a perfect dessert for any occasion.
- Rich Flavor: The combination of pumpkin, spices, and creamy yogurt or coconut cream creates a deliciously rich flavor profile that everyone will love.
- Healthier Option: Using Greek yogurt or coconut cream and natural sweeteners like maple syrup makes this pie a healthier alternative to traditional desserts.
- Versatile Topping: You can easily customize the pie with various toppings like nuts, whipped cream, or additional spices to suit your taste.
Ingredients
Key Ingredients for No Bake Pumpkin Pie
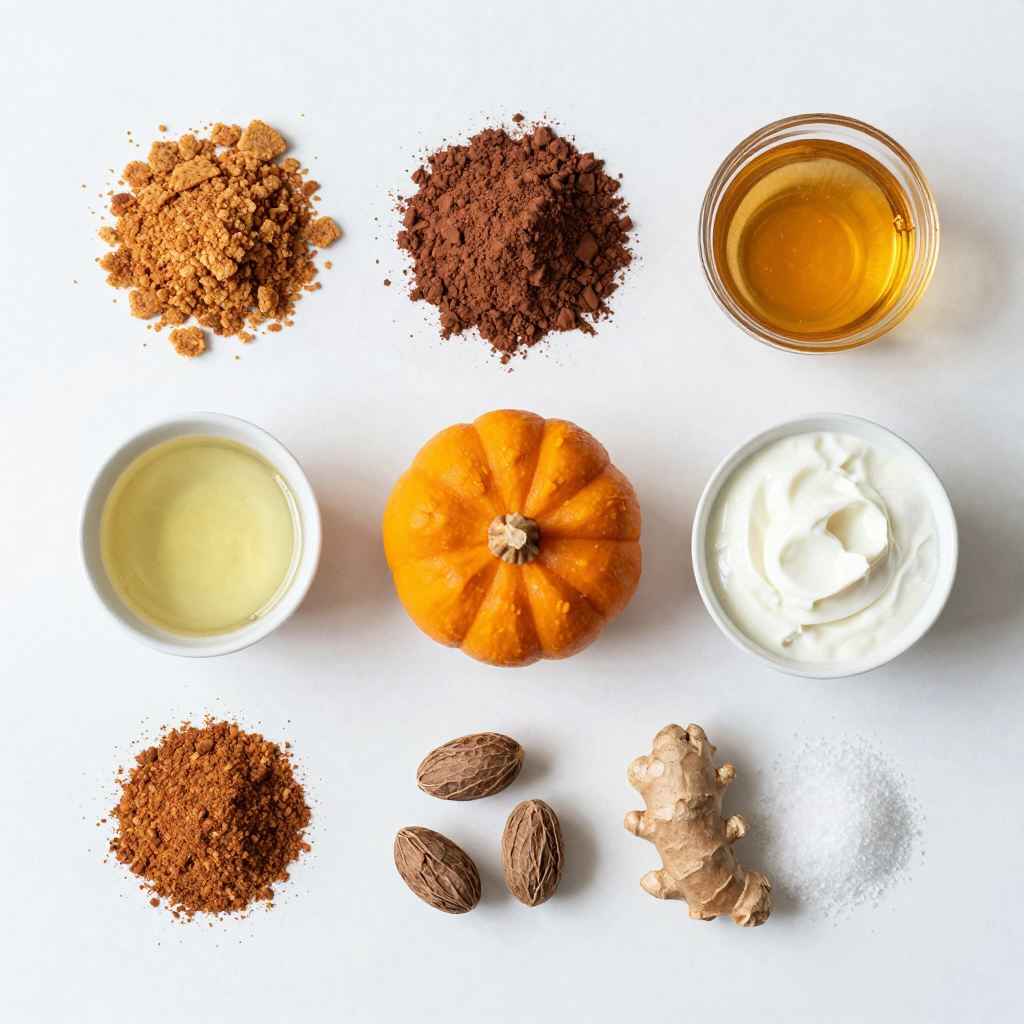
To make a delicious no bake pumpkin pie, you need some key ingredients. Here’s what you’ll need:
– 1 ½ cups graham cracker crumbs
– ½ cup unsweetened cocoa powder
– ½ cup coconut oil (melted)
– 1 cup pumpkin puree
– 1 cup Greek yogurt or coconut cream
– ¾ cup maple syrup
– 1 teaspoon vanilla extract
– 1 teaspoon ground cinnamon
– ½ teaspoon nutmeg
– ¼ teaspoon ground ginger
– Pinch of salt
Each ingredient plays a role. The graham cracker crumbs form a tasty crust, while the pumpkin puree gives it that classic flavor. The Greek yogurt or coconut cream adds creaminess.
Alternative Options for Ingredients
You can swap some ingredients based on your taste. For example, if you want a gluten-free pie, use gluten-free graham crackers. If you like a richer filling, try using cream cheese instead of yogurt. You can also use honey instead of maple syrup for sweetness.
Importance of Ingredient Quality
Using high-quality ingredients matters a lot in cooking. Fresh pumpkin puree tastes much better than canned. Organic maple syrup has a richer flavor than regular. Good ingredients make your pie taste amazing. Always choose the best you can find for the best results.
Step-by-Step Instructions
Prepping the Crust
To start, gather your ingredients for the crust. You’ll need graham cracker crumbs, cocoa powder, and melted coconut oil. In a mixing bowl, combine 1 ½ cups of graham cracker crumbs with ½ cup of cocoa powder. Pour in ½ cup of melted coconut oil. Mix this until it looks like wet sand. This texture is key for a firm crust. Now, press the mixture into a 9-inch pie pan. Make sure it is even and compact. This will create a sturdy base for your pie.
Making the Pumpkin Filling
Next, let’s move on to the filling. In a separate bowl, combine 1 cup of pumpkin puree and 1 cup of Greek yogurt or coconut cream. Add ¾ cup of maple syrup, 1 teaspoon of vanilla extract, and spices: 1 teaspoon of cinnamon, ½ teaspoon of nutmeg, and ¼ teaspoon of ground ginger. Don’t forget a pinch of salt! Whisk these ingredients together until smooth. Make sure everything blends well. This filling is rich and creamy, perfect for your pie.
Assembling the Pie
Now it’s time to bring it all together. Pour the pumpkin filling into the crust you made. Use a spatula to spread it evenly. Once that’s done, cover the pie with plastic wrap. Place it in the fridge for at least 4 hours, or overnight if you have time. This chilling helps the pie set properly. When you’re ready to serve, slice it into wedges. You can add a dollop of extra Greek yogurt or coconut cream on top. A sprinkle of cinnamon makes it look nice too. Enjoy your no-bake pumpkin pie!
Pro Tips
- Use fresh pumpkin puree: For the best flavor, opt for fresh pumpkin puree instead of canned. It gives a richer, more vibrant taste to your pie.
- Chill overnight: Allowing the pie to set overnight will enhance its flavor and texture, making it even more delicious when served the next day.
- Experiment with spices: Feel free to adjust the spices according to your taste. Adding a pinch of allspice or cloves can elevate the flavor profile of the filling.
- Garnish creatively: Top your pie with toasted pecans or a sprinkle of cocoa powder for an added crunch and visual appeal.
Tips & Tricks
Common Mistakes to Avoid
When making no bake pumpkin pie, watch out for a few common mistakes. First, avoid using too much liquid in your filling. This can make your pie soggy. Second, don’t skip chilling the pie. It needs time to set. If you don’t chill it enough, the texture won’t be right. Lastly, make sure to pack the crust tightly. A loose crust will fall apart when you slice it.
How to Achieve the Best Texture
For the best texture, use high-quality pumpkin puree. Avoid pumpkin pie filling, as it has added sugar and spices. Mixing the filling well helps it blend smoothly. I recommend using a whisk for this. If you want a creamier texture, opt for coconut cream instead of Greek yogurt. Chill the pie for at least four hours. This allows it to firm up nicely.
Ideas for Decoration and Serving Suggestions
Decorating your no bake pumpkin pie adds a fun touch. You can top it with whipped cream or a dollop of yogurt. Sprinkling cinnamon or nutmeg on top gives it a warm look. For a festive twist, add some pecans or crushed graham crackers. Serve the pie with a side of extra yogurt or cream. This makes for a lovely presentation and adds flavor.
Variations
Flavor Variations
You can change the flavor of your No Bake Pumpkin Pie easily. Adding chocolate gives a nice twist. Just mix in some cocoa powder or melt chocolate into the filling. You can also try different spices. Try adding cardamom or allspice for a unique taste. For a sweeter pie, increase the maple syrup. Each twist makes the pie new and fun.
Alternative Crust Ideas
If you want a different crust, that’s simple! For a gluten-free option, use almond flour or gluten-free graham crackers. You can also try a nut crust made from finely chopped nuts and dates. Just blend them until sticky, then press into the pie pan. Each crust brings its own flavor and texture to the pie.
Substitutions for Dietary Restrictions
If you have dietary needs, substitutions work well. For dairy-free options, use coconut cream instead of Greek yogurt. You can also replace maple syrup with agave syrup if needed. For a low-sugar version, try a sugar substitute that measures like sugar. No matter your needs, you can enjoy this pie with a few easy swaps.
Storage Info
How to Store No Bake Pumpkin Pie
You can store your No Bake Pumpkin Pie in the fridge. Cover it tightly with plastic wrap. This keeps it fresh and safe from other smells in the fridge. Make sure it stays cool. If you want to keep it for later, you can freeze it too.
Shelf Life and Freezing Tips
In the fridge, the pie lasts about 3 to 4 days. If you freeze it, it can last up to 2 months. To freeze, cut the pie into slices and wrap them in plastic wrap. Then place the slices in a freezer bag. Label the bag with the date so you remember when you made it.
Reheating and Serving After Storage
You can serve the pie straight from the fridge. It tastes great cold! If you like it warm, let it sit at room temperature for about 15 minutes. You can add extra Greek yogurt or coconut cream on top for more flavor. Just remember, avoid refreezing once you thaw it. Enjoy your No Bake Pumpkin Pie straight from the fridge or warmed up. It’s a treat either way!
FAQs
Can I use canned pumpkin for this recipe?
Yes, you can use canned pumpkin. It saves time and makes it easy. Canned pumpkin has a smooth texture and rich flavor. Just make sure it is 100% pumpkin. Avoid pumpkin pie filling as it has added sugars and spices. This recipe tastes great with either option.
How long does the pie need to chill before serving?
The pie needs to chill for at least 4 hours. For the best results, chill it overnight. This time helps the filling set properly. A well-chilled pie is easier to slice. It also helps the flavors blend together nicely.
Can I make this pie ahead of time?
Absolutely! This pie is perfect for making ahead. You can prepare it one or two days before serving. Just store it in the fridge, covered. This way, you save time on the day of your event. Plus, it tastes even better after a day in the fridge.
This blog shared how to make a no-bake pumpkin pie. We covered key ingredients and their quality. I provided step-by-step instructions for a tasty crust and filling. I also shared tips to help you avoid common mistakes. Plus, we explored fun flavor variations and storage tips.
Enjoy creating your pie and feel free to experiment with flavors. A no-bake pumpkin pie is easy and delicious. Make it your own, and it will surely impress everyone!


