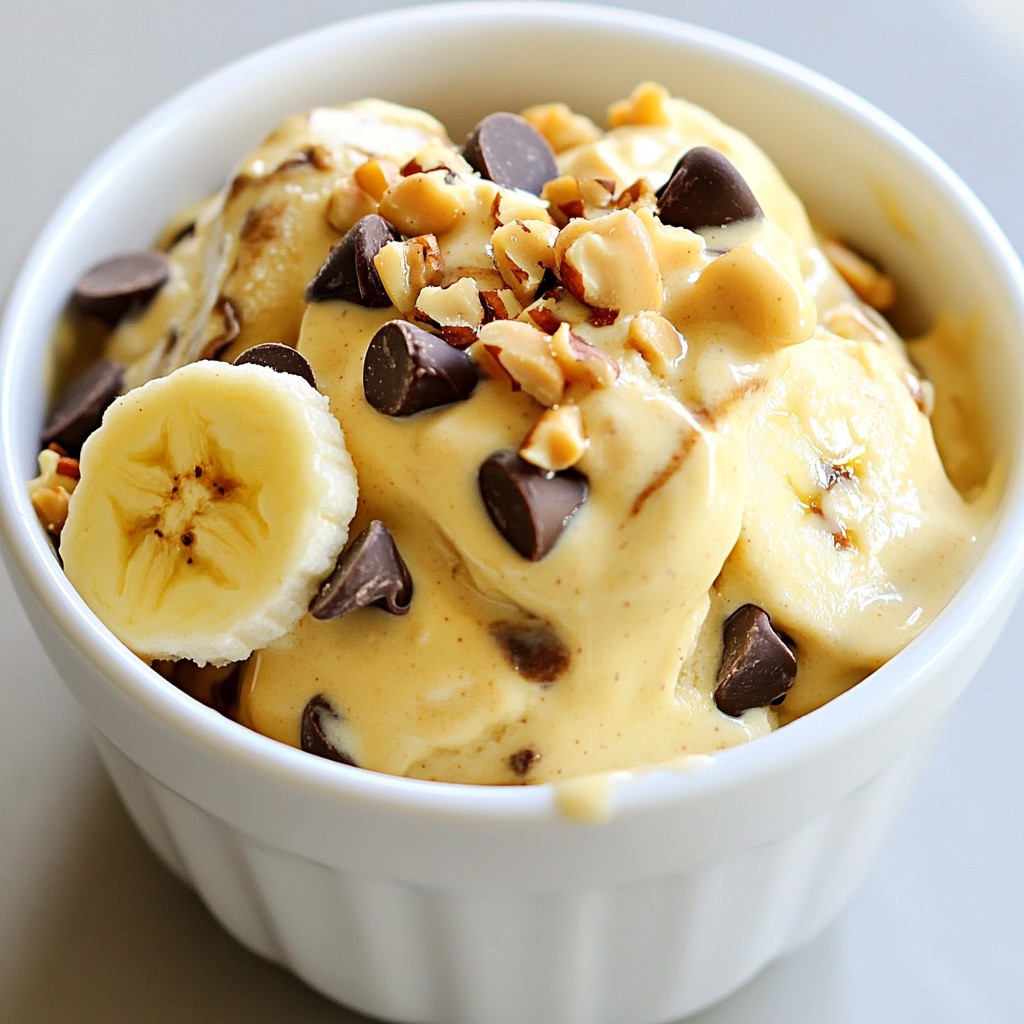
Craving a delicious, creamy treat that’s also healthy? Look no further! My Peanut Butter Banana Nice Cream is super easy to make and packed with flavor. You only need a few simple ingredients, like ripe bananas and creamy peanut butter. This fun treat is perfect for hot days and satisfying your sweet tooth. Let’s dive into the simple steps and tips for making this delightful dessert!
Why I Love This Recipe
- Deliciously Creamy: This nice cream offers a rich and creamy texture that rivals traditional ice cream without the dairy.
- Healthy Ingredients: Made with frozen bananas and natural peanut butter, this recipe is a guilt-free treat packed with nutrients.
- Quick and Easy: With minimal prep and just a few ingredients, you can whip up this delightful dessert in no time.
- Customizable: Add your favorite toppings like nuts or dark chocolate chips to make it your own!
Ingredients
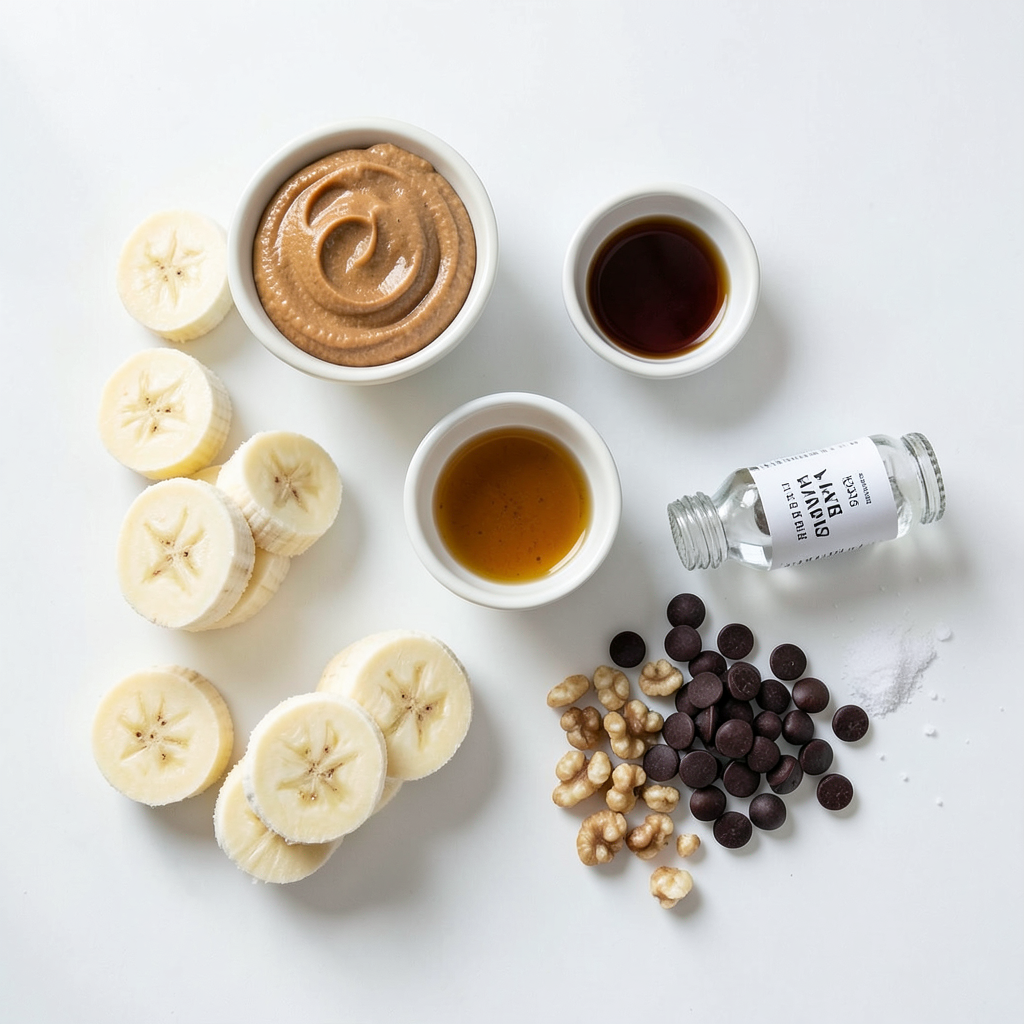
To make Peanut Butter Banana Nice Cream, you need a few simple ingredients. Here is the list:
- 4 ripe bananas, sliced and frozen
- 3 tablespoons creamy peanut butter
- 1 tablespoon maple syrup (optional, for added sweetness)
- ½ teaspoon vanilla extract
- A pinch of sea salt
- Optional toppings: Chopped nuts or dark chocolate chips
Using ripe bananas is key. Ripe bananas have a natural sweetness that makes your nice cream taste great. If you want extra sweetness, add the maple syrup. It's not needed, but it can make a difference.
The creamy peanut butter gives the nice cream a rich flavor. You can use smooth or crunchy peanut butter, depending on what you like. A dash of vanilla extract adds warmth and depth to the taste. The sea salt helps balance the sweetness, making each bite even better.
For toppings, you can get creative! Chopped nuts add a nice crunch. Dark chocolate chips bring a sweet twist. Feel free to mix and match your toppings to find your favorite combination. Enjoy your Peanut Butter Banana Nice Cream!
Step-by-Step Instructions
Preparation of Bananas
First, you need to freeze the bananas. Start with 4 ripe bananas. Slice them into small pieces and lay them out on a baking sheet. Make sure the slices do not touch each other. This helps them freeze evenly. Place the baking sheet in the freezer for about 2-3 hours. The bananas should be frozen solid before you blend them.
Timing is key for the best texture. If your bananas are too ripe, they may become mushy. Look for bananas with a few brown spots. They are sweet and perfect for this nice cream.
Blending the Ingredients
After freezing, it’s time to blend. Put the frozen banana slices into a food processor or blender. Add 3 tablespoons of creamy peanut butter. For extra sweetness, add 1 tablespoon of maple syrup, if you like. Then, pour in ½ teaspoon of vanilla extract and a pinch of sea salt.
Blend everything together until it reaches a smooth and creamy texture. You may need to stop a few times to scrape down the sides. This ensures all the bananas mix well. Be patient; it can take a few minutes to get that perfect soft-serve ice cream feel.
Serving Suggestions
You have two options for serving. If you want a classic nice cream, scoop it into bowls right away. The texture will be soft and creamy, just like ice cream.
For a firmer texture, transfer the nice cream to an airtight container. Freeze it for another 1-2 hours. This makes it easier to scoop later. Top it with chopped nuts or dark chocolate chips for a crunchy finish. Enjoy your tasty treat!
Tips & Tricks
Perfecting the Nice Cream Texture
The ripeness of your bananas makes a big difference. Choose bananas that are very ripe. They should have brown spots. This ripeness gives your nice cream a sweet taste.
When blending, patience is key. Blend the mixture for about 2-3 minutes. Stop to scrape down the sides as needed. You want a smooth and creamy texture. If you blend too little, it will be chunky. If you blend too much, it might melt.
Adding Sweetness
Maple syrup can enhance the flavor. Use it if your bananas aren’t sweet enough. Add it during blending for a balanced taste.
If you want alternatives, try honey or agave syrup. You can also skip sweeteners if your bananas are very ripe. Taste the mixture before adding any sweetness.
Best Practices for Toppings
Toppings can take your nice cream to the next level. I recommend chopped nuts for crunch. Dark chocolate chips add a rich flavor. You can mix and match based on your taste.
Store your toppings in a cool, dry place. Keep them in airtight containers to maintain freshness. Add them just before serving to keep them crisp.
Pro Tips
- Use Overripe Bananas: The riper the bananas, the sweeter and more flavorful your nice cream will be. Look for bananas with plenty of brown spots for the best taste.
- Experiment with Nut Butters: While peanut butter is delicious, try using almond butter or cashew butter for a different flavor profile in your nice cream.
- Freeze in Portions: If you want to save some nice cream for later, consider freezing it in individual portions so you can easily grab a serving whenever you crave a treat.
- Customize Your Toppings: Get creative with your toppings! Consider adding granola, fresh fruit, or coconut flakes for added texture and flavor.
Variations
Flavor Additions
You can easily change the flavor of your peanut butter banana nice cream. One fun way is to add cocoa powder or chocolate. Just mix in two tablespoons of cocoa powder while blending. This adds a rich, chocolatey taste that pairs well with bananas. You could also toss in some chocolate chips for extra texture.
Another great option is mixing in fruits like berries. Strawberries, blueberries, or raspberries add a nice pop of color and flavor. Simply blend in about a half cup of your favorite berries. They not only taste great but also add nutrients.
Dietary Adjustments
If you need a nut-free version, use sunflower seed butter instead of peanut butter. It gives a similar creamy texture without the nuts. Make sure to check that your other ingredients are also nut-free.
For gluten-free options, rest easy! This nice cream is naturally gluten-free. Just ensure that any toppings, like chocolate chips or nuts, are labeled gluten-free. This makes it safe for everyone to enjoy.
Serving Variations
Peanut butter banana nice cream can be a great smoothie ingredient. Blend it into a smoothie for extra creaminess and flavor. Just add some milk or yogurt to help blend it smoothly.
You can also layer it with other desserts for a fun treat. Try putting a scoop of nice cream between layers of cake or in a parfait with granola. This adds a delightful twist to your dessert table!
Storage Info
How to Store Leftover Nice Cream
To keep your nice cream fresh, use an airtight container. This helps prevent freezer burn and keeps the flavor intact. You should fill the container all the way to the top. This reduces the air inside and helps maintain the texture.
Check your nice cream for signs of spoilage. If it has ice crystals on the surface or smells off, it's time to toss it out. A change in color or texture also means it’s no longer good to eat.
Freezing vs Refrigerating
You can freeze nice cream for up to two weeks. After that, its taste and texture might change. Freezing keeps it smooth and creamy. If you refrigerate it, the nice cream will become softer and melt. This makes it harder to scoop.
For the best experience, freeze it before serving. This way, you enjoy a rich, creamy treat every time. If you choose to refrigerate it instead, be ready for a softer dessert.
FAQs
Can I make this nice cream without a food processor?
Yes, you can! If you don’t have a food processor, use a strong blender. A hand mixer works too, but it takes more effort. Just be sure to cut the frozen bananas into smaller pieces. This makes it easier to blend. You might need to stop and scrape down the sides often. Keep blending until it's smooth and creamy.
How can I sweeten the nice cream naturally?
You can sweeten nice cream with more ripe bananas. They add natural sweetness without extra sugar. Another option is honey or agave syrup. These sweeteners mix well and don't change the flavor much. You can also try adding dates or even a splash of orange juice for a fun twist.
Is this recipe suitable for people with dietary restrictions?
This recipe has common allergens like peanuts and bananas. If you're allergic to nuts, use sunbutter or tahini instead of peanut butter. For a dairy-free option, this nice cream is perfect since it’s made from fruits. Always check labels for any added ingredients to ensure they fit your diet.
This nice cream recipe is simple and full of flavor. You learned about key ingredients like ripe bananas, peanut butter, and optional sweeteners. The steps guided you through preparation and blending for the best texture. Explore variations to make this treat fit your diet, and remember storage tips for longer enjoyment. Overall, nice cream is fun to make and enjoy. Experiment with flavors and enjoy a tasty, healthy snack any time.