Looking for a quick and tasty meal idea? You'll love these Quick Turkey Ham & Cheese Quesadillas! They are simple to make, packed with flavor, and perfect for lunch or dinner. I’ll guide you through the easy steps, share tasty tips, and suggest variations that fit your diet. Get ready to impress your family or friends with this fun dish that everyone will enjoy! Let's get started!
Why I Love This Recipe
- Quick and Easy: This recipe comes together in just 20 minutes, making it perfect for busy weeknights.
- Deliciously Cheesy: With a blend of cheddar and mozzarella, these quesadillas are irresistibly cheesy.
- Versatile Filling: You can customize the filling with your favorite meats or veggies for a unique twist.
- Fun to Share: Slicing these into wedges makes them a great party snack or game day treat.
Ingredients
Complete list of ingredients
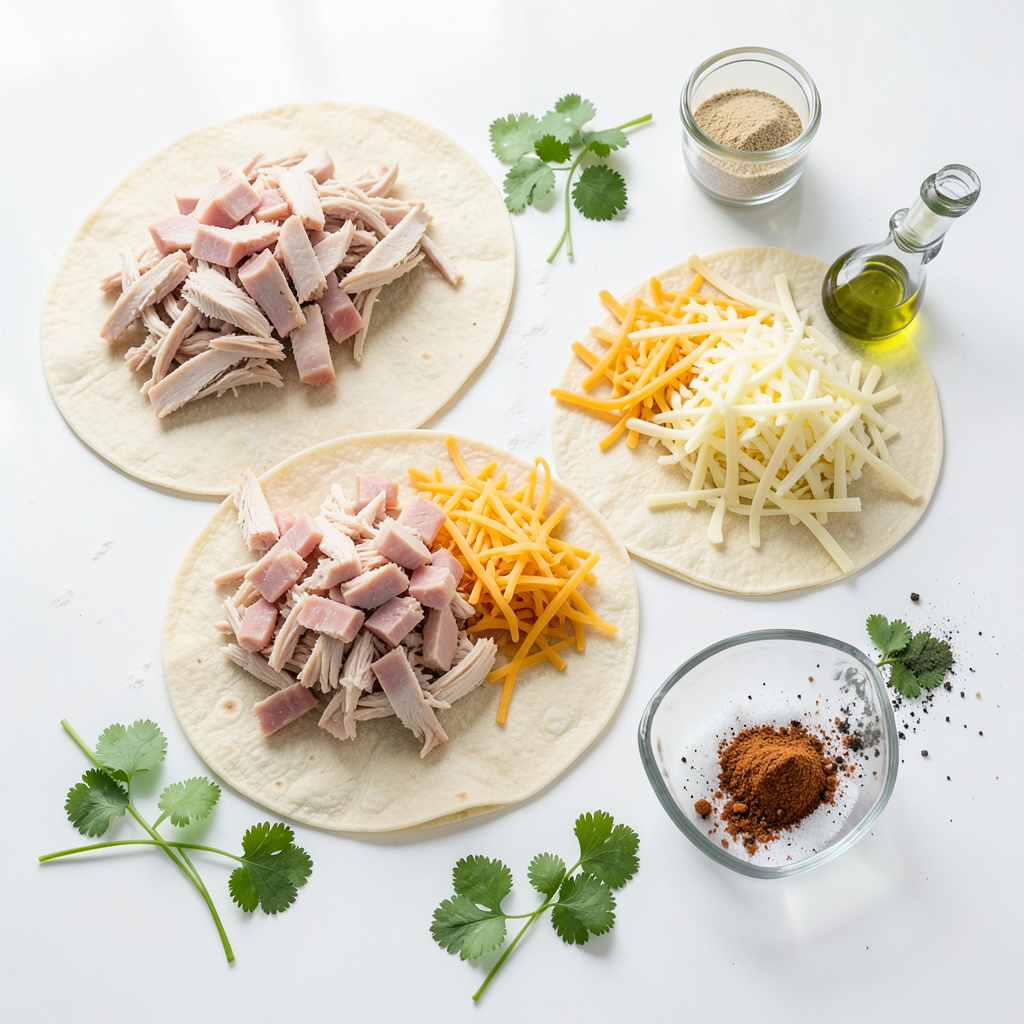
To make Quick Turkey Ham & Cheese Quesadillas, you will need:
- 4 large flour tortillas
- 1 cup cooked turkey breast, shredded
- 1 cup smoked turkey ham, diced
- 2 cups shredded cheddar cheese
- 1 cup shredded mozzarella cheese
- 1 tablespoon olive oil
- 1 teaspoon garlic powder
- 1 teaspoon onion powder
- 1 teaspoon paprika
- Salt and pepper to taste
- Fresh cilantro leaves, for garnish
- Sour cream and salsa, for serving
Ingredient substitutions
You can swap some ingredients if needed. Here are a few ideas:
- Use corn tortillas instead of flour for a gluten-free option.
- Swap shredded turkey for rotisserie chicken for a quick meal.
- If you don’t have smoked turkey ham, regular ham works great.
- Use any cheese you like! Pepper jack adds a spicy kick.
- For a lighter option, swap olive oil with cooking spray.
Nutritional information
Each serving of these quesadillas is packed with flavor and nutrients. Here is a rough breakdown:
- Calories: 450
- Protein: 30g
- Carbohydrates: 35g
- Fat: 25g
- Fiber: 2g
These numbers may vary based on your ingredient choices and serving sizes. Enjoy these delicious quesadillas while keeping an eye on your nutritional needs!
Step-by-Step Instructions
Detailed cooking process
1. Start by heating a large skillet over medium heat. Add one tablespoon of olive oil and let it warm.
2. In a mixing bowl, add one cup of cooked shredded turkey and one cup of diced smoked turkey ham.
3. Next, mix in two cups of shredded cheddar cheese and one cup of shredded mozzarella cheese.
4. Add one teaspoon of garlic powder, one teaspoon of onion powder, one teaspoon of paprika, and a pinch of salt and pepper. Stir until blended.
5. Place one large flour tortilla in the skillet. On one half, add a generous amount of the turkey and cheese mixture. Leave the edges clear to prevent overflow.
6. Fold the tortilla over the filling. Cook for 2-3 minutes until the bottom is golden brown and the cheese starts to melt.
7. Carefully flip the quesadilla using a spatula. Cook the other side for another 2-3 minutes until crispy and golden.
8. Remove the quesadilla from the skillet and let it cool for a minute. Slice into wedges.
9. Repeat these steps with the remaining tortillas and filling.
10. Serve warm with sour cream, salsa, and fresh cilantro leaves on top.
Essential cooking tips
- Use medium heat to avoid burning the tortillas.
- Let the filling cool slightly before adding it to the tortilla.
- Experiment with different cheese for unique flavors.
- Make sure the skillet is hot before adding the tortilla.
Visual aids
For a visual guide, check out this [video link](https://www.youtube.com/watch?v=example) that shows the cooking process step-by-step.
Tips & Tricks
Common mistakes to avoid
A few common mistakes can ruin your quesadillas. First, don’t overfill them. If you add too much filling, they may burst while cooking. It’s best to keep the filling to one side of the tortilla. Second, don’t rush the cooking time. If you cook on too high heat, the outside burns while the cheese stays cold. Lastly, be careful when flipping. Use a spatula to gently lift them without tearing.
How to achieve the perfect crispiness
To get that perfect crispy quesadilla, use a good amount of olive oil. It helps brown the tortillas nicely. Also, cook them slowly over medium heat. This allows the cheese to melt evenly and the tortillas to crisp up. Flip only once to keep the filling inside. Let them rest for a minute after cooking. This helps the cheese set, so it won’t ooze out when you cut them.
Recommended cooking tools
Here are some tools that make cooking easier. A large skillet works best. A non-stick skillet is even better to prevent sticking. Use a spatula for flipping the quesadillas gently. A mixing bowl is essential for combining the filling. Lastly, a sharp knife makes slicing the quesadillas into wedges simple and clean. These tools help you make great quesadillas every time!
Pro Tips
- Use Fresh Ingredients: Always opt for fresh tortillas and quality cheese to enhance the flavor of your quesadillas.
- Don’t Overstuff: Avoid overfilling your quesadillas to prevent them from tearing and ensure even cooking.
- Customize Your Fillings: Feel free to add vegetables like bell peppers or spinach for extra nutrition and flavor.
- Serve Immediately: For the best texture, serve your quesadillas right after cooking while they are hot and crispy.
Variations
Additional filling ideas
You can mix the basic recipe to create new flavors. Try adding veggies like bell peppers or spinach. You can also include beans for added protein. Consider using different cheeses, like pepper jack for spice. If you want a tangy twist, add some diced jalapeños. Each new ingredient can change the taste of the quesadilla.
Gluten-free options
If you need a gluten-free choice, use corn tortillas. They work well with this recipe. You can still fill them with turkey, cheese, and spices. Make sure to check that your other ingredients are gluten-free too. Many cheeses and meats are naturally gluten-free, but it's always good to read labels.
Vegetarian alternatives
For a vegetarian twist, skip the turkey and ham. Use mushrooms or zucchini instead. Add extra cheese for richness. You can also include black beans for protein. This makes the quesadilla hearty and filling without meat. Pair it with guacamole or salsa for a fresh kick.
Storage Info
How to store leftovers
Once you finish your quesadillas, let them cool. Place any leftovers in an airtight container. You can keep them in the fridge for up to three days. If you want to keep them longer, freezing is a great option.
Reheating instructions
To reheat, use a skillet for the best results. Heat the skillet over medium heat. Place the quesadilla in the skillet for about three to four minutes on each side. This will make them warm and crispy again. You can also use a microwave, but they may get soft.
Freezing tips
If you want to freeze your quesadillas, wrap each one tightly in plastic wrap. Then, put them in a freezer bag. They will last for up to two months in the freezer. When you are ready to eat, thaw them in the fridge overnight before reheating.
FAQs
How to customize Quick Turkey Ham & Cheese Quesadillas
You can change the filling to match your taste. Try using chicken or beef instead of turkey. Add veggies like spinach, bell peppers, or mushrooms for extra nutrition. You can also swap the cheeses. Pepper jack adds a spicy kick. If you like herbs, add some fresh basil or oregano.
What can I serve with quesadillas?
Quesadillas go great with many sides. You can serve them with sour cream and salsa for dipping. Guacamole is also a tasty choice. A fresh salad adds color and crunch. You might enjoy some rice or beans for a filling meal.
Can I make these quesadillas ahead of time?
Yes, you can prepare the filling in advance. Store it in the fridge for up to two days. When you're ready to cook, just assemble and heat the quesadillas. You can also cook them, cool, and freeze for later. Reheat them in a skillet for best results.
This blog post covered the key steps to make Quick Turkey Ham & Cheese Quesadillas. You learned about ingredient lists, cooking tips, and common mistakes. I shared fun variations for everyone, including gluten-free and vegetarian options. Don't forget how to store and reheat leftovers for the best taste. With these insights, you can confidently make a tasty meal. Enjoy your cooking and feel free to experiment with new ideas!